Compaq D500 Compaq Evo Family of Personal Computers, Small Form Factor Models-
Compaq D500 - Evo - 256 MB RAM Manual
 |
UPC - 720591157135
View all Compaq D500 manuals
Add to My Manuals
Save this manual to your list of manuals |
Compaq D500 manual content summary:
- Compaq D500 | Compaq Evo Family of Personal Computers, Small Form Factor Models- - Page 1
b Hardware Reference Guide Compaq Evo Desktop Family: Small Form Factor Models - Intel Celeron Versions Document Part Number: 243848-002 January 2002 This book provides basic information for upgrading this series of computers. - Compaq D500 | Compaq Evo Family of Personal Computers, Small Form Factor Models- - Page 2
© 2002 Compaq Computer Corporation Compaq, the Compaq logo, and Evo are trademarks of Compaq Information Technologies Group, L.P. Microsoft, MS-DOS, Windows, Windows NT are trademarks of Microsoft Corporation. Intel, Pentium, Intel Inside, and Celeron are trademarks of Intel Corporation. All other - Compaq D500 | Compaq Evo Family of Personal Computers, Small Form Factor Models- - Page 3
FailSafe Key 2-3 Removing the Computer Cover 2-5 Installing Additional Memory 2-7 DIMMs 2-7 Memory Module Installation 2-8 Removing the Expansion Card Cage 2-11 Installing an Expansion Card 2-12 Drive Positions 2-15 Installing Additional Drives 2-16 Upgrading the Hard Drive 2-16 Removing - Compaq D500 | Compaq Evo Family of Personal Computers, Small Form Factor Models- - Page 4
Contents A Specifications B Hard Drive Installation Guidelines Using the Cable-Select Feature with Ultra ATA Devices Preventing Electrostatic Damage E-1 Grounding Methods E-1 F Routine Computer Care and Shipping Preparation Routine Computer Care F-1 CD-ROM Drive Precautions F-2 Operation F-2 - Compaq D500 | Compaq Evo Family of Personal Computers, Small Form Factor Models- - Page 5
. For a complete listing of the hardware and software installed in your computer, run Compaq Diagnostics for Windows or the INSPECT utility (available on some models). Instructions for using these utilities are provided in the Troubleshooting Guide on the Reference Library CD. Hardware Reference - Compaq D500 | Compaq Evo Family of Personal Computers, Small Form Factor Models- - Page 6
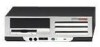
Product Features Front Panel Components Front Panel Components 1 CD-ROM Drive Busy Indicator 2 CD-ROM Eject Button 3 Power-On Light 4 Dual-State Power Button 5 Hard Drive Activity Light 6 Microphone Connector 7 Stereo Headphone Jack (system) 8 Diskette Drive Activity Light 9 Diskette Eject Button - Compaq D500 | Compaq Evo Family of Personal Computers, Small Form Factor Models- - Page 7
Rear Panel Components Product Features Rear Panel Components 1 Power Cord Connector 8 Parallel Connector 2 Voltage Select Switch 9 Monitor Connector 3 Mouse Connector - Headphone 6 Serial Connector (COM1) e Serial Connector (COM2) 7 Ethernet RJ-45 Connector Hardware Reference Guide 1-3 - Compaq D500 | Compaq Evo Family of Personal Computers, Small Form Factor Models- - Page 8
Product Features Easy Access Keyboard Compaq Easy Access Keyboard Components 1 Ctrl Key 2 Windows Logo Key* 3 Alt Key 4 Application Key* application. May perform other functions in other software applications. Provides quick access to specific Internet destinations. 1-4 Hardware Reference Guide - Compaq D500 | Compaq Evo Family of Personal Computers, Small Form Factor Models- - Page 9
Compaq Easy Access Keyboard Components (Continued) 6 Editing Keys Includes the following: Insert, Home, Page Up, Delete, End, and Page Down. ✎ Holding down Ctrl and Alt while pressing Delete allows you to restart your computer desktop status bar. Refer to the Readme-user.txt file for instructions - Compaq D500 | Compaq Evo Family of Personal Computers, Small Form Factor Models- - Page 10
Compaq Computer Minimizes all open applications Undoes Minimize All Displays the Run dialog box Special Mouse Functions Most software applications support the use of a mouse. The functions assigned to each mouse button depend on the software applications you are using. 1-6 Hardware Reference Guide - Compaq D500 | Compaq Evo Family of Personal Computers, Small Form Factor Models- - Page 11
Product Features Serial Number Location Each computer has a unique serial number which may be located on the cover top or the side panel of the computer. Keep this number available for use when contacting Compaq customer service for assistance. Serial Number Location Hardware Reference Guide 1-7 - Compaq D500 | Compaq Evo Family of Personal Computers, Small Form Factor Models- - Page 12
Product Features 1-8 Hardware Reference Guide - Compaq D500 | Compaq Evo Family of Personal Computers, Small Form Factor Models- - Page 13
to unlock the lock and disable the Smart Cover Sensor. For more information about Computer Setup, refer to the Computer Setup Guide. 2. If the computer is already on, turn it off and disconnect the power cord from the wall outlet. Å WARNING: To reduce the risk of personal injury from electrical - Compaq D500 | Compaq Evo Family of Personal Computers, Small Form Factor Models- - Page 14
Upgrades 4. Install any optional equipment. See the applicable sections of this guide or refer to the documentation provided with the optional equipment for instructions. 5. Replace the computer cover. 6. Turn on the monitor, computer, and any devices you want to test. 7. Reconfigure the computer - Compaq D500 | Compaq Evo Family of Personal Computers, Small Form Factor Models- - Page 15
open the computer cover. You will need the key in any of the following circumstances: I Power outage I Startup failure I PC component (for example, processor or power supply) failure I Forgotten password Ä CAUTION: The Smart Cover FailSafe Key is a specialized tool available from Compaq. Be prepared - Compaq D500 | Compaq Evo Family of Personal Computers, Small Form Factor Models- - Page 16
Hardware Upgrades To obtain a FailSafe Key: I Contact your authorized Compaq reseller or service provider. I Refer to the Compaq Web site (www.compaq.com) for ordering information. I Call the appropriate number listed in the warranty. To open the computer cover: 1. Turn off the computer and any - Compaq D500 | Compaq Evo Family of Personal Computers, Small Form Factor Models- - Page 17
devices. Å WARNING: Before removing the computer cover, ensure that the computer is turned off and that the power cord is disconnected from the electrical outlet. 4. Press in the button on each side of the front bezel to release the quick release cover latches. Hardware Reference Guide 2-5 - Compaq D500 | Compaq Evo Family of Personal Computers, Small Form Factor Models- - Page 18
Hardware Upgrades 5. As you slide the computer cover forward, release the buttons and allow them to return to the original position, then lift the cover up and off the unit. ✎ To replace the cover, reverse this procedure. Removing the Computer Cover 2-6 Hardware Reference Guide - Compaq D500 | Compaq Evo Family of Personal Computers, Small Form Factor Models- - Page 19
in a computer, the system memory will run at the lower 100Mhz speed. Some configurations of PC133 SDRAMs may run at 100Mhz, instead of 133Mhz. Ä CAUTION: Some models support ECC memory and some support non-ECC memory. For those systems that do support ECC, Compaq does not support mixing ECC - Compaq D500 | Compaq Evo Family of Personal Computers, Small Form Factor Models- - Page 20
. When upgrading your memory, it is important to use memory modules with gold metal contacts to prevent corrosion and/or oxidation resulting from having incompatible metals in contact with each other. Ä CAUTION: Static electricity can damage the electronic components of the computer or optional - Compaq D500 | Compaq Evo Family of Personal Computers, Small Form Factor Models- - Page 21
Hardware Upgrades Ä CAUTION: Check the position of all cables and wires before raising or lowering the easy access drive bay to prevent damage. Rotating the Easy Access Drive Bay 5. Locate the memory module sockets. Å WARNING: To reduce risk of personal injury from hot surfaces, allow the internal - Compaq D500 | Compaq Evo Family of Personal Computers, Small Form Factor Models- - Page 22
install. 10. Replace the computer cover. 11. If you normally lock the Smart Cover Lock, use Computer Setup to relock the lock and enable the Smart Cover Sensor. The computer should automatically recognize the additional memory the next time you power on the computer. 2-10 Hardware Reference Guide - Compaq D500 | Compaq Evo Family of Personal Computers, Small Form Factor Models- - Page 23
Upgrades Removing the Expansion Card Cage To remove the expansion card cage: 1. If you have locked the Smart Cover Lock, use Computer Setup to unlock it. 2. Turn off the computer and any external devices. 3. Disconnect the power cord from the power of the power supply. Hardware Reference Guide 2-11 - Compaq D500 | Compaq Evo Family of Personal Computers, Small Form Factor Models- - Page 24
the power cord from the power outlet, then disconnect any external devices. 4. Remove the computer cover. 5. Remove the expansion card cage and identify the slot into which you want to insert the expansion card. Location of Expansion Slots in the Expansion Card Cage 2-12 Hardware Reference Guide - Compaq D500 | Compaq Evo Family of Personal Computers, Small Form Factor Models- - Page 25
Hardware Upgrades 6. Remove the retaining screws that secure the slot cover to the expansion card cage. 7. Remove the slot cover from the expansion card cage. Removing the Expansion Slot Cover Hardware Reference Guide 2-13 - Compaq D500 | Compaq Evo Family of Personal Computers, Small Form Factor Models- - Page 26
Hardware Upgrades 8. Install the expansion card. Installing an Expansion Card ✎ When you install an expansion card, make sure you press firmly on the the whole connector seats properly in the expansion card slot. 9. Reinstall the retaining screws to secure the card. 2-14 Hardware Reference Guide - Compaq D500 | Compaq Evo Family of Personal Computers, Small Form Factor Models- - Page 27
Upgrades Desktop Drive Positions 1 3.5-inch, internal, third-height, standard hard drive bay 2 5.25-inch drive bay for optional drives 3 3.5-inch, third-height, standard, 1.44-MB diskette drive To verify the type, size, and capacity of the storage devices installed in your computer, run Compaq - Compaq D500 | Compaq Evo Family of Personal Computers, Small Form Factor Models- - Page 28
Compaq has provided extra guide screws, installed in the front of the computer chassis, behind the front bezel. Some options use metric hardware. The Compaq supplied or speakers. le: Upgrading the Hard Drive The 3.5-inch hard drive is located on the left side of the computer. To remove and replace - Compaq D500 | Compaq Evo Family of Personal Computers, Small Form Factor Models- - Page 29
Hardware Upgrades 4. Remove the computer cover. 5. Disconnect the 1 power cable and 2 signal cable from the back of the drive. Disconnecting Cables from the Hard Drive 6. Push the locking lever on the right side of the drive to the right (facing the front of the computer). Slide the drive to the - Compaq D500 | Compaq Evo Family of Personal Computers, Small Form Factor Models- - Page 30
use Computer Setup to unlock it. 2. Turn off the computer and any external devices. 3. Disconnect the power cord from the power outlet. 4. Remove the computer cover. 5. Rotate the drive cage to the upright position. 6. Rotate the power supply to the upright position. 2-18 Hardware Reference Guide - Compaq D500 | Compaq Evo Family of Personal Computers, Small Form Factor Models- - Page 31
, and drive power cables. The other end of the audio cable should remain connected to the audio connector on the system board. 8. Pull the drive release latch away from the drive 1. 9. Slide the drive toward the front of the drive cage 2, then lift the drive out of the computer 3. Removing the - Compaq D500 | Compaq Evo Family of Personal Computers, Small Form Factor Models- - Page 32
can damage the internal components of the drive. Installing Guide Screws in the CD-ROM or DVD-ROM Drive 3. Position the guide screws on the drive into the J-slots in the drive bay. Slide the drive toward the front of the computer. ✎ Ensure that the spring-loaded locking lever properly secures - Compaq D500 | Compaq Evo Family of Personal Computers, Small Form Factor Models- - Page 33
Hardware Upgrades 4. Raise the easy access drive bay to the upright position and connect the flat ribbon cable and audio cable to the system board. Connecting the Flat Ribbon Cable and Audio Cable 5. Connect the power cable 1, flat ribbon cable 2, and audio cable 3 to the rear of the CD-ROM or DVD- - Compaq D500 | Compaq Evo Family of Personal Computers, Small Form Factor Models- - Page 34
Hardware Upgrades 7. Remove the bezel blank from the front bezel, if necessary. 8. Replace the computer cover. 9. The system will automatically recognize the drive and reconfigure the computer. Ä CAUTION: When servicing the computer, ensure that cables are placed in their proper locations during the - Compaq D500 | Compaq Evo Family of Personal Computers, Small Form Factor Models- - Page 35
Compaq Evo Small Form Factor Desktop Dimensions Height Width Depth Approximate Weight Weight Supported (maximum distributed load) Temperature Range Operating Nonoperating Relative Humidity (noncondensing) Operating Nonoperating Maximum Altitude (unpressurized) Operating Nonoperating Power Supply - Compaq D500 | Compaq Evo Family of Personal Computers, Small Form Factor Models- - Page 36
Specifications A-2 Hardware Reference Guide - Compaq D500 | Compaq Evo Family of Personal Computers, Small Form Factor Models- - Page 37
"Guidelines for Installing Ultra ATA Devices" in this appendix for an example of an Ultra ATA cable. Compaq hard drives ship with jumpers preset to cable-select mode; therefore, no jumper setting changes on the performance. This cable is standard on select models. Hardware Reference Guide B-1 - Compaq D500 | Compaq Evo Family of Personal Computers, Small Form Factor Models- - Page 38
to ensure that the drive lines up correctly in the drive cage. Compaq has provided extra guide screws installed in the front of the computer chassis behind the front bezel. Some options use M3 metric hardware. Compaq supplied metric screws are black. I If only one device is connected to a cable - Compaq D500 | Compaq Evo Family of Personal Computers, Small Form Factor Models- - Page 39
Ultra2 SCSI, Ultra 320 SCSI, or Ultra 160 SCSI controller supports up to 15 SCSI devices per channel. I If using multiple SCSI devices, Compaq recommends that the devices be split between Channel A and 1 through 6 and 8 through 15-available for all other SCSI devices Hardware Reference Guide B-3 - Compaq D500 | Compaq Evo Family of Personal Computers, Small Form Factor Models- - Page 40
was shipped with your computer. ❏ Using a cable Compaq authorized dealer, reseller, or service provider. Ä CAUTION: Do not route cables near the air intake to the power supply. Cables routed in this manner can block airflow to the power supply, causing it to overheat. B-4 Hardware Reference Guide - Compaq D500 | Compaq Evo Family of Personal Computers, Small Form Factor Models- - Page 41
drive is used, it should be installed in bay 4 if your computer has four or more bays. Before installing a SCSI device: I external SCSI device before turning on power to the computer. This enables the system board SCSI connector on the rear panel of the computer, that device becomes the end of the - Compaq D500 | Compaq Evo Family of Personal Computers, Small Form Factor Models- - Page 42
ship with a multimode SCSI cable that supports Low Voltage Differential (LVD) or single The cable that shipped with your computer may look different than the your Compaq authorized dealer, reseller, or service In Post Messages Disabled mode: When the Compaq logo screen displays, press any key - Compaq D500 | Compaq Evo Family of Personal Computers, Small Form Factor Models- - Page 43
I SCSI Disk Utilities Lists all SCSI devices and SCSI ID numbers ✎ For additional information about configuring POST message display status, refer to the Computer Setup Guide on the Reference Library CD. Choosing the Quiet Drive Options ✎ The Quiet Drive is an optional feature and may or may not be - Compaq D500 | Compaq Evo Family of Personal Computers, Small Form Factor Models- - Page 44
computer. If you are in Windows, click Start > Shut Down > Restart the Computer. you must restart the computer to access the utility. 3. Select of five headings displays in the Computer Setup Utilities menu. Using the arrow displayed, your computer does not contain a Quiet drive. - Compaq D500 | Compaq Evo Family of Personal Computers, Small Form Factor Models- - Page 45
battery only with the Compaq spare designated for this product. Ä CAUTION: Before replacing the battery, it is important to back up the computer CMOS settings. When the battery is removed or replaced, the CMOS settings will be cleared. Refer to the Troubleshooting Guide for information on backing - Compaq D500 | Compaq Evo Family of Personal Computers, Small Form Factor Models- - Page 46
turn off the computer and any external devices, disconnect the power cord from the electrical outlet, and remove the computer cover or access panel instructions to replace the battery. Type 1 a. Lift the battery out of its holder. Removing a Coin Cell Battery (Type 1) C-2 Hardware Reference Guide - Compaq D500 | Compaq Evo Family of Personal Computers, Small Form Factor Models- - Page 47
metal clamp that extends above one edge of the battery. b. When the battery pops up, lift it out. Removing a Coin Cell Battery (Type 2) Hardware Reference Guide C-3 - Compaq D500 | Compaq Evo Family of Personal Computers, Small Form Factor Models- - Page 48
or access panel. 6. Plug in the computer and turn on power to the computer. 7. Reset the date and time, your passwords, and any special system setups, using Compaq Computer Setup. Refer to the Computer Setup Guide. If you normally lock the Smart Cover Lock, use Computer Setup to relock the lock and - Compaq D500 | Compaq Evo Family of Personal Computers, Small Form Factor Models- - Page 49
Because of chassis differences, the slots may be located in a different position than shown. Installing Compaq Type 1 Security Bracket (may vary by model) Å WARNING: To avoid injury, use care in so that sharp edges do not extend from the edges of the computer chassis. Hardware Reference Guide D-1 - Compaq D500 | Compaq Evo Family of Personal Computers, Small Form Factor Models- - Page 50
Provisions Installing Compaq Type 2 Security Bracket (may vary by model) Å WARNING: To avoid injury, use care in handling the separated pieces of the security bracket; metal edges may be sharp. Be sure to install the bracket so that sharp edges do not extend from the edges of the computer chassis - Compaq D500 | Compaq Evo Family of Personal Computers, Small Form Factor Models- - Page 51
a Compaq Type 2 Bracket (may vary by model) Å WARNING: To avoid injury, use care in handling the separated pieces of the security bracket; metal edges may be sharp. Be sure to install the bracket so that sharp edges do not extend from the edges of the computer chassis. Hardware Reference Guide D-3 - Compaq D500 | Compaq Evo Family of Personal Computers, Small Form Factor Models- - Page 52
Security Lock Provisions Installing a Kensington Cable Lock (may vary by model) Installing a Kensington Cable Lock (may vary by model) D-4 Hardware Reference Guide - Compaq D500 | Compaq Evo Family of Personal Computers, Small Form Factor Models- - Page 53
the following methods when handling or installing electrostatic-sensitive parts: I Use a wrist strap connected by a ground cord to a grounded workstation or computer chassis. Wrist straps are flexible straps with a minimum of 1 megohm +/- 10 percent resistance in the ground cords. To provide proper - Compaq D500 | Compaq Evo Family of Personal Computers, Small Form Factor Models- - Page 54
work mat. If you do not have any of the suggested equipment for proper grounding, contact your Compaq authorized dealer, reseller, or service provider. ✎ For more information on static electricity, contact your Compaq authorized dealer, reseller, or service provider. E-2 Hardware Reference Guide - Compaq D500 | Compaq Evo Family of Personal Computers, Small Form Factor Models- - Page 55
of the desktop unit as this also restricts airflow. I Keep the computer away from excessive moisture, direct sunlight, and extremes of heat and cold. For information about the recommended temperature and humidity ranges for your computer, refer to Appendix A, "Specifications," in this guide. I Keep - Compaq D500 | Compaq Evo Family of Personal Computers, Small Form Factor Models- - Page 56
while the drive is on, wait at least one hour before you turn off the power. If you operate the unit immediately, it may malfunction while reading. I Avoid placing the drive, immediately unplug the computer and have it checked by an authorized Compaq service provider. F-2 Hardware Reference Guide - Compaq D500 | Compaq Evo Family of Personal Computers, Small Form Factor Models- - Page 57
when the system power is turned off. computer. 7. Pack the system components and external devices in their original packing boxes or similar packaging with sufficient packing material to protect them. ✎ For environmental nonoperating ranges, see Appendix A, "Specifications," in this guide - Compaq D500 | Compaq Evo Family of Personal Computers, Small Form Factor Models- - Page 58
Routine Computer Care and Shipping Preparation F-4 Hardware Reference Guide - Compaq D500 | Compaq Evo Family of Personal Computers, Small Form Factor Models- - Page 59
1-2 rear panel 1-3 computer care F-1 computer cover removing 2-5 D DIMMs (dual inline memory modules) installing 2-7 drawer Guide Index installation guidelines B-1 upgrading 2-16 I installation sequence 2-1 installing additional drives 2-16 an expansion card 2-12 CD-ROM drive 2-20 memory 2-7 memory - Compaq D500 | Compaq Evo Family of Personal Computers, Small Form Factor Models- - Page 60
device guidelines B-3 SCSISelect utility B-6 SDRAM (synchronous dynamic random access memory) 2-7 security lock provisions D-1 serial number 1-7 shipping preparation F-1 smart cover lock failsafe key 2-3 specifications A-1 U Ultra ATA devices B-1 W Windows Logo Key 1-6 Index-2 Hardware Reference
-
 1
1 -
 2
2 -
 3
3 -
 4
4 -
 5
5 -
 6
6 -
 7
7 -
8
-
9
-
10
-
11
-
12
-
13
-
14
-
15
-
16
-
17
-
18
-
19
-
20
-
21
-
22
-
23
-
24
-
25
-
26
-
27
-
28
-
29
-
30
-
31
-
32
-
33
-
34
-
35
-
36
-
37
-
38
-
39
-
40
-
41
-
42
-
43
-
44
-
45
-
46
-
47
-
48
-
49
-
50
-
51
-
52
-
53
-
54
-
55
-
56
-
57
-
58
-
59
-
60
 |
 |

b
Hardware Reference Guide
Compaq Evo Desktop Family: Small Form
Factor Models - Intel Celeron Versions
Document Part Number: 243848-002
January 2002
This book provides basic information for upgrading this series of
computers.