Craftsman 11218 Operation Manual - Page 5
Description, Unpacking, Unpacking Cont., Safety Instructions Cont. - orbital sander
 |
View all Craftsman 11218 manuals
Add to My Manuals
Save this manual to your list of manuals |
Page 5 highlights
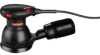
SAFETY INSTRUCTIONS cont. ADDITIONAL RULES FOR SAFE OPERATION cont. 6. INSPECT the tool cords periodically and if damaged have them repaired at your nearest Sears Service Center. ALWAYS BE AWARE of the cord location. 7. ALWAYS check the tool for damaged parts. Before further use of the tool, a guard or other part that is damaged should be carefully checked to determine if it will operate properly and perform its intended function. Check for misalignment or binding of moving parts, breakage of parts, and any other condition that may affect the tool's operation. A guard or other part that is damaged should be properly repaired or replaced at a Sears Service center. 8. SAVE THESE INSTRUCTIONS. Refer to them frequently and use them to instruct others who may use this tool. If someone borrows this tool, make sure they have these instructions also. UNPACKING ! WARNING: This power tool should NEVER be connected to the power source when you are assembling parts, making adjustments, installing or removing sandpaper, cleaning or when it is not in use. Disconnecting the sander will prevent accidental starting, which could cause serious personal injury. 1. Remove the sander from the carton and inspect it carefully to make sure that no breakage or damage has occurred during shipping. 2. Do not discard any of the packing materials until all parts are accounted for. 3. Included with your sander is a dust bag assembly, with vac adapter. 4. 2 discs of hook and loop sandpaper are included; one fine grit, and one medium grit. 5. If any of the parts are damaged or missing (refer to PARTS LIST below), return the sander to your nearest Sears store or Craftsman outlet to have the sander replaced. ! WARNING: If any parts are missing, DO NOT operate this power tool until the missing parts are replaced. Failure to do so could result in possible serious personal injury. 10 UNPACKING cont. PARTS LIST (Fig. 1) 1. Sander 2. Dust Bag Assembly 3. Vac Adapter with dual dust ports DESCRIPTION 4. Two 5-in. Hook and Loop Sanding Discs with Pre-Punched Holes 5. Operator's Manual KNOW YOUR RANDOM ORBIT SANDER (Fig. 2) NOTE: Before attempting to use your sander, familiarize yourself with all of the operating features and safety requirements. Your Professional 5" Random Orbit Sander has a precision-built electric motor and it should be connected to a 120-volt, 60-Hz AC ONLY power supply (normal household current). DO NOT operate on direct current (DC). The large voltage drop will cause a loss of power and the motor will overheat. If the sander does not operate when plugged into correct 120-volt, 60-Hz AC ONLY outlet, check the power supply. This sander has a 10-ft, 2-wire power cord (no adapter needed). This Random Orbit Sander has the following features: 1. Powerful 3.0 amp motor provides the torque, power and durability for a variety of continuous sanding applications. 2. Variable speed 5,000 to 12,000 OPM orbits per minute (no-load speed) is controlled by variable speed dial. Match with the correct speed and sandpaper grit to the surface being sanded for either fast material removal or a fine, smooth finish. 3. Random orbital action with 1/16-in. orbit diameter helps to provide a swirl free finish. 4. Ergonomically designed Palm Grip Handle with Molded-in Comfort Grip for maximum balance, control, gripping comfort and reduced operator fatigue. 5. Precision-tuned counterbalanced system reduces vibration for smooth operation and less operator fatigue. 11 27675 2/11/08
-
 1
1 -
 2
2 -
 3
3 -
 4
4 -
 5
5 -
 6
6 -
 7
7 -
 8
8 -
 9
9 -
 10
10 -
 11
11 -
12
-
13
 |
 |
