Craftsman 16781 Owners Manual
Craftsman 16781 - Professional 80 Gal. Vertical Air Compressor Manual
 |
View all Craftsman 16781 manuals
Add to My Manuals
Save this manual to your list of manuals |
Craftsman 16781 manual content summary:
- Craftsman 16781 | Owners Manual - Page 1
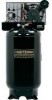
Stage Air Compressor AiR COMPRESSOR = Safety Guidelines = Assembly = Operation = Maintenance = Troubleshooting = Repair Parts CAUTION; Read the Safety Guidelines and All Instructions Carefully Before Operating. Sears, Roebuck and Co., Hoffman Estates, IL 60179 U.S.A. Visit our Craftsman website - Craftsman 16781 | Owners Manual - Page 2
STORAG.E TROUBLESHOOTING GUIDE REPAIR PARTS ESPA_IOL REPAIR PROTECTION AGREEMENTS HOW TO ORDER REPAIR PARTS 2 2 No. Running Horsepower Voltage-Single Phase Minimum Branch Circuit Requirement Fuse Type Air Tank Capacity, Gallons Approximate Cut-in Pressure Approximate Cut-out Pressure SCFM - Craftsman 16781 | Owners Manual - Page 3
such tools. When using air tools, basic safety precautions should instruction manual for safety, operation and maintenance instructions. #x-_l SAVE THESE INSTRUCTIONS It is normal for electrical contacts within the motor and pressure switchWtoHAsTparCkA, N HAPPEN Always operate the compressor - Craftsman 16781 | Owners Manual - Page 4
obstruction that would restrict the flow of fresh air to the ventilation openings. Operate compressor in a clean, dry well ventilated area. air to all applicable local and federal codes prior to human consumption. Work in an area with good cross ventilation. Read and follow the safety instructions - Craftsman 16781 | Owners Manual - Page 5
Never attempt to repair a damaged or leaking air tank. Replace with a new air tank. The air tank is designed to withstand specific operating pressures. Never make adjustments or parts substitutions to alter the factory set operating pressures. The compressor must be properly mounted, see "Anchoring - Craftsman 16781 | Owners Manual - Page 6
electrocution. Refer to "Grounding Instructions" paragraph in the Installation section. HOW TO PREVENT iT Never operate the compressor outdoors when it is any part of the body or at other people or animals. Always turn the compressor off and bleed pressure from the air hose and air tank before - Craftsman 16781 | Owners Manual - Page 7
long hair can be caught in moving parts. Air vents may cover moving parts and should be avoided as well. Attempting to operate compressor with damaged or missing parts or attempting to repair compressor with protective shrouds removed can expose you to moving parts and can result in serious injury - Craftsman 16781 | Owners Manual - Page 8
air I = Review and understand all compressor could lead to serious inju- I instructions and warnings in this ry or death to you or others, manual. • Become familiar with the operation and controls of the air compressor with missing, broken, or unauthor zed parts. [__ RISK OF INJURY FROM - Craftsman 16781 | Owners Manual - Page 9
low pressure at which the motor automatically restarts is called "cut-in" pressure. Cut-Out Pressure: When an air compressor is turned on and begins to run, air pressure in the air tank begins to build. It builds to a certain high pressure before the motor automatically shuts off - protecting your - Craftsman 16781 | Owners Manual - Page 10
Contents of Carton 1 - Air Compressor 1 - Parts bag containing: 1 - Owner's Manual 4 - 5/8" Washers 1 - Conduit Connector Tools Required for Assembly 1 - 9/16" socket or open end wrench 1 - Electric drill Unpacking 1. Remove all packaging. __l_t to mbaraycebeornescuepspsoarrty one side of - Craftsman 16781 | Owners Manual - Page 11
(net supplied) (not supplied) 6. Place the (4) 3/8" lag screws through the air compressor feet, washers, shims, and into the anchors. 7. Torque 3/8" lag screws to 7 - 10 ft. Ibs. Wiring Instructions _Risk Shocko.f EImlepcrtoripcearl electrical grounding can result in electrical shock. The - Craftsman 16781 | Owners Manual - Page 12
TYPICAL COMPRESSED AiR DiSTRiBUTiON SYSTEM AIR COMPRESSOR DRAIN COCK VALVE 1000002023 12 ENG - Craftsman 16781 | Owners Manual - Page 13
KNOW YOUR AIR COMPRESSOR READ THIS OWNER'S MANUAL AND SAFETY RULES BEFORE OPERATING YOUR UNIT. Compare the illustrations with your unit to familiarize yourself with the location of various controls and adjustments. Save this manual for future reference. DESCRiPTiON OF OPERATION Become familiar with - Craftsman 16781 | Owners Manual - Page 14
this instruction manual for safety, operation and maintenance instructions. Break-in Procedure _Risk DamaogfeP. roSpeerirotyus damage may result if the following break-in instructions are not closely followed. This procedure is required before the air compressor is put into service and - Craftsman 16781 | Owners Manual - Page 15
. Readjust or shim air compressor feet, if necessary. 9. After 20 minutes, close the globe valve. The air receiver will fill to instructions. if any unusual "__ noise or vibration is noticed, stop the compressor immediately and have it checked by a trained service technician. The compressor - Craftsman 16781 | Owners Manual - Page 16
for the location of controls. cycles automatically when power is on. When servicing, you may be exposed to voltage sources, compressed air, or moving parts. Before servicing unit unplug or disconnect electrical supply to the air compressor, bleed tank TO CHECK SAFETY VALVE __B_ isk If the - Craftsman 16781 | Owners Manual - Page 17
other body parts away from outlet of drain. Use ANSi Z87.1 eye protection (CAN/CSA Z94.3) when draining as debris can be kicked up into face. Use ear protection (ANSi $12,6 (S3.19) hearing protection) as air flow noise is loud when draining. NOTE: Operation of the air compressor will cause - Craftsman 16781 | Owners Manual - Page 18
when filter cover is removed. Allow compressor to cool prior to servicing. _Keep clean tahtealal itrimfiletesr. Do not operate the air compressor with the air filter removed. A dirty air filter will not allow the compressor to operate at full capacity. Keep the air filter clean at all times - Craftsman 16781 | Owners Manual - Page 19
the motor drive pulley setscrew. See Parts manual for torque specifications. 9. Reinstall belt guard. AIR COMPRESSOR PUMP iNTAKE AND EXHAUST VALVES Once a year have a Trained Service Technician check the air compressor pump intake and exhaust valves. iNSPECT AIR LINES AND FITTINGS FOR LEAKS 1. Turn - Craftsman 16781 | Owners Manual - Page 20
. ADDiTiONAL SERVICE Disassembly or service of the air compressor beyond what is covered in this manual is not recommended. If additional service is required, contact your nearest Authorized Warranty Service Center. Before you store the air compressor, make sure you do the following: 1. Review the - Craftsman 16781 | Owners Manual - Page 21
,nityocuycmleasy abuetoemxaptoicsaeldly towhen voltage sources, compressed air, or moving parts. Before servicing unit unplug or disconnect electrical supply to the air compressor, bleed tank of pressure, and allow the air compressor to cool PROBLEM Excessive tank pressure - safety valve pops - Craftsman 16781 | Owners Manual - Page 22
PROBLEM Compressor is not supplying enough air to operate accessories Restricted air intake Motor will not run CAUSE CORRECTION Prolonged excessive use Decrease amount of air usage. of air. Compressor is not large enough for air requirement. Hole in hose. Check the accessory air requirement. If - Craftsman 16781 | Owners Manual - Page 23
valve. Loose pulley. Loose flywheel. Compressor mounting screws loose. Loose belt. Operate safety valve manually by pulling on ring. If valve still leaks, it should be replaced. Remove and clean, or replace. Tighten pulley set screw, see Parts manual for torque specifications. Tighten flywheel - Craftsman 16781 | Owners Manual - Page 24
Air Compressor Model Number 919.167810 FARTS SHOWN 2 3 FOR REFERENCE 1 ONLY 2 11 12 51 20 16 17 47 48 31 _30 2_28 53 F 1000002023 1000002023 Air Compressor - MODEL NUMBER 919.16781 24 ENG 05/07TS - Craftsman 16781 | Owners Manual - Page 25
Air Compressor Model Number 919.167810 iTEM PART NO. NO. 1 BT-226 ¢2 91895680 3 SSN-51 4 AC-0485 5 SSP-6461 6 A03163 7 SSPW824 ¢8 A03164 9 Z-D26719 ¢10 SSF-3140-ZN 11 SSF-8111-ZN 12 AC- - Craftsman 16781 | Owners Manual - Page 26
Air Compressor Model Number 919.167810 PARTS SHOWN FOR REFERENCE ONLY 130__....... 131 _"'_134 3 2 113 147 174 171 i 169-_ 113 I 113 150 1000002023 26 ENG - Craftsman 16781 | Owners Manual - Page 27
Air Compressor Model Number 919.167810 ITEM PART NO. NO. 9101 A04421 102 A04422 103 A04423 106 A03957 110 A03959 111 A04023 113 A03945 _)120 A04424 121 A04378 122 A04426 123 A04427 125 - Craftsman 16781 | Owners Manual - Page 28
ACCESORIOS ENSAMBLADO INSTALACION OPERACION MANTENIMiENTO SERVICIOS Y REGULAClONES ALMACENAJE GUIA DE DIAGNOSTICO DE PROBLEMAS NOTES/NOTAS CONTRATOS DE PROTECClON PARA REPARACIONES LISTA DE PARTES COMO SOLiCITAR PIEZAS PARA REPARACION 28 28 29 29-34 34 34 35 35 35-37 38-40 41-44 45 48 - Craftsman 16781 | Owners Manual - Page 29
de SU SEGURIDAD y LA PREVENClON DE PROBLEMAS A SU EQUIP& Para ayudarlo a reconocer esta informaci6n, usamos los simbolos indicados mAs abajo. Sirvase leer el manual y prestar atencbn a estas secciones. Indica una situaci6n de riesgo inminente, que si no se evita, causarA la muerte o lesiones serias - Craftsman 16781 | Owners Manual - Page 30
el compresor en un lugar abierto con una distancia de al menos 30,5 cm (12 pulg.) a cualquier pared u obstrucci6n que pudiera restringir el flujo de aire fresco alas aberturas de ventilaci6n. Opere el compresor en un Area limpia, seca y bien ventilada. No opere la unidad dentro de la casa o en un - Craftsman 16781 | Owners Manual - Page 31
siempre el compresor nivelado y nunca Io coloque de costado. "O _ RIESGO DE EXPLOSION Tanque de aire: El tanque de aire de su compresor de aire est_ dise_ado y puede tener c6digo UM (para unidades con tanques de aire de m_s de 152 mm (6 pulgadas) de di_metro) segOn las normas de la ASME, Secci6n - Craftsman 16781 | Owners Manual - Page 32
al usar el compresor. Nunca apunte ninguna boquilla ni pulverizador a ninguna parte del cuerpo o a otras personas o animales. Apague siempre el compresor y drene la presi6n de la manguera de aire y del tanque de aire antes de intentar hacer mantenimiento, conectar herramientas o accesorios. _1__ - Craftsman 16781 | Owners Manual - Page 33
o con sus ropas. ,, Intentar hacer funcionar el compresor con partes da_adas o faltantes, o intentar reparar el compresor sin las cubiertas COMO EVITARLO Revise y comprenda todas las instrucciones y advertencias de este manual. Familiaricese con la operaci6n y los controles del compresor de mire. - Craftsman 16781 | Owners Manual - Page 34
por los laboratorios dedicados a la certificaci6n de la seguridad. Presibn Apro×. de Cone×i6n: Cuando el motor est_ apagado, la presi6n del tanque de aire baja a medida que usted continL_a usando su accesorio. Cuando la presi6n del tanque baja al valor fijado en f_brica como punto bajo, el motor - Craftsman 16781 | Owners Manual - Page 35
acceserios con una capacidad nominal igual e superior a la de la cempreser de aire. Contenido de la Caja 1 - Compresor de aire 1 - Bolsa de piezas conteniendo Io siguiente: 1 - Manual del operador 4 - Arandelas de 5/8 pulg. 1 - Conector de conductos Herramientas ensamble necesarias para - Craftsman 16781 | Owners Manual - Page 36
no suministrada) Tarugos para anclaje en cemento (no suministrados) 6. Coloque los (4) tornillos tirafondo de 3/8 pulg. a trav6s de las patas del compresor de aire; de las arandelas y cutlas, hasta Ilegar a los tarugos de anclaje. 7. Aplique un torque de 7-10 pies-lbs, al los tomillos tirafondo de - Craftsman 16781 | Owners Manual - Page 37
uniones de la misma se encuentran libres de fugas. • Se recomienda la instalaci6n de un acoplamiento flexible, entre la salida de descarga del aire y la linea principal de distribuci6n del mismo, a fin de aliviar eventuales vibraciones. o Se recomienda la instalaci6n de un segundo regulador para el - Craftsman 16781 | Owners Manual - Page 38
CONOZCA SU COMPRESOR DE AIRE LEA ESTE MANUAL DEL PROPIETARIO Y SUS NORMAS DE SEGURIDAD ANTES DE OPERAR LA UNIDAD. Compare las ilustraciones contra su unidad a fin de familiarizarse con la ubicaci6n de los distintos controles y regulaciones. Conserve este manual para referencias futuras. Descripci6n - Craftsman 16781 | Owners Manual - Page 39
motor. Cuando el motor se detiene, deber[a escucharse el escape del aire a trav_s de dicha valvula durante unos segundos. No debe escucharse escape Protector de sobrecalentamiento del motor: Este motor tiene un protector manual de sobrecarga t6rmica. Si el motor se sobrecalienta por cualquier motivo - Craftsman 16781 | Owners Manual - Page 40
z6calo de conexi6n rapida. Riesgo de -- Explosi6n. Demasiada presibn de aire pedr& ser la cauea de rieego de explosi6n. Verifique lee valores m_xima presi6n especificados. _ Riesgo de -- operacibn insegura. El aire comprimido de la unidad puede contener condensaci6n de agua y - Craftsman 16781 | Owners Manual - Page 41
horas Cada 100 horas Cada 160 horas Anualmente o o Verifique el aceite de la o bomba Cambie el aceite de la bomba Ruido inusual y/o vibraci6n Filtro de aire Estado de la correa o o o Alineado de la polea/volan- o te del motor Wlvulas de entrada y escape de la bomba del compresor de - Craftsman 16781 | Owners Manual - Page 42
COMe DRENAR EL TANQUE Riesgo de operaci6n insegura. Riesgo per ruidos. Los tanques de aire contienen aire de alta presi6n. Mantenga la cara y otras partes del cuerpo lejos de la salida del drenaje. Utilice anteojoe de seguridad ANSi Z87.1(CAN/CSA Z94.3}, ya que al drenar se pueden desprender - Craftsman 16781 | Owners Manual - Page 43
aire dentro del tanque. 2. Extraiga la protecci6n de la correa. 3. Marque la posici6n de la bomba sobre el montante. 4. Afloje los tomillos montantes del motor y deslice 6ste hacia el compresor. 4. Una vez Iograda la tensi6n adecuada, ajuste los cuatro tornillos montantes. Vea el Manual de partes - Craftsman 16781 | Owners Manual - Page 44
. - TORQUE Los tornillos del cabezal del compresor de aire deben mantenerse debidamente ajustados. Verifique el torque de los tomillos del cabezal luego de las primeras cinco horas de operaci6n. ReajOstelos si fuese necesario. Vea el Manual de partes para informarse de las especificaciones de torque - Craftsman 16781 | Owners Manual - Page 45
Puesta en Marcha" en la secci6n Operaci6n. SERVIClO ADICIONAL No se recomienda desarmar ni darle servicio a este compresor de aire mas all_ de Io tratado en este manual. Si se requiere de servicios adicionales, contactarse con el Centro de Servicios de Garantfa Autorizado m_s cercano. abierta nada - Craftsman 16781 | Owners Manual - Page 46
de retenci6n o dentro de ella Compruebe si el asiento de Una valvula de retenci6n defec- la vailvula est_ da_ado. tuosa causa una fuga constante de aire en la vAIvula de alivio de )resi6n cuando hay presi6n en el tanque y se apaga el compresor. Reemplace la v_lvula de retenci6n. Consulte "c6mo - Craftsman 16781 | Owners Manual - Page 47
calificado en servicio. Es normal que ocurra "algLin" descenso en la )resi6n. Posible defecto en la vAIvula de seguridad. Excesivo y prolongado uso del aire. Si hubiese una caida excesiva de )resi6n durante el use del acceso- rio, ajuste el regulador de acuerdo alas instrucciones de la secci6n - Craftsman 16781 | Owners Manual - Page 48
PROBLEMA El motor no funciona El motor no funciona Salta la vAIvula de seguridad CAUSA CORRECCION El interruptor de protecci6n de sobrecarga del motor se ha abierto. Consulte "Protector de sobrecalentamiento del motor" on la secci6n Operaci6n. Si la protecci6n de la sobrecarga del motor dispara - Craftsman 16781 | Owners Manual - Page 49
de piezas para conocer las especificaciones de torque. Ajuste el tornillo del volante, Vea el manual de piezas para conocer las especificaciones de torque. Ajustar los tomillos de montaje a, Vea el manual de piezas para conocer las especificaciones de torque. Verifique la tensi6n de la corra, lea - Craftsman 16781 | Owners Manual - Page 50
1000002023 50 - Craftsman 16781 | Owners Manual - Page 51
service and service-related parts not covered by the agreement; also, 10% off regular price of preventive maintenance check [] Fast help by phone - phone support Felicitaciones pot hacer una compra inteligente. Su nueva unidad Craftsman ® est_ diseSada y fabricada para a5os de operacidn confiable - Craftsman 16781 | Owners Manual - Page 52
it, no matter who sold it! For the replacement parts, accessories and owner's manuals that you need to do-it-yourself. For Sears purchase a protection agreement (U.S.A.) or maintenance agreement (Canada) on a product serviced by Sears: 1-800-827-6655 (U.S.A.) 1-800-361-6665 (Canada)
-
 1
1 -
 2
2 -
 3
3 -
 4
4 -
 5
5 -
 6
6 -
 7
7 -
8
-
9
-
10
-
11
-
12
-
13
-
14
-
15
-
16
-
17
-
18
-
19
-
20
-
21
-
22
-
23
-
24
-
25
-
26
-
27
-
28
-
29
-
30
-
31
-
32
-
33
-
34
-
35
-
36
-
37
-
38
-
39
-
40
-
41
-
42
-
43
-
44
-
45
-
46
-
47
-
48
-
49
-
50
-
51
-
52
 |
 |

Owner's
Manual
I
CRRFTgMRNI
Oil
Lube Two
Stage
Air
Compressor
AiR COMPRESSOR
=
Safety
Guidelines
=
Assembly
=
Operation
=
Maintenance
=
Troubleshooting
=
Repair
Parts
CAUTION;
Read the Safety Guidelines
and All Instructions
Carefully
Before
Operating.
Sears,
Roebuck
and
Co.,
Hoffman
Estates,
IL
60179
U.S.A.
Visit our Craftsman website:
www.sears.com/craftsman
1000002023
5J2eJo7