Craftsman 22124 Owners Manual - Page 31
retainingboltremoved, instep1., foreasyremoval., See
 |
View all Craftsman 22124 manuals
Add to My Manuals
Save this manual to your list of manuals |
Page 31 highlights
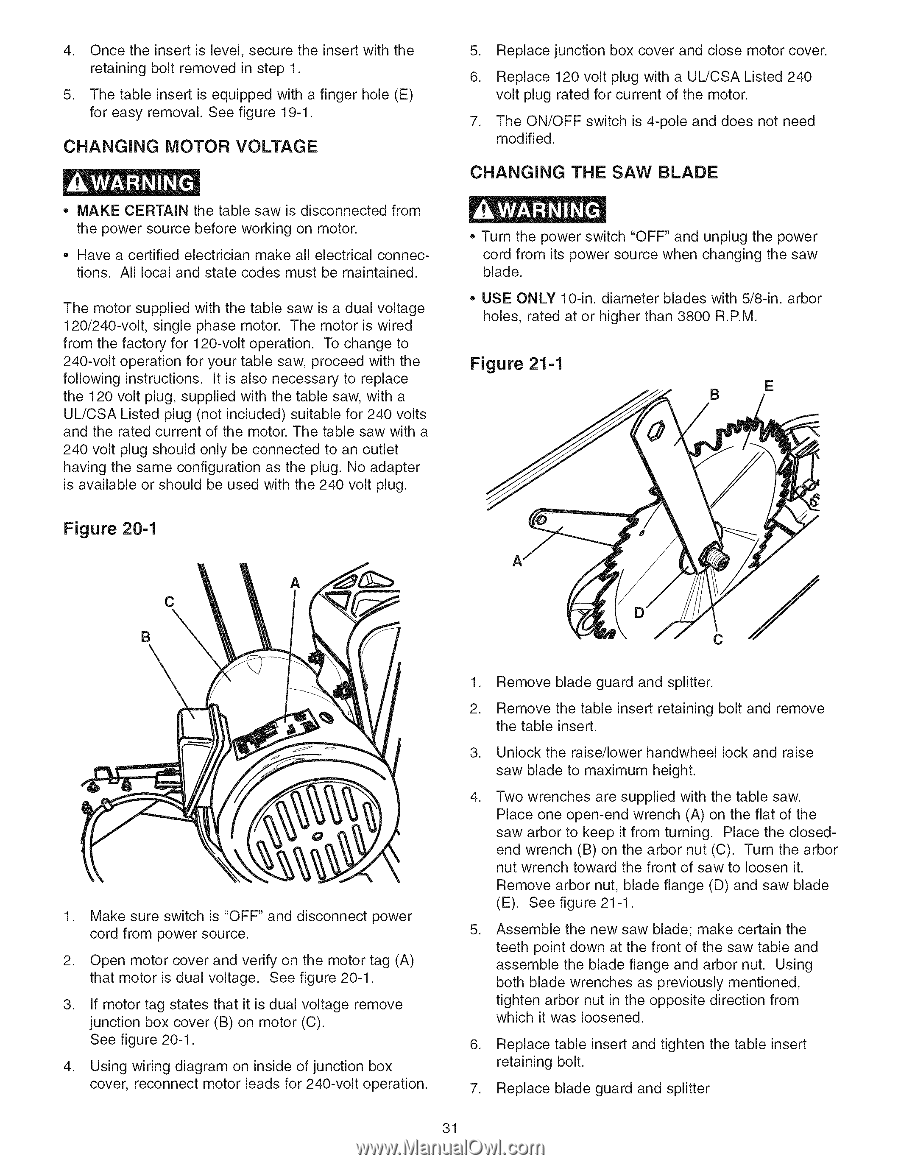
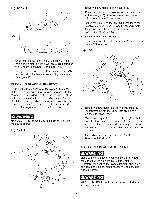
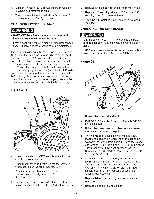
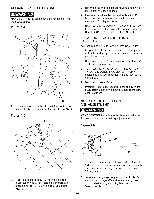
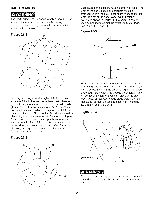
4. Oncetheinsertis level,securetheinsertwiththe retainingboltremovedinstep1. 5. Thetableinsertis equippedwitha fingerhole(E) foreasyremovalS. eefigure19-1. CHANGING MOTOR VOLTAGE • MAKE CERTAIN the table saw is disconnected from the power source before working on motor. • Have a certified electrician make all electrical connections. All local and state codes must be maintained. The motor supplied with the table saw is a dual voltage 120/240-volt, single phase motor. The motor is wired from the factory for 120-volt operation. To change to 240-volt operation for your table saw, proceed with the following instructions. It is also necessary to replace the 120 volt plug, supplied with the table saw, with a UL/CSA Listed plug (not included) suitable for 240 volts and the rated current of the motor. The table saw with a 240 volt plug should only be connected to an outlet having the same configuration as the plug. No adapter is available or should be used with the 240 volt plug. 5. Replace junction box cover and close motor cover. 6. Replace 120 volt plug with a UL/CSA Listed 240 volt plug rated for current of the motor. 7. The ON/OFF switch is 4-pole and does not need modified. CHANGING THE SAW BLADE • Turn the power switch "OFF" and unplug the power cord from its power source when changing the saw blade. • USE ONLY 10-in. diameter blades with 5/8-in. arbor holes, rated at or higher than 3800 R.P.M. Figure 21=1 Figure 20=1 B / C 1. Make sure switch is "OFF" and disconnect power cord from power source. 2. Open motor cover and verify on the motor tag (A) that motor is dual voltage. See figure 20-1. 3. If motor tag states that it is dual voltage remove junction box cover (B) on motor (C). See figure 20-1. 4. Using wiring diagram on inside of junction box cover, reconnect motor leads for 240-volt operation. 1. Remove blade guard and splitter. 2. Remove the table insert retaining bolt and remove the table insert. 3. Unlock the raise/lower handwheel lock and raise saw blade to maximum height. 4. Two wrenches are supplied with the table saw. Place one open-end wrench (A) on the flat of the saw arbor to keep it from turning. Place the closedend wrench (B) on the arbor nut (C). Turn the arbor nut wrench toward the front of saw to loosen it. Remove arbor nut, blade flange (D) and saw blade (E). See figure 21-1. 8. Assemble the new saw blade; make certain the teeth point down at the front of the saw table and assemble the blade flange and arbor nut. Using both blade wrenches as previously mentioned, tighten arbor nut in the opposite direction from which it was loosened. 6. Replace table insert and tighten the table insert retaining bolt. 7. Replace blade guard and splitter 31
-
 1
1 -
2
-
3
-
4
-
5
-
6
-
7
-
8
-
9
-
10
-
11
-
12
-
13
-
14
-
15
-
16
-
17
-
18
-
19
-
20
-
21
-
22
-
23
-
24
-
25
-
 26
26 -
 27
27 -
 28
28 -
 29
29 -
 30
30 -
 31
31 -
 32
32 -
 33
33 -
 34
34 -
 35
35 -
 36
36 -
37
-
38
-
39
-
40
-
41
-
42
-
43
-
44
-
45
-
46
-
47
-
48
-
49
-
50
-
51
-
52
-
53
-
54
-
55
-
56
-
57
-
58
-
59
-
60
-
61
-
62
-
63
-
64
-
65
-
66
-
67
-
68
-
69
-
70
-
71
-
72
-
73
-
74
-
75
-
76
-
77
-
78
-
79
-
80
-
81
-
82
-
83
-
84
-
85
-
86
-
87
-
88
 |
 |