Craftsman 22901 Instruction Manual - Page 13
See
 |
View all Craftsman 22901 manuals
Add to My Manuals
Save this manual to your list of manuals |
Page 13 highlights
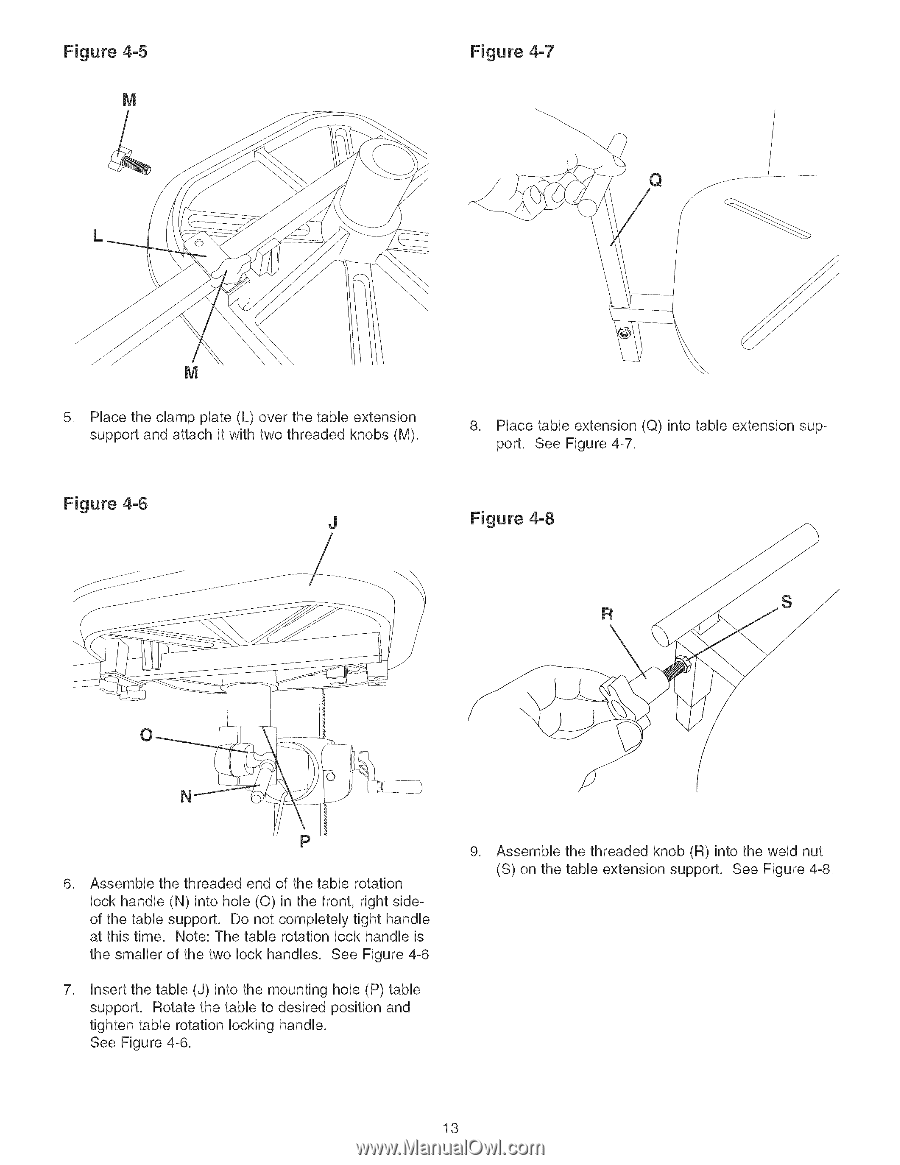
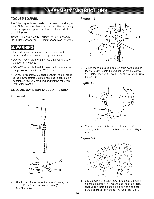
Figure 4-5 Figure 4-7 Q / C_ M 5, Hace the clamp plate (L) over the tame extension support and attach it with two threaded knobs (M), Figure 4-6 J / 8, Hace tame extension (Q) into tame extension support, See Figure 4-7, Figure 4-8 R y /, N 6, AssemMe the threaded end of the tame rotation lock handle (N) into hole (0) in the front, right sideof the tame support, Do not completely tight handle at this time, Note: The tame rotation lock handle is the smaller of the two lock handles, See Figure 4-6 7, Insert the tame (J) into the mounting hole (P) tame support, Rotate the tame to desired position and tighten tame rotation locking handle, See Figure 4-6, 9, Assemble the threaded knob (R) into the weld nut (S) on the table extension support, See Figure 4-8, 13
-
 1
1 -
2
-
3
-
4
-
5
-
6
-
7
-
 8
8 -
 9
9 -
 10
10 -
 11
11 -
 12
12 -
 13
13 -
 14
14 -
 15
15 -
 16
16 -
 17
17 -
 18
18 -
19
-
20
-
21
-
22
-
23
-
24
-
25
-
26
-
27
-
28
-
29
-
30
-
31
-
32
-
33
-
34
-
35
-
36
-
37
-
38
-
39
-
40
-
41
-
42
-
43
-
44
-
45
-
46
-
47
-
48
-
49
-
50
-
51
-
52
-
53
-
54
-
55
-
56
-
57
-
58
-
59
-
60
 |
 |