Cuisinart DBM-T10 User Manual - Page 5
Introduction, Operating Instructions - touch screen burr grinder
 |
View all Cuisinart DBM-T10 manuals
Add to My Manuals
Save this manual to your list of manuals |
Page 5 highlights
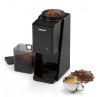
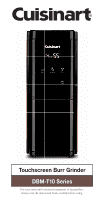
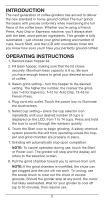
INTRODUCTION The next generation of coffee grinders has arrived to deliver the new standard in home-ground coffee! The burr grinds the beans with precise uniformity while maintaining the full flavor of the coffee bean. Whether you're using a French Press, Auto Drip or Espresso machine, you'll always start with the best, most precise ingredients. This grinder is fully automated - just choose your grind setting and number of cups, touch Start, and the LCD with countdown timer lets you know how soon you'll have your perfectly ground coffee! OPERATING INSTRUCTIONS 1. Remove bean hopper lid. 2. Fill bean hopper, making sure that the lid closes securely. Maximum bean capacity is 8 oz. Be sure you have enough beans to grind your desired amount of coffee. 3. Select grind setting - turn the hopper to the desired setting. The higher the number, the coarser the grind. Use 1-6 for Espresso, 7-12 for Auto Drip, 13-18 for French Press. 4. Plug cord into outlet. Touch the power icon to illuminate the touchscreen. 5. Select cup setting - press the cup selector icon repeatedly until your desired number of cups is displayed on the LCD, from 1 to 14 cups. Press and hold the icon to scroll through the numbers quickly. 6. Touch the Start icon to begin grinding. A safety interlock system prevents the unit from operating unless the hopper and grind chamber are properly in place. 7. Grinding will automatically stop upon completion. NOTE: To cancel operation during use, touch the Start or Power icon. The grinder will stop and the display will return to the selection screen. 8. Pull the grind chamber toward you to remove from unit. NOTE: If the grind chamber is overfilled, the chute can get clogged and the unit will not work. To unclog, use the scoop brush to clear out the chute of excess grounds. Should the grinder stop at any point, the motor has likely overheated. Wait for your grinder to cool off (up to 30 minutes), then resume use. 5
-
 1
1 -
 2
2 -
 3
3 -
 4
4 -
 5
5 -
 6
6 -
 7
7 -
 8
8 -
 9
9 -
 10
10 -
 11
11 -
12
-
13
-
14
-
15
-
16
-
17
-
18
-
19
 |
 |
