D-Link DCS-2330L User Manual
D-Link DCS-2330L Manual
 |
View all D-Link DCS-2330L manuals
Add to My Manuals
Save this manual to your list of manuals |
D-Link DCS-2330L manual content summary:
- D-Link DCS-2330L | User Manual - Page 1
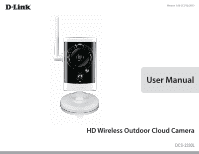
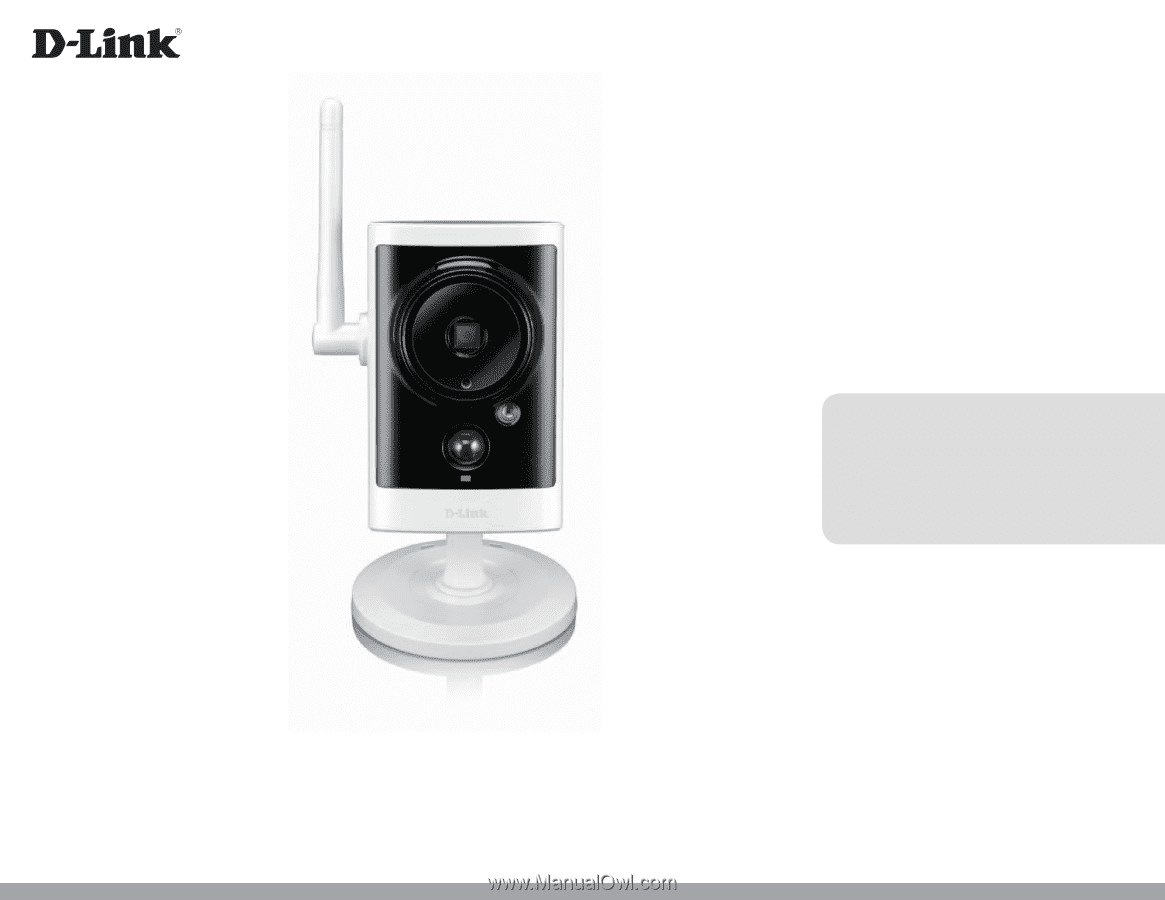
Version 1.00 | 12/12/2013 User Manual HD Wireless Outdoor Cloud Camera DCS-2330L - D-Link DCS-2330L | User Manual - Page 2
for the most current information. Revision 1.00 Manual Revisions Date December 12, 2013 Description DCS-2330L Revision A1 with firmware version 1.00 Trademarks D-Link and the D-Link logo are trademarks or registered trademarks of D-Link Corporation or its subsidiaries in the United States - D-Link DCS-2330L | User Manual - Page 3
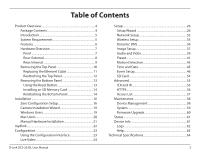
Configuration Setup 16 Camera Installation Wizard 19 Windows Users 19 Mac Users 20 Manual Hardware Installation 21 mydlink 22 Configuration 23 Using the Configuration Interface 23 Live Video 24 D-Link DCS-2330L User Manual Setup 26 Setup Wizard 26 Network Setup 32 Wireless Setup 35 - D-Link DCS-2330L | User Manual - Page 4
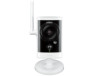
Section 1: Product Overview Product Overview Package Contents DCS-2330L HD Wireless Outdoor Cloud Camera CAT5 Ethernet cable Power adapter (Pre-Attached) CD-ROM with User Manual and software Quick Installation Guide If any of the above items are missing, please contact your reseller. Note: Using - D-Link DCS-2330L | User Manual - Page 5
DCS-2330L HD Wireless Outdoor Cloud Camera. The DCS-2330L is a versatile and unique solution for your small office or home. Unlike a standard webcam, the DCS-2330L with Java installed and enabled • Existing 10/100 Ethernet-based network or 802.11g/n wireless network D-Link DCS-2330L User Manual 5 - D-Link DCS-2330L | User Manual - Page 6
Ethernet based network or 100Mbps Fast Ethernet based network for traditional wired environments, and works with 802.11n routers or access points for added flexibility. The Site Survey feature also allows you to view and connect to any available wireless networks. D-Link DCS-2330L User Manual 6 - D-Link DCS-2330L | User Manual - Page 7
sensor for motion detection 5 IR LED Infrared LED illuminates the camera's field of view at night 6 WPS Status LED Indicates the WPS connection status of the camera 7 Power/Status LED Indicates the camera's current status 8 Antenna Outdoor wireless antenna D-Link DCS-2330L User Manual 7 - D-Link DCS-2330L | User Manual - Page 8
Card slot and reset DC 5 V power adapter 6 WPS Button Press this button, then press the WPS button for 5 seconds on your router to set up a wireless connection automatically 7 Adjustment Ring Tighten or loosen the adjustment ring to adjust the camera's position D-Link DCS-2330L User Manual - D-Link DCS-2330L | User Manual - Page 9
2 RJ45 Ethernet Port RJ45 connector for Ethernet 3 Reset Button Use a paperclip or similar tool to press and hold the recessed button for 10 seconds to reset the camera 4 SD Memory Card Slot Insert a MicroSD card for for storing recorded images and video D-Link DCS-2330L User Manual 9 - D-Link DCS-2330L | User Manual - Page 10
using a thin flat blade. Step 3: Undo the two screws using a Philips #00 Screwdriver. Step 4: Lift off the protective panel. Note: To ensure that the camera stays weatherproof, users are advised to ensure that all the rubber seals are secured firmly in place. D-Link DCS-2330L User Manual 10 - D-Link DCS-2330L | User Manual - Page 11
6: Follow the steps outlined in "Reattaching the Top Panel" on page 12. Note: To avoid damage to the weatherproof aspects of the camera, users are advised not to remove the rear cable connection covering. To use a longer Ethernet cable install a coupling adaptor. D-Link DCS-2330L User Manual 11 - D-Link DCS-2330L | User Manual - Page 12
Replace the two screws. Ensure that the screws are tightened firmly. Step 3: Firmly replace the protective rubber screw coverings. Note: To ensure that the camera stays weatherproof, users are advised to ensure that all the rubber seals are secured firmly in place. D-Link DCS-2330L User Manual 12 - D-Link DCS-2330L | User Manual - Page 13
the Bottom Panel" on page 13. Step 2: Using a paperclip or similar tool, press and hold the Reset Button for 10 seconds. This will reset the device to it's factory settings. Step 3: Follow the steps outlined in "Reattaching the Bottom Panel" on page 14. 2 D-Link DCS-2330L User Manual 13 - D-Link DCS-2330L | User Manual - Page 14
Installing an SD Memory Card Step 1: Follow the steps outlined in "Removing the Bottom Panel" on page 13. Step 2: Insert a MicroSD Memory card into the camera stays weatherproof, users are advised to ensure that all the rubber seals are secured firmly in place. D-Link DCS-2330L User Manual 2 - D-Link DCS-2330L | User Manual - Page 15
LED will turn solid. Note: If your router does not support WPS, you can still use the wired connection method on the previous page. After Zero Configuration setup is complete, your router's wireless settings will be automatically transferred to the camera. D-Link DCS-2330L User Manual WPS Button 15 - D-Link DCS-2330L | User Manual - Page 16
the Ethernet Cable Carefully remove the rubber seal on the back of the DCS-2330L and use the included Ethernet cable to connect the DCS-2330L to your network. Attach the External Power Supply Attach the external power supply to your wall outlet or power strip. D-Link DCS-2330L User Manual 16 - D-Link DCS-2330L | User Manual - Page 17
Section 2: Installation Check Your mydlink Account Open a web browser and login to your mydlink account. The mydlink page will appear with the automatically configured details. Make a note of the details and click Yes to add the camera to your account. DCS-2330L D-Link DCS-2330L User Manual 17 - D-Link DCS-2330L | User Manual - Page 18
to the camera, and no further configuration is required. Your camera is now set up, and you can skip to "mydlink" on page 22 to learn more about the mydlink features of this camera, or to "Configuration" on page 23 for advanced configuration of your camera. D-Link DCS-2330L User Manual 18 - D-Link DCS-2330L | User Manual - Page 19
through the installation process from connecting your hardware to configuring your camera and registering it with your mydlink account. Note: If the autorun program does not open, go to My Computer, browse to your CD drive, and double-click on the autorun.exe file. D-Link DCS-2330L User Manual 19 - D-Link DCS-2330L | User Manual - Page 20
installation process from connecting your hardware to configuring your camera and registering it with your mydlink account. Note: mydlink portal requires JavaTM to function correctly. For more guidelines, please refer to mydlink FAQ pages at https://eu.mydlink.com/faq/mydlink D-Link DCS-2330L User - D-Link DCS-2330L | User Manual - Page 21
Camera Setup Wizard. Connect the Ethernet Cable Carefully remove the rubber seal on the back of the DCS-2330L and use the included Ethernet cable to connect the DCS-2330L to your network. Attach the External Power Supply Attach the external power supply to your wall outlet or power strip. D-Link - D-Link DCS-2330L | User Manual - Page 22
similar to the following: DCS-2330L For more details on using your camera with mydlink, go to the Support section of the mydlink website and check the User Manual section for your product to find the latest instruction guide for your camera's mydlink features. D-Link DCS-2330L User Manual 22 - D-Link DCS-2330L | User Manual - Page 23
address of your camera into a web browser, such as Mozilla Firefox. To log in, use the User name admin and the password you created in the Installation Wizard. If you did not create a password, the default password is blank. After entering your password, click OK. D-Link DCS-2330L User Manual 23 - D-Link DCS-2330L | User Manual - Page 24
panning function. The ROI will pan from back and forth within the FOV Stops the camera ePTZ motion Preset Path Starts the camera's motion along the predefined path ePTZ Speed: You may select a value between 0 and 64. 0 is the slowest and 64 is the fastest. D-Link DCS-2330L User Manual 24 - D-Link DCS-2330L | User Manual - Page 25
This window indicates the total field of view (FOV) of the camera. The red box indicates the visible region of interest (ROI). Profile 2 Video Profile 3 Full screen mode Take a Snapshot Record a Video Clip Set a Storage Folder Listen/Stop Audio In (from microphone) D-Link DCS-2330L User Manual 25 - D-Link DCS-2330L | User Manual - Page 26
"Network Setup" on page 32. To quickly configure your Network Camera's motion detection settings, click Motion Detection Setup Wizard. If you want to enter your settings without running the wizard, click Manual Motion Detection Setup and skip to "Motion Detection" on page 43. D-Link DCS-2330L User - D-Link DCS-2330L | User Manual - Page 27
Connection Setup Wizard This wizard will guide you through a step-by-step process to configure your new D-Link Camera and connect the camera to the internet. Click Next to continue. Note: Select DHCP if you are unsure of which settings to choose. Click Next to continue. D-Link DCS-2330L User Manual - D-Link DCS-2330L | User Manual - Page 28
click Next to continue. If you have a Dynamic DNS account and would like the camera to update your IP address automatically, Select Enable DDNS and enter your host information. Click Next to continue. Enter a name for your camera and click Next to continue. D-Link DCS-2330L User Manual DCS-2330L 28 - D-Link DCS-2330L | User Manual - Page 29
Click Next to continue. If you have selected DHCP, you will see a summary of your settings, including the camera's IP address. Please write down all of this information as you will need it in order to access your camera. Click Apply to save your settings. DCS-2330L D-Link DCS-2330L User Manual 29 - D-Link DCS-2330L | User Manual - Page 30
Section 3: Configuration Motion Detection Setup Wizard This wizard will guide you through a step-by-step process to configure your camera's motion detection functions. Click Next to continue. Specify the day and hours. You may also choose to always record motion. D-Link DCS-2330L User Manual 30 - D-Link DCS-2330L | User Manual - Page 31
information for your e-mail or FTP account. Click Next to continue. Step 4 You have completed the Motion Detection Wizard. Please verify your settings and click Apply to save them. Please wait a few moments while the camera saves your settings and restarts. D-Link DCS-2330L User Manual 31 - D-Link DCS-2330L | User Manual - Page 32
server translates names to IP addresses. Secondary DNS: The secondary DNS acts as a backup to the primary DNS. Enable UPnP Enabling this setting allows your camera to be configured as a UPnP device on your network. Presentation: D-Link DCS-2330L User Manual 32 - D-Link DCS-2330L | User Manual - Page 33
to mobile devices, such as mobile phones or PDAs. The default port number is 554. You may specify the address of a particular stream. For instance, live1.sdp can be accessed at rtsp://x.x.x.x/video1.sdp where the x.x.x.x represents the ip address of your camera. D-Link DCS-2330L User Manual 33 - D-Link DCS-2330L | User Manual - Page 34
of Service during busy periods. If the Network Camera is DCS-2330L allows you to multicast each of the available streams via group address and specify the TTL value for each stream. Enter the port and TTL settings you wish to use if you do not want to use the defaults. D-Link DCS-2330L User Manual - D-Link DCS-2330L | User Manual - Page 35
your wireless network uses TKIP or AES encryption. If you use Open or Shared authentication, WEP encryption should be the setting. Key: If you use WEP, WPA-PSK, or WPA2-PSK authentication, enter the Key (also known as password) used for your wireless network. D-Link DCS-2330L User Manual 35 - D-Link DCS-2330L | User Manual - Page 36
or e-mail used to connect to your DDNS account. Password: Enter the password used to connect to your DDNS server account. Timeout: Enter the DNS timeout values you wish to use. Status: Indicates the connection status, which is automatically determined by the system. D-Link DCS-2330L User Manual 36 - D-Link DCS-2330L | User Manual - Page 37
distortion. White Balance: Use the drop-down box to change white balance settings to help balance colors for different environments. You can choose from Auto, Outdoor, Indoor, Fluorescent, and Push Hold. D-Link DCS-2330L User Manual 37 - D-Link DCS-2330L | User Manual - Page 38
the exposure mode. Use the drop-down box to set the camera for Indoor, Outdoor, or Night environments, or to Moving to capture moving objects. much sharpening to apply to the image. Reset Default: Click this button to reset the image to factory default settings. D-Link DCS-2330L User Manual 38 - D-Link DCS-2330L | User Manual - Page 39
and mobile display. In addition, you may also configure the two-way audio settings for your camera. After making any changes, click the Save Settings button to save your changes. Aspect ratio: Set will result in stuttering motion, and requires less bandwidth. D-Link DCS-2330L User Manual 39 - D-Link DCS-2330L | User Manual - Page 40
for the camera to try to maintain. High quality levels will result in increased bit rates. Audio in off: Selecting this checkbox will mute incoming audio. Audio in gain This setting controls the amount of gain applied to level: incoming audio to increase its volume. D-Link DCS-2330L User Manual 40 - D-Link DCS-2330L | User Manual - Page 41
to change the displayed camera view to the preset. Clicking the Remove button will delete the currently selected preset. Preset Sequence: This section allows you to create a preset sequence, which automatically moves the camera's view between a set of preset views. D-Link DCS-2330L User Manual 41 - D-Link DCS-2330L | User Manual - Page 42
the drop-down box at the bottom of this window, set the Dwell time to determine how long the camera view will stay at that preset, then click the Add button. The preset name will appear in the it from the list, enter a new dwell time, then click the Update button. D-Link DCS-2330L User Manual 42 - D-Link DCS-2330L | User Manual - Page 43
clicking on the camera image brings up the following menu options: Select All: Draws a motion detection area over the entire screen. Clear All: Clears any motion detection areas that have been drawn. Restore: Restores the previously specified motion detection areas. D-Link DCS-2330L User Manual 43 - D-Link DCS-2330L | User Manual - Page 44
Detection: feature of your camera. Detection Level: Specify the volume level that a sound must exceed in order to trigger the sound detection feature. The higher the number the more sensitive the camera will be to sound. Click Save Settings to save your changes. D-Link DCS-2330L User Manual 44 - D-Link DCS-2330L | User Manual - Page 45
the DCS-2330L with an Internet time server. Choose the one that is closest to your location. Set the Date and This option allows you to set the time and date Time Manually: manually. Copy Your This will synchronize the time information from your Computer's Time PC. Settings: D-Link DCS-2330L User - D-Link DCS-2330L | User Manual - Page 46
(what to send) ex. Snapshot, Video Clips Server (where to send) ex. Email, FTP To start plotting an event, it is suggested to configure server and media columns first so that the Network Camera will know what action shall be performed when a trigger is activated. D-Link DCS-2330L User Manual 46 - D-Link DCS-2330L | User Manual - Page 47
Section 3: Configuration The Event Setup page includes 4 different sections. • Server • Media • Event • Recording 1. To add a new item - "event, server or media," click Add. A screen will appear Delete. 3. Click on the item name to pop up a window for modifying. D-Link DCS-2330L User Manual 47 - D-Link DCS-2330L | User Manual - Page 48
configuration for the target e-mail server account. FTP: Enter the configuration for the target FTP server account. Network Storage: Specify a network storage device. Only one network storage device is supported. SD Card: Use the camera's onboard SD card storage. D-Link DCS-2330L User Manual 48 - D-Link DCS-2330L | User Manual - Page 49
will be added on the file name. Add date and time Check it to add timing information as file name suffix. suffix to file name: D-Link DCS-2330L User Manual 49 - D-Link DCS-2330L | User Manual - Page 50
filename of saved video clips. System log: Select this option to set the media type to system logs. This will save the event to the camera system log, but will not record any snapshots or video. D-Link DCS-2330L User Manual 50 - D-Link DCS-2330L | User Manual - Page 51
in minutes. System Boot: Triggers an event when the system boots up. Network Lost: Triggers an event when the network connection is lost. Passive Infrared Triggers an event when the PIR sensor is during monitoring. Time: Select Always or enter the time interval. D-Link DCS-2330L User Manual 51 - D-Link DCS-2330L | User Manual - Page 52
new file for cyclical recording. Please note that if the free HDD space is not enough, the recording will stop. Before you set up this option please make sure your HDD has enough space, and it is better to not save other files in the same folder as recording files. D-Link DCS-2330L User Manual 52 - D-Link DCS-2330L | User Manual - Page 53
separated based on the recording: file size you specify. Time of each file If this is selected, files will be separated based on the for recording: maximum length you specify. File Name Prefix: The prefix name will be added on the file name of the recording file(s). D-Link DCS-2330L User Manual 53 - D-Link DCS-2330L | User Manual - Page 54
and choose the picture file you would like to view. Playback If video files are stored on the SD card, click on the Recorded Video: video folder and choose the video file you would like to view. Refresh: Reloads the file and folder information from the SD card. D-Link DCS-2330L User Manual 54 - D-Link DCS-2330L | User Manual - Page 55
sensitivity in low light environments. Automatic: The Day/Night mode is set automatically. Generally, the camera uses Day mode and switches to Night mode when needed. Day Mode: Day mode enables the IR or off according to the schedule that you specify below. D-Link DCS-2330L User Manual 55 - D-Link DCS-2330L | User Manual - Page 56
certificate manually Create a certificate request and install Status: Displays the status of the certificate. Note: The certificate cannot be removed while the HTTPS is still enabled. To remove the certificate, you must first uncheck Enable HTTPS secure connection. D-Link DCS-2330L User Manual 56 - D-Link DCS-2330L | User Manual - Page 57
List is set from 1.1.1.0 to 192.255.255.255 and the range of the Denied List is set from 1.1.1.0 to 170.255.255.255. Only users with IPs located between 171.0.0.0 and 192.255.255.255 can access the Network Camera. D-Link DCS-2330L User Manual Alowed List Denied List 57 - D-Link DCS-2330L | User Manual - Page 58
your camera. Label: Enter a label for the camera, which will be shown on the OSD when it is enabled. Show Time: Select this option to enable the time-stamp display on the video screen. LED: You may specify whether or not to illuminate the status LED on the camera. D-Link DCS-2330L User Manual 58 - D-Link DCS-2330L | User Manual - Page 59
the factory Default: settings by clicking Restore Factory Defaults. Reboot Device: This will restart your camera. Schedule Reboot: Select this option to schedule a time for the device to reboot. After making any changes, click the Save button to save your changes. D-Link DCS-2330L User Manual 59 - D-Link DCS-2330L | User Manual - Page 60
the firmware. Current Firmware Displays the detected firmware version. Version: Current Product Displays the camera model name. Name: File Path: Locate the file (upgraded firmware) on your hard drive by clicking Browse. Upload: Uploads the new firmware to your camera. D-Link DCS-2330L User Manual - D-Link DCS-2330L | User Manual - Page 61
Section 3: Configuration Status Device Info This page displays detailed information about your device and network connection. D-Link DCS-2330L User Manual 61 - D-Link DCS-2330L | User Manual - Page 62
Section 3: Configuration Logs This page displays the log information of your camera. You may download the information by clicking Download. You may also click Clear to delete the saved log information. D-Link DCS-2330L User Manual 62 - D-Link DCS-2330L | User Manual - Page 63
Section 3: Configuration Help This page provides helpful information regarding camera operation. D-Link DCS-2330L User Manual 63 - D-Link DCS-2330L | User Manual - Page 64
sharpness ƒƒ JPEG for still images 4:3 - 960x720, 800x592, 640x480, 480x352, 320x240 ƒƒ MicroSD/SDHC card slot HTTP / HTTPS Samba Client PPPoE UPnP port forwarding RTP / RTSP/ RTCP IP filtering QoS CoS Multicast IGMP ONVIF compliant ƒƒ HTTP and RTSP authentication D-Link DCS-2330L User Manual 64 - D-Link DCS-2330L | User Manual - Page 65
ƒƒ Protocol: Standard TCP/IP ƒƒ Supports all management functions provided in web interface ƒƒ Scheduled motion triggered, or manual recording options Output: 5 V DC, 1.2 A Storage: -20 to 70 °C (-4 to 158 °F) Storage: 5% to 95% non-condensing ƒƒ C-Tick ƒƒ IC D-Link DCS-2330L User Manual 65 - D-Link DCS-2330L | User Manual - Page 66
Appendix A: Technical Specilfci-c8a46ti4o(DnCsS-2330L) Dimensions • 85 45.7 8.1 66 188.8 105 146.8 D-Link DCS-2330L User Manual 66
-
 1
1 -
 2
2 -
 3
3 -
 4
4 -
 5
5 -
 6
6 -
 7
7 -
8
-
9
-
10
-
11
-
12
-
13
-
14
-
15
-
16
-
17
-
18
-
19
-
20
-
21
-
22
-
23
-
24
-
25
-
26
-
27
-
28
-
29
-
30
-
31
-
32
-
33
-
34
-
35
-
36
-
37
-
38
-
39
-
40
-
41
-
42
-
43
-
44
-
45
-
46
-
47
-
48
-
49
-
50
-
51
-
52
-
53
-
54
-
55
-
56
-
57
-
58
-
59
-
60
-
61
-
62
-
63
-
64
-
65
-
66
 |
 |
User Manual
HD Wireless Outdoor Cloud Camera
Version 1.00 | 12/12/2013
DCS-2330L