D-Link DWL-500 User Manual
D-Link DWL-500 - 11Mb Wireless LAN PCI Network Card Manual
 |
UPC - 790069232244
View all D-Link DWL-500 manuals
Add to My Manuals
Save this manual to your list of manuals |
D-Link DWL-500 manual content summary:
- D-Link DWL-500 | User Manual - Page 1
DWL-500 PCI Wireless Adapter User's Manual - D-Link DWL-500 | User Manual - Page 2
Table of Contents for the DWL-500 PCI Wireless Adapter Introduction i Contents of Package ii Wireless Basics 1 Getting Started 3 Configuration Utility 10 Troubleshooting 18 Networking Basics 38 Technical Support 65 Specifications 66 Warranty 70 Registration 75 - D-Link DWL-500 | User Manual - Page 3
INTRODUCTION The D-Link DWL-500 802.11b Wireless PCI Adapter is an ideal way to connect your laptop computer to a wireless network or as part of a wired LAN (Local Area Network) with a wireless network segment. After completing the steps outlined in this manual, you will have the ability to share - D-Link DWL-500 | User Manual - Page 4
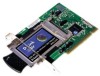
CONTENTS OF PACKAGE C D A B DWL-500 Wireless Adapter Package Contents A DWL-650 PCMCIA Wireless Adapter & PCI Cardholder* B Driver CD C User's Manual D Quick Install Guide *Note: Please insert only the DWL-650 PC Card into the provided PCI Holder. Use of other cards could result in damage to - D-Link DWL-500 | User Manual - Page 5
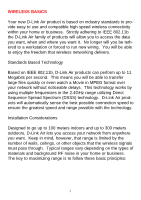
will be able to enjoy the freedom that wireless networking delivers. Standards Based Technology Based on IEEE 802.11b, D-Link Air products can perform up to 11 with the technology. Installation Considerations Designed to go up to 100 meters indoors and up to 300 meters outdoors, D-Link Air lets you - D-Link DWL-500 | User Manual - Page 6
wall or ceiling can rob your D-Link Air Wireless product from 1-30M of range. Position meters thick! Try to make sure that the AP and Adapters are positioned so that the signal will travel straight through a 4-bedroom home, range should not be a problem. If you experience low or no signal strength - D-Link DWL-500 | User Manual - Page 7
must select the type of wireless network you will be building and follow the relevant instructions. Which statement below best describes a Wireless Router or Access Point and Ethernet capable Gateway, Router, or Firewall or an existing Ethernet network). When you have installed your Wireless network - D-Link DWL-500 | User Manual - Page 8
the provided Ethernet cable, connect the router to the Cable/DSLmodem. Also connect the Access Point to the Router. 2. Install the wireless adapter - see the Quick Install Guides. 3. Check the wireless connection- see Configuration Utility and Networking Basics section. 4. Check IP Address for the - D-Link DWL-500 | User Manual - Page 9
from my Internet Service Provider or I want to connect to an Ethernet network that uses Static IP addresses" (requires Access Point, Ethernet capable Broadband modem, and multiple IP address Internet Account or an existing Ethernet network). When you have installed your wireless network it will - D-Link DWL-500 | User Manual - Page 10
point and connect it to your cable/DSL modem. 2. Install the wireless adapter - see the Quick Install Guides. 3. Check the wireless connection- see Configuration Utility and Networking Basics section. 4. Set Static IP Address for the wireless adapter - see Networking Basics section. NOTE: If you are - D-Link DWL-500 | User Manual - Page 11
and printers" When you have installed your Wireless network it will look like this: To complete this installation, please follow these steps: 1. Install the wireless adapter - see the Quick Install Guides. 2. Set Static IP Address for the wireless adapter - see Networking Basics section. 3. Check - D-Link DWL-500 | User Manual - Page 12
Sharing software or use Windows 98SE's or ME's Internet Connection Sharing (ICS) utility. Please follow your software documentation to properly configure the Internet sharing software after you install your wireless networking adapters. To install your wireless network adapter follow these steps: 8 - D-Link DWL-500 | User Manual - Page 13
your Internet Sharing Software. If the Internet Sharing Software is installed on a different computer follow these steps: 1. Install the wireless adapter - see the Quick Install Guides. 2. Check IP Address for the wireless adapter - see Networking Basics section. NOTE: The default settings for the - D-Link DWL-500 | User Manual - Page 14
to click on Start > Programs > DLink DWL-650 Control Utility > Configuration Utility. If the utility icon appears with a red "X" in the toolbar, then the utility did not install properly and will need to be reinstalled. Sometimes the icon will be red. This happens when the wireless adapter is set to - D-Link DWL-500 | User Manual - Page 15
to detect the SSID (Service Set ID) of an Access Point within range. NOTE: This field will also display an error message if for some reason the driver failed to initialize. Rescan Pressing the rescan button will cause the wireless adapter to look for a connection. When the wireless adapter is set to - D-Link DWL-500 | User Manual - Page 16
can take on one of the following values: "Not Applicable" "Poor" "Fair" "Good" "Excellent" The wireless adapter will start looking for a better Access Point if the Link Quality becomes "Poor". Link Quality is a measure of receive and transmit errors over the radio channel. Signal Strength The Signal - D-Link DWL-500 | User Manual - Page 17
CONFIGURATION UTILITY Figure 3 -Configuration Utility with opened "CONFIGURATION" tab Restore Defaults Pressing this button restores each field in the panel to its default value. "Apply Changes" or "OK" button must be pressed before the default values are restored. Undo Changes Pressing this button - D-Link DWL-500 | User Manual - Page 18
only one wireless "cell" is supported for each Service Set Identification) The field allows the user to set the identification by typing the name for a particular group of connected wireless adapters and Access Point. The SSID has the name "default" as the initial settings after the drivers - D-Link DWL-500 | User Manual - Page 19
Utility with opened "Encryption" tab. If an additional measure of security is desired on the wireless network, WEP (Wired Equivalent Privacy) encryption can be enabled. WEP encrypts each frame transmitted from the wireless adapter using one of the keys entered in the "WEP Key Entry" field. 15 - D-Link DWL-500 | User Manual - Page 20
can be used to manually enter the encryption keys. This may be necessary if you wish this node to match keys in a different vendor's product. These fields also display the keys when they are generated using a Pass-phrase. Default Tx Key The button updates the wireless adapter with the four keys - D-Link DWL-500 | User Manual - Page 21
CONFIGURATION UTILITY Apply This button updates the settings for the wireless adapter with the four keys displayed in Key field. The keys are updated in the driver registry for permanent storage until another key is selected. About tab Figure 5 - Configuration Utility with opened "ABOUT" tab About - D-Link DWL-500 | User Manual - Page 22
can be simple to install and maintain. However, occasionally something might go wrong. The best approach to troubleshooting network problems is to start at the very simplest level and work your way up. On the following pages we have covered many of the common troubleshooting situations. Please read - D-Link DWL-500 | User Manual - Page 23
traffic and help you determine problems when troubleshooting. The DWL-650 PC Card has an indicator labeled "LINK" on the top panel. a steady green "LINK" light indicates a good connection with the network. A flashing green "LINK" light indicates that the Network Adapter is sending or receiving data - D-Link DWL-500 | User Manual - Page 24
TROUBLESHOOTING VERIFYING DRIVER INSTALLATION To check that the wireless network adapter drivers are loaded properly: A. Go to: Start>Settings>Control Panel 20 - D-Link DWL-500 | User Manual - Page 25
TROUBLESHOOTING B. Double click on "System". 21 - D-Link DWL-500 | User Manual - Page 26
TROUBLESHOOTING C. Click on the "Device Manager" Tab D. Click on the + symbol in front of "Network Adapters" E. Highlight "D-Link DWL-650 11 Mbps WLAN Adapter" F. Click on "Properties" 22 - D-Link DWL-500 | User Manual - Page 27
TROUBLESHOOTING G. Check under "Device Status" to see if the DWL-650 is working properly H. Click on the "Resources" tab. 23 - D-Link DWL-500 | User Manual - Page 28
TROUBLESHOOTING I. Check under "Conflicting device list" to identify if there are any existing conflicts. J. If there is an existing IRQ conflict, please refer to the "How to Free an IRQ" section of "Troubleshooting." 24 - D-Link DWL-500 | User Manual - Page 29
TROUBLESHOOTING CHECKING THE WIRELESS ADAPTER CONFIGURATION A. Go to: START>Programs>D-Link Air DWL-650 Utility>D-Link DWL-650Control Utility 25 - D-Link DWL-500 | User Manual - Page 30
TROUBLESHOOTING CHECKING THE WIRELESS ADAPTER CONFIGURATION cont. B. Select the "Configuration" Tab. C. Check that the SSID "name" is the same as that of the Access Point. D. Check that the Network mode - D-Link DWL-500 | User Manual - Page 31
the Access Point is within the range assigned by the DHCP server. When using D-Link routers, the DHCP server will assign an IP range of 192.168.0.2 - 192.168.0.254 C. Check that the "Channel" setting for the Wireless Adapter is the same channel setting as that of the Access Point. D. Check that the - D-Link DWL-500 | User Manual - Page 32
TROUBLESHOOTING CHECKING PCMCIA SOCKET CONTROLLER A. Go to: START>SETTINGS>CONTROL PANEL 28 - D-Link DWL-500 | User Manual - Page 33
TROUBLESHOOTING CHECKING PCMCIA SOCKET CONTROLLER cont. B. Double click on "System." 29 - D-Link DWL-500 | User Manual - Page 34
TROUBLESHOOTING CHECKING PCMCIA SOCKET CONTROLLER continued C. Click on the "Device Manager" Tab. D. Click on the + symbol in front of "PCMCIA Socket." E. Highlight "CardBus Controller." F. Click on "Properties." 30 - D-Link DWL-500 | User Manual - Page 35
TROUBLESHOOTING CHECKING PCMCIA SOCKET CONTROLLER continued G. Check under "Device Status" to see if the CardBus Controller is working properly. H. If the socket controller is not loading automatically, please - D-Link DWL-500 | User Manual - Page 36
TROUBLESHOOTING CHECKING PCMCIA SOCKET CONTROLLER continued J. Check under "Conflicting device list" to identify if there are any existing conflicts. K. If there is an existing IRQ conflict, please refer to the "How to Free an IRQ" section of "Troubleshooting." 32 - D-Link DWL-500 | User Manual - Page 37
TROUBLESHOOTING HOW TO FREE AN IRQ What to do if you don't have an available IRQ If there is not an available (open) IRQs on your system, you can do the following. The first thing you can do is let your Motherboard and Windows thing. Refer to your motherboard's manual or contact the manufacturer if - D-Link DWL-500 | User Manual - Page 38
TROUBLESHOOTING HOW TO FREE AN IRQ What to do if you don't have an available . Meaning after you reboot your computer the setting will return to "Disabled." This setting allows Windows to reconfigure all of the configuration information for your Plug and Play hardware. It is reset to "Disabled" so - D-Link DWL-500 | User Manual - Page 39
TROUBLESHOOTING HOW TO FREE AN IRQ If you do not have a Plug and Play Motherboard or you still do not Change the setting for "Reset Configuration" to "Enabled." 8. Hit the "ESC" key and go to the heading "Save and Exit." 9. Let Windows load and follow the steps to Checking for an Availabler IRQ. 35 - D-Link DWL-500 | User Manual - Page 40
TROUBLESHOOTING HOW TO FREE AN IRQ If you do not have a Plug and Play "Built On" Modem if you know that you have upgraded your Modem, you have had a Broadband connection (Cable/DSL) installed, or if youdo not use it to connect to the Internet. Disabling the "Built On" Modem will make it so it - D-Link DWL-500 | User Manual - Page 41
TROUBLESHOOTING HOW TO FREE AN IRQ If you do not have a Plug and Play Motherboard or you still do not have a free IRQ continued 7. Change the setting for "Reset Configuration" to "Enabled." 8. Hit the "ESC" key and go to the heading "Save and Exit." 9. Let Windows load and follow the steps to - D-Link DWL-500 | User Manual - Page 42
installing comprehensive guide to networking, Link's technological expertise and dedication to providing quality products at a low price makes D-Link a good place to watch for the newest in networking innovations. Or, you may want to get the newest drivers available for your Network Adapters - D-Link DWL-500 | User Manual - Page 43
NETWORKING BASICS Computer Identification If you had previously given your Windows 98 computers names or if you are using Windows 98, you may need to verify that each computer has a unique name and common workgroup name. A. On your Desktop, right-click the icon "Network Places" - D-Link DWL-500 | User Manual - Page 44
NETWORKING BASICS Computer Identification C. Type a unique, identifying name for this particular computer in the "Computer name:" box. This will be the name that other computers on your network will use to communicate with this computer. Each computer's name must be unique on a particular network or - D-Link DWL-500 | User Manual - Page 45
NETWORKING BASICS Sharing Files With your computers connected together on a network, you may now open and save files on another computer. You will be able to specify particular folders or disk drives to "share" and even password protect them. The steps below will enable you to share specific files - D-Link DWL-500 | User Manual - Page 46
give others access to my files." E. Click "OK" on the "File and Print Sharing" dialog box. F. Click "OK" on the "Network" dialog box. G. Provide the Windows 98 installation CD or diskette(s) if prompted or direct Windows to the proper location of the installation files. Reboot if prompted. 42 - D-Link DWL-500 | User Manual - Page 47
you specifically identify as shared will be accessible to other computers on your network. I. Find the disk drive or folder you want to share with Windows Explorer or the "My Computer" icon on your desktop. J. Right-click on the disk drive or folder icon and select "Sharing." 43 - D-Link DWL-500 | User Manual - Page 48
NETWORKING BASICS Sharing Files K. Select "Share As:" to set the parameters for sharing this particular disk drive or folder. L. The "Share Name:" box is used to identify the disk drive or folder you are sharing to other computers on the network. You can give it any name you wish. However, a - D-Link DWL-500 | User Manual - Page 49
NETWORKING BASICS Sharing Files O. "Passwords:" allow you to apply a level of security to your shared disk drives and folders. Another computer (user) will be required to enter the password you designate here before accessing the disk drive or folder. Two passwords are used to give two levels of - D-Link DWL-500 | User Manual - Page 50
drive or folder from another computer on your network. Do so by double-clicking the "My Network Places" icon on your desktop or inside Windows Explorer. R. Navigate to the computer with the shared disk drive or folder (recognized by the "Computer Name" you provided), double-click. You should now - D-Link DWL-500 | User Manual - Page 51
NETWORKING BASICS Sharing Printers "Sharing" a printer connected to one computer with other computers on you network can be very convenient - allowing you to print from any computer on the network. The steps below will enable you to print with other computers on your network. A. On your Desktop, - D-Link DWL-500 | User Manual - Page 52
NETWORKING BASICS Sharing Printers B. Click the "File and Print Sharing·" button. C. Click to place a check mark next to "I want to be able to allow others to print to my printer(s)." D. Click "OK" on the "File and Print Sharing" dialog box. E. Click "OK" on the "Network" dialog box. 48 - D-Link DWL-500 | User Manual - Page 53
the printer to other computers on the network. "Comment:" and "Password:" are optional. Then click "OK". For a computer to access a Network Printer, the device driver or software for that printer must be installed and pointed to the proper location of the printer. This is done much the same way you - D-Link DWL-500 | User Manual - Page 54
. Click "OK" when you have selected the desired printer. Finish the installation by continuing the "Add Printer Wizard" normally. M. You may now use this inconvenient, devices known as Network Print Servers are available from D-Link including the DP-301 and DP-101P. A Network Print Server would - D-Link DWL-500 | User Manual - Page 55
NETWORKING BASICS How to Install TCP/IP Go to START > Settings > Control Panel Double click on "Network". 51 - D-Link DWL-500 | User Manual - Page 56
NETWORKING BASICS How to Install TCP/IP Select the "D-Link DWL-650 Wireless Adapter" Click on "Add" Select "Protocol" Click "Add" 52 - D-Link DWL-500 | User Manual - Page 57
NETWORKING BASICS How to Install TCP/IP Select "Microsoft" Scroll down and Select "TCP/IP" Click "Ok" Now the "TCP/IP for D-Link DWL-650 Wireless Adapter" will be available. The TCP/IP Installation is now complete. 53 - D-Link DWL-500 | User Manual - Page 58
NETWORKING BASICS Configuring a Dynamic IP Address When the drivers are installed, the default setting is set to obtain IP dynamically through a DHCP server. If you need to check or change the settings, then do the following: Go to START > Settings > Control Panel Double Click on "Network" 54 - D-Link DWL-500 | User Manual - Page 59
NETWORKING BASICS Configuring a Dynamic IP Address Highlight TCP/IP for the DWL-650 Click on "Properties" NOTE: If TCP/IP is not present see Section 1: "How to Install TCP/IP". 55 - D-Link DWL-500 | User Manual - Page 60
NETWORKING BASICS Configuring a Dynamic IP Address When the TCP/IP window opens, choose "IP Address" tab. Select "Obtain an IP Address Automatically" Click "OK" When the network properties window comes back up, click "OK". Windows will ask you to reboot and click "Yes". 56 - D-Link DWL-500 | User Manual - Page 61
NETWORKING BASICS Configuring a Static IP Address Go to START > Settings > Control Panel Double Click on "Network" 57 - D-Link DWL-500 | User Manual - Page 62
NETWORKING BASICS Configuring a Static IP Address Highlight TCP/IP for the DWL-650. Scroll down if you cannot see it Click on "Properties" NOTE: If TCP/IP is not present see Section 1: "How to Install TCP/IP". 58 - D-Link DWL-500 | User Manual - Page 63
Configuring a Static IP Address When the "TCP/IP Properties" window opens, choose "IP Address" tab Select "Specify an IP address .255.255.0 Click "OK". When the "Network Properties" window comes back up click "OK". Insert Windows CD if prompted. Windows will ask you to reboot and click "Yes". 59 - D-Link DWL-500 | User Manual - Page 64
NETWORKING BASICS Checking TCP/IP Address of the wireless Adapter Click on the Start button and click "Run". Figure 11 - Start > Run 60 - D-Link DWL-500 | User Manual - Page 65
NETWORKING BASICS Checking TCP/IP Address of the Wireless Adapter Type "winipcfg" in the "Open" box. Click "OK". The IP Configuration screen will be displayed. The IP address will be displayed in the IP Address box. Click on "More Info" to display additional IP information. 61 - D-Link DWL-500 | User Manual - Page 66
NETWORKING BASICS Checking TCP/IP Address of the Wireless Adapter Additional IP information: 62 - D-Link DWL-500 | User Manual - Page 67
NETWORKING BASICS Checking the Connection by Pinging Click on the Start button and click "Run." Type "command" in the "Open" box. Click "OK" to get to a DOS prompt. 63 - D-Link DWL-500 | User Manual - Page 68
NETWORKING BASICS Checking the Connection by Pinging Type "ping 192.168.0.1", which is the IP address of the Gateway in this case, and hit the "Enter" key. A successful ping will show four replies. 64 - D-Link DWL-500 | User Manual - Page 69
is available Monday through Friday from 6:00 a.m. to 6:00 p.m. (PST). Web: http://www.dlink.com E-mail: [email protected] Phone: 949-788-0805 (option #4) Thank you for purchasing the D-Link DWL-500. We like to receive feedback from our customers concerning our products. Please take a moment to - D-Link DWL-500 | User Manual - Page 70
TECHNICAL SPECIFICATIONS Product Name: D-Link DWL-500 Model: DWL-500 Standards: · IEEE 802.11b · All major networking standards (including IP, IPX) · Currently undergoing WiFi Certification · Adapter Type: PCI Local Bus 2.2 compliant Transport Protocols: · TCP/IP · IPX/SPX · NetBEUI · NDIS3/4 - D-Link DWL-500 | User Manual - Page 71
10 dBm min. · Frequency Range: 2.400 - 2.4835 GHz, Direct Sequence Spread Spectrum (DSSS) Network Architecture: · Supports Ad-Hoc Mode (Peer-to-Peer without Access Point) · Supports Infrastructure Mode (Communications to wired networks · via Access Points with Roaming) · Compliant with IEEE 802.11b - D-Link DWL-500 | User Manual - Page 72
= 18 mm · H = 120 mm Diagnostic LED (Green): · Power · Activity · Link Temperature: · Operating Temperature: -10°C to 50°C · Storing: -20°C to 70°C · -Telec · Safety: UL · Warranty: Lifetime Warranty and Free Technical Support Standards: · IEEE 802.11b · All major networking standards (including - D-Link DWL-500 | User Manual - Page 73
Copyright ©2000 D-Link, all rights reserved. D-Link, DWL-120, DWL-1000AP, DWL-500, and DWL-650 are registered trademarks of D-Link. Microsoft Windows 98, Windows ME, Windows 2000, and Windows NT are trademarks of the Microsoft Corporation. All other trademarks are registered trademarks or trademarks - D-Link DWL-500 | User Manual - Page 74
within ninety (90) days after the date of original retail purchase of the Hardware. If a completed Registration Card is not received by an authorized D-Link Service Office within such ninety (90) day period, then the Warranty Period shall be ninety (90) days from the date of purchase. Product Type - D-Link DWL-500 | User Manual - Page 75
"), if the Software is properly installed on approved hardware and operated as contemplated in its documentation. D-Link further warrants that, during the /fax list of the nearest Authorized D-Link Service Office is provided in the back of this manual. FAILURE TO PROPERLY COMPLETE AND TIMELY RETURN - D-Link DWL-500 | User Manual - Page 76
covered in the operating manual for the product, and normal maintenance; Damage that occurs in shipment, due to act of God, failures due to power surge, and cosmetic damage; and Any hardware, software, firmware or other products or services provided by anyone other than D-Link. Disclaimer of Other - D-Link DWL-500 | User Manual - Page 77
derivative such as translation, transformation, or adaptation without permission from DLink Corporation/D-Link Systems Inc., as stipulated by the installation. This equipment generates, uses and can radiate radio frequency energy and, if not installed and used in accordance with the instructions - D-Link DWL-500 | User Manual - Page 78
and on, the user is encouraged to try to correct the interference by one or more of the following measures: -Reorient or relocate the receiving antenna. -Increase the separation between the equipment and receiver. -Connect the equipment into an outlet on a circuit different from that to which the - D-Link DWL-500 | User Manual - Page 79
installed computer computer (e.g., Compaq 485) serial number *Applies to adapters only. Product was purchased from: Reseller's name: Telephone: Fax: Reseller's full address: Answers to the following questions help us to support oD-View oHP OpenView/Windows oHPOpenView/Unix oSunNet Manager Link - D-Link DWL-500 | User Manual - Page 80
76
-
 1
1 -
 2
2 -
 3
3 -
 4
4 -
 5
5 -
 6
6 -
 7
7 -
8
-
9
-
10
-
11
-
12
-
13
-
14
-
15
-
16
-
17
-
18
-
19
-
20
-
21
-
22
-
23
-
24
-
25
-
26
-
27
-
28
-
29
-
30
-
31
-
32
-
33
-
34
-
35
-
36
-
37
-
38
-
39
-
40
-
41
-
42
-
43
-
44
-
45
-
46
-
47
-
48
-
49
-
50
-
51
-
52
-
53
-
54
-
55
-
56
-
57
-
58
-
59
-
60
-
61
-
62
-
63
-
64
-
65
-
66
-
67
-
68
-
69
-
70
-
71
-
72
-
73
-
74
-
75
-
76
-
77
-
78
-
79
-
80
 |
 |

DWL-500
PCI Wireless Adapter
User's Manual