DeLonghi DFH2550TB Owner Manual - Page 3
vfolnatiadly.
 |
View all DeLonghi DFH2550TB manuals
Add to My Manuals
Save this manual to your list of manuals |
Page 3 highlights
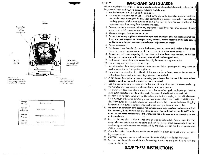
ELECTRICAL CONNECTION Before plugging into the outlet, make sure the voltage of your outlet corresponds to the value V indicated on the appliance and that the outlet and power line are appropriate for the load required. • THIS APPLIANCE COMPLIES WITH DIRECTIVE 89/336/EEC AND D.M. 476/92 ON RADIO INTERFERENCE SUPPRESSION. INSTALLATION The applic.ince oe u.sea either as a portable unit. The appliance s' "c' be placed under a fixed power outlet. FUNCTIONING AND USE Models v. ••• selector and thermostat Turn the seerrnostat dial (left) clockwise to maximum • Summer mode (Fan only): turn the function selector to the X position (the light comes on). Low power operation: turn the function selector to position 1 High power operation: turn the function selector to position 2. Switching off: turn the function selector to the "0" position Setting the thermostat: Whe- hos reached the required temperature turn the thermostat dial slowly counter - clock sf- :coo the licjlit goes out. The thermostat will then keep room temperature at the select• ed ie. e ::vfolnatiadly. ANTI-FREEZE SETTING *a. %e ,rriction selector in position 2 and the thermostat dial In position the appliance maintains root- •ernoeralure at about 41"F {St), preventing freezing with minimal energy consumption Models with thermostat only To sµ tc- re appliance on turn the dial clockwise as for as it will go to maximum position. To switch the apc :e o;4 completely, turn the knob to the minimum position then unplug from the outlet MODELS WITH 24 HOUR TIMER To t-cha-i g proceed as follows: Checsc '-e • r•-•e or your clock or watch. If it is 10.00 for exarer)ie turn the numbered timer disk until : ides with the pointer • marked on the timer. Set the periods of time dur Inc "r• cr you wont me appliance to operate by pushing me notches towards the center. Each mice rerr esentl, oe• xi of 15 min. At the end of this procedure. red notches corresponding to the ope-ce perioes can De see%. The hecre• w.:!! new ;.....c•ion automatically each day at the progrommecl time (important: the applicmce -.;st ae plugged into the outlet) • To ciroc:•::-.Amed time period, lust bring the black notches back to their original pcs t-ce• se• -ew working periods required. - To L se ose zrce..,.ithout programming, push all the teeth into the center. In this case, to tun- •he c•-• completely, as well as turn off me switches, unplug the heater from the outle"; cyoass -c. • -ter function. 1, MODELS WITH MOTORIZED ROTATING BASE Some maces zed rotating base and pedal switch To distribute -re c: • -:" Dver a larger area, press the peso: The appliance swings from right to left. To stop '- E' . _ n the desired position, simpry c-en the pedal again.
-
 1
1 -
 2
2 -
 3
3 -
 4
4
 |
 |
