DeLonghi ECAM23210B Owner Manual
DeLonghi ECAM23210B Manual
 |
View all DeLonghi ECAM23210B manuals
Add to My Manuals
Save this manual to your list of manuals |
DeLonghi ECAM23210B manual content summary:
- DeLonghi ECAM23210B | Owner Manual - Page 1
the inside of the coffee maker 15 Cleaning the water tank 15 Cleaning the coffee spouts 15 Cleaning the pre-ground coffee funnel 15 Cleaning the infuser 15 DESCALE 16 SETTING WATER HARDNESS 17 Measuring water hardness 17 Set water hardness 17 WATER SOFTENER FILTER 17 Installing the - DeLonghi ECAM23210B | Owner Manual - Page 2
of the unit. Don't attempt to repair or modify the machine, doing so will void the warranty. Repair should be done by authorized service personnel only! SAVE THESE INSTRUCTIONS THIS APPLIANCE IS FOR HOUSEHOLD USE ONLY short cord instructions A short power cord is provided to reduce risks resulting - DeLonghi ECAM23210B | Owner Manual - Page 3
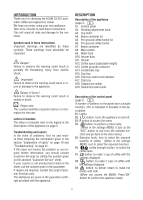
for choosing the ECAM 23.210 automatic coffee and cappuccino maker. We hope you enjoy using your new appliance. Take a few minutes to read these instructions. This will avoid all risks and damage to the machine. Symbols used in these instructions Important warnings are identified by these symbols - DeLonghi ECAM23210B | Owner Manual - Page 4
Descaler bottle C4. Water softener filter (certain models only) Description of lights Light flashing: the machine is heating up or a rinse cycle is underway. The appliance is delivering two cups of coffee De'Longhi Customer Services coffee maker. • Water penetrating the coffee maker could cause damage. - DeLonghi ECAM23210B | Owner Manual - Page 5
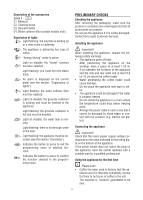
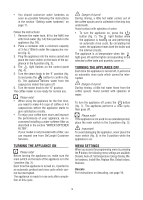
enjoy your coffee even more and improve the performance of your appliance, we recommend installing a water softener filter as described in the section "WATER SOFTENER FILTER". If your model is not provided with a filter, you can request one from De'Longhi Customer Services. TURNING THE APPLIANCE - DeLonghi ECAM23210B | Owner Manual - Page 6
of the first coffee as the appliance must heat up again. Setting water hardness For instructions on setting water hardness, see page 17. Install filter For instructions on how to install the filter, see the section "Installing the filter" on page 17. Replacing the filter For instructions on how to - DeLonghi ECAM23210B | Owner Manual - Page 7
- how many times the water softener filter has been replaced. 5. The quantities are indicated by the flashing beans as follows: TENS OF THOUSANDS THOUSANDS HUNDREDS TENS UNITS Example: you want to know how many coffees have been made. Enter the menu and select the light. Count the flashes of - DeLonghi ECAM23210B | Owner Manual - Page 8
the tips in the "Troubleshooting" section on page 21. • Lights may be displayed on the control panel during use. Their meaning is given in the section "Explanation of the lights" on page 19. Making coffee using pre-ground coffee Important! • Never add pre-ground coffee when the machine is off or it - DeLonghi ECAM23210B | Owner Manual - Page 9
), - water tank (A9), - coffee spouts (A12), - pre-ground coffee funnel (A6), - inside of the machine, accessible after ope- ning the infuser door (A10), - infuser (A11). Important! • Do not use solvents, abrasive detergents or alcohol to clean the coffee maker. With De'Longhi superautomatic coffee - DeLonghi ECAM23210B | Owner Manual - Page 10
grounds container. Cleaning the inside of the coffee maker Danger of electric shock! Before cleaning internal parts, the machine must be turned off (see "Turning off") and unplugged from the mains power supply. Never immerse the coffee maker in water. 1. Check regularly (about once a week) that the - DeLonghi ECAM23210B | Owner Manual - Page 11
and eyes. Please note! Use De'Longhi descaler only. Under no circumstances should you use sulpha- mic or acetic based descalers. Their use invalida- tes the guarantee. Failure to descale the appliance as described also invalidates the guarantee. 1. Turn the machine on. 2. Press the P button - DeLonghi ECAM23210B | Owner Manual - Page 12
Certain models are fitted with a water softener filter. If this is not the case with your model, you are recommended to purchase one from De'Longhi Customer Services. To use the filter correctly, follow the instructions below. Installing the filter 1. Remove the filter from the packaging. 2. Turn - DeLonghi ECAM23210B | Owner Manual - Page 13
of delivery, the light flashes. Close the knob and the appliance returns automatically to the "ready for coffee" state. The new filter is active and you can now use the coffee maker. Replacing the filter When the light flashes, after two months (see date indicator) or when the appliance has not been - DeLonghi ECAM23210B | Owner Manual - Page 14
done, when you make the next coffee, the grounds container may fill up more coffee than expected and clog the machine. After cleaning, the grounds Remove the the coffee mill on page 29). If the problem persists, turn the steam knob to the I position and deliver water from the cappuccino maker. 19 - DeLonghi ECAM23210B | Owner Manual - Page 15
" function has been selected without placing any pre-ground coffee in the funnel. Place pre-ground coffee in the funnel or deselect the "pre-ground" function. The machine must be descaled. The descaling procedure described in the section "Descaling" needs to be performed as soon as possible. Too - DeLonghi ECAM23210B | Owner Manual - Page 16
TROUBLESHOOTING Below is a list of some of the possible malfunctions. If the problem cannot be resolved as described, contact Customer Service. PROBLEM POSSIBLE CAUSE REMEDY The coffee is not hot The cups were not preheated. The coffee is thin or not creamy enough. The infuser has cooled down - DeLonghi ECAM23210B | Owner Manual - Page 17
De'Longhi or Kenwood brand names. What does the warranty cover? We warrant each appliance to be free from defects in material and workmanship. Our obligation under this warranty is limited to repair at our factory or authorized service center of any defective parts or part thereof, other than parts
-
 1
1 -
 2
2 -
 3
3 -
 4
4 -
 5
5 -
 6
6 -
 7
7 -
8
-
9
-
10
-
11
-
12
-
13
-
14
-
15
-
16
-
17
 |
 |

6
CONTENTS
IMPORTANT SAFEGUARDS ��������������������� 7
SAVE THESE INSTRUCTIONS ��������������������������� 7
SHORT CORD INSTRUCTIONS ����������������� 7
INTRODUCTION ���������������������������������� 8
Letters in brackets ��������������������������������������������� 8
Troubleshooting and repairs ������������������������������ 8
Description of the appliance ������������������������������ 8
Description of the control panel ������������������������� 8
Description of the accessories ��������������������������� 9
Description of lights ������������������������������������������� 9
PRELIMINARY CHECKS ������������������������� 9
Checking the appliance �������������������������������������� 9
Connecting the appliance ����������������������������������� 9
Using the appliance for the first time ����������������� 9
TURNING THE APPLIANCE ON ����������������10
TURNING THE APPLIANCE OFF ��������������10
MENU SETTINGS ��������������������������������10
Descale ������������������������������������������������������������ 10
Auto-off ������������������������������������������������������������ 11
Setting the temperature ����������������������������������� 11
Energy Saving �������������������������������������������������� 11
Setting water hardness ������������������������������������ 11
Install filter ������������������������������������������������������� 11
Replacing the filter ������������������������������������������� 11
Default values (reset) ��������������������������������������� 11
Statistics function �������������������������������������������� 11
MAKING COFFEE ��������������������������������12
Selecting the coffee taste ��������������������������������� 12
Selecting the quantity of coffee in the cup ������ 12
Customizing the “my coffee” quantity ������������� 12
Adjusting the coffee mill ���������������������������������� 12
Tips for a hotter coffee ������������������������������������� 13
Making coffee using coffee beans �������������������� 13
Making coffee using pre-ground coffee ����������� 13
MAKING CAPUCCINO ��������������������������13
Cleaning the cappuccino maker after use� �������� 14
HEATING WATER ��������������������������������14
CLEANING ����������������������������������������14
Cleaning the coffee maker �������������������������������� 14
Cleaning the coffee grounds container ������������� 15
Cleaning the drip tray and condensate tray ������ 15
Cleaning the inside of the coffee maker ����������� 15
Cleaning the water tank ������������������������������������ 15
Cleaning the coffee spouts ������������������������������� 15
Cleaning the pre-ground coffee funnel ������������� 15
Cleaning the infuser ����������������������������������������� 15
DESCALE �����������������������������������������16
SETTING WATER HARDNESS ������������������17
Measuring water hardness ������������������������������� 17
Set water hardness ������������������������������������������ 17
WATER SOFTENER FILTER ���������������������17
Installing the filter �������������������������������������������� 17
Replacing the filter ������������������������������������������� 18
Removing the filter ������������������������������������������ 18
TECHNICAL SPECIFICATION �������������������18
EXPLANATION OF LIGHTS ���������������������19
TROUBLESHOOTING ����������������������������21
LIMITED WARRANTY ��������������������������� 22