Dell 1710n Owner's Manual - Page 37
Setting Up for Network Printing, Print and Check the Network Setup Disable Windows XP Firewall - ip address
 |
View all Dell 1710n manuals
Add to My Manuals
Save this manual to your list of manuals |
Page 37 highlights
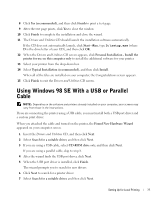
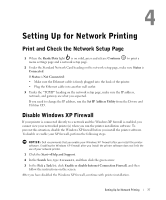
4 Setting Up for Network Printing Print and Check the Network Setup Page 1 When the Ready/Data light is on solid, press and release Continue menu settings page and a network setup page. to print a 2 Under the Standard Network Card heading on the network setup page, make sure Status is Connected. If Status is Not Connected: • Make sure the Ethernet cable is firmly plugged into the back of the printer. • Plug the Ethernet cable into another wall outlet. 3 Under the "TCP/IP" heading on the network setup page, make sure the IP address, netmask, and gateway are what you expected. If you need to change the IP address, run the Set IP Address Utility from the Drivers and Utilities CD. Disable Windows XP Firewall If your printer is connected directly to a network and the Windows XP firewall is enabled, you cannot view your networked printer(s) when you run the printer installation software. To prevent this situation, disable the Windows XP firewall before you install the printer software. To disable or enable your XP firewall, perform the following steps. NOTICE: Dell recommends that you enable your Windows XP firewall after you install the printer software. Enabling the Windows XP firewall after you install the printer software does not limit the use of your network printer. 1 Click the Start→Help and Support. 2 In the Search box, type firewall, and then click the green arrow. 3 In the Pick a Task list, click Enable or disable Internet Connection Firewall, and then follow the instructions on the screen. After you have disabled the Windows XP firewall, continue with printer installation. Setting Up for Network Printing 37
-
 1
1 -
2
-
3
-
4
-
5
-
6
-
7
-
8
-
9
-
10
-
11
-
12
-
13
-
14
-
15
-
16
-
17
-
18
-
19
-
20
-
21
-
22
-
23
-
24
-
25
-
26
-
27
-
28
-
29
-
30
-
31
-
 32
32 -
 33
33 -
 34
34 -
 35
35 -
 36
36 -
 37
37 -
 38
38 -
 39
39 -
 40
40 -
 41
41 -
 42
42 -
43
-
44
-
45
-
46
-
47
-
48
-
49
-
50
-
51
-
52
-
53
-
54
-
55
-
56
-
57
-
58
-
59
-
60
-
61
-
62
-
63
-
64
-
65
-
66
-
67
-
68
-
69
-
70
-
71
-
72
-
73
-
74
-
75
-
76
-
77
-
78
-
79
-
80
-
81
-
82
-
83
-
84
-
85
-
86
-
87
-
88
-
89
-
90
-
91
-
92
-
93
-
94
-
95
-
96
-
97
-
98
-
99
-
100
-
101
-
102
-
103
-
104
-
105
-
106
-
107
-
108
 |
 |