Dell 3001YR2 User's Guide
Dell 3001YR2 - Axim X3 - Win Mobile Manual
 |
View all Dell 3001YR2 manuals
Add to My Manuals
Save this manual to your list of manuals |
Dell 3001YR2 manual content summary:
- Dell 3001YR2 | User's Guide - Page 1
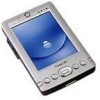
Dell™ Axim™ X3 User's Guide Model HC02U www.dell.com | support.dell.com - Dell 3001YR2 | User's Guide - Page 2
and tells you how to avoid the problem. CAUTION: A CAUTION indicates a potential for Windows, and ActiveSync are registered trademarks and Mobile is a trademark of Microsoft Corporation; EMC is a trademark of EMC Corporation; Bluetooth is a trademark owned by Bluetooth SIG, Inc. and is used by Dell - Dell 3001YR2 | User's Guide - Page 3
18 Finding Information 18 1 About Your Device Front, Side, and Back Views 20 Front and Side Views 20 Back View 22 Using the Battery 23 Installing and Removing the Battery . . . . . 23 Charging the Battery 24 Connecting to a Computer 25 Using the Cradle 25 Using the Sync Cable 28 Contents 3 - Dell 3001YR2 | User's Guide - Page 4
Using Secure Digital Memory Cards 29 Performing a Reset 29 Soft Reset 29 Hard Reset 30 2 Using Windows Mobile™ 2003 Software for Pocket PC Device Buttons and the Stylus 32 Today Screen 32 Status Icons 34 Programs 35 Program Buttons 35 Switcher Bar 36 Navigation Bar and Command Bar 37 Pop- - Dell 3001YR2 | User's Guide - Page 5
4 Adjusting Settings Personal Tab 54 System Tab 54 Connections Tab 55 5 Using Microsoft® ActiveSync® About ActiveSync 58 Installing and Using ActiveSync 59 6 Scheduling and Communicating About Microsoft® Pocket Outlook 62 Calendar 62 Using the Summary Screen 64 Creating Meeting Requests 64 - Dell 3001YR2 | User's Guide - Page 6
Composing Messages 72 Managing E-Mail Messages and Folders . . . . 73 Notifications 74 7 Adding and Removing Programs Adding Programs Using Microsoft® ActiveSync 76 Downloading Programs From the Internet . . . . 77 Adding a Program to the Start Menu 78 Using File Explorer on the Device 78 Using - Dell 3001YR2 | User's Guide - Page 7
8 Using Companion Programs Microsoft Pocket Word 82 Pocket Excel 84 Tips for Working in Pocket Excel 86 MSN Messenger 86 Setting Up 87 Working With Contacts 87 Chatting With Contacts 88 Windows® Media Player for Pocket PC . . . . . 88 Microsoft Reader 88 Using the Library 89 Reading a Book - Dell 3001YR2 | User's Guide - Page 8
10 Getting Connected Using Infrared 100 Using Bluetooth 101 Using Wi-Fi (802.11b 101 Creating a Modem Connection 102 Creating an Ethernet Connection 103 Creating a VPN Connection 104 Ending a Connection 105 Connecting Directly - Dell 3001YR2 | User's Guide - Page 9
Notice (Taiwan Only 121 NOM Information (Mexico Only 123 Wireless Regulatory Information 123 Europe-CE Declaration of Conformity . Limited Warranty Terms for Dell-Branded Hardware Products (Canada Only 162 "Total Satisfaction" Return Policy (Canada Only 166 Dell Software and Peripherals (Canada - Dell 3001YR2 | User's Guide - Page 10
10 Contents - Dell 3001YR2 | User's Guide - Page 11
environment from potential damage. General • Do not attempt to service the device yourself unless you are a trained service technician. Always follow installation instructions closely. • If you use an extension power cable with your AC adapter, ensure that the total ampere rating of the products - Dell 3001YR2 | User's Guide - Page 12
www.dell.com | support.dell.com CAUTION: Safety Instructions (continued) • The AC adapter may become hot during normal operation of your device. Use care when handling the adapter during or immediately after operation. • Do not use your device in a wet environment, for example, near a bath tub, - Dell 3001YR2 | User's Guide - Page 13
power sources, turn the device off, remove the battery pack, and disconnect the AC adapter from the electrical outlet. • To help prevent electric shock, plug the AC adapter and device power cables into properly grounded power sources. These power cables may be equipped with 3-prong plugs to provide - Dell 3001YR2 | User's Guide - Page 14
www.dell.com | support.dell.com CAUTION: Safety Instructions (continued) Battery • Use only Dell™ battery modules that are approved for use with this device. Use of other types may increase the risk of fire or explosion. • Do not carry a battery pack in your pocket, purse, or other container where - Dell 3001YR2 | User's Guide - Page 15
the use of a PED is allowed. EMC Instructions Use shielded signal cables to ensure that you maintain the appropriate EMC classification for the intended environment. For parallel printers, a cable is available from Dell. If you prefer, you can order a cable from Dell at its worldwide website at www - Dell 3001YR2 | User's Guide - Page 16
dell.com | support.dell.com CAUTION: Safety Instructions battery available in case you are asked to turn on the device. • Protect your device, battery, and hard taking the device from low-temperature conditions into a a cable, pull on its connector or on its strain-relief loop, not on the cable itself - Dell 3001YR2 | User's Guide - Page 17
: Safety Instructions (continued) to moisture can damage the display. Do not use a commercial window cleaner to clean your display. Ergonomic Computing Habits CAUTION: Improper the antistatic packing material until you are ready to install the component. Just before unwrapping the antistatic packaging - Dell 3001YR2 | User's Guide - Page 18
Help. Last-minute updates and detailed technical information The readme files, located in the ActiveSync folder on the computer and on the Dell Companion CD. Up-to-date information on your Pocket PC www.microsoft.com/windowsmobile My service tag Label located in the battery slot (remove the - Dell 3001YR2 | User's Guide - Page 19
About Your Device Front, Side, and Back Views Using the Battery Connecting to a Computer Using Secure Digital Memory Cards Performing a Reset 19 - Dell 3001YR2 | User's Guide - Page 20
www.dell.com | support.dell.com Front, Side, and Back Views CAUTION: Before performing any of the procedures in this section, read and follow the safety instructions on page 11. Front and Side Views microphone infrared sensor (top) Secure Digital card slot (top) wireless antenna (optional) - Dell 3001YR2 | User's Guide - Page 21
When the main battery charge is low, the power button light flashes amber. • When the device relays a notification, the power button light rapidly flashes green. TOUCH SCREEN-Use the touch screen and the stylus to enter information into your device. See "Entering Information" on page 41. WIRELESS OR - Dell 3001YR2 | User's Guide - Page 22
www.dell.com | support.dell.com Back View stylus (secured) battery lock battery speaker cradle/sync cable connector (bottom) reset button BATTERY LOCK-Use this switch to release and remove the main battery. See "Installing and Removing the Battery" on page 23. BATTERY-See "Using the Battery" - Dell 3001YR2 | User's Guide - Page 23
for the first time, you must install and charge the battery. Once the battery is charged, use the power properties to monitor the battery charge. See Pocket PC Help on the device for more information. Installing and Removing the Battery To install the battery: 1 Ensure that the device is turned - Dell 3001YR2 | User's Guide - Page 24
call Dell for customer service or technical support. Charging the Battery Use one of the following options to charge the main battery: • Connect the AC adapter directly to the charger adapter and then to the device and to an electrical outlet. • Connect the AC adapter directly to the sync cable and - Dell 3001YR2 | User's Guide - Page 25
to conserve battery power. • Charge the main battery. See "Using the Battery" on page 23 for more information. • Charge a spare battery. NOTE: Before connecting your device to a computer for the first time, ensure that you install ActiveSync on the computer from the Dell™ Companion CD. About Your - Dell 3001YR2 | User's Guide - Page 26
www.dell.com | support.dell.com To connect your device to the cradle: 1 Place the cradle on a flat, level surface near your computer. 2 Connect the cradle cable to the USB connector on your computer. power cord cradle AC adapter cradle cable USB connection to the computer 26 About Your Device - Dell 3001YR2 | User's Guide - Page 27
3 Connect the AC adapter to the cradle and to an electrical outlet. front of cradle spare battery charger stylus holder (2) 4 Align in the cradle, the DELL™ logo on the cradle lights up and the connection status icon appears on the command bar (see page 35). The spare battery status light on the - Dell 3001YR2 | User's Guide - Page 28
www.dell.com | support.dell.com Using the Sync Cable Use the sync cable to connect your device directly to the computer without using the cradle. NOTE: Depending on the configuration of your device, the sync cable is optional. To connect the sync cable: 1 Connect one end of the cable to the USB - Dell 3001YR2 | User's Guide - Page 29
check the orientation, and reinsert it. See the documentation that came with the card for information on using the card. Performing a Reset Soft Reset When you perform a soft reset, the device deletes any data that has not been saved but saves any data that has been stored in memory. Try performing - Dell 3001YR2 | User's Guide - Page 30
www.dell.com | support.dell.com To perform a soft reset, use the stylus to press the reset button. stylus reset button Hard Reset NOTICE: When you perform a hard reset, you lose all the data stored and any program you installed on your device. Perform a hard reset if: • You want to delete all the - Dell 3001YR2 | User's Guide - Page 31
Using Windows Mobile™ 2003 Software for Pocket PC Device Buttons and the Stylus Today Screen Status Icons Programs Navigation Bar and Command Bar Pop-Up Menus Finding and Organizing Information Backing Up Data 31 - Dell 3001YR2 | User's Guide - Page 32
change the background that displays on the Today screen. Use the Items tab to change the items that appear on the Today screen. 32 Using Windows Mobile™ 2003 Software for Pocket PC - Dell 3001YR2 | User's Guide - Page 33
Start button connection configuration icon volume control icon New items menu connection status icon Using Windows Mobile™ 2003 Sof tware for Pocket PC 33 - Dell 3001YR2 | User's Guide - Page 34
. Main battery is very low. Main battery is full. Connection is active. Tap the icon to configure connections. Connection is not detected. Wireless network is detected. Synchronization is beginning or ending. Synchronization is occurring. 34 Using Windows Mobile™ 2003 Software for Pocket PC - Dell 3001YR2 | User's Guide - Page 35
menus. To see the full spelling of an abbreviated label, tap and hold the stylus on the label. Drag the stylus off the label so that the command is not carried out. Program Buttons You can , the buttons launch Home, Inbox, Contacts, and Calendar. Using Windows Mobile™ 2003 Sof tware for Pocket PC 35 - Dell 3001YR2 | User's Guide - Page 36
of your appointments and create meeting requests. Keep track of your friends and colleagues. Inbox Pocket Internet Explorer Send and receive e-mail messages. Browse websites and WAP sites, and download new programs and files from the Internet. 36 Using Windows Mobile™ 2003 Software for Pocket PC - Dell 3001YR2 | User's Guide - Page 37
or recordings. Tasks Keep track of your tasks. Pocket Excel MSN Messenger Pocket Word Create new workbooks or view and edit Excel , tap and hold the stylus on the icon. Drag the stylus off the icon so that the command is not carried out. Using Windows Mobile™ 2003 Sof tware for Pocket PC 37 - Dell 3001YR2 | User's Guide - Page 38
www.dell.com | support.dell.com navigation bar Start menu stylus on an item name. When the menu appears, lift the stylus and tap the action you want to perform. To close the menu without performing an action, tap anywhere outside the menu. 38 Using Windows Mobile™ 2003 Software for Pocket PC - Dell 3001YR2 | User's Guide - Page 39
Explorer to find files on your device and to organize your files into folders. On the Start menu, tap Programs and tap File Explorer. Using Windows Mobile™ 2003 Sof tware for Pocket PC 39 - Dell 3001YR2 | User's Guide - Page 40
ActiveSync to synchronize the files on your device with the files on your computer. You can also drag and drop files from your device to your computer using Windows Explorer. See the ActiveSync Help on your computer for additional information. 40 Using Windows Mobile™ 2003 Software for Pocket PC - Dell 3001YR2 | User's Guide - Page 41
Entering Information Entering Text Using the Input Panel Writing on the Screen Drawing on the Screen Recording a Message Using My Text 41 - Dell 3001YR2 | User's Guide - Page 42
www.dell.com | support.dell.com You have several options for entering information: • Use the input panel to enter typed text using the soft keyboard or another input method. • Write directly on the screen with the stylus. • Draw pictures on the screen with the stylus. • Speak into your device - Dell 3001YR2 | User's Guide - Page 43
the Soft Keyboard 1 Tap the arrow next to the input panel icon and tap Keyboard. 2 Tap the keys on the soft keyboard with your stylus. Letter Recognizer Letter Recognizer allows you to use your stylus to write letters on the screen as you would write them on paper. Entering Infor mation 43 - Dell 3001YR2 | User's Guide - Page 44
versions do not support Letter Recognizer. 1 Tap the arrow next to the input panel icon and tap Letter Recognizer. 2 With your stylus, write a letter between the lines that appear on the bottom of the screen. The letters are converted to typed text on the screen. For specific instructions on using - Dell 3001YR2 | User's Guide - Page 45
. Other versions do not support Transcriber. 1 Tap the arrow next to the input panel icon and tap Transcriber. 2 With your stylus, write anywhere on the screen. When you pause, Transcriber converts your written characters to typed characters. For specific instructions on using Transcriber, tap - Dell 3001YR2 | User's Guide - Page 46
www.dell.com | support.dell.com pen icon Editing Written Text To edit or format written text, you must select it first: 1 Tap the pen icon to deselect it. 2 Drag the stylus across the text that you want to select. 3 Tap and hold the selected text. 4 Tap the appropriate editing command in the pop-up - Dell 3001YR2 | User's Guide - Page 47
Recognize (or tap and hold the selected words and then tap Recognize on the pop-up menu). If a word is not recognized, it is not converted to printstyle text. If the conversion is incorrect, you can select different words from a list of alternatives or return to the original written text: 1 Tap - Dell 3001YR2 | User's Guide - Page 48
www.dell.com | support.dell.com alternate words Tips for getting good recognition: • Write neatly. • • Hyphenated words, foreign words that use special characters such as accents, and some punctuation cannot be converted. • You cannot add written text to a word to change it after the word has been - Dell 3001YR2 | User's Guide - Page 49
a zoom level. Cross three ruled lines on your first stroke. A drawing box appears. Subsequent strokes that touch or are inside of the drawing box become part of the drawing. Drawings that do not cross three ruled lines are treated as written text. drawing box Entering Infor mation 49 - Dell 3001YR2 | User's Guide - Page 50
www.dell.com | support.dell.com Editing a Drawing To edit or format a drawing, you must select it first: 1 Tap and hold the stylus on the drawing until the selection handle appears. To select multiple drawings, deselect the pen icon and drag to select the drawings. 2 Tap and hold - Dell 3001YR2 | User's Guide - Page 51
NOTE: You can also make a recording by tapping the Record icon on the Recording toolbar. To play a recording, tap the name of the recording in the list or tap the speaker icon in the note. Using My Text When using Inbox or MSN Messenger, use My Text to quickly insert preset or frequently used - Dell 3001YR2 | User's Guide - Page 52
www.dell.com | support.dell.com 52 Entering Information - Dell 3001YR2 | User's Guide - Page 53
Adjusting Settings Personal Tab System Tab Connections Tab 53 - Dell 3001YR2 | User's Guide - Page 54
look and the information that is displayed on the Today screen. System Tab • About - Find information about Microsoft® Windows Mobile™ 2003 Software for Pocket PC and your device. • Brightness - Adjust the brightness settings to conserve power. • Certificates - View or delete certificates stored on - Dell 3001YR2 | User's Guide - Page 55
• Power - Check the battery or charge status. Set the Bluetooth - Turn the Bluetooth™ radio on and off, and create and edit bonded devices. By default, the Bluetooth radio is off. • Connections - Add and configure modem or server connections. • Wireless Ethernet - Configure your network adapter - Dell 3001YR2 | User's Guide - Page 56
www.dell.com | support.dell.com 56 Adjusting Settings - Dell 3001YR2 | User's Guide - Page 57
Using Microsoft® ActiveSync® About ActiveSync Installing and Using ActiveSync 57 - Dell 3001YR2 | User's Guide - Page 58
. To synchronize your data, you need both the Microsoft Windows® and Pocket PC versions of ActiveSync. You must install the Windows version of ActiveSync on your computer using the Dell™ Companion CD. The Pocket PC version is already installed on your device. NOTE: Before connecting your device to - Dell 3001YR2 | User's Guide - Page 59
and Using ActiveSync To install ActiveSync: 1 Insert the Dell Companion CD. 2 Click the yellow triangle to access the main menu. 3 Click Start Here. 4 Click Install ActiveSync and follow the instructions on the screen. After the installation is complete, the ActiveSync Setup Wizard helps you - Dell 3001YR2 | User's Guide - Page 60
www.dell.com | support.dell.com 60 Using Microsoft® ActiveSync® - Dell 3001YR2 | User's Guide - Page 61
Scheduling and Communicating About Microsoft® Pocket Outlook Calendar Contacts Tasks Notes Inbox Notifications 61 - Dell 3001YR2 | User's Guide - Page 62
| support.dell.com About Microsoft® Pocket Outlook Pocket Outlook includes Calendar, Contacts, Tasks, Inbox, and Notes. You can use these programs individually or together. For example, e-mail addresses stored in Contacts can be used to address e-mail messages in Inbox. Using Microsoft ActiveSync - Dell 3001YR2 | User's Guide - Page 63
today icon view menu input panel icon NOTE: To customize Calendar, such as changing the first day of the week, tap Tools and tap Options. To create an appointment: 1 In the Day or Week view, tap the desired date and time for the appointment. 2 Tap New. 3 Tap a field to select it, and enter a - Dell 3001YR2 | User's Guide - Page 64
www.dell.com | support.dell. Calendar to set up meetings with users of Outlook or Pocket Outlook. The meeting request is automatically created when you tap Options. If you send and receive e-mail messages through ActiveSync, select ActiveSync. To schedule a meeting: 1 Create an appointment. 2 On - Dell 3001YR2 | User's Guide - Page 65
Contacts Use Contacts to maintain a list of your friends and colleagues. You can quickly share Contacts information with other device users using the infrared port. category search field NOTE: To change the way information is displayed in the list, tap Tools and tap Options. To create a contact: 1 - Dell 3001YR2 | User's Guide - Page 66
www.dell.com | support.dell.com 4 To assign the contact to a category, tap Categories and select a category from the list. In the contact list, you can display contacts by category. 5 - Dell 3001YR2 | User's Guide - Page 67
sort menu To create a task: 1 Tap the Start button and tap Tasks. 2 Tap New. 3 Enter a description using the input panel. 4 If necessary, enter a start date and due date or other information by first tapping the field. Tap the input panel icon to hide it to see all available fields. 5 To assign the - Dell 3001YR2 | User's Guide - Page 68
www.dell.com | support.dell.com NOTE: To quickly create a task with only a subject, tap Tools and tap Entry Bar. Tap Tap here to add a new task, and enter your - Dell 3001YR2 | User's Guide - Page 69
, see "Getting Connected" on page 99. During synchronization: • Messages are copied from the e-mail folders of Exchange or Outlook on your computer to the ActiveSync folder in Inbox on your device. By default, you receive: - Messages from the past 3 days - The first 100 lines of each message - File - Dell 3001YR2 | User's Guide - Page 70
dell.com | support.dell.com Connecting Directly to an E-Mail Server In addition to synchronizing e-mail messages with your computer, you can send and receive e-mail messages by connecting to an e-mail server using a modem or network card the settings you selected in ActiveSync. When you are working - Dell 3001YR2 | User's Guide - Page 71
e-mail server connection. In the message list, tap and hold the message that you want to retrieve. On the pop-up menu, tap Mark for Download. The icons in the Inbox message list indicate message status. Scheduling and Communicating 71 - Dell 3001YR2 | User's Guide - Page 72
www.dell.com | support.dell.com You specify your downloading preferences when you set up the service or select your synchronization options. You can change the settings at any time: • Change options for Inbox synchronization using ActiveSync options. For more information, see ActiveSync Help on - Dell 3001YR2 | User's Guide - Page 73
Folders By default, messages are displayed in one of five folders for each service you have created: Inbox, Deleted Items, Drafts, Outbox, or Sent Items. . You can select to synchronize additional folders by designating them for ActiveSync. The folders you create and the messages you move are then - Dell 3001YR2 | User's Guide - Page 74
www.dell.com | support.dell.com • If you use POP3 and you move e-mail messages to a folder you created, the link is broken between the messages on the device and - Dell 3001YR2 | User's Guide - Page 75
Adding and Removing Programs Adding Programs Using Microsoft® ActiveSync® Downloading Programs From the Internet Adding a Program to the Start Menu Removing Programs 75 - Dell 3001YR2 | User's Guide - Page 76
memory. The most popular place to find software for your device is on the Microsoft® Windows Mobile™ 2003 Software for Pocket PC website: www.microsoft.com/windowsmobile. Adding Programs Using Microsoft® ActiveSync® You need to install the appropriate software for your device on your computer before - Dell 3001YR2 | User's Guide - Page 77
. Ensure that you select the program designed for the Pocket PC and your device processor type. 3 Read any installation instructions, readme files, or documentation that comes with the program. Many programs provide special installation instructions. 4 Tap the file, such as a *.xip or *.exe file - Dell 3001YR2 | User's Guide - Page 78
www.dell.com | support.dell.com Adding a Program to the Start Menu 1 Tap the Start button and . Move the shortcut to the Start Menu folder in the Windows folder. The shortcut now appears on the Start menu. For more information, see ActiveSync Help on your computer. 78 Adding and Removing Programs - Dell 3001YR2 | User's Guide - Page 79
1 Tap the Start button and tap Settings. 2 Tap the System tab and tap Remove Programs. If the program does not appear in the list of installed programs, use File Explorer on your device to locate the program. 3 Tap and hold the name of the program, and tap Delete on the pop - Dell 3001YR2 | User's Guide - Page 80
www.dell.com | support.dell.com 80 Adding and Removing Programs - Dell 3001YR2 | User's Guide - Page 81
Using Companion Programs Microsoft Pocket Word Pocket Excel MSN Messenger Windows® Media Player for Pocket PC Microsoft Reader 81 - Dell 3001YR2 | User's Guide - Page 82
www.dell.com | support.dell.com The companion programs include Microsoft® Pocket Word, Microsoft Pocket Excel, Microsoft Money, Windows Media Player for Pocket PC, and Microsoft Reader. To switch to a companion program on your device, tap the Start button, tap Programs, and then tap the program - Dell 3001YR2 | User's Guide - Page 83
a variety of formats, including Word (.doc), Pocket Word (.psw), Rich Text Format (.rtf), and Plain Text (.txt). Pocket Word contains a list of the files stored appropriate action in the pop-up menu. You can enter information in Pocket Word in one of four modes: typing, writing, drawing, or - Dell 3001YR2 | User's Guide - Page 84
com | support.dell.com To change the zoom magnification, tap View, tap Zoom, and then select the percentage that you want. Select a higher percentage to enter text and a lower percentage to see more of your document. If you are opening a Word document created on a computer, select Wrap to Window on - Dell 3001YR2 | User's Guide - Page 85
or edit a workbook in a variety of formats, including Pocket Excel (.pxl) and Excel (.xls). Pocket Excel contains a list of the files stored on your device Then select the appropriate action from the pop-up menu. Pocket Excel provides fundamental spreadsheet tools, such as formulas, functions, sorting - Dell 3001YR2 | User's Guide - Page 86
dell.com | support.dell Pocket Excel Use the following tips when working in large worksheets in Pocket Excel: • Tap View and tap Full Screen to see as much of your worksheet as possible. To exit full-screen mode, tap Restore. • Show and hide window more information on using Pocket Excel, tap the - Dell 3001YR2 | User's Guide - Page 87
have a Passport to use MSN Messenger Service. If you have a Hotmail or MSN Passport account at www.passport.com. Get a free Microsoft Hotmail e-mail address at www.hotmail.com. password. Working With Contacts The MSN Messenger window shows all of your messenger contacts at Companion Programs 87 - Dell 3001YR2 | User's Guide - Page 88
copy digital audio and video files to your Pocket PC. You can play Windows Media and MP3 files on your Pocket PC. For more information about using Windows Media Player for Pocket PC, tap the Start button and tap Help. Microsoft Reader Use Reader to read eBooks on your device. Download books to your - Dell 3001YR2 | User's Guide - Page 89
for words. The Guidebook contains all the information you need to use the software. To open the Guidebook, tap Help on the Reader command bar. Or, Library The Library displays a list of all books stored on your device or storage card. To open the Library: • On the Reader command bar, tap Library. - Dell 3001YR2 | User's Guide - Page 90
www.dell.com | support.dell.com Reading a Book Each book consists of a cover page, an optional table of contents, and the pages of the book. book electronically gives you several options not available with paper books. The options are available from any book page. 90 Using Companion Programs - Dell 3001YR2 | User's Guide - Page 91
a drawing icon appears on the page. Draw by dragging your stylus. • Find - Tap Find on the pop-up menu to Text - You can copy text from books that support this feature into any program that accepts text. On the book is stored on your computer, you can download it again at any time. To remove a book - Dell 3001YR2 | User's Guide - Page 92
www.dell.com | support.dell.com 92 Using Companion Programs - Dell 3001YR2 | User's Guide - Page 93
Using Microsoft® Pocket Internet Explorer Mobile Favorites Using AvantGo Channels Browsing Mobile Favorites and the Web 93 - Dell 3001YR2 | User's Guide - Page 94
dell.com | support.dell.com Use Pocket Internet Explorer to view Web or WAP pages: • During synchronization with your computer, download your favorite links and mobile favorites that are stored in the Mobile Favorites subfolder in Internet Explorer on your computer. • Connect to an Internet service - Dell 3001YR2 | User's Guide - Page 95
was created automatically when you installed ActiveSync. Favorite Links During synchronization, the list of favorites in the Mobile Favorites folder on your computer is synchronized with Pocket Internet Explorer on your device. The computer and the device are updated with changes made to either - Dell 3001YR2 | User's Guide - Page 96
www.dell.com | support.dell.com mobile favorite, only the link is downloaded to your device-you need to connect to your ISP or network to view the content. For more information on synchronization, see ActiveSync Help on your computer. Using AvantGo Channels AvantGo is a free interactive service - Dell 3001YR2 | User's Guide - Page 97
icon favorites icon To view mobile favorites and channels: 1 Tap the favorites icon to display your list of favorites. 2 Tap the page you want to view. The page that was downloaded the last time you synchronized the page, and then tap Add to Favorites. Using Microsof t® Pocket Inter net Explorer 97 - Dell 3001YR2 | User's Guide - Page 98
www.dell.com | support.dell.com To connect to and browse the Internet: • Tap the favorites icon and tap the favorite you want to view. • Tap View the Web address that you want to see and tap Go. Tap the arrow to select previously entered addresses. 98 Using Microsoft® Pocket Internet Explorer - Dell 3001YR2 | User's Guide - Page 99
Getting Connected Using Infrared Using Bluetooth Using Wi-Fi (802.11b) Creating a Modem Connection Creating an Ethernet Connection Creating a VPN Connection Ending a Connection Connecting Directly to an E-Mail Server Getting Help on Connecting 99 - Dell 3001YR2 | User's Guide - Page 100
Web or WAP pages by using Microsoft® Pocket Internet Explorer. The communication software for creating an ISP connection is already installed on your device. Your service provider provides software needed to install other services, such as paging and fax services. • Connect to the network at your - Dell 3001YR2 | User's Guide - Page 101
configure a Bluetooth device in a Pocket PC environment: 1 From the lower-right corner of the Today screen, tap the Bluetooth icon, . 2 From the pop-up menu, select Bluetooth Manager. 3 To establish a Bluetooth connection, tap New. 4 Tap Explore a Bluetooth device. 5 Tap the remote Bluetooth device - Dell 3001YR2 | User's Guide - Page 102
www.dell.com | support.dell. non 802.1x enabled wireless network connected to a certificate server. Select or configure a non 802.1x enabled wireless network from the list such as MSN/username. 2 Install a modem card, or use a null modem cable and appropriate adapters to connect an external modem to - Dell 3001YR2 | User's Guide - Page 103
. For more information, see "Using Microsoft® Pocket Internet Explorer" on page 93. • Send and receive instant messages with MSN Messenger. For more information, see "MSN Messenger" on page 86. Creating an Ethernet Connection 1 Install the network card driver, if required. See the documentation that - Dell 3001YR2 | User's Guide - Page 104
www.dell.com | support.dell.com 2 Insert the network card into your device. • If a network with a broadcast SSID is detected, the wireless network icon, , and the New Network Detected bubble appear in the navigation bar. Go to step 3. • If a network with a broadcast SSID is not detected, skip - Dell 3001YR2 | User's Guide - Page 105
8 Install the network card driver, if required. See the documentation that came with your network card. 9 Insert the network card into your device. • If a network with a broadcast SSID is detected, the wireless network icon, , and the New Network Detected bubble appear in the navigation bar. Go to - Dell 3001YR2 | User's Guide - Page 106
www.dell.com | support.dell.com Connecting Directly to an E-Mail Server You can set up All Installed Help, and then tap Inbox or Connections. • ActiveSync Help on your computer. In ActiveSync, click Help and click Microsoft ActiveSync Help. • See www.microsoft.com/windowsmobile for troubleshooting - Dell 3001YR2 | User's Guide - Page 107
Appendix Specifications Regulatory Notices Wireless Regulatory Information Contacting Dell Limited Warranties and Return Policy Glossary 107 - Dell 3001YR2 | User's Guide - Page 108
www.dell.com | support.dell.com Specifications System Information Processor Memory RAM ROM Operating System Display or 32-MB SDRAM 64- or 32-MB Intel® StrataFlash™ ROM Microsoft® Windows® Mobile™ 2003 Software for Pocket PC QVGA TFT Color 16-bit, touchsensitive transflective display 3.5 inches 240 - Dell 3001YR2 | User's Guide - Page 109
/speaker Headphone one Secure Digital card slot (3.3v) standard v1.2 (115 kbps) 26-pin connector stereo headphone connector 117.0 mm (4.61 inches) 122.4 mm (4.82 inches) with wireless antenna 77.2 mm (3.04 inches) 14.9 mm (0.59 inches) 136.5 g (0.30 lb) with standard battery 140.4 g (0.31 lb) with - Dell 3001YR2 | User's Guide - Page 110
www.dell.com | support.dell.com Power Supply Battery type: Main Backup AC adapter: Supply voltage Frequency Current 950-mAh lithium-ion removable, rechargeable battery (standard) 1800-mAh lithium-ion removable, rechargeable battery (optional) 20-mAh rechargeable nickel metal hydride button cell 100 - Dell 3001YR2 | User's Guide - Page 111
services, radar, air-traffic control, pager, and Personal Communication Services (PCS). These licensed services particular installation. If this equipment does cause interference with radio communications services, which necessary, consult a Dell Technical Support representative or an experienced - Dell 3001YR2 | User's Guide - Page 112
services. Using shielded cables ensures that you maintain the appropriate EMC classification for the intended environment. For parallel printers, a cable is available from Dell. If you prefer, you can order a cable from Dell on the World Wide Web at accessories.us.dell and on the cards themselves. If - Dell 3001YR2 | User's Guide - Page 113
radio frequency energy and, if not installed and used in accordance with the manufacturer's instruction manual, may cause interference with radio communications. compliance with FCC regulations: • Model number: HC02U • Company name: Dell Inc. One Dell Way Round Rock, Texas 78682 USA 512-338-4400 - Dell 3001YR2 | User's Guide - Page 114
this Dell computer to the EMC Directive and the Low Voltage Directive of the European Union. Such marking is indicative that this Dell system of Measurement." • EN 61000-3-2 - "Electromagnetic Compatibility (EMC) - Part 3: Limits - Section 2: Limits for Harmonic Current Emissions (Equipment Input - Dell 3001YR2 | User's Guide - Page 115
"Electromagnetic Compatibility (EMC) - Part 3: Limits - Section 3: Limitation of Voltage Fluctuations and Flicker in Low-Voltage Supply Systems for Equipment preceding directives and standards has been made and is on file at Dell Inc. Products Europe BV, Limerick, Ireland. EN 55022 Compliance (Czech - Dell 3001YR2 | User's Guide - Page 116
www.dell.com | support.dell.com Australia and New Zealand VCCI Notice (Japan Only) Most Dell computers are classified by the Voluntary Control Council for in a domestic environment, it may cause radio interference. Install and use the equipment according to the instruction manual. 116 Appendix - Dell 3001YR2 | User's Guide - Page 117
is a Class B product: MIC Notice (Republic of Korea Only) To determine which classification (Class A or B) applies to your computer (or other Dell digital device), examine the Republic of Korean Ministry of Information and Communications (MIC) registration labels located on your computer (or other - Dell 3001YR2 | User's Guide - Page 118
www.dell.com | support.dell.com MIC Class B Regulatory Label If the regulatory label includes value no larger than 16 amperes (A). To completely switch off the equipment, the power supply cable must be removed from the power supply socket, which should be located near the equipment and easily - Dell 3001YR2 | User's Guide - Page 119
PN-EN 60950:2000 i PN-EN 55022:2000. Appendix 119 - Dell 3001YR2 | User's Guide - Page 120
www.dell.com | support.dell.com 120 Appendix - Dell 3001YR2 | User's Guide - Page 121
BSMI Notice (Taiwan Only) If you find a or mark on the regulatory label on the bottom, side, or back panel of your computer, the following section is applicable: Appendix 121 - Dell 3001YR2 | User's Guide - Page 122
www.dell.com | support.dell.com 122 Appendix - Dell 3001YR2 | User's Guide - Page 123
D.F. HC02U 100-240 VAC 50-60 Hz 0.4 A 5.4 VDC 2.41 A Wireless Regulatory Information The Dell™ Axim™ X3 device must be used in strict accordance with the manufacturer's instructions as or attachment of connecting cables and equipment other than that specified by Dell Inc. The correction of - Dell 3001YR2 | User's Guide - Page 124
www.dell.com | support.dell.com authorized resellers or distributors are not liable 328-2(August 2002), EN60950 (January 2000) English Finnish Dutch French Hereby, Dell Inc. declares that this HC02U is in compliance with the essential requirements and other relevant provisions of Directive 1999 - Dell 3001YR2 | User's Guide - Page 125
ai requisiti essenziali ed alle altre disposizioni pertinenti stabilite dalla direttiva 1999/5/CE. Spanish Por medio de la presente Dell Inc. declara que el HC02U cumple con los requisitos esenciales y cualesquiera otras disposiciones aplicables o exigibles de la Directiva 1999/5/CE Portuguese - Dell 3001YR2 | User's Guide - Page 126
www.dell.com | support.dell.com 100 mW for frequencies between 2446.5 MHz and 2483.5 MHz (NOTE- Channels 10 through 13 inclusive operate in the band 2446.6 MHz to 2483.5 - Dell 3001YR2 | User's Guide - Page 127
use your wireless LAN card in more areas within France. Please check with ART for the latest information (www.art-telecom.fr). NOTE-Your Dell Axim X3 transmits device complies with RSS210 of Industry Canada. (1999) FCC Standard 47 CFR Part 15, Subpart C (Section 15.247). This version is limited to - Dell 3001YR2 | User's Guide - Page 128
technician for help. NOTE-This Dell Axim X3 device must be installed and used in strict accordance with the manufacturer's instructions as described in the user documentation that comes with the product. Any other installation or use will violate FCC Part 15 regulations. NOTE-FCC Radiation Exposure - Dell 3001YR2 | User's Guide - Page 129
your wireless network device in a specific country, please check to see if the radio type number that is printed on the identification label of your device is listed on the radio approval list posted on the general Dell support site at support.dell.com. Contacting Dell To contact Dell electronically - Dell 3001YR2 | User's Guide - Page 130
Department Name or Service Area, Website and E-Mail Address General Support Antigua and Barbuda General Support Argentina (Buenos Aires) International Access Code: 00 Country Code: 54 City Code: 11 Website: www.dell.com.ar Tech Support and Customer Care Sales Tech Support Fax Customer Care - Dell 3001YR2 | User's Guide - Page 131
Code Austria (Vienna) International Access Code: 900 Country Code: 43 City Code: 1 Bahamas Department Name or Service Area, Website and E-Mail Address Website: support.euro.dell.com E-mail: tech_support_central_europe@del l.com Home/Small Business Sales Home/Small Business Fax Home/Small Business - Dell 3001YR2 | User's Guide - Page 132
City Code Department Name or Service Area, Website and E-Mail Address Area Codes, Local Numbers, and Toll-Free Numbers Bolivia General Support toll-free: 800-10-0238 Brazil Website: www.dell.com/br International Access Customer Support, Technical Code: 00 Support 0800 90 3355 Country - Dell 3001YR2 | User's Guide - Page 133
) Spare Parts Sales & Extended Service Sales General Support Sales, Customer Support, and Technical Support Area Codes, Local Numbers, and Toll-Free Numbers toll-free: 1-800-2479362 toll-free: 1-800-9501329 toll-free: 1-800-8474096 toll-free: 1-800-3269463 toll-free: 1-800-8474096 toll-free: 1-800 - Dell 3001YR2 | User's Guide - Page 134
Code: 592 Department Name or Service Area, Website and E-Mail Address Tech Support website: support.ap.dell.com/china Tech Support E-mail: [email protected] Tech Support Fax Home and Small Business Technical Support Corporate Accounts Technical Support Customer Experience Home and Small Business - Dell 3001YR2 | User's Guide - Page 135
Name or Service Area, Website and E-Mail Address General Support General Support Website: support.euro.dell.com E-mail: [email protected] Technical Support Customer Care Fax TechFax Switchboard Website: support.euro.dell.com E-mail Support (portable computers): [email protected] E-mail - Dell 3001YR2 | User's Guide - Page 136
Access Code Country Code City Code Department Name or Service Area, Website and E-Mail Address Dominican Republic General Support Ecuador General Support El Salvador General Support Finland (Helsinki) Website: support.euro.dell.com International Access Code: 990 Country Code: 358 E-mail - Dell 3001YR2 | User's Guide - Page 137
00 Country Code: 33 City Codes: (1) (4) Department Name or Service Area, Website and E-Mail Address Website: support.euro.dell.com E-mail: support.euro.dell.com/fr/fr/emaild ell/ Home and Small Business Technical Support Customer Care Switchboard Switchboard (calls from outside of France) Sales Fax - Dell 3001YR2 | User's Guide - Page 138
Customer Care Switchboard Website: support.euro.dell.com E-mail: support.euro.dell.com/gr/en/emaild ell/ Technical Support Gold Technical Support Switchboard Sales Fax General Support Guatemala Guyana General Support General Support Area Codes, Local Numbers, and Toll-Free Numbers 06103 766-7200 - Dell 3001YR2 | User's Guide - Page 139
Code: 852 India Department Name or Service Area, Website and E-Mail Address Website: support.ap.dell.com E-mail: [email protected] Technical Support (Dimension™ and Inspiron™) Technical Support (OptiPlex™, Latitude™, and Dell Precision™) Technical Support (PowerApp™ and PowerVault™) Gold Queue - Dell 3001YR2 | User's Guide - Page 140
Service Area, Website and E-Mail Address Website: support.euro.dell.com E-mail: [email protected] Technical Support U.K. Technical Support within U.K. only) Fax/SalesFax Switchboard Area Codes, Local Numbers, and Toll-Free Numbers 1850 543 543 0870 908 0800 01 204 4014 01 204 4014 0870 - Dell 3001YR2 | User's Guide - Page 141
Access Code Country Code City Code Italy (Milan) International Access Code: 00 Country Code: 39 City Code: 02 Jamaica Department Name or Service Area, Website and E-Mail Address Website: support.euro.dell.com E-mail: support.euro.dell.com/it/it/emaild ell/ Home and Small Business Technical - Dell 3001YR2 | User's Guide - Page 142
and Inspiron) Technical Support (Dell Precision™, OptiPlex™, and Latitude™) Technical Support outside of Japan (Dell Precision, OptiPlex, and Latitude) Technical Support (Axim™) Technical Support outside of Japan (Axim) Faxbox Service 24-Hour Automated Order Service Customer Care Business - Dell 3001YR2 | User's Guide - Page 143
(Austin, Texas, U.S.A.) Fax (Technical Support and Customer Service) (Austin, Texas, U.S.A.) Sales (Austin, Texas, U.S.A.) SalesFax (Austin, Texas, U.S.A.) Area Codes, Local Numbers, and Toll-Free Numbers toll-free: 080-2003800 toll-free: 080-2003600 toll-free: 080-2003800 604 633 4949 2194-6202 - Dell 3001YR2 | User's Guide - Page 144
) International Access Code: 00 Country Code: 60 City Code: 4 Department Name or Service Area, Website and E-Mail Address Website: support.euro.dell.com E-mail: [email protected] Technical Support (Brussels, Belgium) Home/Small Business Sales (Brussels, Belgium) Corporate Sales (Brussels, Belgium - Dell 3001YR2 | User's Guide - Page 145
Access Code: 00 Country Code: 52 Department Name or Service Area, Website and E-Mail Address Customer Technical Support Sales Customer Service Main Montserrat General Support Netherlands Antilles General Support Area Codes, Local Numbers, and Toll-Free Numbers 001-877-384-8979 or 001-877-269 - Dell 3001YR2 | User's Guide - Page 146
: 20 Department Name or Service Area, Website and E-Mail Address Website: support.euro.dell.com E-mail (Technical Support): (Enterprise): [email protected] (Latitude): [email protected] (Inspiron): [email protected] (Dimension): [email protected] (OptiPlex - Dell 3001YR2 | User's Guide - Page 147
Peru Department Name or Service Area, Website and E-Mail Address E-mail (New Zealand): [email protected] E-mail (Australia): [email protected] Home and Small Business Government and Business Sales Fax General Support Website: support.euro.dell.com E-mail Support (portable computers - Dell 3001YR2 | User's Guide - Page 148
E-Mail Address Website: support.euro.dell.com E-mail: [email protected] Customer Service Phone Customer Care Sales Customer Service Fax Reception Desk Fax Switchboard Website: support.euro.dell.com E-mail: support.euro.dell.com/pt/en/email dell/ Technical Support Customer Care Sales Puerto - Dell 3001YR2 | User's Guide - Page 149
.com E-mail: [email protected] Technical Support Customer Care Sales Fax Switchboard Southeast Asian and Customer Technical Support, Pacific Countries Customer Service, and Sales (Penang, Malaysia) Area Codes, Local Numbers, and Toll-Free Numbers tollfree: 800 6011 051 604 633 4949 tollfree - Dell 3001YR2 | User's Guide - Page 150
or Service Area, Website and E-Mail Address Website: support.euro.dell.com E-mail: support.euro.dell.com/es/es/email dell/ Home and Small Business Technical Support Customer Care Sales Switchboard Fax Corporate Technical Support Customer Care Switchboard Fax Area Codes, Local Numbers, and Toll-Free - Dell 3001YR2 | User's Guide - Page 151
Department Name or Service Area, Website and E-Mail Address Website: support.euro.dell.com E-mail: [email protected] E-mail Support for Latitude and Inspiron: [email protected] E-mail Support for OptiPlex: [email protected] E-mail Support for Servers: [email protected] Technical - Dell 3001YR2 | User's Guide - Page 152
Tobago Turks and Caicos Islands Department Name or Service Area, Website and E-Mail Address Website: support.euro.dell.com E-mail: [email protected] E-mail for French-speaking HSB and Corporate Customers: support.euro.dell.com/ch/fr/email dell/ Technical Support (Home and Small Business) Technical - Dell 3001YR2 | User's Guide - Page 153
Access Code: 00 Country Code: 44 City Code: 1344 Uruguay Department Name or Service Area, Website and E-Mail Address Area Codes, Local Numbers, and Toll-Free Numbers Website: support.euro.dell.com Customer Care website: support.euro.dell.com/uk/en/ECare/Form/Home.asp E-mail: dell_direct_support - Dell 3001YR2 | User's Guide - Page 154
: 1-800-6958133 Financial Services website: www.dellfinancialservices.com Financial Services (lease/loans) toll-free: 1-877-5773355 Financial Services (Dell Preferred Accounts [DPA]) toll-free: 1-800-2832210 Business Customer Service and Technical Support toll-free: 1-800-8228965 Employee - Dell 3001YR2 | User's Guide - Page 155
computers) Software and Peripherals Sales Spare Parts Sales Extended Service and Warranty Sales Fax Dell Services for the Deaf, Hardof-Hearing, or Speech-Impaired U.S. Virgin Islands General Support Venezuela General Support Area Codes, Local Numbers, and Toll-Free Numbers toll-free: 1-800 - Dell 3001YR2 | User's Guide - Page 156
www.dell.com | support.dell.com 156 Appendix - Dell 3001YR2 | User's Guide - Page 157
is not in accordance with product instructions - Failure to follow the product instructions or failure to perform preventive maintenance - Problems caused by using accessories, parts, or components not supplied by Dell • Products with missing or altered Service Tags or serial numbers • Products for - Dell 3001YR2 | User's Guide - Page 158
on Dell-branded batteries lasts only 1 year and the limited warranty on the lamps for Dell-branded projectors lasts only 90 days. The limited warranty begins on the date of the packing slip or invoice. The warranty period is not extended if we repair or replace a warranted product or any parts. Dell - Dell 3001YR2 | User's Guide - Page 159
Support and Customer Service Government and Education Customers: 1-800-456-3355 1-800-822-8965 Technical Support and Customer Service Dell-Branded or workmanship. If we are not able to repair the product, we will replace it with a comparable product that is new or refurbished. When you contact us - Dell 3001YR2 | User's Guide - Page 160
www.dell.com | support.dell.com NOTE: Before you ship the product(s) to us, make sure to back up the data on the hard drive(s) and any other storage device(s) in the product(s). Remove any confidential, proprietary, or personal information and removable media such as floppy disks, CDs, or PC Cards. - Dell 3001YR2 | User's Guide - Page 161
All new hardware, accessories, parts, and unopened software still in its sealed package, excluding the products listed below, may be returned within 30 days from the date on the packing slip or invoice. To return applications software or an operating system that has been installed by Dell, you must - Dell 3001YR2 | User's Guide - Page 162
is not in accordance with product instructions - Failure to follow the product instructions or failure to perform preventive maintenance - Problems caused by using accessories, parts, or components not supplied by Dell • Products with missing or altered Service Tags or serial numbers • Products for - Dell 3001YR2 | User's Guide - Page 163
on Dell-branded batteries lasts only 1 year and the limited warranty on the lamps for Dell-branded projectors lasts only 90 days. The limited warranty begins on the date of the packing slip or invoice. The warranty period is not extended if we repair or replace a warranted product or any parts. Dell - Dell 3001YR2 | User's Guide - Page 164
Program: Technical Support Customer Service Dell-Branded Memory replaced products to you if you use an address in Canada. Otherwise, we will ship the product to you freight collect. If we determine that the problem is not covered under this warranty, we will notify you and inform you of service - Dell 3001YR2 | User's Guide - Page 165
disks, CDs, or PC Cards. We are not responsible for any of your confidential, proprietary or personal information; lost or corrupted data; or damaged or lost removable media. During the remaining years following the first year of all limited warranties: We will replace any defective part with new - Dell 3001YR2 | User's Guide - Page 166
, and all of the manuals, floppy disk(s), CD(s), power cables, and other items included with a product must be returned with it. For customers who want to return, for refund or credit only, either application or operating system software that has been installed by Dell, the whole system must - Dell 3001YR2 | User's Guide - Page 167
the risk of loss or damage during shipment. To qualify for refund or replacement, returned products must be in as-new condition, software products must be unopened, and all of the manuals, floppy disk(s), CD(s), power cables, and other items included with a product must be returned with it. Appendix - Dell 3001YR2 | User's Guide - Page 168
at Dell's expense. Dell owns all parts removed from repaired products. Dell uses new and reconditioned parts made by various manufacturers in performing repairs and building replacement products. Exclusions This Guarantee does not apply to defects resulting from: improper or inadequate installation - Dell 3001YR2 | User's Guide - Page 169
Industrial Belgraf, 400 92990-000 - Eldorado do Sul - RS - Brasil Dell Computer de Chile Ltda Coyancura 2283, Piso 3- Of.302, Providencia, Santiago - Chile Dell Computer de Colombia Corporation Carrera 7 #115-33 Oficina 603 Bogota, Colombia Dell Computer de Mexico SA de CV Paseo de la Reforma 2620 - Dell 3001YR2 | User's Guide - Page 170
www.dell.com | support.dell.com 170 Appendix - Dell 3001YR2 | User's Guide - Page 171
that is used to expand the capabilities of a device. Common types of CompactFlash cards include memory and wireless cards. C R A D L E - A device that allows your handheld device to synchronize with a computer, recharge its battery, and run on AC power. D H C P - dynamic host configuration protocol - Dell 3001YR2 | User's Guide - Page 172
an intranet or extranet. U S B - universal serial bus - A hardware interface for a low-speed device such as a USB-compatible keyboard, mouse, joystick, scanner, set of speakers, printer, broadband devices (DSL and cable modems), imaging devices, or storage devices. Devices are plugged directly into - Dell 3001YR2 | User's Guide - Page 173
Index A ActiveSync about, 57 installing, 59 appointments scheduling, 63 audio Media player, 88 notifications, 74 AvantGo about, 96 B battery charging, 24 main, 23 using and installing, 23 block recognizer, 44 Bluetooth settings, 55 books library, 89 Reader, 88 reading ebooks, 90 removing, 91 - Dell 3001YR2 | User's Guide - Page 174
25 D data backing up, 40 disconnecting dial-up connection, 105 from a cable or cradle, 105 from a network, 105 infrared sensor, 105 drawing creating, , 57 finding information, 18 contacting Dell, 129 H help ActiveSync Help, 106 contacting Dell, 129 finding, 106 Pocket PC Help, 18 I icons program, 36 - Dell 3001YR2 | User's Guide - Page 175
99 Internet Explorer about, 93 browsing the web, 96 favorite links, 95 mobile favorites, 94-95 K keyboard soft, 43 L letter recognizer, 43 M Pocket Outlook about, 62 Pocket PC getting started, 31 pop-up menus, 38 print-style text converting written text to, 43-44 programs accessing, 35 ActiveSync, - Dell 3001YR2 | User's Guide - Page 176
instructions, 11 scroll dial, 21 Secure Digital card slot installing cards, 29 location, 20 service tag, 18, 24 settings adjusting, 53 Connections tab, 55 Personal tab, 54 System tab, 54 software. See programs specifications, 108 stylus using, 32 writing methods, 41 Switcher Bar, 36 sync cable - Dell 3001YR2 | User's Guide - Page 177
editing, 45-46 input panel, 42 typing, 43 written, 43-45 Today screen, 32 transcriber, 44 V video Media Player, 88 VPN connection, 104 W warranty, 157 Word about, 82 writing block recognizer, 44 converting written text to print-style text, 43-44 drawing, 49 editing, 45 letter recognizer, 43 methods - Dell 3001YR2 | User's Guide - Page 178
178 Index
-
 1
1 -
 2
2 -
 3
3 -
 4
4 -
 5
5 -
 6
6 -
 7
7 -
8
-
9
-
10
-
11
-
12
-
13
-
14
-
15
-
16
-
17
-
18
-
19
-
20
-
21
-
22
-
23
-
24
-
25
-
26
-
27
-
28
-
29
-
30
-
31
-
32
-
33
-
34
-
35
-
36
-
37
-
38
-
39
-
40
-
41
-
42
-
43
-
44
-
45
-
46
-
47
-
48
-
49
-
50
-
51
-
52
-
53
-
54
-
55
-
56
-
57
-
58
-
59
-
60
-
61
-
62
-
63
-
64
-
65
-
66
-
67
-
68
-
69
-
70
-
71
-
72
-
73
-
74
-
75
-
76
-
77
-
78
-
79
-
80
-
81
-
82
-
83
-
84
-
85
-
86
-
87
-
88
-
89
-
90
-
91
-
92
-
93
-
94
-
95
-
96
-
97
-
98
-
99
-
100
-
101
-
102
-
103
-
104
-
105
-
106
-
107
-
108
-
109
-
110
-
111
-
112
-
113
-
114
-
115
-
116
-
117
-
118
-
119
-
120
-
121
-
122
-
123
-
124
-
125
-
126
-
127
-
128
-
129
-
130
-
131
-
132
-
133
-
134
-
135
-
136
-
137
-
138
-
139
-
140
-
141
-
142
-
143
-
144
-
145
-
146
-
147
-
148
-
149
-
150
-
151
-
152
-
153
-
154
-
155
-
156
-
157
-
158
-
159
-
160
-
161
-
162
-
163
-
164
-
165
-
166
-
167
-
168
-
169
-
170
-
171
-
172
-
173
-
174
-
175
-
176
-
177
-
178
 |
 |

www.dell.com | support.dell.com
Dell™ Axim™ X3
User’s Guide
Model HC02U