Dell 924 All-in-One Photo Printer Owner's Manual - Page 32
See More Scan Settings, Advanced, Display Advanced Scan Settings, Scan multiple items before output
 |
View all Dell 924 All-in-One Photo Printer manuals
Add to My Manuals
Save this manual to your list of manuals |
Page 32 highlights
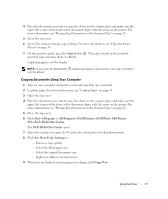
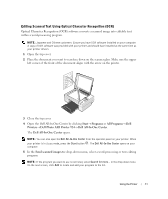
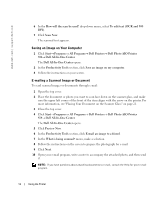
www.dell.com | support.dell.com 7 In the Scan section, click See More Scan Settings. 8 Click the Advanced button. 9 Click Display Advanced Scan Settings to change advanced options. 10 On the Scan tab, click the Scan multiple items before output box. 11 Click OK. 12 When you finish customizing your settings, click Scan Now. After you scan the first page, a prompt appears requesting the next page. 13 Place the next sheet on the scanner glass, and click Yes. Repeat until you finish scanning all pages. 14 When finished, click No. The program opens with the multiple pages scanned. Scanning a Photo or Document Across a Network If your printer is attached to a network, you can scan photos or documents and have them sent to any computer on the network. 1 Open the top cover. 2 Place the document or photo you want to scan face down on the scanner glass, and make sure the upper left corner of the front of the item aligns with the arrow on the printer. For more information, see "Placing Your Document on the Scanner Glass" on page 21. 3 Close the top cover. 4 Press the up arrow button on the operator panel to change printer modes. When the LED displays Scan, press the Menu button to save the selection. 5 From the submenu, scroll through the available computers until you find the one you want to send your photo or document to, and then press the Menu button to save the selection. The photo or document is scanned and sent to the specified computer. NOTE: If your printer is connected locally, the Scan submenu does not appear; the host computer is automatically selected. 32 Using the Printer
-
 1
1 -
2
-
3
-
4
-
5
-
6
-
7
-
8
-
9
-
10
-
11
-
12
-
13
-
14
-
15
-
16
-
17
-
18
-
19
-
20
-
21
-
22
-
23
-
24
-
25
-
26
-
 27
27 -
 28
28 -
 29
29 -
 30
30 -
 31
31 -
 32
32 -
 33
33 -
 34
34 -
 35
35 -
 36
36 -
 37
37 -
38
-
39
-
40
-
41
-
42
-
43
-
44
-
45
-
46
-
47
-
48
-
49
-
50
-
51
-
52
-
53
-
54
-
55
-
56
-
57
-
58
-
59
-
60
-
61
-
62
-
63
-
64
-
65
-
66
-
67
-
68
-
69
-
70
-
71
-
72
-
73
-
74
-
75
-
76
-
77
-
78
-
79
-
80
-
81
-
82
-
83
-
84
-
85
-
86
-
87
-
88
-
89
-
90
-
91
-
92
-
93
-
94
 |
 |