Dell Axim X50 Information Update - Page 2
EAP/TTLS, EAP/LEAP, Next., Finish, Connect to, Enter your user name and password. Tap - pocket pc
 |
View all Dell Axim X50 manuals
Add to My Manuals
Save this manual to your list of manuals |
Page 2 highlights
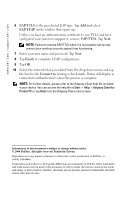
www.dell.com | support.dell.com 6 EAP/TTLS is the preselected EAP type. Tap Add and select EAP/LEAP in the window that opens up. Unless you have an authentication certificate to use TTLS and have configured your system to support it, remove EAP/TTLS. Tap Next. NOTE: Failure to remove EAP/TTLS when it is not properly set up may prevent your wireless security system from functioning. 7 Enter your user name and password. Tap Next. 8 Tap Finish to complete LEAP configuration. 9 Tap OK. 10 Select the network that you added from the drop down menu and tap the box beside Connect to, leaving a check mark. Status will display as connected (authenticated) when this process is complete. NOTE: For further details, please refer to the Odyssey Client help file included in your device. You can access the help file at Start→ Help→ Odyssey Client for Pocket PC or tap Help from the Odyssey Client main screen. Information in this document is subject to change without notice. © 2004 Dell Inc. All rights reserved. Printed in Taiwan. Reproduction in any manner whatsoever without the written permission of Dell Inc. is strictly forbidden. Trademarks used in this text: Dell and the DELL logo are trademarks of Dell Inc. Other trademarks and trade names may be used in this document to refer to either the entities claiming the marks and names or their products. Dell Inc. disclaims any proprietary interest in trademarks and trade names other than its own.
-
 1
1 -
 2
2 -
 3
3 -
 4
4 -
 5
5 -
 6
6 -
 7
7 -
 8
8 -
9
-
10
-
11
-
12
-
13
-
14
-
15
-
16
-
17
-
18
 |
 |
