Dell Dimension 4600 Owner's Manual
Dell Dimension 4600 Manual
 |
View all Dell Dimension 4600 manuals
Add to My Manuals
Save this manual to your list of manuals |
Dell Dimension 4600 manual content summary:
- Dell Dimension 4600 | Owner's Manual - Page 1
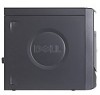
Dell™ Dimension™ 4600 Series Service Tag CD or DVD headphone connector CD or DVD volume control dial floppy drive light* power light power button CD or DVD drive activity light CD or DVD eject button floppy drive eject button* hard-drive activity light USB 2.0 connectors (2) headphone connector - Dell Dimension 4600 | Owner's Manual - Page 2
to avoid the problem. CAUTION: Dell, the DELL logo, DellNet, Inspiron, Dell Precision, Dimension, OptiPlex, PowerVault, PowerApp, PowerEdge, PowerConnect, Axim, and Latitude are trademarks of Dell Inc.; Intel, Pentium, and Celeron are registered trademarks of Intel Corporation; Microsoft and Windows - Dell Dimension 4600 | Owner's Manual - Page 3
Using Blank CD-Rs and CD-RWs 16 Helpful Tips 17 Hyper-Threading 17 Booting to a USB Device 18 Turning Off Your Computer 18 2 Solving Problems Finding Solutions 19 Finding Help Information 21 Battery Problems 21 Drive Problems 21 Floppy drive problems 21 CD drive problems 22 Contents 3 - Dell Dimension 4600 | Owner's Manual - Page 4
a CD-RW drive 23 DVD drive problems 23 Hard drive problems 24 E-Mail, Modem, and Internet Problems 24 Error Messages 25 General Problems 26 The computer stops responding 26 A program stops responding 27 A program crashes repeatedly 27 A program is designed for an earlier Microsoft® Windows - Dell Dimension 4600 | Owner's Manual - Page 5
Troubleshooting Diagnostic Lights 39 Dell Diagnostics 43 Starting the Dell Diagnostics 43 Dell Diagnostics Main Menu 44 Drivers 45 What Is a Driver 45 Identifying Drivers 45 Reinstalling Drivers 45 Restoring Your Operating System 46 Using Microsoft Windows XP System Restore 47 Using Dell - Dell Dimension 4600 | Owner's Manual - Page 6
Installation Guidelines 75 Installing Memory 76 Replacing the Computer Cover 78 5 Appendix Specifications 79 System Setup 82 Overview 82 Viewing Settings 83 Boot Sequence 84 Clearing Forgotten Passwords 85 Replacing the Battery 86 Dell Technical Support Policy (U.S. Only 88 Definition - Dell Dimension 4600 | Owner's Manual - Page 7
Safety Instructions See your Product Information Guide for safety instructions. Safety Instructions 7 - Dell Dimension 4600 | Owner's Manual - Page 8
www.dell.com | support.dell.com 8 Safety Instructions - Dell Dimension 4600 | Owner's Manual - Page 9
use my mouse and keyboard • Express Service Code and Service Tag • Microsoft Windows License Label Tell Me How Help File 1 Click the Start button and click Help and Support. 2 Click User and system guides and click User's guides. 3 Click Tell Me How. Express Service Code and Product Key Label These - Dell Dimension 4600 | Owner's Manual - Page 10
as memory, the hard drive, and the operating system • Customer Care - Contact information, order status, warranty, and repair information • Downloads - Drivers, patches, and software updates • Reference - Computer documentation, product specifications, and white papers • How to use Windows XP - Dell Dimension 4600 | Owner's Manual - Page 11
Up and Using Your Computer Setting Up a Printer NOTICE: Complete the operating system setup before you connect a printer to the computer. See the documentation that came with the printer for setup information, including how to: • Obtain and install updated drivers. • Connect the printer to the - Dell Dimension 4600 | Owner's Manual - Page 12
dell.com | support.dell.com parallel connector on computer screws (2) parallel printer cable connector on printer clips (2) notches (2) 4 Turn on the printer and then turn on the computer. If the Add New Hardware Wizard window appears, click Cancel. 5 Install the printer driver printer driver if - Dell Dimension 4600 | Owner's Manual - Page 13
USB connector on computer USB printer cable USB connector on printer Setting Up a Home and Office Network Connecting to a Network Adapter Before you connect your computer to a a network wall jack. NOTE: Do not use a network cable with a telephone wall jack. Setting Up and Using Your Computer 13 - Dell Dimension 4600 | Owner's Manual - Page 14
www.dell.com | support.dell.com network adapter connector on computer network wall jack network cable Network Setup Wizard The Microsoft® Windows® XP operating system provides a Network Setup Wizard to guide you through the process of sharing files, printers, or an Internet connection between - Dell Dimension 4600 | Owner's Manual - Page 15
open programs. 2 Double-click the MSN Explorer or AOL icon on the Windows® desktop. 3 Follow the instructions on the screen to complete the setup. If you do not have an MSN Explorer or AOL icon on your desktop or if you want to set up an Internet connection with a different ISP: 1 Save and close any - Dell Dimension 4600 | Owner's Manual - Page 16
the upper-right corner of the window, and click RecordNow Help or RecordNow Tutorial. How to Copy a CD or DVD NOTE: If you have a DVD/CD-RW combo drive and you experience recording problems, check for available software patches at the Sonic support website at support.sonic.com. NOTE: Most commercial - Dell Dimension 4600 | Owner's Manual - Page 17
you use the Microsoft® Windows® XP operating system because Windows XP is optimized to take advantage of HyperThreading technology. While many programs can benefit from Hyper-Threading, some programs have not been optimized for Hyper-Threading and may require an update from the software manufacturer - Dell Dimension 4600 | Owner's Manual - Page 18
such as a floppy drive, memory key, or CD-RW drive: 1 Connect the USB device to a USB connector.. 2 Shut down (see page 18) and restart the computer. 3 Turn on the computer. When the DELL™ logo appears, press immediately. If you wait too long and the Microsoft® Windows® logo appears, continue - Dell Dimension 4600 | Owner's Manual - Page 19
Solving Problems Finding Solutions Sometimes it's difficult to figure out where to go for answers. Use this chart to help you Tell Me How help file for information on standby mode. For more information, see page 32. Get technical assistance from Dell. See page 88. See page 25. Solving Problems 19 - Dell Dimension 4600 | Owner's Manual - Page 20
www.dell.com | support.dell.com See page 26. See page 36. See page 35. See page 33. See page 24. See page 30. See page 30. See page 21. See page 31. See page 34. See page 25. See page 26. See page 24. See page 24. 20 Solving Problems - Dell Dimension 4600 | Owner's Manual - Page 21
work properly, contact Dell (see page 90). Drive Problems Floppy drive problems ENSURE THAT WINDOWS® RECOGNIZES THE DRIVE - Click the Start button and click My Computer. If the floppy drive is not listed, perform a full scan with your antivirus software to check for and remove viruses. Viruses can - Dell Dimension 4600 | Owner's Manual - Page 22
www.dell.com | support.dell.com TEST THE DRIVE - • Insert drive inoperable. CLEAN THE DRIVE - Use a commercially available cleaning kit. CD drive problems NOTE: High-speed CD drive vibration is normal and may cause noise, which does not indicate a defect in the drive or the CD. ADJUST THE WINDOWS - Dell Dimension 4600 | Owner's Manual - Page 23
software to check for and remove viruses. Viruses can sometimes prevent Windows from recognizing the drive. CLEAN THE DISC - See the Tell Me How help file for instructions on cleaning your CDs. To access help files, see page 21. Problems writing to a CD-RW drive CLOSE OTHER PROGRAMS - The CD - Dell Dimension 4600 | Owner's Manual - Page 24
www.dell.com | support.dell.com Hard drive problems RUN CHECK DISK - 1 Click the Start button and click My Computer. 2 Right-click the drive letter (local disk) that you want to scan for errors, and then click Properties. 3 Click the Tools tab. 4 Under Error-checking, click Check Now. 5 Click - Dell Dimension 4600 | Owner's Manual - Page 25
Click Properties, click the Diagnostics tab, and then click Query Modem to verify that the modem is communicating with Windows. If all commands receive responses, the modem is operating properly. TURN OFF CALL WAITING (CATCH-PHONE) - See your telephone directory for instructions on deactivating this - Dell Dimension 4600 | Owner's Manual - Page 26
- A floppy disk is in the floppy drive. Remove the floppy disk and restart the computer. NOT ENOUGH MEMORY OR RESOURCES. CLOSE SOME PROGRAMS AND TRY AGAIN - You have too many programs open. Close all windows and open the program that you want to use. In some cases, you might have to restart your - Dell Dimension 4600 | Owner's Manual - Page 27
off. Press the power button again to restart the computer. The chkdsk program automatically runs during the start-up process. Follow the instructions on the screen. Other software problems CHECK THE SOFTWARE DOCUMENTATION OR CONTACT THE SOFTWARE MANUFACTURER FOR TROUBLESHOOTING INFORMATION Solving - Dell Dimension 4600 | Owner's Manual - Page 28
and software support provided by Dell. General hardware problems If your computer exhibits one or more of the following symptoms, a device conflict may exist: • Your computer locks up, particularly while using a specific device. • A recently added device does not work. • A sound card emits noise - Dell Dimension 4600 | Owner's Manual - Page 29
RECENTLY ADDED HARDWARE TO SEE IF IT RESOLVES THE CONFLICT - If removing the hardware resolves the conflict, see the hardware documentation for configuration and troubleshooting instructions. If the problem persists, contact the hardware manufacturer for technical assistance. CHECK YOUR OPERATING - Dell Dimension 4600 | Owner's Manual - Page 30
dell.com | support.dell.com Keyboard Problems RESTART THE COMPUTER - • If the mouse is functioning, shut down the computer through the Start menu (see page 13). After the computer shuts down, press the power cables. Straighten bent pins. • Remove keyboard extension cables and connect the keyboard - Dell Dimension 4600 | Owner's Manual - Page 31
2 Click Mouse. 3 Try adjusting the settings. REINSTALL THE MOUSE DRIVER - See page 45. CHECK FOR INTERRUPT REQUEST CONFLICTS - See page 49. Network Problems CHECK THE NETWORK CABLE CONNECTOR - Ensure that the network cable is connected as shown on page 14. CHECK THE NETWORK LIGHTS ON THE BACK OF THE - Dell Dimension 4600 | Owner's Manual - Page 32
Guide. ADJUST THE POWER PROPERTIES - Your computer may be in standby or hibernate mode. For information on power conservation modes, see the Tell Me How help file, or search for the keyword standby or hibernate in Windows® Help. To access help files, see page 21. IF THE POWER LIGHT IS BLINKING - Dell Dimension 4600 | Owner's Manual - Page 33
cable is securely connected to the system board. • Remove and then reinstall the memory modules. • Remove and then reinstall any cards. • If the problem persists, contact Dell (see page 90). IF THE POWER LIGHT IS BLINKING AMBER - A device might be malfunctioning or incorrectly installed. • Ensure - Dell Dimension 4600 | Owner's Manual - Page 34
LPT1 (Printer Port). For a USB printer, ensure that the Print to the following port(s): setting is USB. REINSTALL THE PRINTER DRIVER - See the printer documentation for instructions. Scanner Problems NOTE: Dell does not cover the scanner's warranty. If you need technical assistance for your scanner - Dell Dimension 4600 | Owner's Manual - Page 35
the name of your CD drive. 5 Click the Properties tab. 6 Check the Enable digital CD audio for this CD-ROM device box. ELIMINATE POSSIBLE INTERFERENCE - Turn off nearby fans, fluorescent lights, or halogen lamps to check for interference. RUN THE SPEAKER DIAGNOSTICS - Some speaker systems have self - Dell Dimension 4600 | Owner's Manual - Page 36
www.dell.com | support.dell.com REINSTALL THE AUDIO (SOUND) DRIVER - See page 45. CHECK FOR INTERRUPT is not muted. Video and Monitor Problems If the screen is blank NOTE: See the monitor documentation for troubleshooting procedures. CHECK THE MONITOR POWER LIGHT - If the power light is off, - Dell Dimension 4600 | Owner's Manual - Page 37
the power cable is defective. TEST THE VIDEO EXTENSION CABLE (IF USED) - If you are using a video extension cable and removing the cable solves the problem, the cable is defective. TEST ANOTHER MONITOR - If another monitor is available, connect it to the computer. CHECK THE DIAGNOSTIC LIGHTS - See - Dell Dimension 4600 | Owner's Manual - Page 38
www.dell.com | support.dell.com 38 Solving Problems - Dell Dimension 4600 | Owner's Manual - Page 39
Information Guide. Light Pattern A B C D Problem Description The computer is in a normal off condition or a possible pre-BIOS failure has occurred. Suggested Resolution Verify that the computer is plugged into a working electrical outlet and that you have pressed the power button. = yellow - Dell Dimension 4600 | Owner's Manual - Page 40
all modules without error. • If available, install properly working memory of the same type into your computer (see page 75). • If the problem persists, contact Dell (see page 90). 1 Determine if a conflict exists by removing a card (not the video card) (see page 62) and then restarting the computer - Dell Dimension 4600 | Owner's Manual - Page 41
Light Pattern A B C D A B C D Problem Description A possible video card failure has occurred. A possible floppy or hard drive failure has occurred. Suggested Resolution • If the computer has a video card, remove the card and reinstall it (see page 62), and restart the computer. • If the problem - Dell Dimension 4600 | Owner's Manual - Page 42
, troubleshoot the last card removed from the computer for resource conflicts (see "Resolving Software and Hardware Incompatibilities" on page 49). 4 If the problem persists, contact Dell (see page 90). • Ensure that the cables are properly connected from the hard drive, CD drive, and DVD drive to - Dell Dimension 4600 | Owner's Manual - Page 43
Dell Diagnostics before you contact Dell for technical assistance. Running the Dell Diagnostics may help you resolve the problem without contacting Dell. If you do contact Dell, the test results can provide important information for Dell's service and support personnel. The Dell Diagnostics allows - Dell Dimension 4600 | Owner's Manual - Page 44
encountered, error codes, and problem description. Describes the test and may indicate requirements for running the test. Displays your hardware configuration for the selected device. The Dell Diagnostics obtains your configuration information for all devices from system setup, memory, and various - Dell Dimension 4600 | Owner's Manual - Page 45
if you: • Upgrade your operating system. • Reinstall your operating system. • Connect or install a new device. Identifying Drivers If you experience a problem with any device, identify whether the driver is the source of your problem and, if necessary, update the driver. Windows XP 1 Click the - Dell Dimension 4600 | Owner's Manual - Page 46
www.dell.com | support.dell.com Using Windows XP Device Driver Rollback If a problem occurs on your computer after you install or update a driver, use Windows XP Device Driver Rollback to replace the driver with the previously installed version. 1 Click the Start button and click Control Panel. 2 - Dell Dimension 4600 | Owner's Manual - Page 47
set your Dell™ computer to the Windows Classic view. Creating a Restore Point 1 Click the Start button and click Help and Support. 2 Click System Restore. 3 Follow the instructions on the screen. Restoring the Computer to an Earlier Operating State If problems occur after you install a device driver - Dell Dimension 4600 | Owner's Manual - Page 48
dell.com | support.dell PC Restore permanently deletes all data on the hard drive and removes any applications or drivers installed after you received your computer. If possible click Finish to reboot the computer. NOTE: Do not manually shut down the computer. Click Finish and let the Troubleshooting - Dell Dimension 4600 | Owner's Manual - Page 49
window reports the cards or devices that share the device's IRQ. 6 Resolve conflicts by reconfiguring the devices or removing the devices from the Device Manager. To use the Windows XP Hardware Troubleshooter: 1 Click the Start button and click Help and Support. 2 Type hardware troubleshooter - Dell Dimension 4600 | Owner's Manual - Page 50
www.dell.com | support.dell.com 50 Advanced Troubleshooting - Dell Dimension 4600 | Owner's Manual - Page 51
Adding Parts Front and Back View of the Computer Front View 12 1 11 2 10 9* 3* 8 4 7 6 5 *On computers with an optional floppy drive. Adding Parts 51 - Dell Dimension 4600 | Owner's Manual - Page 52
power light illuminates and blinks or remains solid to indicate different states. For more information, see page 32. 9 floppy-drive activity light The floppy-drive light is on when the computer reads data from or writes data to the floppy drive. Wait until this light turns off before you remove - Dell Dimension 4600 | Owner's Manual - Page 53
with a video card. Connect a parallel device, such as a printer, to the parallel connector. If you have a USB printer, plug it into a USB connector. Use the lights to help you troubleshoot a computer problem based on the diagnostic code. For more information, see "Diagnostic lights" on page - Dell Dimension 4600 | Owner's Manual - Page 54
www.dell.com | support.dell.com 7 network adapter connector To attach your computer to a network or cable from your monitor into the blue connector. (On computers with a video card.) If you purchased the optional sound card, plug your sound equipment (speakers, microphone, and so on) into the - Dell Dimension 4600 | Owner's Manual - Page 55
serial port. 18 voltage selection switch For more information, see the safety instructions located in the Project Information (may not be available on Guide. all computers) 19 power connector Insert the power cable. Removing the Computer Cover CAUTION: Before you begin any of the procedures in - Dell Dimension 4600 | Owner's Manual - Page 56
www.dell.com | support.dell.com computer cover cover latch back of computer 8 Place the computer cover on a level surface. 56 Adding Parts - Dell Dimension 4600 | Owner's Manual - Page 57
section, follow the safety instructions located in the Product Information Guide. CAUTION: To guard against electrical shock, always unplug your computer from the electrical outlet before opening the computer cover. CD or DVD drive floppy drive hard drive power supply system board Adding Parts 57 - Dell Dimension 4600 | Owner's Manual - Page 58
www.dell.com | support.dell.com System Board main power connector (J3J1) memory module connectors (DDR2, DDR4) memory module connectors (DDR1, DDR3) fan connector (J1F1) microprocessor connector (J2E1) microprocessor power connector (J5B1) floppy drive connector (J4J1) hard drive connector (J6J2 - Dell Dimension 4600 | Owner's Manual - Page 59
Cards CAUTION: Before you begin any of the procedures in this section, follow the safety instructions located in the Product Information Guide , and then press the power button to ground the system from the electrical outlet before opening the cover. 5 Remove the computer cover (see page 55). 6 Lay - Dell Dimension 4600 | Owner's Manual - Page 60
www.dell.com | support.dell.com card card cutout card connector on system board crossbar Ensure that the card is fully seated and that its bracket is within the card slot. not fully seated card fully seated card bracket within slot bracket caught outside of slot 9 Secure the filler bracket - Dell Dimension 4600 | Owner's Manual - Page 61
drivers required for the card as described in the card documentation. Adding or Replacing the AGP Card CAUTION: Before you begin any of the procedures in this section, follow the safety instructions located in the Product Information Guide. Your Dell power the cover. 5 Remove the computer cover (see - Dell Dimension 4600 | Owner's Manual - Page 62
www.dell.com | support.dell.com Removing an AGP Card 1 Press the card lever toward the PCI connector. 2 Pull the card up and out of the card clip. notch lever tab card clip AGP connector PCI connector back of computer Installing an AGP Card 1 To add or replace the card, press the card lever - Dell Dimension 4600 | Owner's Manual - Page 63
Hard Drive CAUTION: Before you begin any of the procedures in this section, follow the safety instructions located in the Product Information Guide. CAUTION: To avoid damage to the drive, do not set it on a hard surface. Instead, set the drive , and then press the power button to ground the system - Dell Dimension 4600 | Owner's Manual - Page 64
www.dell.com | support.dell.com 5 Remove the hard drive, remove the drive from the bracket: a Remove the hard drive-securing screws. b Remove the hard drive from the bracket. empty drive bracket for second hard drive existing hard drive bracket-securing screw hard drive-securing screws (3) drive - Dell Dimension 4600 | Owner's Manual - Page 65
the additional hard drive. 10 Check the jumper setting on the back of the second drive. Ensure that the jumper setting on the new device is set for "cable select" (see the documentation that came with the drive for information). 11 Install the additional hard drive: a Insert hard-drive securing - Dell Dimension 4600 | Owner's Manual - Page 66
dell.com | support.dell drive operation. Adding a Floppy Drive CAUTION: Before you begin any of the procedures in this section, follow the safety instructions located in the Product Information Guide press the power button to ground 5 Remove the computer cover (see page 55). 6 Release and remove the - Dell Dimension 4600 | Owner's Manual - Page 67
side hinges (3) front panel top tab release lever middle tab bottom tab 7 Press in the two insert tabs, and then push out the front-panel insert. Adding Parts 67 - Dell Dimension 4600 | Owner's Manual - Page 68
www.dell.com | support.dell.com tabs (2) insert top bracket screw drive bracket floppy drive 8 Connect the floppy-drive power cable to the back of the drive. CAUTION: Match the colored strip on the cable with pin 1 on the drive (pin 1 is marked as "1"). 68 Adding Parts - Dell Dimension 4600 | Owner's Manual - Page 69
came with your drive. 12 Reattach the front panel to the side hinges, and then rotate it until it snaps onto the front of the computer. side hinges (3) front panel 13 Check all cable connections, and fold cables out of the way to provide airflow for the fan and cooling vents. 14 Replace - Dell Dimension 4600 | Owner's Manual - Page 70
safety instructions located in the Product Information Guide. 1 Shut down the computer through the Start menu (see page 18). NOTE: Drives sold by Dell come with all attached devices from their electrical outlets, and then press the power button to ground the system board. CAUTION: To guard against - Dell Dimension 4600 | Owner's Manual - Page 71
6 Release and remove the front panel: a Push the release lever to release the top tab. b Reach inside the computer and push the bottom tab towards you to release - Dell Dimension 4600 | Owner's Manual - Page 72
www.dell.com | support.dell.com 7 Pull the two front-panel tabs towards you, and then push out the front-panel insert. tabs (2) insert 8 Ensure that the jumper setting on the new drive is set for "cable select" (see the documentation that came with the drive for information). 9 Remove two extra - Dell Dimension 4600 | Owner's Manual - Page 73
the power cable to the system board. 14 Locate the data cable from the CD or DVD drive in the upper drive bay and connect its middle data connector to the new drive. 15 Check all cable connections, and then fold the cables out of the way to provide airflow for the fan and cooling vents - Dell Dimension 4600 | Owner's Manual - Page 74
www.dell.com | support.dell.com side hinges (3) front panel 17 Replace the computer cover (see page 78). NOTICE: To connect a network and devices to electrical outlets, and then turn them on. See the documentation that came with the drive for instructions on installing any software required for - Dell Dimension 4600 | Owner's Manual - Page 75
with an 800-MHz front-side bus. DDR Memory Overview DDR memory modules should be installed in pairs of matched memory size. This means that if you purchased your computer with 128 MB of memory installed and you want to add another 128 MB of memory, you should install it in the appropriate connector - Dell Dimension 4600 | Owner's Manual - Page 76
www.dell.com | support.dell.com NOTICE: If you remove your original memory modules from the computer during a memory upgrade, keep them separate from any new modules that you may have, even if you purchased the new modules from Dell. You should install your original memory modules in pairs either - Dell Dimension 4600 | Owner's Manual - Page 77
module cutouts (2) crossbar NOTICE: To avoid breaking the memory module, do not press near the middle of the module. 10 Insert the module straight down into the connector, ensuring that it fits into the vertical guides at each end of the connector. Press firmly on the ends of the module until it - Dell Dimension 4600 | Owner's Manual - Page 78
www.dell.com | support.dell.com 11 Replace the computer cover (see page 78). NOTICE then click Properties. 14 Click the General tab. 15 To verify that the memory is installed correctly, check the amount of memory (RAM) listed. Replacing the Computer Cover 1 Ensure that all cables are connected, and - Dell Dimension 4600 | Owner's Manual - Page 79
Appendix Specifications Microprocessor Microprocessor type Level 1 (L1) cache Level 2 (L2) cache System Information System chip set DMA channels Interrupt levels System BIOS chip System clock Expansion Bus Bus types Bus speed PCI connectors PCI connector size PCI connector data width (maximum) AGP - Dell Dimension 4600 | Owner's Manual - Page 80
www.dell.com | support.dell.com Memory Architecture Memory connectors Memory capacities Minimum memory Maximum memory Memory type Drives Externally accessible Internally accessible Ports and Connectors Externally accessible: Serial Parallel Video Keyboard Mouse USB Network Audio Headphone Dual - Dell Dimension 4600 | Owner's Manual - Page 81
10/100 Ethernet Controls and Lights Power control Front-panel power light Hard-drive access light Diagnostic code lights push button solid green for power-on state; blinking green for standby state green four bicolor (amber and green) located on back panel Power DC power supply: Wattage 250 - Dell Dimension 4600 | Owner's Manual - Page 82
www.dell.com | support.dell.com Environmental Temperature: Operating Storage Relative humidity Maximum vibration: remove any hardware in your computer • To set or change a user-selectable option such as the user password • To read the current amount of memory or set the type of hard drive installed - Dell Dimension 4600 | Owner's Manual - Page 83
Viewing Settings 1 Turn on (or restart) your computer. 2 When the blue DELL™ logo appears, press immediately. If you wait too long and the operating system logo appears, continue to wait until you see the Microsoft® Windows® desktop. Then shut down your computer (see page 18) and try again. - Dell Dimension 4600 | Owner's Manual - Page 84
, memory key, or CD-RW drive. 1 Turn on (or restart) your computer. 2 When F2 = Setup, F12 = Boot Menu appears in the upper-right corner of the screen, press . If you wait too long and the operating system logo appears, continue to wait until you see the Microsoft Windows desktop. Then shut - Dell Dimension 4600 | Owner's Manual - Page 85
menu. NOTE: Write down your current boot sequence in case you want to restore it. 3 Press the up- and the safety instructions located in the Product Information Guide. CAUTION: To computer power cable from the wall outlet, and then press the power button to ground the system board. 4 Remove the - Dell Dimension 4600 | Owner's Manual - Page 86
dell.com | support.dell.com 9 After the Microsoft Windows desktop power cable from the wall outlet, and then press the power button to ground the system board. 12 Remove the computer cover (see page 78). 13 Remove follow the safety instructions located in the Product Information Guide. CAUTION: To - Dell Dimension 4600 | Owner's Manual - Page 87
the socket or by breaking circuit traces on the system board. battery socket battery 7 Remove the battery by carefully prying it out of its socket with your fingers or with page 82) and restore the settings you recorded in step 1. 12 Properly dispose of the old battery. See the Product - Dell Dimension 4600 | Owner's Manual - Page 88
www.dell.com | support.dell.com Dell Technical Support Policy (U.S. Only) Technician-assisted technical support requires the cooperation and participation of the customer in the troubleshooting process and provides for restoration of the operating system, software programs, and hardware drivers to - Dell Dimension 4600 | Owner's Manual - Page 89
FCC regulations provide that changes or modifications not expressly approved by Dell could void your authority to operate this equipment. This device complies installed and used in accordance with the manufacturer's instruction manual, may cause interference with radio communications. However, there - Dell Dimension 4600 | Owner's Manual - Page 90
access the following websites: • www.dell.com • support.dell.com (technical support) • premiersupport.dell.com (technical support for educational, government, healthcare, and medium/large business customers, including Premier, Platinum, and Gold customers) For specific web addresses for your country - Dell Dimension 4600 | Owner's Manual - Page 91
: www.dell.com.ar International Access Code: 00 E-mail: [email protected] Country Code: 54 City Code: 11 E-mail for desktop and portable computers: [email protected] E-mail for servers and EMC: [email protected] Customer Care Tech Support Tech Support Services Sales Aruba - Dell Dimension 4600 | Owner's Manual - Page 92
www.dell.com | support.dell.com Country (City) International Access Code Country Code City Code Department Name or Service Area, Website and E-Mail Address Barbados General Support Belgium (Brussels) Website: support.euro.dell.com International Access Code: 00 Country Code: 32 City Code: 2 - Dell Dimension 4600 | Owner's Manual - Page 93
Code: 86 City Code: 592 Colombia Costa Rica Department Name or Service Area, Website and E-Mail Address Sales, Customer Support, and Technical Support Technical Support website: support.dell.com.cn Technical Support E-mail: [email protected] Technical Support Fax Technical Support (Dimension - Dell Dimension 4600 | Owner's Manual - Page 94
Service Area, Website and E-Mail Address Website: support.euro.dell.com E-mail: [email protected] Technical Support Technical Support Fax Customer Care Customer Care Fax Switchboard Website: support.euro.dell.com E-mail Support (portable computers): [email protected] E-mail Support (desktop - Dell Dimension 4600 | Owner's Manual - Page 95
and E-Mail Address Finland (Helsinki) Website: support.euro.dell.com International Access Code: 990 E-mail: [email protected] Country Code: 358 City Code: 9 E-mail Support (servers): [email protected] Technical Support Technical Support Fax Relational Customer Care Home/Small - Dell Dimension 4600 | Owner's Manual - Page 96
Accounts Customer Care Switchboard Website: support.euro.dell.com E-mail: support.euro.dell.com/gr/en/emaildell/ Technical Support Gold Service Technical Support Switchboard Gold Service Switchboard Sales Fax General Support General Support General Support Area Codes, Local Numbers, and Toll-Free - Dell Dimension 4600 | Owner's Manual - Page 97
Country (City) International Access Code Country Code City Code Department Name or Service Area, Website and E-Mail Address Hong Kong Website: support.ap.dell.com International Access Code: 001 E-mail: [email protected] Country Code: 852 Technical Support (Dimension™ and Inspiron™) Technical - Dell Dimension 4600 | Owner's Manual - Page 98
www.dell.com | support.dell.com Country (City) International Access Code Country Code City Code Italy (Milan) International Access Code: 00 Country Code: 39 City Code: 02 Jamaica Department Name or Service Area, Website and E-Mail Address Website: support.euro.dell.com E-mail: support.euro.dell. - Dell Dimension 4600 | Owner's Manual - Page 99
Website: support.jp.dell.com International Access Code: 001 Technical Support (servers) Country Code: 81 Technical Support outside of Japan (servers) City Code: 44 Technical Support (Dimension™ and Inspiron™) Technical Support outside of Japan (Dimension and Inspiron) Technical Support (Dell - Dell Dimension 4600 | Owner's Manual - Page 100
(Dell Precision, OptiPlex, and Latitude) Technical Support (Dimension and Inspiron) Technical Support (PowerEdge and PowerVault) Customer Service Transaction Sales Corporate Sales Area Codes, Local Numbers, and Toll-Free Numbers 512 728-4093 512 728-3619 512 728-3883 512 728-4397 512 728-4600 or - Dell Dimension 4600 | Owner's Manual - Page 101
mail (New Zealand): [email protected] E-mail (Australia): [email protected] Technical Support (for desktop and portable computers) Technical Support (for servers and storage) Home and Small Business Government and Business Sales Fax General Support Area Codes, Local Numbers, and Toll - Dell Dimension 4600 | Owner's Manual - Page 102
) Website: support.euro.dell.com International Access Code: 00 E-mail Support (portable computers): Country Code: 47 [email protected] E-mail Support (desktop computers): [email protected] E-mail Support (servers): [email protected] Technical Support Relational - Dell Dimension 4600 | Owner's Manual - Page 103
Access Code Country Code City Code Department Name or Service Area, Website and E-Mail Address St. Lucia General Support St. Vincent and the Grenadines General Support Singapore (Singapore) Technical Support (Dimension and Inspiron) International Access Code: 005 Technical Support (Optiplex - Dell Dimension 4600 | Owner's Manual - Page 104
: support.euro.dell.com/ch/fr/emaildell/ Technical Support (Home and Small Business) Technical Support (Corporate) Customer Care (Home and Small Business) Customer Care (Corporate) Fax Switchboard Taiwan International Access Code: 002 Country Code: 886 Technical Support (portable and desktop - Dell Dimension 4600 | Owner's Manual - Page 105
: 1344 Uruguay Department Name or Service Area, Website and E-Mail Address Area Codes, Local Numbers, and Toll-Free Numbers General Support 1-800-805-8035 General Support toll-free: 1-866-540-3355 Website: support.euro.dell.com Customer Care website: support.euro.dell.com/uk/en/ECare/Form - Dell Dimension 4600 | Owner's Manual - Page 106
-free: 1-800-357-3355 Extended Service and Warranty Sales toll-free: 1-800-247-4618 Fax toll-free: 1-800-727-8320 Dell Services for the Deaf, Hard-of-Hearing, or Speech-Impaired toll-free: 1-877-DELLTTY (1-877-335-5889) U.S. Virgin Islands General Support 1-877-673-3355 Venezuela General - Dell Dimension 4600 | Owner's Manual - Page 107
16 E e-mail problems, 24 error messages diagnostic lights, 39 Express Service Code, 9 F Files and Settings Transfer Wizard, 13 fixing problems Dell Diagnostics, 43 floppy drive problems, 21 H hard drive problems, 24 hardware problems, 28 Hardware Troubleshooter, 49 Help and Support Center, 10 Index - Dell Dimension 4600 | Owner's Manual - Page 108
system reinstalling Windows XP, 47 P password clearing system setup, 85 PC Restore, 48 power problems, 32 turning off your computer, 18 power light conditions, 32 printer cable, 11 connecting, 11 parallel, 11 problems, 33 setting up, 11 USB, 12 problems battery, 21 blue screen, 27 CD drive, 22 CD - Dell Dimension 4600 | Owner's Manual - Page 109
file accessing, 21 troubleshooting conflicts, 49 Dell Diagnostics, 43 diagnostic lights, 39 Hardware Troubleshooter, 49 Help and Support Center, 10 restore to previous operating state, 46 troubleshooting. See problems turning off your computer, 18 W Windows XP Device Driver Rollback, 46 Hardware - Dell Dimension 4600 | Owner's Manual - Page 110
110 Index 110 Index
-
 1
1 -
 2
2 -
 3
3 -
 4
4 -
 5
5 -
 6
6 -
 7
7 -
8
-
9
-
10
-
11
-
12
-
13
-
14
-
15
-
16
-
17
-
18
-
19
-
20
-
21
-
22
-
23
-
24
-
25
-
26
-
27
-
28
-
29
-
30
-
31
-
32
-
33
-
34
-
35
-
36
-
37
-
38
-
39
-
40
-
41
-
42
-
43
-
44
-
45
-
46
-
47
-
48
-
49
-
50
-
51
-
52
-
53
-
54
-
55
-
56
-
57
-
58
-
59
-
60
-
61
-
62
-
63
-
64
-
65
-
66
-
67
-
68
-
69
-
70
-
71
-
72
-
73
-
74
-
75
-
76
-
77
-
78
-
79
-
80
-
81
-
82
-
83
-
84
-
85
-
86
-
87
-
88
-
89
-
90
-
91
-
92
-
93
-
94
-
95
-
96
-
97
-
98
-
99
-
100
-
101
-
102
-
103
-
104
-
105
-
106
-
107
-
108
-
109
-
110
 |
 |

www.dell.com | support.dell.com
Dell™ Dimension™ 4600 Series
*On computers with an optional floppy drive.
CD or DVD drive
activity light
CD or DVD
headphone
connector
CD or DVD eject button
floppy drive light*
floppy drive eject button*
hard-drive activity light
power button
CD or DVD
volume
control dial
power light
USB 2.0 connectors (2)
headphone connector
Service Tag
PCI card slots (3)
keyboard connector
USB 2.0 connectors (6)
microphone connector*
line-out connector*
serial connector
voltage selection switch
power connector
center/LFE connector*
integrated video connector**
mouse connector
line-in connector*
parallel connector
network adapter connector
diagnostic lights (4)
video connector***
cover latch
surround connector*
optional sound card connector
(see the setup diagram)
*On computers with integrated sound.
**On computers with integrated video.
***On computers with a video card.
Model DMC, MTC2