Dell Force10 S25-01-GE-24V Installing the S25N and S25V Systems - Page 21
Installing the System on a Tabletop, Installing the System in a Rack or Cabinet
 |
View all Dell Force10 S25-01-GE-24V manuals
Add to My Manuals
Save this manual to your list of manuals |
Page 21 highlights
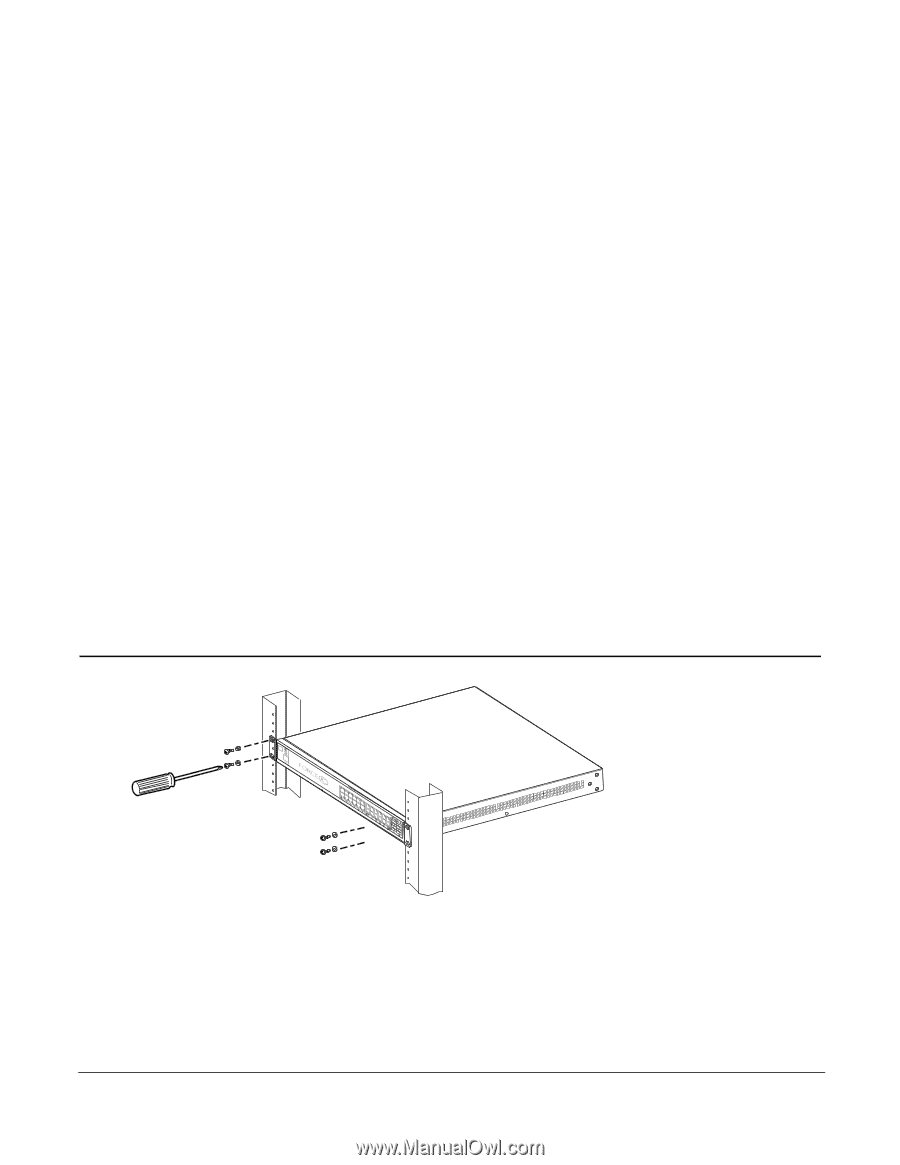
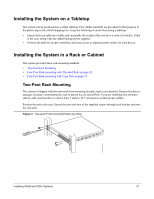
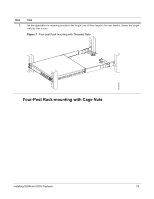
Installing the System on a Tabletop The system can be positioned on a stable tabletop. Four rubber standoffs are provided for that purpose in the plastic bag in the switch shipping box. Keep the following in mind when using a tabletop: • Ensure that your tabletop is stable and can handle the weight of the switch or a stack of switches, if that is the case, along with any added backup power supplies. • Position the table for proper ventilation and easy access to separate power outlets for each device. Installing the System in a Rack or Cabinet The system provides three rack-mounting methods: • Two-Post Rack Mounting • Four-Post Rack-mounting with Threaded Rails on page 22 • Four-Post Rack-mounting with Cage Nuts on page 23 Two-Post Rack Mounting The system is shipped with the universal front-mounting brackets (rack ears) attached. Ensure that there is adequate clearance surrounding the rack to permit access and airflow. If you are installing two switches side-by-side, position the two unit at least 5 inches (12.7 cm) apart to permit proper airflow. Position the unit in the rack. Secure the unit with two of the supplied screws through each bracket and onto the rack post. Figure 4 Two-post (Front-mounted) Rack-mounting AC STACK ID XFP25 XFP26 Alarm DC 27 P28 S50-01-GE-24V fn00147aS25N Installing S25N and S25V Systems 21
-
 1
1 -
2
-
3
-
4
-
5
-
6
-
7
-
8
-
9
-
10
-
11
-
12
-
13
-
14
-
15
-
 16
16 -
 17
17 -
 18
18 -
 19
19 -
 20
20 -
 21
21 -
 22
22 -
 23
23 -
 24
24 -
 25
25 -
 26
26 -
27
-
28
-
29
-
30
-
31
-
32
-
33
-
34
-
35
-
36
-
37
-
38
-
39
-
40
-
41
-
42
-
43
-
44
-
45
-
46
-
47
-
48
-
49
-
50
-
51
-
52
-
53
-
54
 |
 |