Dell Force10 S25N-S50N Dell Force10 S25 Systems Quick Start Guide
Dell Force10 S25N-S50N Manual
 |
View all Dell Force10 S25N-S50N manuals
Add to My Manuals
Save this manual to your list of manuals |
Dell Force10 S25N-S50N manual content summary:
- Dell Force10 S25N-S50N | Dell Force10 S25 Systems Quick Start Guide - Page 1
Dell Force10 S25 Systems Quick Start Guide Regulatory Model: S25N/S25V/S25P - Dell Force10 S25N-S50N | Dell Force10 S25 Systems Quick Start Guide - Page 2
- Dell Force10 S25N-S50N | Dell Force10 S25 Systems Quick Start Guide - Page 3
Dell Force10 S25 Systems Quick Start Guide Regulatory Model: S25N/S25V/S25P - Dell Force10 S25N-S50N | Dell Force10 S25 Systems Quick Start Guide - Page 4
instructions are not followed. WARNING: A WARNING indicates a potential for property damage, personal injury, or death. If you purchased a Dell © 2011 Dell Inc. All Dell Inc. is strictly forbidden. Trademarks used in this text: Dell™, the DELL logo, Dell Dell Inc. disclaims any proprietary interest in trademarks - Dell Force10 S25N-S50N | Dell Force10 S25 Systems Quick Start Guide - Page 5
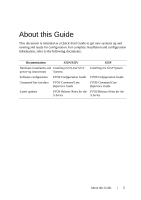
, refer to the following documents: Documentation S25N/S25V S25P Hardware installation and Installing S25N and S25V Installing the S25P System power-up instructions Systems Software configuration FTOS Configuration Guide FTOS Configuration Guide Command line interface FTOS Command Line - Dell Force10 S25N-S50N | Dell Force10 S25 Systems Quick Start Guide - Page 6
4 About this Guide - Dell Force10 S25N-S50N | Dell Force10 S25 Systems Quick Start Guide - Page 7
, Dell Force10 recommends that you complete the installation procedures in the order presented below. NOTE: Unless stated otherwise, the installation instructions below apply to the S25N, S25V, and S25P systems. Always handle the system and its components with care. Avoid dropping the switch or - Dell Force10 S25N-S50N | Dell Force10 S25 Systems Quick Start Guide - Page 8
Step Task 1 Dell Force10 recommends that one person hold the chassis in place while a second person attaches the brackets to the posts. 2 Position the unit in the rack. Secure the unit with two of the supplied screws through each bracket and onto the rack post. S25N/V AC STACK ID XFP25 - Dell Force10 S25N-S50N | Dell Force10 S25 Systems Quick Start Guide - Page 9
switch is running. CAUTION: Before connecting a transceiver to a source, check the receive power of the transceiver with an optical power meter. Generally, Dell Force10 catalog number GP-SFP2-1T is used in the S25P switch, the SFP speed can be manually set with the speed command. When the speed is - Dell Force10 S25N-S50N | Dell Force10 S25 Systems Quick Start Guide - Page 10
position. (The SFP optic has a key that prevents it from being inserted incorrectly.). 2 Insert the SFP into the port until it gently snaps into place. S25N/V with SFP S25P with SFP S25-01-GE-24P 8 Installing the Hardware - Dell Force10 S25N-S50N | Dell Force10 S25 Systems Quick Start Guide - Page 11
XFP transceivers while the switch is operating. However, inserting or removing the module is not supported; it can crash or lock up the switch, requiring a reboot. into place. NOTE: For details on Dell Force10 supported optics, refer to http://www.force10networks.com/products/specifications.asp Installing - Dell Force10 S25N-S50N | Dell Force10 S25 Systems Quick Start Guide - Page 12
other power cables must be ordered separately. S25N The S25N has two AC receptacles in the PSU side you have three options for providing power to the switch - AC only, DC only, or using both AC the power source. Cables must be sized for 11.5 A service at no more than -48 VDC input. Step Task 1 - Dell Force10 S25N-S50N | Dell Force10 S25 Systems Quick Start Guide - Page 13
left terminal block, as you face the PSU side, corresponds to the DC2 status LED on the I/O side of the switch; DC1 is on the right. Cables must be sized for 11.5 A service at -48VDC input (per NEC in the United States. Internationally, follow local safety codes.) Step Task 1 Make sure that - Dell Force10 S25N-S50N | Dell Force10 S25 Systems Quick Start Guide - Page 14
as you face the I/O side. The fans operate at a constant speed and with automatic speed adjustment for temperature changes. Switch Number of Fans S25N 4 S25V 5 S25P 6 For the S25N and S25V, FTOS turns on major and minor alarms and logs temperature warnings at the following temperatures (in - Dell Force10 S25N-S50N | Dell Force10 S25 Systems Quick Start Guide - Page 15
°C) (-40° to 158°F (-40° to 70°C) (-40° to 158°F (-40° to 70°C) non-operating (storage non-operating (storage temperature) temperature) Maximum Thermal Output S25N: 349.05 BTU/Hour S25V: 349.05 BTU/Hour S25P: 305 BTU/Hour S25P-DC: 262 BTU/Hour Maximum altitude No performance degradation No - Dell Force10 S25N-S50N | Dell Force10 S25 Systems Quick Start Guide - Page 16
S25P Specifications Nominal Input Voltage 90 - 254 VAC, 47/63 Hz S25P: 90 - 254 VAC, 47/63 Hz S25P-DC: -48 VDC Maximum Current Draw S25N: 2 A @ 100/120 VAC; 1 S25P: 2 A @ 100/120 VAC; 1 A @ 200/240 VAC A @ 200/240 VAC S25V (AC): 6.5 A @ 100/120 S25P-DC: 3.6 A @ -48 VDC VAC; 3.25A @ 200/240 - Dell Force10 S25N-S50N | Dell Force10 S25 Systems Quick Start Guide - Page 17
2 Installing the Software Navigating CLI Modes The FTOS prompt changes to indicate the CLI mode. You must move linearly through the command modes, with the exception of the end command which takes you directly to EXEC Privilege mode; the exit command moves you up one command mode level. Console - Dell Force10 S25N-S50N | Dell Force10 S25 Systems Quick Start Guide - Page 18
Stack ID AC1 XFP25 XFP26 AACla2rm 27 P28 Step Task 1 Install the RJ-45 copper cable that is shipped with the system into the console port. CAUTION: You must install a straight-through RJ-45 copper cable (a standard Ethernet cable) into the console port. This is different from many other - Dell Force10 S25N-S50N | Dell Force10 S25 Systems Quick Start Guide - Page 19
can modify the settings to match at each end of the connection. 4 S25P only: If you use the console port to download software to the switch, you will probably want to raise the console baud rate. Establish a connection with the default settings to verify the connection. Then use the lineconfig - Dell Force10 S25N-S50N | Dell Force10 S25 Systems Quick Start Guide - Page 20
Dell Force10 Operating System (FTOS) is pre-loaded onto the chassis, however the system is not configured when you power up for the first time (except for the default hostname, which is Force10 2 Place the interface in switchport Layer 2 (switching) mode. Command Mode INTERFACE INTERFACE To view - Dell Force10 S25N-S50N | Dell Force10 S25 Systems Quick Start Guide - Page 21
The S25N, S25V, and S25P systems do not have a dedicated management port, nor a separate management routing able. Configure any port on one of the chassis to be - Dell Force10 S25N-S50N | Dell Force10 S25 Systems Quick Start Guide - Page 22
using a DES encryption method. • enable secret is stored in the running/startup configuration in using a stronger, MD5 encryption method. Dell Force10 recommends using the enable secret password. Task Command Syntax Create a password to enable [password | secret] [level level] access EXEC - Dell Force10 S25N-S50N | Dell Force10 S25 Systems Quick Start Guide - Page 23
Create a VLAN The Default VLAN is part of the system startup configuration, and is by default, VLAN 1. You may make another VLAN the Default VLAN. The Default VLAN cannot be deleted, disabled, or configured (you cannot assign it an IP address), and only untagged interfaces can belong to it. When an - Dell Force10 S25N-S50N | Dell Force10 S25 Systems Quick Start Guide - Page 24
Step Task Command Syntax 1 Assign a switchport to [tagged | untagged] interface a VLAN. 2 Display all show vlan switchports and the VLANs of which they are members. Command Mode INTERFACE VLAN EXEC Privilege Assign an IP address to a VLAN NOTE: An IP address cannot be assigned to the - Dell Force10 S25N-S50N | Dell Force10 S25 Systems Quick Start Guide - Page 25
- Dell Force10 S25N-S50N | Dell Force10 S25 Systems Quick Start Guide - Page 26
Printed in the U.S.A. www.dell.com | support.dell.com
-
 1
1 -
 2
2 -
 3
3 -
 4
4 -
 5
5 -
 6
6 -
 7
7 -
8
-
9
-
10
-
11
-
12
-
13
-
14
-
15
-
16
-
17
-
18
-
19
-
20
-
21
-
22
-
23
-
24
-
25
-
26
 |
 |
Dell Force10 S25 Systems
Quick Start Guide
Regulatory Model:
S25N/S25V/S25P