Dell Inspiron 13z Me and My Dell
Dell Inspiron 13z Manual
 |
View all Dell Inspiron 13z manuals
Add to My Manuals
Save this manual to your list of manuals |
Dell Inspiron 13z manual content summary:
- Dell Inspiron 13z | Me and My Dell - Page 1
Me and My Dell © 2013 Dell Inc. - Dell Inspiron 13z | Me and My Dell - Page 2
. Trademarks used in this text: Dell™, the DELL logo, and Inspiron™ are trademarks of Dell Inc.; Intel®, Centrino®, Core™, and Atom™ are either trademarks or registered trademarks of Intel Corporation in the U.S. and other countries; Microsoft®, Windows®, and Windows start button logo are either - Dell Inspiron 13z | Me and My Dell - Page 3
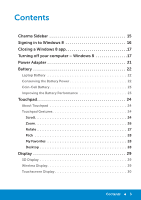
Contents Charms Sidebar 15 Signing in to Windows 8 16 Closing a Windows 8 app 17 Turning off your computer - Windows 8 17 Power Adapter 21 Battery 22 Laptop Battery 22 Conserving the Battery Power 22 Coin-Cell Battery 23 Improving the Battery Performance 23 Touchpad 24 About Touchpad 24 - Dell Inspiron 13z | Me and My Dell - Page 4
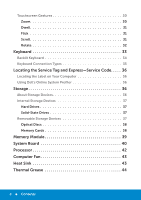
Keyboard 33 Backlit Keyboard 34 Keyboard Connection Types 35 Locating the Service Tag and Express-Service Code 36 Locating the Label on Your Computer 36 Using Dell's Online System Profiler 36 Storage 36 About Storage Devices 36 Internal Storage Devices 37 Hard Drives 37 Solid-State Drives - Dell Inspiron 13z | Me and My Dell - Page 5
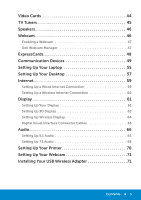
Video Cards 44 TV Tuners 45 Speakers 46 Webcam 46 Enabling a Webcam 47 Dell Webcam Manager 47 ExpressCards 48 Communication Devices 49 Setting Up Your Laptop 55 Setting Up Your Desktop 57 Internet 59 Setting Up a Wired Internet Connection 59 Setting Up a Wireless Internet Connection 60 - Dell Inspiron 13z | Me and My Dell - Page 6
75 Charging Laptop Battery 75 Improving the Battery Performance 75 Dell Desktop Mode 76 Dell Desktop Mode 76 Keyboard 77 General Keyboard Shortcuts 77 Changing Keyboard Input Language 79 Using Numeric Keypad on a Laptop Computer 80 Touchpad 81 Using Your Touchpad 81 Touchpad Gestures - Dell Inspiron 13z | Me and My Dell - Page 7
USB 90 USB Connectors 90 USB Standards 91 Digital Visual Interface (DVI 92 DisplayPort/Mini-DisplayPort 92 Advantages of DisplayPort 93 HDMI 93 Advantages of HDMI 93 eSATA Connector 94 S/PDIF 94 IEEE 1394 94 Key Features 94 Types of IEEE 1394 Cables 95 Comparing USB and IEEE 1394 96 - Dell Inspiron 13z | Me and My Dell - Page 8
Network Card 105 Setting Up a Wired Internet Connection 105 Setting Up a Wireless Internet Connection 107 Computrace 111 About Computrace 111 Enabling Computrace 112 Getting Help on Computrace 112 My Dell Downloads 113 My Dell Support Center 113 Downloading or Upgrading Dell Support Center - Dell Inspiron 13z | Me and My Dell - Page 9
118 DellConnect 118 Using DellConnect 118 About Restoring Your Operating System - Windows 8 123 Dell Backup and Recovery 123 Dell Backup and Recovery - Windows 8 123 Dell Backup and Recovery Basic - Windows 8 124 Dell Backup and Recovery Professional - Windows 8 125 System Recovery Media 126 - Dell Inspiron 13z | Me and My Dell - Page 10
ePSA 138 Beep Codes 139 Troubleshooting 140 Display Screen is Difficult to Read 140 Desktop 140 Laptop 141 No Display on the Screen or Screen is Blank 142 Desktop 142 Laptop 143 Keyboard Not Working, Not Detected, or Working Intermittently 143 External Keyboard 143 Laptop Keyboard 144 - Dell Inspiron 13z | Me and My Dell - Page 11
150 Flashing the BIOS 150 Getting Help and Contacting Dell 155 Self-Help Options 155 Accessing Windows Help and Support 155 Contacting Dell 156 Before Calling Dell 159 Computer Maintenance 160 Ergonomic Instructions for Desktops 160 Ergonomic Instructions for Laptops 162 Dell and the - Dell Inspiron 13z | Me and My Dell - Page 12
12 Contents - Dell Inspiron 13z | Me and My Dell - Page 13
New Features in Windows 8 - Dell Inspiron 13z | Me and My Dell - Page 14
- Dell Inspiron 13z | Me and My Dell - Page 15
Share charm Start charm Allows you to share photos, links, and so on with your friends and social networks. Takes you to the Start screen. Devices charm Settings charm Allows you to send files and stream movies to TVs, printers, and other devices. Provides access to notifications, volume controls - Dell Inspiron 13z | Me and My Dell - Page 16
the screen (or press any key if you are using a keyboard) to dismiss the lock screen. 2. In the sign-in screen, sign in to your computer using the method of your choice. NOTE: To use a different sign-in method, tap or click Sign-in options to see the available options. 16 Signing in to Windows - Dell Inspiron 13z | Me and My Dell - Page 17
release the app. • If you are using touchscreen, drag the app to the bottom of the screen and release the app. Turning off your computer - Windows 8 To turn off your computer: 1. Swipe from the right edge of the screen (or if you are using a mouse, point to the upper-right corner of the - Dell Inspiron 13z | Me and My Dell - Page 18
18 Closing a Windows 8 app - Dell Inspiron 13z | Me and My Dell - Page 19
About Your Computer - Dell Inspiron 13z | Me and My Dell - Page 20
- Dell Inspiron 13z | Me and My Dell - Page 21
computers. Power adapters convert AC current to DC current for supplying to computers. The Dell power-adapter kit consists of the power adapter and the power cable. The power-adapter your computer or a Dell-approved replacement power adapter, to avoid damaging your computer. Power Adapter 21 - Dell Inspiron 13z | Me and My Dell - Page 22
power on your laptop, do any of the following: • Connect the computer to an electrical outlet when possible; battery life is largely determined by the number of times the battery is used and recharged. • Configure the power management settings using Microsoft Windows Power Options to optimize - Dell Inspiron 13z | Me and My Dell - Page 23
the operating time of your battery: • Using optical drives. • Using wireless communications devices, ExpressCards, media cards, or USB devices. • Using high-brightness display settings, 3D screen savers, or other power-intensive programs like complex 3D graphics applications and games. You may - Dell Inspiron 13z | Me and My Dell - Page 24
and position of your finger(s) to a relative position on the computer screen. Touchpads are available on laptop computers and some high-end keyboards. Touchpad Gestures NOTE: Some of the touchpad gestures may not be supported on your computer. NOTE: You can change the touchpad gestures settings by - Dell Inspiron 13z | Me and My Dell - Page 25
activate vertical auto scrolling. Tap on the touchpad to stop auto scrolling. Auto Scroll Horizontal - Allows you to scroll left or right on the active window. Move two fingers to your left or right at a fast pace to activate horizontal auto scrolling. Tap on the touchpad to stop auto scrolling - Dell Inspiron 13z | Me and My Dell - Page 26
in a clockwise circular motion to scroll right or counterclockwise circular motion to scroll left. Zoom Allows you to increase or decrease the magnification of the screen content. The zoom feature includes: One finger zoom - Allows you to zoom in or out. To zoom in: Move a finger up in the zoom zone - Dell Inspiron 13z | Me and My Dell - Page 27
. To zoom out: Move two fingers close together to reduce the view of the active window. Rotate Allows you to rotate the active content on the screen. The rotate feature includes: Twist - Allows you to rotate active content in 90° increments using two fingers where one finger is anchored and the - Dell Inspiron 13z | Me and My Dell - Page 28
forward or backward based on the direction of the flick. Move three fingers quickly in the desired direction to flip content in the active window. My Favorites Allows you to open your favorite applications. Tap three fingers on the touchpad. The applications that are configured in the touchpad - Dell Inspiron 13z | Me and My Dell - Page 29
card Operating System Driver Intel Core i3-3xx to i7-66xx Intel HD Graphics Intel Centrino 6100/6200/6300 or Intel Centrino Advanced-N + WiMAX 6250 Windows 7 Home Premium, Professional, or Ultimate Latest wireless-card drivers and Intel Wireless Display Connection Manager available at support.dell - Dell Inspiron 13z | Me and My Dell - Page 30
on the screen by touching the display instead of using a mouse, touchpad, or a keyboard. You can : Touchscreen display may not be supported on all computers. Touchscreen Gestures not work across applications. Zoom Allows you to increase or decrease the magnification of the active screen content - Dell Inspiron 13z | Me and My Dell - Page 31
the touch screen, to open context-sensitive menus. Flick Allows you to flip content forward or backward based on the direction of the flick. Move a finger quickly in the desired direction to flip through content in the active window like pages in a book. Flick also works vertically when navigating - Dell Inspiron 13z | Me and My Dell - Page 32
scrolling. Scroll Horizontal - Allows you to scroll right or left on the active window. Move a finger to the right or left to activate horizontal scrolling. Rotate Allows you to rotate the active content on the screen. Twist - Allows you to rotate the active content using two fingers. Keeping - Dell Inspiron 13z | Me and My Dell - Page 33
keys, in addition to the normal numbered keys. Laptop computers have a physical keyboards built into their chassis, but most exclude the number pad to save space. Some small-sized laptops and netbook computers do not have a physical keyboard, and provide an on‑screen keyboard. Keyboard 33 - Dell Inspiron 13z | Me and My Dell - Page 34
keypad on most laptop computers is integrated into the alphabetic keys). Backlit Keyboard Backlit keyboards provide visibility in dark environments by illuminating the symbols on the keys using LEDs present below the keyboard. You can turn on the backlight manually or configure the backlight to turn - Dell Inspiron 13z | Me and My Dell - Page 35
On a Dell laptop computer, there are generally three lighting states available: • Full keyboard/touchpad brightness • Half keyboard/touchpad brightness • No lighting Pressing the and the right-arrow key toggles between the three lighting states. NOTE: Backlit keyboard may not be available on - Dell Inspiron 13z | Me and My Dell - Page 36
you to store data for later use. Storage devices can be internal or external. Most of the storage devices store data till you manually delete the data. Examples of storage devices are hard drives, optical drives, USB memory keys, and so on. 36 Locating the Service Tag and Express-Service Code - Dell Inspiron 13z | Me and My Dell - Page 37
you manually delete it. Internal storage devices include hard drives (HDD) and solid-state drives (SSD). Hard Drives An Solid-State Drives An SSD is a data storage device that uses solid-state (flash) memory to store data. SSDs contain no moving parts as Memory cards • Magnetic tapes Storage 37 - Dell Inspiron 13z | Me and My Dell - Page 38
gaming consoles, and so on. Some common types of memory cards are: Secure Digital (SD)/Secure Digital High Capacity (SDHC) Memory Stick (MS)/Memory Stick Pro (MS Pro) Extreme Digital (xD) Multimedia Card (MMC) Secure Digital Extended Capacity (SDXC) [card with Ultra High Speed (UHS)] 38 Storage - Dell Inspiron 13z | Me and My Dell - Page 39
Memory Stick XC (MSXC) MultiMedia Card plus (MMC+) Memory Module Memory modules are Printed Circuit Boards (PCB) with Random Access Memory (RAM) chips soldered on them. Memory modules provide RAM needed by your computer. Based on the type of computer they are used in, memory modules are categorized - Dell Inspiron 13z | Me and My Dell - Page 40
that forms the central part of computers. All memory module(s). • Expansion card slot(s) - Provides slot(s) to install expansion card(s). • Chipset - Provides an interface between the processor's front-side bus, main memory, and peripheral buses. • Flash memory - Contains the system memory or BIOS - Dell Inspiron 13z | Me and My Dell - Page 41
1 battery socket 2 PCI-Express x1 connector 3 PCI-Express x16 connector 4 eSATA connector 5 processor 6 processor socket 7 memory-module connector 8 power connector System Board 41 - Dell Inspiron 13z | Me and My Dell - Page 42
part of the computer or another electronic device that processes data and instructions to generate a desired output. Processors are mainly classified based on: • Number of processing cores present on the die • Speed or frequency measured in GigaHertz (GHz) or MegaHertz (MHz) • Onboard memory, also - Dell Inspiron 13z | Me and My Dell - Page 43
Processors are specifically designed for mobile devices, laptop computers, desktop computers, servers, and so on. A , and damage. Fans are used to cool: • Computer chassis • Processor • Graphics card • Chipset • Hard drive and so on. Heat Sink Heat sinks are used to dissipate heat generated by - Dell Inspiron 13z | Me and My Dell - Page 44
a display device such as a monitor or projector. Video cards can be of two types: • Integrated video - Often referred to as an on-board video card, it is a chip that is part of the system board. Integrated video cards do not have dedicated memory, and share the system memory and processor to output - Dell Inspiron 13z | Me and My Dell - Page 45
computer. TV tuners are available for both desktop and laptop computers and are available in various connectivity options such as: • Internal -- PCI-E -- PCI • External -- USB -- PC Card -- ExpressCard TV tuners are mostly standalone, however, some video cards also have built in TV tuners. Most TV - Dell Inspiron 13z | Me and My Dell - Page 46
are generally used only for producing error or failure beeps. External speakers, also called multimedia speakers, produce sound or 7.1 channel speakers to produce 5.1 or 7.1 channel sound, your computer sound card must support 5.1 or 7.1 channel audio. Webcam A webcam is a device that allows you - Dell Inspiron 13z | Me and My Dell - Page 47
popular instant messaging services such as Dell Webcam→ Dell Webcam Manager. The Dell Webcam Manager window appears. Enable the Digital Array Microphone in the Dell Webcam Center 1. Click Start → All Programs or Programs. 2. Click Dell Webcam→ Dell Webcam Manager. Dell Webcam Manager window - Dell Inspiron 13z | Me and My Dell - Page 48
ExpressCards allow you to connect peripheral devices such as memory cards, wired and wireless communications, printers, scanners, microphone, and so on, to your laptop computer. ExpressCards replace PC cards. ExpressCards are installed on externally accessible ExpressCard slots. ExpressCard - Dell Inspiron 13z | Me and My Dell - Page 49
The following figure shows the size-comparison of PC-cards and ExpressCards: PC Card 54 mm ExpressCard (EC 54) 34 mm ExpressCard (EC 34) Communication Devices An electronic device that can send and receive data on the network is - Dell Inspiron 13z | Me and My Dell - Page 50
Line (DSL) or Integrated Services Digital Network (ISDN). Network Interface Controller (NIC) - Also referred to as network adapters or Local Area Network (LAN) adapters. They usually connect to networks using an Ethernet cable. NICs can be internal (expansion cards or integrated to the system - Dell Inspiron 13z | Me and My Dell - Page 51
traditional network cabling. WLAN controllers can be internal (expansion cards or integrated to the system board) or external. Wireless controllers - Allow wireless connectivity through cellular tower technology. A SIM card may be is required for WWAN connectivity. Bluetooth adapters - Allow - Dell Inspiron 13z | Me and My Dell - Page 52
52 Communication Devices - Dell Inspiron 13z | Me and My Dell - Page 53
Setting Up Your Computer - Dell Inspiron 13z | Me and My Dell - Page 54
- Dell Inspiron 13z | Me and My Dell - Page 55
Setting Up Your Laptop WARNING: The AC adapter works with electrical outlets worldwide. However, power connectors and power strips vary among countries. Using an incompatible cable or AC adapter to the computer and then plug it into a wall outlet or surge protector. Setting Up Your Laptop 55 - Dell Inspiron 13z | Me and My Dell - Page 56
2. Press the power button to turn on your laptop. NOTE: The location of the power button and AC adapter connector may vary depending on the your computer model. 56 Setting Up Your Laptop - Dell Inspiron 13z | Me and My Dell - Page 57
the display to the appropriate display connector on your computer (see Setting Up Your Display). 2. Connect the USB keyboard and mouse to the USB connectors. NOTE: Depending on your computer model, USB ports may also be present on the front panel of your computer. Setting Up Your Desktop 57 - Dell Inspiron 13z | Me and My Dell - Page 58
3. Connect the power cable. 4. Press the power button to turn on your computer. 58 Setting Up Your Desktop - Dell Inspiron 13z | Me and My Dell - Page 59
connection, contact your Internet Service Provider (ISP) or cellular telephone service for setup instructions. NOTE:ISPs and ISP offerings window appears. NOTE:If you do not know which type of connection to select, click Help me choose or contact your ISP. 5. Follow the instructions on the screen - Dell Inspiron 13z | Me and My Dell - Page 60
or network → Connect to the Internet. The Connect to the Internet window appears. NOTE: If you do not know which type of connection to select, click Help me choose or contact your ISP. 2. Follow the instructions on the screen and use the setup information provided by your ISP to complete the setup - Dell Inspiron 13z | Me and My Dell - Page 61
to identify and select the appropriate display connector to use. NOTE: If you purchased the optional discrete graphics card, connect the display using the connector on the discrete graphics card. NOTE: The integrated VGA and HDMI connectors may be disabled and capped if your computer has a discrete - Dell Inspiron 13z | Me and My Dell - Page 62
can purchase the DVI-to-VGA adapter, HDMI-to-DVI adapter, and additional HDMI or DVI cables at dell.com. Setting Up 3D Display NOTE: Your TV or computer may not support 3D. To know if your computer supports 3D, see the documentation that shipped with your computer. To know if your TV - Dell Inspiron 13z | Me and My Dell - Page 63
of the glasses. NOTE: If you are unable to view the entire Windows desktop on your TV, use the 3D TV's settings to reduce the display match the resolution of the 3D content type: a. In the NVIDIA Control Panel window, click Display to expand the selection, and then click Change resolution. b. For - Dell Inspiron 13z | Me and My Dell - Page 64
click the Intel Wireless Display icon Intel Wireless Display window appears. on the desktop. The 2. Select Connect to Existing Adapter. NOTE: You can download and install the latest driver for Intel Wireless Display Connection Manager from support.dell.com. NOTE: For more information on wireless - Dell Inspiron 13z | Me and My Dell - Page 65
. 1. Turn off your computer. 2. Turn off the display and disconnect it from the power supply. 3. Connect one end of the display cable to the DVI port on your computer. 4. Connect the other end of the cable to the same connector on your display. 5. If necessary, connect one end of the power - Dell Inspiron 13z | Me and My Dell - Page 66
6. Connect the other end of the power cable to the display's three-prong power strip or wall outlet. 7. Turn on your computer, and then turn on your display. Audio Setting Up 5.1 Audio 5.1 audio is most effective when the speakers are placed as shown in the following figure: 66 Audio - Dell Inspiron 13z | Me and My Dell - Page 67
See the following figure to connect 5.1 speakers to your computer. 1 Rear audio connector on the 5 computer 2 Center/LFE surround out on 6 the computer 3 Front audio connector on 7 the computer 4 5.1 channel audio cable Center/LFE surround out on the speaker Front audio connector on the speaker - Dell Inspiron 13z | Me and My Dell - Page 68
Setup window appears. 3. Select a speaker configuration under Audio channels: and click Test. You should hear a tone from every speaker. 4. Click Next. 5. Follow the instructions on the screen. If you experience problems with your computer sound, see the knowledge base article 266424 at support.dell - Dell Inspiron 13z | Me and My Dell - Page 69
speaker 4 Front audio connector on 9 Side audio connector on the the computer speaker 5 7.1 channel audio cable To set up your speakers: Windows 7 and Windows Vista 1. Click Start → Control Panel→ Hardware and Sound→ Sound. 2. Select Speakers and then click Configure. The Speaker Setup - Dell Inspiron 13z | Me and My Dell - Page 70
instructions on the screen. If you experience problems with your computer sound, see the knowledge base article 266424 at support.dell.com. Setting Up Your Printer You can connect one or more printers to your computer and also add one or more computers to your printer. Adding a Printer 1. In Windows - Dell Inspiron 13z | Me and My Dell - Page 71
laptop display or external display purchased with your computer External webcam Drivers and software are installed when you receive your computer. Use the media shipped with the computer only to reinstall the drivers the drive letter of your optical drive). c. Follow the instructions on the screen. - Dell Inspiron 13z | Me and My Dell - Page 72
72 Setting Up Your Webcam - Dell Inspiron 13z | Me and My Dell - Page 73
Using Your Computer - Dell Inspiron 13z | Me and My Dell - Page 74
- Dell Inspiron 13z | Me and My Dell - Page 75
your laptop computer. The operating time of your battery significantly reduces if you use: • Optical drives. • Wireless communications devices, ExpressCards, media cards, or USB devices. • High-brightness display settings, 3D screen savers, or other power‑intensive programs like complex 3D graphics - Dell Inspiron 13z | Me and My Dell - Page 76
monitors the charging and discharging behavior of your battery, and if applicable, displays a message requesting you to enable longevity mode. NOTE: Dell longevity mode may not be supported on your laptop battery. To enable or disable longevity mode: 1. Right-click the battery icon on the Windows - Dell Inspiron 13z | Me and My Dell - Page 77
To enable or disable desktop mode: 1. Right-click the battery icon on the Windows notification area, and then click Dell Extended Battery Life Options. The Battery Meter dialog box is displayed. 2. Click the Desktop mode tab. 3. Click Enable or Disable based on your preference. 4. Click OK. NOTE: - Dell Inspiron 13z | Me and My Dell - Page 78
an arrow key with any arrow key Cycles through screen elements in a window or on the desktop. Activates the menu bar in the Selects all items in a document or window. Closes the active window (in programs that allow you to window or on the desktop, or select text within a document. 78 - Dell Inspiron 13z | Me and My Dell - Page 79
Windows logo key and Windows logo key and Windows logo key and Windows logo key and Windows logo key and Windows logo key and Minimizes all open windows. Restores all minimized windows. This key combination functions as a toggle to restore minimized windows - Dell Inspiron 13z | Me and My Dell - Page 80
Using Numeric Keypad on a Laptop Computer 1 Numeric Keypad Your laptop computer may have a numeric keypad integrated into the keyboard. The keypad corresponds to the keypad of an extended keyboard • To type a number or symbol, press and hold and press the desired key. • To enable the numeric - Dell Inspiron 13z | Me and My Dell - Page 81
use the touchpad to move the cursor or selected objects on the computer screen: • To move the cursor, gently slide your finger over the twice. Touchpad Gestures NOTE: Some of the touchpad gestures may not be supported on your computer. NOTE: You can change the touchpad gestures settings by - Dell Inspiron 13z | Me and My Dell - Page 82
activate vertical auto scrolling. Tap on the touchpad to stop auto scrolling. Auto Scroll Horizontal - Allows you to scroll left or right on the active window. Move two fingers to your left or right at a fast pace to activate horizontal auto scrolling. Tap on the touchpad to stop auto scrolling - Dell Inspiron 13z | Me and My Dell - Page 83
Zoom Allows you to increase or decrease the magnification of the screen content. The zoom feature includes: One finger zoom - Allows you to zoom in or in: Move two fingers apart to enlarge the view of the active window. To zoom out: Move two fingers close together to reduce the view of the active - Dell Inspiron 13z | Me and My Dell - Page 84
Allows you to rotate the active content on the screen. The rotate feature includes: Twist - Allows you to flick. Move three fingers quickly in the desired direction to flip content in the active window. My Favorites Allows you to open your favorite applications. Tap three fingers on the touchpad - Dell Inspiron 13z | Me and My Dell - Page 85
. • Zoom-in by moving two fingers apart to enlarge the view of the active window. • Zoom-out by moving two fingers close together to reduce the view of the active window. • Press and hold a finger on the touch screen to open context-sensitive menus. • Rotate the active content by keeping a finger or - Dell Inspiron 13z | Me and My Dell - Page 86
86 Touchscreen - Dell Inspiron 13z | Me and My Dell - Page 87
Ports and Connectors - Dell Inspiron 13z | Me and My Dell - Page 88
- Dell Inspiron 13z | Me and My Dell - Page 89
Effects (LFE) audio channel, found in digital surround sound audio schemes, carries only frequency information (80 Hz and below). The LFE channel drives a subwoofer to provide extremely low bass extension. Systems not using subwoofers can shunt the LFE information to the main speakers in the - Dell Inspiron 13z | Me and My Dell - Page 90
may not be supported on all computers. NOTE: On computers with a discrete sound card, connect the speakers to the connectors on the card. USB Universal devices like mice, keyboards, printers, external drives, digital cameras, mobile phones, and so on. USB also supports Plug-and-Play installation - Dell Inspiron 13z | Me and My Dell - Page 91
USB 3.0 ports in USB 2.0 mode temporarily for troubleshooting purposes and also in situations where an OS reinstallation is done using a USB optical or Flash drive. USB 2.0 - Referred to as Hi-Speed USB, it provides additional bandwidth for multimedia and storage applications. USB 2.0 supports data - Dell Inspiron 13z | Me and My Dell - Page 92
can use DVI to connect your computer to displays such as flat-panel monitors, LCD TVs, and so on. There are three types of DVI connections: • DVI-D (DVI-Digital) - DVI-D is used for direct digital connection between the video card (source) and the digital display. This provides fast and high-quality - Dell Inspiron 13z | Me and My Dell - Page 93
10.8 gbps over standard cables • Natively supports fiber optic cables • Blu-ray Disc ready with built-in support for HDCP. With its unique direct drive boxes, DVD players, Blu-ray Disc players, computers, and video game consoles to compatible digital audio devices, such as computers, monitors, video - Dell Inspiron 13z | Me and My Dell - Page 94
hard drives and optical drives, to your computer. eSATA provides considerably higher throughput as compared to USB 2.0 or FireWire 800. eSATA cables can be up to 2 meters long. eSATA ports • Easy to use - Eliminates the need for special drivers or perform complicated set-ups. • Hot pluggable - - Dell Inspiron 13z | Me and My Dell - Page 95
daisychaining them together, without the need for hubs or switches. Also supports branching, looping, and other topologies, which reduces cabling complexity. Supports up to 64 devices on a single connection. • Fast - Supports delivery of time-critical data at multiple speeds, currently including 100 - Dell Inspiron 13z | Me and My Dell - Page 96
Comparing USB and IEEE 1394 Feature USB Data transfer rate USB 1.1: 12 Mbps USB 2.0: 480 Mbps Number of devices 127 Plug and play Yes Hot-pluggable Yes Isochronous devices Yes Bus type Yes Network topology Hub IEEE1394 IEEE 1394a: 400 Mbps IEEE 1394b: 800 Mbps 63 Yes Yes Yes Yes Daisy - Dell Inspiron 13z | Me and My Dell - Page 97
Network - Dell Inspiron 13z | Me and My Dell - Page 98
- Dell Inspiron 13z | Me and My Dell - Page 99
home or small office, you can: • Print to a shared printer • Access drives and files on another computer • Share files • Browse other networks • Access the using a wireless router or access point. Network Connections Wizard guides you through the process of setting up a computer network and - Dell Inspiron 13z | Me and My Dell - Page 100
or wireless router and the wireless network card in the computer communicate by broadcasting data from zone. Contact your cellular/Internet service provider for coverage details. centered around your personal workspace. WPAN technology supports communication over a short distance. Bluetooth, used - Dell Inspiron 13z | Me and My Dell - Page 101
provides fixed and laptop connectivity without the need for direct line-of-sight with a base station. Mobile wireless broadband support is expected in Internet Service Provider (ISP). If an external USB modem or WLAN adapter is not a part of your original order, you can purchase one from dell.com. - Dell Inspiron 13z | Me and My Dell - Page 102
Service Provider (ISP). If an external wireless modem or WLAN adapter is not a part of your original order, you can purchase one from dell Internet connection: Follow the instructions on the screen and use the setup information provided by your ISP to complete the setup. Windows 8 1. Save and close - Dell Inspiron 13z | Me and My Dell - Page 103
broadband modem. A router has multiple ports, each supporting one computer or one peripheral such service for setup instructions. To set up WLAN: Windows 8 1. Set up your wired Internet connection. For more information contact your Internet Service Provider. 2. Swipe from the right edge of the screen - Dell Inspiron 13z | Me and My Dell - Page 104
network→ Connect to the Internet. The Connect to the Internet window appears. 5. Follow the instructions on the screen. Windows 7 and Windows Vista 1. Set up your wired Internet connection. For more information contact your Internet Service Provider. 2. Click Start , type network in the search box - Dell Inspiron 13z | Me and My Dell - Page 105
window appears. 3. Follow the instructions on the screen. Checking Your Wireless Network Card NOTE: To confirm that your computer has a wireless network card and to determine the type of card contact your Internet Service Provider (ISP) or cellular telephone service for setup instructions. NOTE: ISPs - Dell Inspiron 13z | Me and My Dell - Page 106
type of connection to select, click Help me choose or contact your ISP. 5. Follow the instructions on the screen and use the setup information provided by your ISP to complete the setup. Windows 7 and Windows Vista 1. Click Start , type network in the search box, and then click Network and Sharing - Dell Inspiron 13z | Me and My Dell - Page 107
the search box, and then click Network and Sharing Center → Set up a new connection or network → Connect to the Internet. The Connect to the Internet window appears. 3. Follow the instructions on the screen to complete the setup. Setting Up a Local Area Network 107 - Dell Inspiron 13z | Me and My Dell - Page 108
108 Setting Up a Local Area Network - Dell Inspiron 13z | Me and My Dell - Page 109
Software and Applications - Dell Inspiron 13z | Me and My Dell - Page 110
- Dell Inspiron 13z | Me and My Dell - Page 111
inventory Prevent theft License compliance Remotely delete data Plus Locate stolen computers Track leases Investigate loss Prevent theft Lo/Jack for Laptops For home and home office Protects against theft Locates using hidden software Recovers within 30 days NOTE: Computrace may not be - Dell Inspiron 13z | Me and My Dell - Page 112
BIOS settings, you will be unable to change this setting in future. This is to prevent from somebody else enabling or disabling this option. NOTE: You will need to install the Computrace software in Windows for the software to protect your computer. Getting Help on Computrace Dell provides - Dell Inspiron 13z | Me and My Dell - Page 113
improvement offers, warranty and system information, and links to other Dell tools and diagnostic services. Downloading or Upgrading Dell Support Center To download or upgrade to the latest version of My Dell Support Center, go to dell.com/dellsupportcenter. NOTE: It is recommended to download the - Dell Inspiron 13z | Me and My Dell - Page 114
-- Get Help - View Dell Technical Support options, Customer Support, Tours and Training, Online Tools, Owner's Manual, Warranty Information, FAQs, and so on. -- Backup and Recovery - Access system recovery tools that allow you to: -- Create a Dell Factory Image Restore on your hard drive. -- Create - Dell Inspiron 13z | Me and My Dell - Page 115
find articles and FAQs on the most common problems and instructions on connecting your computer to your TV and home networking. The support categories provide flexible pricing and varying degrees of customer involvement in issue resolution. Solution Station Offerings Type Offerings Computer Setup - Dell Inspiron 13z | Me and My Dell - Page 116
and audio controls through keyboard shortcuts • Power management controls • Battery information • Icon resizing • Wireless enable/disable Installation Dell QuickSet Utilities come pre-installed on a new Dell computer, and can also be restored using the PC Restore utility or similar application - Dell Inspiron 13z | Me and My Dell - Page 117
Shortcuts The following are some of the keyboard shortcuts available for 3D gaming: Keys < ; minimum convergence places all objects behind the scene in your space; also used to place the laser sight. Dell QuickSet 117 - Dell Inspiron 13z | Me and My Dell - Page 118
window, click Stereoscopic 3D to expand the selection, and then click Set keyboard Dell agent views your screen and provides instructions. • Full access to keyboard and mouse - The Dell agent takes control of your computer. Using DellConnect Follow the instructions below to get connected to a Dell - Dell Inspiron 13z | Me and My Dell - Page 119
by support agent. 7. Enter the code provided by the Dell representative in the field provided and click Go. 8. Download and install the DellConnect applet to run the screen sharing application. 9. After installing the applet, DellConnect checks for user permissions or firewall settings and so on. 10 - Dell Inspiron 13z | Me and My Dell - Page 120
120 DellConnect - Dell Inspiron 13z | Me and My Dell - Page 121
Restoring Your Operating System - Dell Inspiron 13z | Me and My Dell - Page 122
- Dell Inspiron 13z | Me and My Dell - Page 123
failure prevents the use of Dell Backup and Recovery • when installing the factory image on a newly installed hard drive Dell Backup and Recovery Dell Backup and Recovery - Windows 8 CAUTION: Using Dell Backup and Recovery permanently removes any programs or drivers installed after you received - Dell Inspiron 13z | Me and My Dell - Page 124
local storage device Automated scheduled backups Basic Professional √ Dell Backup and Recovery Basic - Windows 8 Task To launch Dell Backup and Recovery To create system recovery media To restore your computer to a previous date or factory settings Procedure 1. Turn on your computer. 2. Swipe - Dell Inspiron 13z | Me and My Dell - Page 125
Recovery. Folder Local Backup 2. Click the Backup tile, and then select Data Backup. 3. Follow the instructions on the screen. To restore specific files or folders from a Full System Backup 1. Launch Dell Backup and Recovery. 2. Click the Recovery tile, and then select Data Recovery. 3. Click Yes - Dell Inspiron 13z | Me and My Dell - Page 126
that prevents the use of recovery options that are installed on your computer. • Hard drive failure that prevents data from being recovered. Restoring Your Computer Using System Recovery Media - Windows 8 To restore your computer using the system recovery media: 1. Insert the system recovery disc or - Dell Inspiron 13z | Me and My Dell - Page 127
media Dell Factory Image Restore Operating System disc Use as the first solution when System Restore does not resolve your problem when operating system failure prevents the use of System Restore and DataSafe Local Backup when installing the factory image on a newly installed hard drive to restore - Dell Inspiron 13z | Me and My Dell - Page 128
action. 3. Click Next and follow the instructions on the screen. In the event that System Restore did not resolve the issue, you may undo the last system restore. Undoing the Last System Restore CAUTION: Backup data files regularly. System Restore does not monitor or recover your data files. NOTE - Dell Inspiron 13z | Me and My Dell - Page 129
Image Restore to restore your operating system. Dell DataSafe Local Backup has two versions: • Dell DataSafe Local Backup Basic • Dell DataSafe Local Backup Professional Dell DataSafe Local Backup Features Basic Restore your system back to factory state Yes Create system recovery media on DVD or - Dell Inspiron 13z | Me and My Dell - Page 130
→ Restore your entire system to a previous date or to the factory state. 3. Follow the instructions on the screen. Dell DataSafe Local Backup Professional NOTE: Dell DataSafe Local Backup Professional may be installed on your computer, if you ordered it at the time of purchase. Task To upgrade to - Dell Inspiron 13z | Me and My Dell - Page 131
Local Backup. 2. Click Restore→ Restore specific files or folders from a File & Folder Backup. 3. Follow the instructions on the screen. System Recovery Media About System Recovery Media The system recovery media, created using Dell DataSafe Local Backup, allows you to return your hard drive to the - Dell Inspiron 13z | Me and My Dell - Page 132
deletes all data on the hard drive and removes any programs or drivers installed after you received your computer. If possible, back up the data before using this option. Use Dell Factory Image Restore only if System Restore did not resolve your operating system problem. 1. Turn on the computer - Dell Inspiron 13z | Me and My Dell - Page 133
box to confirm that you want to continue reformatting the hard drive and restoring the system software to the factory condition, then click Next. The restore process begins and may take five or more minutes to complete. 9. When the restore operation is complete, click Finish to restart the computer - Dell Inspiron 13z | Me and My Dell - Page 134
134 Operating System Disc - Dell Inspiron 13z | Me and My Dell - Page 135
Diagnostics and Troubleshooting - Dell Inspiron 13z | Me and My Dell - Page 136
- Dell Inspiron 13z | Me and My Dell - Page 137
can use the Pre-Boot System Assessment (ePSA) to diagnose various hardware problems. Once invoked, the PSA tests devices such as the system board, keyboard, display, memory, hard drive, and so on. NOTE: You computer may not support PSA. Invoking PSA 1. Power-on or restart your computer. 2. When the - Dell Inspiron 13z | Me and My Dell - Page 138
Enhanced Pre-Boot System Assessment (ePSA) to diagnose various hardware problems. The ePSA tests devices such as the system board, keyboard, display, memory, hard drive, and so on. NOTE:You computer may not support ePSA. The ePSA home screen is divided into three areas: • Device Tree - Appears on - Dell Inspiron 13z | Me and My Dell - Page 139
start-up if there are errors or problems. This series of beeps, called a beep code, identifies a problem. If this occurs, note the beep code and contact Dell for assistance. The following table lists some of the common beep codes. NOTE: Some of the beep codes mentioned in the table below may not - Dell Inspiron 13z | Me and My Dell - Page 140
Processor failure NOTE: This beep code is supported for computers with Intel processor only. Display failure Troubleshooting Display Screen is Difficult to Read • Desktop • Laptop Desktop 1. Adjust the resolution of the screen. For more information, see Help and Support. -- Windows 8 Swipe from the - Dell Inspiron 13z | Me and My Dell - Page 141
from support.dell.com. 3. Run the display built-in self test: a. Turn off your computer. b. Press and hold the and power buttons for 10-15 seconds. c. The display built-in self test begins. d. Follow the instructions on the screen. 4. If the problem still remains, contact Dell. Troubleshooting - Dell Inspiron 13z | Me and My Dell - Page 142
display brightness. See the monitor documentation at support.dell.com/manuals. b. Ensure that the monitor video cable is connected to the correct connector on the computer. NOTE: If your computer supports both integrated and discrete video cards, you must connect your monitor to the discrete video - Dell Inspiron 13z | Me and My Dell - Page 143
keyboard, try connecting the keyboard to the PS/2 mouse connector. 9. Connect the keyboard to a different computer, if available. 10. If the keyboard works on another computer or connector, there may be a problem with the computer or connector. Contact Dell for further assistance. Troubleshooting - Dell Inspiron 13z | Me and My Dell - Page 144
the problem. 5. If a particular key is not working or is stuck, shut down the computer and carefully clean the keyboard using a can of compressed air. 6. Disable any software that may change the way the keyboard responds. 7. If the keyboard is still not working, contact Dell. 144 Troubleshooting - Dell Inspiron 13z | Me and My Dell - Page 145
BIOS - Dell Inspiron 13z | Me and My Dell - Page 146
- Dell Inspiron 13z | Me and My Dell - Page 147
is to load and start the operating system. When the computer starts, the BIOS initializes and identifies system devices such as the video card, keyboard and mouse, hard disk, optical drive, and so on. You can use the BIOS to: • Change the system configuration information after you add, change, or - Dell Inspiron 13z | Me and My Dell - Page 148
the current or changeable configuration information for your computer. Information on the screen is divided into three sections: options list, active options field, and key functions. Menu - Appears on top of the System Setup window and allows you to access the System Setup options. Press the left - Dell Inspiron 13z | Me and My Dell - Page 149
Boot Device Menu: 1. If booting from the optical drive, insert the bootable media into the drive. If booting from a USB device, connect the USB appears on the screen. NOTE: If you wait too long and the operating system logo appears, continue to wait until you see the Microsoft Windows desktop. Then - Dell Inspiron 13z | Me and My Dell - Page 150
is available or when replacing the system board. To flash the BIOS: 1. Turn on the computer. 2. Go to support.dell.com/support/downloads. 3. Locate the BIOS update file for your computer. NOTE: Locate the Service Tag of your computer. For more information, see the Quick Start Guide that shipped with - Dell Inspiron 13z | Me and My Dell - Page 151
Complete window appears, click Close. 9. Navigate to the folder where you downloaded the BIOS update file. The file icon appears in the folder and is titled the same as the downloaded BIOS update file. 10. Double-click the BIOS update file icon and follow the instructions that appear on the screen - Dell Inspiron 13z | Me and My Dell - Page 152
152 Changing the Default Boot Sequence - Dell Inspiron 13z | Me and My Dell - Page 153
Getting Help and Contacting Dell - Dell Inspiron 13z | Me and My Dell - Page 154
- Dell Inspiron 13z | Me and My Dell - Page 155
to troubleshooting wizards, user manuals, technical help blogs, download Dell driver and software updates, and so on. You can access Dell Support through the following websites and e-mail addresses: Dell Support Websites • support.dell.com • support.jp.dell.com (Japan only) • support.euro.dell.com - Dell Inspiron 13z | Me and My Dell - Page 156
in your area. To contact Dell for sales, technical support, or customer service issues: 1. Go to www.dell.com/ContactDell. 2. Select your country or region. 3. Select the appropriate service or support link based on your requirement. 4. Choose the method of contacting Dell that is convenient for you - Dell Inspiron 13z | Me and My Dell - Page 157
References - Dell Inspiron 13z | Me and My Dell - Page 158
- Dell Inspiron 13z | Me and My Dell - Page 159
of the computer): -- Express Service Code: -- Return Material Authorization Number (if provided by Dell support technician): -- Operating system and version beep codes, or diagnostic codes: -- Description of the problem and any troubleshooting procedures you have performed. Before Calling Dell - Dell Inspiron 13z | Me and My Dell - Page 160
result in degraded performance. • Enable Windows and other software updates to correct software bugs and improve computer security. Ergonomic Instructions for Desktops CAUTION: Improper or prolonged keyboard use may result in injury. CAUTION: Viewing the monitor screen for extended periods of time - Dell Inspiron 13z | Me and My Dell - Page 161
windows) to minimize reflections and glare on the monitor screen. • Use a chair that provides good lower back support. • Keep your forearms horizontal with your wrists in a neutral, comfortable position while using the keyboard a potential trip hazard. Ergonomic Instructions for Desktops 161 - Dell Inspiron 13z | Me and My Dell - Page 162
6 wrists relaxed and flat NOTE: For the latest ergonomic instructions, go to www.dell.com/regulatory_compliance. Ergonomic Instructions for Laptops CAUTION: Improper or prolonged keyboard use may result in injury. CAUTION: Viewing the monitor screen for extended periods of time may result in eye - Dell Inspiron 13z | Me and My Dell - Page 163
or blinds on nearby windows) to minimize reflections and glare on the monitor screen. • Use a chair that provides good lower back support. • Keep your forearms horizontal with your wrists in a neutral, comfortable position while using the keyboard, touchpad, track stick, or external mouse. • Always - Dell Inspiron 13z | Me and My Dell - Page 164
make this a reality by delivering practical products and services that make an impact on real environmental issues, money and resources. Better ways to live, work and succeed in our world. Bamboo-Nature's Eco and currently cradles Dell's netbooks, some phones, and most Inspiron notebooks with more - Dell Inspiron 13z | Me and My Dell - Page 165
greenhouse gas emissions from your computer equipment and to help build a healthier planet - one tree and forest at a time. Recycle With Dell As you upgrade computers and electronics, please join our efforts to keep technology out of the world's landfills. Recycling your home and business computers - Dell Inspiron 13z | Me and My Dell - Page 166
programs themselves, only the user-specified settings. Also, some programs may not work with Windows 7. Check your program documentation for more information. • User accounts and settings like desktop backgrounds, screen savers, and accessibility options • Internet settings and favorites • Music 166 - Dell Inspiron 13z | Me and My Dell - Page 167
state designed primarily for laptops. While sleep puts your work and settings in memory and draws a small amount of power, hibernation puts your open documents and programs on your hard disk, and then turns off your computer. Of all the power-saving states in Windows, hibernation uses the least - Dell Inspiron 13z | Me and My Dell - Page 168
it puts any open documents and programs in memory and on your hard disk, and then puts your computer into a low-power state so that you can quickly resume your work. That way, if a power failure occurs, Windows can restore your work from your hard disk. When hybrid sleep is turned on, putting
-
 1
1 -
 2
2 -
 3
3 -
 4
4 -
 5
5 -
 6
6 -
 7
7 -
8
-
9
-
10
-
11
-
12
-
13
-
14
-
15
-
16
-
17
-
18
-
19
-
20
-
21
-
22
-
23
-
24
-
25
-
26
-
27
-
28
-
29
-
30
-
31
-
32
-
33
-
34
-
35
-
36
-
37
-
38
-
39
-
40
-
41
-
42
-
43
-
44
-
45
-
46
-
47
-
48
-
49
-
50
-
51
-
52
-
53
-
54
-
55
-
56
-
57
-
58
-
59
-
60
-
61
-
62
-
63
-
64
-
65
-
66
-
67
-
68
-
69
-
70
-
71
-
72
-
73
-
74
-
75
-
76
-
77
-
78
-
79
-
80
-
81
-
82
-
83
-
84
-
85
-
86
-
87
-
88
-
89
-
90
-
91
-
92
-
93
-
94
-
95
-
96
-
97
-
98
-
99
-
100
-
101
-
102
-
103
-
104
-
105
-
106
-
107
-
108
-
109
-
110
-
111
-
112
-
113
-
114
-
115
-
116
-
117
-
118
-
119
-
120
-
121
-
122
-
123
-
124
-
125
-
126
-
127
-
128
-
129
-
130
-
131
-
132
-
133
-
134
-
135
-
136
-
137
-
138
-
139
-
140
-
141
-
142
-
143
-
144
-
145
-
146
-
147
-
148
-
149
-
150
-
151
-
152
-
153
-
154
-
155
-
156
-
157
-
158
-
159
-
160
-
161
-
162
-
163
-
164
-
165
-
166
-
167
-
168
 |
 |

Me and My Dell
© 2013 Dell Inc.