Dell Latitude D630 XFR Service Manual - Page 13
XBay Devices
 |
View all Dell Latitude D630 XFR manuals
Add to My Manuals
Save this manual to your list of manuals |
Page 13 highlights
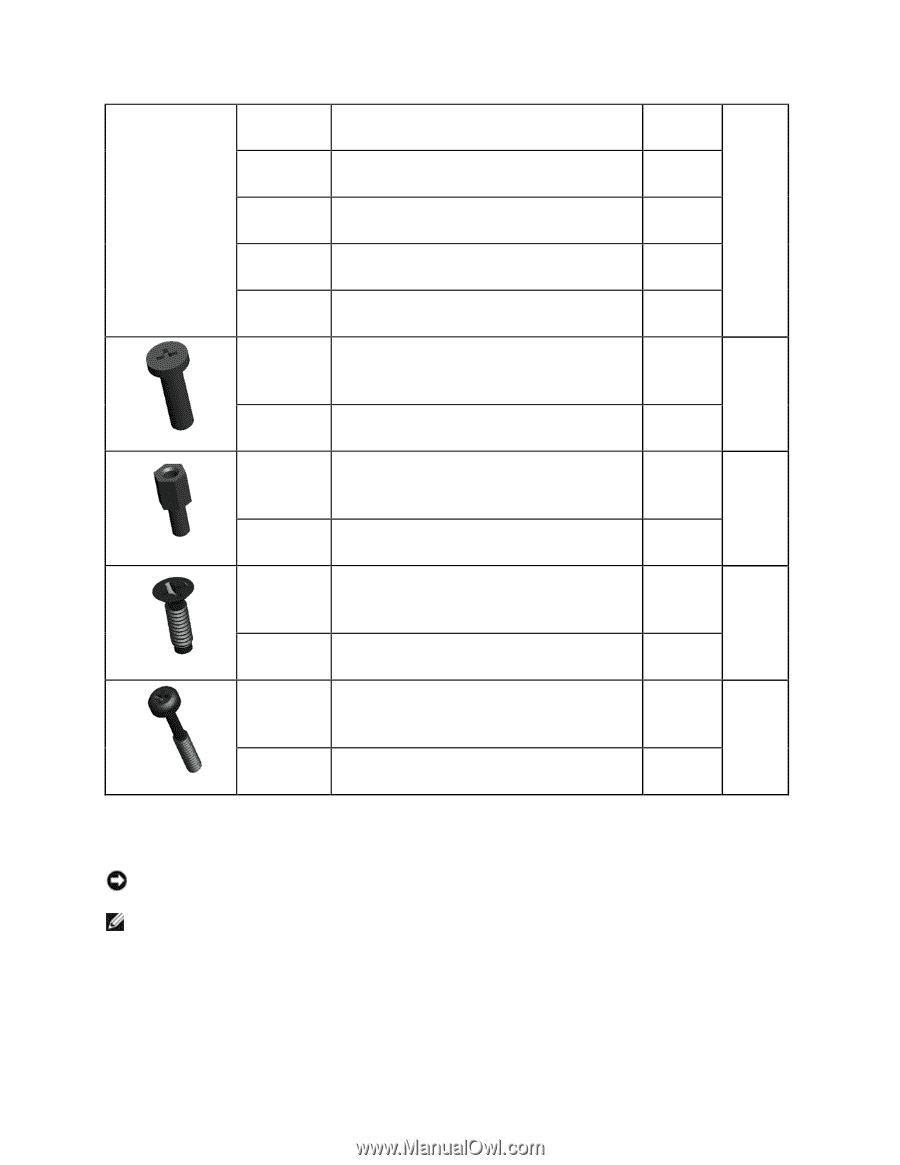
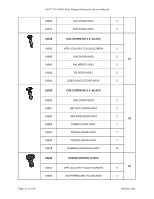
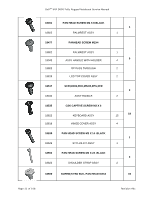
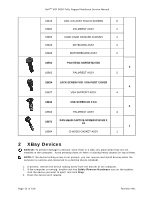
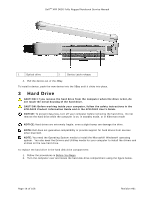
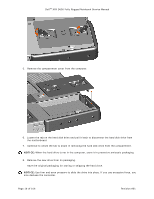
DellTM XFR D630 Fully Rugged Notebook Service Manual 18815 XFR LCD ASSY TOUCH SCREEN 8 18802 PALMREST ASSY 2 18803 CARD CAGE ON BASE CHASSIS 4 18623 KEYBOARD ASSY 3 18823 MOTHERBOARD ASSY 2 18591 18802 PAN HEAD SCREW M2.5X8 PALMREST ASSY 2 2 18634 JACK SCREW FOR VGA PORT COVER 4 18617 VGA SUPPORT ASSY 4 18642 18802 CSK SCREW M2 X 6.6 PALMREST ASSY 4 4 18671 PAN HEAD CAPTIVE SCREW-DVD M2 X 12 1 18804 CHASSIS GASKET ASSY 1 2 XBay Devices NOTICE: To prevent damage to devices, store them in a safe, dry place when they are not installed in the computer. Avoid pressing down on them or placing heavy objects on top of them. NOTE: If the device locking screw is not present, you can remove and install devices while the computer is running and connected to a docking device (docked). 1. If present, remove the device locking screw from the bottom of the computer. 2. If the computer is running, double-click the Safely Remove Hardware icon on the taskbar, click the device you want to eject, and click Stop. 3. Press the device latch release. Page 13 of 106 Revision A01
-
 1
1 -
2
-
3
-
4
-
5
-
6
-
7
-
 8
8 -
 9
9 -
 10
10 -
 11
11 -
 12
12 -
 13
13 -
 14
14 -
 15
15 -
 16
16 -
 17
17 -
 18
18 -
19
-
20
-
21
-
22
-
23
-
24
-
25
-
26
-
27
-
28
-
29
-
30
-
31
-
32
-
33
-
34
-
35
-
36
-
37
-
38
-
39
-
40
-
41
-
42
-
43
-
44
-
45
-
46
-
47
-
48
-
49
-
50
-
51
-
52
-
53
-
54
-
55
-
56
-
57
-
58
-
59
-
60
-
61
-
62
-
63
-
64
-
65
-
66
-
67
-
68
-
69
-
70
-
71
-
72
-
73
-
74
-
75
-
76
-
77
-
78
-
79
-
80
-
81
-
82
-
83
-
84
-
85
-
86
-
87
-
88
-
89
-
90
-
91
-
92
-
93
-
94
-
95
-
96
-
97
-
98
-
99
-
100
-
101
-
102
-
103
-
104
-
105
-
106
 |
 |