Dell Latitude XT2 XFR Service Manual
Dell Latitude XT2 XFR Manual
 |
View all Dell Latitude XT2 XFR manuals
Add to My Manuals
Save this manual to your list of manuals |
Dell Latitude XT2 XFR manual content summary:
- Dell Latitude XT2 XFR | Service Manual - Page 1
Dell™ Latitude™ XT2 XFR Service Manual - Dell Latitude XT2 XFR | Service Manual - Page 2
Dell™ Latitude™ XT2 XFR Service Manual Notes, Notices, and Cautions NOTE: A NOTE indicates important information that helps you make better use of your computer. CAUTION: A CAUTION indicates either potential damage to hardware or loss of data and tells you how to avoid the problem. WARNING: A - Dell Latitude XT2 XFR | Service Manual - Page 3
Dell™ Latitude™ XT2 XFR Service Manual Table of Contents 1 XT2 XFR FEATURES ...6 1.1 XT2 XFR USER MODES ...6 1.1.1 Notebook Mode...6 1.1.2 Tablet Mode ...7 1.2 XT2 XFR BUTTONS ...8 1.2.1 Tablet Buttons...8 1.2.2 Scroll Buttons ...8 1.3 XT2 XFR INTERFACE...9 1.3.1 Windows Vista/XP XT2 XFR Interface - Dell Latitude XT2 XFR | Service Manual - Page 4
4.23 GPS MODULE (OPTIONAL) ...70 4.23.1 Removing the GPS Module ...71 4.24 CAMERA MODULE (OPTIONAL) ...72 4.24.1 Removing the Camera Module 72 5 SPECIFICATIONS ...73 6 DELL DIAGNOSTICS...74 6.1.1 Error Messages ...77 6.2 SOLVING PROBLEMS...78 6.2.1 Battery Problems ...78 6.2.2 Drive Problems ...78 - Dell Latitude XT2 XFR | Service Manual - Page 5
Dell™ Latitude™ XT2 XFR Service Manual 6.2.8 Video and Display Problems ...83 6.3 DELL TECHNICAL UPDATE SERVICE...83 6.4 DELL SUPPORT UTILITY ...84 6.4.1 Clicking the Dell Support Icon ...84 6.4.2 Double-Clicking the Dell Support Icon 84 6.5 GPS DEVICE ...85 6.5.1 GPS Hardware Configuration ...85 - Dell Latitude XT2 XFR | Service Manual - Page 6
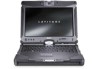
Dell™ Latitude™ XT2 XFR Service Manual 1 XT2 XFR Features 1.1 XT2 XFR User Modes 1.1.1 Notebook Mode Your XT2 XFR can be used either in notebook mode or tablet mode. To use your XT2 XFR in notebook mode, open the display until it reaches a comfortable viewing angle as in the image to the above, and - Dell Latitude XT2 XFR | Service Manual - Page 7
Press the latch down to secure the display. When you convert your XT2 XFR between notebook and tablet modes, the screen orientation of your XT2 XFR will automatically change according to the settings you have established in the Dell Control Point System Manager application or the Windows Vista Pen - Dell Latitude XT2 XFR | Service Manual - Page 8
, the screen image rotates clockwise 90 degrees. Dell Control Point tablet settings button - Press this button to view and configure options for the XT2 XFR and the pen through Dell Control Point System Manager. You can configure this button to perform a different action using Windows Vista™ XT2 XFR - Dell Latitude XT2 XFR | Service Manual - Page 9
use the Tablet and Pen Settings in Windows Vista. 1.3 XT2 XFR Interface 1.3.1 Windows Vista/XP XT2 XFR Interface Comparison Depending on the configuration you ordered, your XT2 XFR shipped with either the Windows Vista or Windows XP operating system. There are several differences in the Tablet PC - Dell Latitude XT2 XFR | Service Manual - Page 10
Dell™ Latitude™ XT2 XFR Service Manual The table below describes how to use the pen. Electrostatic Pen Usage Appearance Action Function Gently tap the pen tip on the screen of your Tablet PC. Same as a single-click on a mouse. Gently tap the pen tip twice in quick succession on the Same as a - Dell Latitude XT2 XFR | Service Manual - Page 11
Dell™ Latitude™ XT2 XFR Service Manual You can use the writing pad, the character pad, or the on-screen keyboard to enter text. The writing pad and the character pad convert your handwriting into typed text. The on-screen keyboard works just like a standard keyboard except that you enter text by - Dell Latitude XT2 XFR | Service Manual - Page 12
Dell™ Latitude™ XT2 XFR Service Manual Pen Flicks Pen flicks enable you to use the pen to perform actions that normally require a keyboard, such as pressing or using the directional arrow keys. Pen flicks are quick, directional gestures. You simply quickly draw a short line in one of eight - Dell Latitude XT2 XFR | Service Manual - Page 13
Dell™ Latitude™ XT2 XFR Service Manual Using the Pen as a Pen The native handwriting recognition software makes it easy to enter text into your applications with the pen. Some applications, such as Windows Journal, allow you to write with the pen directly into the application window. Tablet PC - Dell Latitude XT2 XFR | Service Manual - Page 14
Dell™ Latitude™ XT2 XFR Service Manual an InstallShield Wizard will use of both pen and touch but the seamless switching capability that Vista offers is not available. 1.4.3 N-trig Applet The N-trig Tablet Settings applet is used to adjust several settings for the digitizer. Once the N-trig drivers - Dell Latitude XT2 XFR | Service Manual - Page 15
™ Latitude™ XT2 XFR Service Manual Clicking on Properties opens up the N-trig Tablet Settings window. There are four tabs on the N-trig Tablet Settings window: • Digitizer Options • Interaction Options • Multi-Touch Gestures • About 1.4.3.1 Digitizer Options Tab The Digitizer Options tab is used - Dell Latitude XT2 XFR | Service Manual - Page 16
Dell™ Latitude™ XT2 XFR Service Manual 1.4.3.1.1 Input Mode Selection The N-trig applet has 4 operating modes: Pen Only - In this mode, the stylus is the only device that can be used as the input device with the N-trig digitizer. Changing from Pen Only mode to any other mode is done by clicking - Dell Latitude XT2 XFR | Service Manual - Page 17
Dell™ Latitude™ XT2 XFR Service Manual After the test is complete, the results are displayed as illustrated below. Use this table to define or touch may be malfunctioning in a specific physical display area. 47 Internal Firmware Internal Error Firmware Error Firmware resource problem in - Dell Latitude XT2 XFR | Service Manual - Page 18
Dell™ Latitude™ XT2 XFR Service Manual 49 Host Timeout Error Capacitor 50 Calibration Required Host Timeout Error Hardware calibration is required Host communication or resources problem in executing diagnostics. Hardware calibration is required to gain maximum performance. 1.4.3.2 - Dell Latitude XT2 XFR | Service Manual - Page 19
Dell™ Latitude™ XT2 XFR Service Manual Scroll Gesture Placing two fingers on the screen and moving them horizontally or vertically generates scrolling in the direction of movement: right, left, up, or down. Zoom Gesture Touching the screen with two fingers and moving them together or apart generates - Dell Latitude XT2 XFR | Service Manual - Page 20
Dell™ Latitude™ XT2 XFR Service Manual 1.5 XT2 XFR Pen Your XT2 XFR uses a specifically designed electrostatic pen or stylus for use in tablet PC mode. Instead of relying on battery power, the energy source for the stylus is magnetic energy produced by the excitation coil built into the digitizer - Dell Latitude XT2 XFR | Service Manual - Page 21
Dell™ Latitude™ XT2 XFR Service Manual 1. Open Dell Control Point. 2. Click System Tablet Settings. 3. On the Dell Tablet Settings window, click Pen & Input then click Calibrate. 4. Follow the instructions on the screen. The calibration markers are displayed on the screen as plus signs (+). Tap - Dell Latitude XT2 XFR | Service Manual - Page 22
Dell™ Latitude™ XT2 XFR Service Manual 1.6 Application Matrix The following matrix shows the gestures supported by the operating system and specific application software packages. Other applications may also respond to these gestures. Operating System Microsoft™ Windows Vista™ Microsoft Windows - Dell Latitude XT2 XFR | Service Manual - Page 23
on your XT2 XFR. Damage due to servicing that is not authorized by Dell is not covered by your warranty. CAUTION: To avoid electrostatic discharge, ground yourself by using a wrist grounding strap or by periodically touching an unpainted metal surface, such as a connector on the back of the computer - Dell Latitude XT2 XFR | Service Manual - Page 24
Dell™ Latitude™ XT2 XFR Service Manual CAUTION: To guard against electrical shock, always unplug your XT2 XFR from the electrical outlet before opening the display. CAUTION: Before touching anything inside your XT2 XFR, ground yourself by touching an unpainted metal surface, such as the metal at the - Dell Latitude XT2 XFR | Service Manual - Page 25
Dell™ Latitude™ XT2 XFR Service Manual After you complete any replacement procedure, ensure you connect any external devices, cards, and cables before turning on your computer. CAUTION: To avoid damage to the XT2 XFR, use only the battery designed for this particular Dell computer. Do not use - Dell Latitude XT2 XFR | Service Manual - Page 26
Dell™ Latitude™ XT2 XFR Service Manual 9 WIFI ASSEMBLY 10 HINGE PLATE TO CHASSIS Palm Rest 1 KEYBOARD DOOR 2 TOUCH PAD ASSEMBLY 3 USB HUB BOARD 4 BLUETOOTH MODULE (option) 5 KEYBOARD 6 Upper Palm Rest Screw LCD inner- Bezel 1 FPR board LCD Outer 1 Rocker Switch Assy 2 Antenna bracket - Dell Latitude XT2 XFR | Service Manual - Page 27
Dell™ Latitude™ XT2 XFR Service Manual Base to Palm rest 1 under the battery area 2 under the battery area 3 bottom side screws Battery Module KEYPAD / HINGE COVER 1 Battery module assy 1 Captive screw-M2 Dimms Door 1 Captive screw-M2 Latch Palm Rest 1 shoulder screw, Captive custom M2.5 - Dell Latitude XT2 XFR | Service Manual - Page 28
Dell™ Latitude™ XT2 XFR Service Manual 4.1.1 Removing the Main Battery 1. Follow the procedures in Before Working Inside Your XT2 XFR. 2. Slide the two battery-bay latch releases on the bottom of the XT2 XFR outward to each side. 3. Slide the battery out of the battery bay. Lift slightly using the - Dell Latitude XT2 XFR | Service Manual - Page 29
Dell™ Latitude™ XT2 XFR Service Manual 4. Rotate the door up to remove the battery. 5. Remove the battery. 4.1.3 Installing the Battery into the Battery Door 1. Place the bracket onto the battery. 2. Slide - Dell Latitude XT2 XFR | Service Manual - Page 30
Dell™ Latitude™ XT2 XFR Service Manual 3. Hold the bracket down and tighten the four captive screws. 4.2 Hinge Cover WARNING: Before working inside your XT2 XFR, read the safety information that shipped with your XT2 XFR. For additional safety best practices information, see the Regulatory - Dell Latitude XT2 XFR | Service Manual - Page 31
Dell™ Latitude™ XT2 XFR Service Manual 4.3 Keyboard WARNING: Before working inside your XT2 XFR, read the safety information that shipped with your XT2 XFR. For additional safety best practices information, see the Regulatory Compliance Homepage at www.dell.com/regulatory_compliance. 4.3.1 Removing - Dell Latitude XT2 XFR | Service Manual - Page 32
Dell™ Latitude™ XT2 XFR Service Manual 5. Gently slide the keyboard towards the display. 6. Remove the two screws (M2 x 3-mm) securing the connector door to the palm rest. 7. Lift and remove the connector door. 8. Release the zif connector for the touchpad cable. Page 32 of 94 Version A00-01 - Dell Latitude XT2 XFR | Service Manual - Page 33
Dell™ Latitude™ XT2 XFR Service Manual 7. Disconnect the touch pad cable. 8. Release the zif connector for the keyboard cable. Page 33 of 94 Version A00-01 - Dell Latitude XT2 XFR | Service Manual - Page 34
Dell™ Latitude™ XT2 XFR Service Manual 9. Lift using the blue pull tab on the keyboard cable and disconnect the keyboard cable from the system board. 10. Remove the keyboard from the XT2 XFR. 4.4 Memory and Mini-Card Cover WARNING: Before working inside your XT2 XFR, read the safety information - Dell Latitude XT2 XFR | Service Manual - Page 35
Dell™ Latitude™ XT2 XFR Service Manual 4. Lift the cover up from the left side using the grip tab. 5. Lift the cover while sliding to the left, and remove from the XT2 XFR. Page 35 of 94 Version A00-01 - Dell Latitude XT2 XFR | Service Manual - Page 36
™ XT2 XFR Service Manual 4.5 Memory WARNING: Before working inside your XT2 XFR, read the safety information that shipped with your XT2 XFR. For additional safety best practices information, see the Regulatory Compliance Homepage at www.dell.com/regulatory_compliance. 4.5.1 Removing a Memory Module - Dell Latitude XT2 XFR | Service Manual - Page 37
Dell™ Latitude™ XT2 XFR Service Manual 4.6 Hard Drive WARNING: Before working inside your XT2 XFR, read the safety information that shipped with your XT2 XFR. For additional safety best practices information, see the Regulatory Compliance Homepage at www.dell.com/regulatory_compliance. 4.6.1 - Dell Latitude XT2 XFR | Service Manual - Page 38
Dell™ Latitude™ XT2 XFR Service Manual 4. Lift the handle to remove the hard drive from the XT2 XFR. Handle 4.7 Mini-Card WARNING: Before working inside your XT2 XFR, read the safety information that shipped with your XT2 XFR. For additional safety best practices information, see the Regulatory - Dell Latitude XT2 XFR | Service Manual - Page 39
4.7.1 Dell™ Latitude™ XT2 XFR Service Manual Removing the Mini-Card 1. Follow the procedures in Before Working Inside Your XT2 XFR. 2. Remove the battery from the XT2 XFR. 3. Remove the memory and mini-card cover before continuing. 4. Depending on the type of wireless adapter installed, disconnect - Dell Latitude XT2 XFR | Service Manual - Page 40
Dell™ Latitude™ XT2 XFR Service Manual 5. Use your finger to gently pry the retaining clips back and release the mini-card. 6. Remove the mini-card from the XT2 XFR at an angle. Page 40 of 94 Version A00-01 - Dell Latitude XT2 XFR | Service Manual - Page 41
Dell™ Latitude™ XT2 XFR Service Manual 4.8 Internal Card With Bluetooth® Wireless Technology WARNING: Before working inside your XT2 XFR, read the safety information that shipped with your XT2 XFR. For additional safety best practices information, see the Regulatory Compliance Homepage at www.dell. - Dell Latitude XT2 XFR | Service Manual - Page 42
Dell™ Latitude™ XT2 XFR Service Manual 6. Remove the Bluetooth assembly from the XT2 XFR. Page 42 of 94 Version A00-01 - Dell Latitude XT2 XFR | Service Manual - Page 43
Dell™ Latitude™ XT2 XFR Service Manual 4.9 Palm Rest WARNING: Before working inside your XT2 XFR, read the safety information that shipped with your XT2 XFR. For additional safety best practices information, see the Regulatory Compliance Homepage at www.dell.com/regulatory_compliance. 4.9.1 Removing - Dell Latitude XT2 XFR | Service Manual - Page 44
Dell™ Latitude™ XT2 XFR Service Manual 12. Lay the display assembly behind the chassis. 13. Gently lift the palm rest, moving the door opening over to the right slightly and disconnect - Dell Latitude XT2 XFR | Service Manual - Page 45
Dell™ Latitude™ XT2 XFR Service Manual 15. Remove the palm rest from the XT2 XFR. 4.9.2 Installing the Palm Rest 1. Insert the cable clamp over the LCD cables and secure with the cable clamp to base screws. CAUTION: Make sure the - Dell Latitude XT2 XFR | Service Manual - Page 46
Dell™ Latitude™ XT2 XFR Service Manual 3. Ensure the ribbon cable for the touch pad can be seen through the palm rest door, then place the palm rest over the chassis so the view through the door is over the touchpad connector. Insert the touch pad cable into the connector and close the lock tab. - Dell Latitude XT2 XFR | Service Manual - Page 47
Dell™ Latitude™ XT2 XFR Service Manual 6. With the LCD bracket rotated 90 degrees, set the display onto the chassis and align the bracket guide pins. Bracket guide pin 7. Install the back hinge cap and tighten the two screws securing the cover. 8. Install the front two screws securing the display - Dell Latitude XT2 XFR | Service Manual - Page 48
Dell™ Latitude™ XT2 XFR Service Manual 13. Install the WLAN/WWAN mini-cards. (See mini-card chapter for reference) 14. Install the memory module. (See memory chapter for reference) 15. Install the mini-card and memory door. (See memory cover chapter for reference) 16. Install the hard drive. (See - Dell Latitude XT2 XFR | Service Manual - Page 49
Dell™ Latitude™ XT2 XFR Service Manual 4.10.2 Installing the Coin-Cell Battery 1. Connect the coin-cell battery to the system board. 2. Place the tape side of the battery to the left - Dell Latitude XT2 XFR | Service Manual - Page 50
Dell™ Latitude™ XT2 XFR Service Manual 1. Follow the procedures in Before Working Inside Your XT2 XFR. 2. Follow the procedures in removing the palm rest before continuing. 3. Flip the palm rest over and remove the protective Mylar tape (covering the USB hub - Dell Latitude XT2 XFR | Service Manual - Page 51
Dell™ Latitude™ XT2 XFR Service Manual 4. Loosen and remove the screw holding the stylus bay housing to the chassis. 5. Unthread the cable and connector for the stylus bay. 6. Remove the Stylus Bay from the bottom chassis by lifting up. Being careful not to damage the grommet that seals to the base - Dell Latitude XT2 XFR | Service Manual - Page 52
Dell™ Latitude™ XT2 XFR Service Manual 4.13.1 Removing the Speaker 1. Follow the procedures in Before Working Inside Your XT2 XFR. 2. Follow the procedures in removing the palm rest before continuing. 3. Disconnect the speaker cable from the system board. 4. Remove the speaker assembly from the XT2 - Dell Latitude XT2 XFR | Service Manual - Page 53
Dell™ Latitude™ XT2 XFR Service Manual 4.14 WiFi Sniffer Assembly WARNING: Before working inside your XT2 XFR, read the safety information that shipped with your XT2 XFR. For additional safety best practices information, see the Regulatory Compliance Homepage at www.dell.com/regulatory_compliance. - Dell Latitude XT2 XFR | Service Manual - Page 54
Dell™ Latitude™ XT2 XFR Service Manual 4.15 Sniffer Button and Wifi Switch 1. Remove the sniffer button by inserting a plastic scribe on the top corner and lightly pressing down to relase the - Dell Latitude XT2 XFR | Service Manual - Page 55
Dell™ Latitude™ XT2 XFR Service Manual 3. Press the switches clips through the hole in the bracket until it locks in place. Set flat scribe here. NOTE: It may help to hold the tool and bracket in place with the flathead screwdriver and set the switch in place then use your index finger to hold the - Dell Latitude XT2 XFR | Service Manual - Page 56
Dell™ Latitude™ XT2 XFR Service Manual 4.16 System Board WARNING: Before working inside your XT2 XFR, read the safety information that shipped with your XT2 XFR. For additional safety best practices information, see the Regulatory Compliance Homepage at www.dell.com/regulatory_compliance. 4.16.1 - Dell Latitude XT2 XFR | Service Manual - Page 57
Dell™ Latitude™ XT2 XFR Service Manual 2 3 5 4 1 6 1 Speaker connection 2 Stylus connection 3 Coin-cell battery connection 4 WiFi sniffer connection 5 System board screw (2.5 x 5-mm) 6 System board screw at bracket (2.5 x 8-mm) 10. Carefully lift the gasket surround from - Dell Latitude XT2 XFR | Service Manual - Page 58
Dell™ Latitude™ XT2 XFR Service Manual 4.16.2 Installing the System Board 1. Examine the system board to make sure there are nine (9) insulation pads set around the grounding clips on the palmrest side of the system board, and one (1) on the processor side of the system board near the docking - Dell Latitude XT2 XFR | Service Manual - Page 59
Dell™ Latitude™ XT2 XFR Service Manual 5 System board screw (2.5 x 5-mm) 6 System board screw at bracket (2.5 x 8-mm) 4. Connect the sniffer switch cable to the system board. 5. Connect the stylus bay cable to the system board. 6. Connect the speaker to the system board. 7. Connect the video cable - Dell Latitude XT2 XFR | Service Manual - Page 60
Dell™ Latitude™ XT2 XFR Service Manual 5. Loosen the four captive screws on the heat sink. 16. Remove the top section of the heat sink assembly from the system board, then turn over the system board again. 17. Remove the bottom section of the heat sink assembly. Page 60 of 94 Version A00-01 - Dell Latitude XT2 XFR | Service Manual - Page 61
Dell™ Latitude™ XT2 XFR Service Manual NOTE: Make sure the insulator is attached to the system board prior to installation of the heat sink assembly. If this insulator is missing a replacement system board should be ordered. 4.18 Display Assembly WARNING: Before working inside your XT2 XFR, read - Dell Latitude XT2 XFR | Service Manual - Page 62
Dell™ Latitude™ XT2 XFR Service Manual 4.18.1 Removing the Display Assembly 1. Follow the procedures in Before Working Inside Your XT2 XFR. 2. Follow the procedures in Removing the palm rest before continuing. 3. From the inside of the XT2 XFR 6. Remove the rear two Dock Door Screws along with the - Dell Latitude XT2 XFR | Service Manual - Page 63
Dell™ Latitude™ XT2 XFR Service Manual 7. Remove the two (M2 x 3-mm) screws holding the RF Passthru board to the chassis and lift the RF passthru board up. 8. Disconnect the back Black/ - Dell Latitude XT2 XFR | Service Manual - Page 64
Dell™ Latitude™ XT2 XFR Service Manual 1 2 3 4 5 ID PCB Reference Wiring Color 1 WWAN - Back Black / Grey 2 GPS - Back Red 3 WLAN - Back Black 4 WWAN - Front Grey 5 WLAN - Front Black 3. Route the three cables under the tab for the docking door bracket, then install and tighten the - Dell Latitude XT2 XFR | Service Manual - Page 65
Dell™ Latitude™ XT2 XFR Service Manual 6. Set the three antenna cables from the display assembly within the memory door opening. 7. Place the grommet surrounding the cables into the grommet chamber. Be - Dell Latitude XT2 XFR | Service Manual - Page 66
Dell™ Latitude™ XT2 XFR Service Manual 10. Complete the assembly by performing Installing the palm rest. 4.19 RF Passthru 4.19.1 Removing the RF Passthru Board WARNING: Before working inside your XT2 XFR, read the safety information that shipped with your XT2 XFR. For additional safety best - Dell Latitude XT2 XFR | Service Manual - Page 67
Dell™ Latitude™ XT2 XFR Service Manual 1 2 3 4 5 ID PCB Reference Wiring Color 1 WWAN - Back Black / Grey 2 GPS - Back Red 3 WLAN - Back Black 4 WWAN - Front Grey 5 WLAN - Front Black 2. Set the RF Passthru board on the chassis, insert and tighten the two (2 x 3-mm) - Dell Latitude XT2 XFR | Service Manual - Page 68
Dell™ Latitude™ XT2 XFR Service Manual 4.21 Doors WARNING: Before working inside your XT2 XFR, read the safety information that shipped with your XT2 XFR. For additional safety best practices information, see the Regulatory Compliance Homepage at www.dell.com/regulatory_compliance. 4.21.1 Removing - Dell Latitude XT2 XFR | Service Manual - Page 69
Dell™ Latitude™ XT2 XFR Service Manual 4.21.3 Removing the Power Door 1. Follow the procedures in Before Working Inside Your XT2 XFR. 2. Remove the two(2.5 x 5-mm) screws from the door hinge connected to the bottom chassis. 3. Rotate the pull tab to release the lock and open the - Dell Latitude XT2 XFR | Service Manual - Page 70
XFR Service Manual Unlock Position WARNING: Before working inside your XT2 XFR, read the safety information that shipped with your XT2 XFR. For additional safety best practices information, see the Regulatory Compliance Homepage at www.dell.com/regulatory_compliance. 4.22.1 Removing the USB Module - Dell Latitude XT2 XFR | Service Manual - Page 71
XFR Service Manual Unlock Position WARNING: Before working inside your XT2 XFR, read the safety information that shipped with your XT2 XFR. For additional safety best practices information, see the Regulatory Compliance Homepage at www.dell.com/regulatory_compliance. 4.23.1 Removing the GPS Module - Dell Latitude XT2 XFR | Service Manual - Page 72
Dell™ Latitude™ XT2 XFR Service Manual 4.24 Camera Module (OPTIONAL) Unlock Position WARNING: Before working inside your XT2 XFR, read the safety information that shipped with your XT2 XFR. For additional safety best practices information, see the Regulatory Compliance Homepage at www.dell.com/ - Dell Latitude XT2 XFR | Service Manual - Page 73
Dell™ Latitude™ XT2 XFR Service Manual 5 Specifications NOTE: Offerings may vary by region. For more information regarding the configuration of your XT2 XFR, click Start (or Start in Windows XP)Help and Support, and then select the option to view information about your XT2 XFR. Processors Chipset - Dell Latitude XT2 XFR | Service Manual - Page 74
Dell™ Latitude™ XT2 XFR Service Manual 6 Dell Diagnostics CAUTION: Before you begin any of the procedures in this section, follow the safety instructions that shipped with your computer. When to Use the Dell Diagnostics If you experience a problem with your computer, perform the checks in Solving - Dell Latitude XT2 XFR | Service Manual - Page 75
active. For more information on using the system setup program, see the Dell™ Technology Guide on your computer or at support.dell.com. 1. Insert the Drivers and Utilities media into the optional external optical drive. 2. Restart your computer. 3. When the DELL logo appears, press immediately - Dell Latitude XT2 XFR | Service Manual - Page 76
Dell™ Latitude™ XT2 XFR Service Manual thirty minutes or more to complete. When the test completes, record the test results and then press any key to return to the previous menu. 9. At the Dell Diagnostics Main Menu, left-click with the touch pad/mouse, or press and then , to select - Dell Latitude XT2 XFR | Service Manual - Page 77
Dell™ Latitude™ XT2 XFR Service Manual NOTE: When contacting Dell Support, have your Service Tag ready. The Service Tag for your computer is located at the top of each test screen. The following tabs provide additional information for tests run from the Custom Test or Symptom Tree option: Tab - Dell Latitude XT2 XFR | Service Manual - Page 78
- Contact Dell Support. 6.2 Solving Problems CAUTION: Before you begin any of the procedures in this section, follow the safety instructions that shipped with your computer. Follow these tips when troubleshooting your computer: • If you added or removed a part before the problem started, review the - Dell Latitude XT2 XFR | Service Manual - Page 79
™ Latitude™ XT2 XFR Service Manual TEST THE DRIVE - • Insert another disc to eliminate the possibility that the original drive is defective. • Insert a bootable floppy disk and restart the computer. CLEAN THE DRIVE OR DISK - For information on cleaning your computer, see the Dell™ Technology Guide - Dell Latitude XT2 XFR | Service Manual - Page 80
Dell™ Latitude™ XT2 XFR Service Manual 6.2.3 IEEE 1394 Device Problems CAUTION: Before you begin any of the procedures in this section, follow the safety instructions that shipped with your computer. NOTE: Your computer supports only IEEE 1394a standard. ENSURE THAT THE CABLE FOR THE IEEE 1394 - Dell Latitude XT2 XFR | Service Manual - Page 81
Dell™ Latitude™ XT2 XFR Service Manual A Program Crashes Repeatedly NOTE: Most software includes installation instructions in its documentation or on a floppy disk, CD, or DVD. CHECK THE SOFTWARE DOCUMENTATION - If necessary, uninstall and then reinstall the program. A Program is Designed - Dell Latitude XT2 XFR | Service Manual - Page 82
Dell™ Latitude™ XT2 XFR Service Manual Save and close any open files and exit any open programs you are not using to see if that resolves the problem. • See the software documentation for minimum memory requirements. If necessary, install additional memory (see Replacing a Memory Module). • Reseat - Dell Latitude XT2 XFR | Service Manual - Page 83
Dell™ Latitude™ XT2 XFR Service Manual RUN THE HARDWARE TROUBLESHOOTER - See Hardware Troubleshooter. No Sound From Headphones CHECK THE HEADPHONE CABLE CONNECTION - Ensure that the headphone cable is securely inserted into the headphone connector. See the Setup and Features Information Guide for - Dell Latitude XT2 XFR | Service Manual - Page 84
Dell™ Latitude™ XT2 XFR Service Manual 6.4 Dell Support Utility The Dell Support Utility is installed on your computer and available from the Dell Support, , icon on the taskbar or from the Start button. Use this support utility for self-support information, software updates, and health scans of - Dell Latitude XT2 XFR | Service Manual - Page 85
Dell™ Latitude™ XT2 XFR Service Manual 6.5 GPS Device Follow the directions in the hot swappable modules section above to install the GPS device. Ensure the GPS device is properly seated and the lock is in the locked position. 6.5.1 GPS Hardware Configuration It is important that you configure your - Dell Latitude XT2 XFR | Service Manual - Page 86
Dell™ Latitude™ XT2 XFR Service Manual 3. Double-click on "Ports". Right-click on the USB Serial Port (COM#) device and select Properties. Page 86 of 94 Version A00-01 - Dell Latitude XT2 XFR | Service Manual - Page 87
Latitude™ XT2 XFR Service Manual 4. Select the Port Settings tab. Confirm that the following settings are assigned to each field shown below: Bits per second: 4800 Data bits: 8 Parity: none Stop bits: 1 Flow control: None 6.5.2 Software Configuration There are many off the shelf and usage specific - Dell Latitude XT2 XFR | Service Manual - Page 88
Dell™ Latitude™ XT2 XFR Service Manual 6.6 Camera Follow the directions in the Hot Swappable Module Devices section above to install the Camera device. Ensure the camera is properly seated and the lock is in the locked position. 6.6.1 Camera Configuration Verification If the camera is not working, - Dell Latitude XT2 XFR | Service Manual - Page 89
Dell™ Latitude™ XT2 XFR Service Manual 3. Double-click on "Imaging Device", and locate "USB UVC Webcam". a. If a 'Yellow Bang" appears on the device, then the drivers should be reinstalled. b. If "USB UVC Webcam" is under Device Manager, but the camera is non-functional, locate the "USB Composite - Dell Latitude XT2 XFR | Service Manual - Page 90
Dell™ Latitude™ XT2 XFR Service Manual If the USB device test fails the Camera only, replace the Camera module. If the ping test does not recognize a Camera module is attached, a replacement USB hub board may be needed or the USB cable checked for proper connection. If no USB devices are present, - Dell Latitude XT2 XFR | Service Manual - Page 91
Dell™ Latitude™ XT2 XFR Service Manual 6.8 Keyboard Status LEDs The green lights located above the Next Step 1. Install supported memory modules. 2. If memory is already present, reseat the module(s) one at time in each slot. 3. Try known good memory from another computer or replace the memory. - Dell Latitude XT2 XFR | Service Manual - Page 92
Dell™ Latitude™ XT2 XFR Service Manual ON-FLASH-ON OFF-FLASH-FLASH FLASH-FLASH-FLASH 4. Replace the system board. Memory is detected but has errors 1. Reseat the memory. 2. If two modules are installed remove one and test. Try the other module in the same slot and test. Test the other slot with - Dell Latitude XT2 XFR | Service Manual - Page 93
Dell™ Latitude™ XT2 XFR Service Manual 7 System BIOS Your XT2 XFR offers the following system BIOS options: • Bring up a one-time boot menu by pressing • Access the System Setup utility by pressing 7.1 BIOS Screen Navigation Keystrokes Use the following keystrokes to navigate the BIOS - Dell Latitude XT2 XFR | Service Manual - Page 94
™ Latitude™ XT2 XFR Service Manual Press to enter System Setup and change the user-definable settings. If you have trouble entering System Setup using this key, press when the keyboard LEDs first flash. Follow the on-screen instructions to view and/or change any settings. On each screen
-
 1
1 -
 2
2 -
 3
3 -
 4
4 -
 5
5 -
 6
6 -
 7
7 -
8
-
9
-
10
-
11
-
12
-
13
-
14
-
15
-
16
-
17
-
18
-
19
-
20
-
21
-
22
-
23
-
24
-
25
-
26
-
27
-
28
-
29
-
30
-
31
-
32
-
33
-
34
-
35
-
36
-
37
-
38
-
39
-
40
-
41
-
42
-
43
-
44
-
45
-
46
-
47
-
48
-
49
-
50
-
51
-
52
-
53
-
54
-
55
-
56
-
57
-
58
-
59
-
60
-
61
-
62
-
63
-
64
-
65
-
66
-
67
-
68
-
69
-
70
-
71
-
72
-
73
-
74
-
75
-
76
-
77
-
78
-
79
-
80
-
81
-
82
-
83
-
84
-
85
-
86
-
87
-
88
-
89
-
90
-
91
-
92
-
93
-
94
 |
 |

Dell™ Latitude™ XT2 XFR
Service Manual