Dell OptiPlex GX1p Dell OptiPlex GX1 and GX1p Midsize Managed PC Systems Refe
Dell OptiPlex GX1p Manual
 |
View all Dell OptiPlex GX1p manuals
Add to My Manuals
Save this manual to your list of manuals |
Dell OptiPlex GX1p manual content summary:
- Dell OptiPlex GX1p | Dell OptiPlex GX1 and GX1p Midsize Managed PC Systems
Refe - Page 1
® - Dell OptiPlex GX1p | Dell OptiPlex GX1 and GX1p Midsize Managed PC Systems
Refe - Page 2
Corporation is strictly forbidden. Trademarks used in this text: Dell, OptiPlex, and the DELL logo are registered trademarks, Dell OpenManage is a trademark, and DellWare is a registered service mark of Dell Computer Corporation; Intel, LANDesk, and Pentium are registered trademarks and MMX is - Dell OptiPlex GX1p | Dell OptiPlex GX1 and GX1p Midsize Managed PC Systems
Refe - Page 3
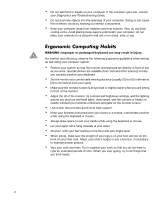
and to ensure your own personal safety. As you use your computer system, observe the following safety guidelines. To help avoid damaging your computer, be sure the voltage selection switch on the power supply is set to match the AC power available at your location: - 115 volts (V)/60 hertz (Hz) in - Dell OptiPlex GX1p | Dell OptiPlex GX1 and GX1p Midsize Managed PC Systems
Refe - Page 4
food or liquids on your computer. If the computer gets wet, consult your Diagnostics and Troubleshooting Guide. Do not push any objects into the openings of your computer. Doing so can cause fire or electric shock by shorting out interior components. Keep your computer away from radiators and heat - Dell OptiPlex GX1p | Dell OptiPlex GX1 and GX1p Midsize Managed PC Systems
Refe - Page 5
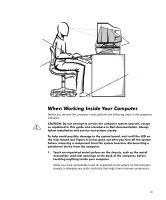
at or below eye level arms at desk level monitor and keyboard positioned directly in front of user feet flat on the floor Before you remove the computer cover, perform the following steps in the sequence indicated. While you work, periodically touch an unpainted metal surface on the - Dell OptiPlex GX1p | Dell OptiPlex GX1 and GX1p Midsize Managed PC Systems
Refe - Page 6
damage from electrostatic discharge (ESD): When unpacking a static-sensitive component from its shipping carton, do not remove the component from the antistatic packing material until you are ready to install the component in your computer. Just before unwrapping the antistatic packaging, be sure to - Dell OptiPlex GX1p | Dell OptiPlex GX1 and GX1p Midsize Managed PC Systems
Refe - Page 7
Handle all sensitive components in a static-safe area. If possible, use antistatic floor pads and workbench pads. The following caution may appear throughout this document to remind you of these precautions: ix - Dell OptiPlex GX1p | Dell OptiPlex GX1 and GX1p Midsize Managed PC Systems
Refe - Page 8
x - Dell OptiPlex GX1p | Dell OptiPlex GX1 and GX1p Midsize Managed PC Systems
Refe - Page 9
This guide is intended for anyone who uses a Dell OptiPlex GX1 or GX1p midsize Managed PC system. It can be used by both first-time and experienced computer users who want to learn about the features and operation of the systems or who want to upgrade their computers. The chapters and appendixes are - Dell OptiPlex GX1p | Dell OptiPlex GX1 and GX1p Midsize Managed PC Systems
Refe - Page 10
install these options in your Dell computer. Installation instructions for the options are included in this Reference and Installation Guide. Technical information files-sometimes called "readme" files-may be installed on your hard-disk drive to provide last-minute updates about technical changes to - Dell OptiPlex GX1p | Dell OptiPlex GX1 and GX1p Midsize Managed PC Systems
Refe - Page 11
helps you make better use of your computer system. The following list defines (where appropriate) and illustrates typographical conventions used as visual cues for specific font are part of an instruction and intended to be typed. Example: "Type format a: to format the diskette in drive A." Filenames - Dell OptiPlex GX1p | Dell OptiPlex GX1 and GX1p Midsize Managed PC Systems
Refe - Page 12
message, for example, or it can be text that you are instructed to type as part of a command (referred to as a command line). Screen text is presented in the Courier New font. Example: The following message appears on your screen: No boot - Dell OptiPlex GX1p | Dell OptiPlex GX1 and GX1p Midsize Managed PC Systems
Refe - Page 13
Using the Power Switch 1-10 Using the Optional Stand for Vertical Orientation 1-10 ENERGY STAR Compliance 1-11 Important Note for Windows 95 Users 1-12 Intel PIIX4 INF Update Installer for Windows 95 1-13 Accessing Online Documentation 1-14 Getting Help 1-14 Entering the System Setup Program - Dell OptiPlex GX1p | Dell OptiPlex GX1 and GX1p Midsize Managed PC Systems
Refe - Page 14
2-5 Drives: Primary and Secondary 2-5 Reserved Memory 2-6 CPU Speed 2-7 Num Lock 2-7 Chassis Intrusion 2-7 DAC Snoop 2-8 ACPI 2-8 Keyboard Errors 2-8 System Password 2-8 Password Status 2-9 Boot Sequence 2-9 Diskette First 2-9 Hard Disk Only 2-9 CD-ROM First 2-9 Device List 2-9 Setup - Dell OptiPlex GX1p | Dell OptiPlex GX1 and GX1p Midsize Managed PC Systems
Refe - Page 15
ICU 3-5 Accessing Help 3-5 Making Selections in the ICU 3-5 Adding a Listed Card 3-6 Adding an Unlisted Card 3-9 Modifying a Card 3-11 Removing a Card 3-16 Video Controller 4-1 Reinstalling DirectX and Video Drivers 4-1 Audio Controller 4-3 NIC 4-3 Network Cable Requirements 4-4 Setting - Dell OptiPlex GX1p | Dell OptiPlex GX1 and GX1p Midsize Managed PC Systems
Refe - Page 16
10 Removing a DIMM 6-11 Adding Video Memory (OptiPlex GX1 Only 6-11 Upgrading the Microprocessor 6-13 Replacing the System Battery 6-15 Removing and Replacing Front-Panel Inserts 7-2 Connecting Drives 7-3 Installing a Drive in a 5.25-Inch Drive Bay 7-5 Installing an EIDE Hard-Disk Drive 7-10 - Dell OptiPlex GX1p | Dell OptiPlex GX1 and GX1p Midsize Managed PC Systems
Refe - Page 17
Coverage During Year One D-1 Coverage During Years Two and Three D-2 General Provisions D-2 "Total Satisfaction" Return Policy (U.S. and Canada Only D-3 Year 2000 Statement of Compliance for Dell-Branded Hardware Products D-4 Previous Products D-4 Software D-5 Additional Information D-5 xix - Dell OptiPlex GX1p | Dell OptiPlex GX1 and GX1p Midsize Managed PC Systems
Refe - Page 18
Cover 5-4 Figure 5-3. Replacing the Computer Cover 5-5 Figure 5-4. Computer Orientation View 5-6 Figure 5-5. Inside the Chassis 5-8 Figure 5-6. System Board Jumpers 5-9 Figure 5-7. Removing the Expansion-Card Cage 5-13 Figure 5-8. Rotating the Power Supply 5-14 Figure 6-1. System Board - Dell OptiPlex GX1p | Dell OptiPlex GX1 and GX1p Midsize Managed PC Systems
Refe - Page 19
7-8. Inserting the New Drive Into the Drive Bay 7-7 Figure 7-9. Attaching Diskette/Tape Drive and DC Power Cables 7-8 Figure 7-10. Removing the Hard-Disk Drive Bracket 7-11 Figure 7-11. Inserting the Hard-Disk Drive in the Bracket 7-12 Figure 7-12. Attaching Hard-Disk Drive Cables 7-13 Figure - Dell OptiPlex GX1p | Dell OptiPlex GX1 and GX1p Midsize Managed PC Systems
Refe - Page 20
xxii - Dell OptiPlex GX1p | Dell OptiPlex GX1 and GX1p Midsize Managed PC Systems
Refe - Page 21
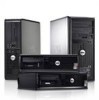
Dell® OptiPlex® GX1 and GX1p midsize Managed PC systems are high-speed, expandable personal computers designed around the Intel® Pentium® II microprocessor. Each computer system uses a high-performance Peripheral Component Interconnect (PCI) design that allows you to configure the computer system to - Dell OptiPlex GX1p | Dell OptiPlex GX1 and GX1p Midsize Managed PC Systems
Refe - Page 22
hard-disk drive in your computer. All hard-disk drives shipped with OptiPlex GX1 systems are SMART II-compliant. A basic input/output system (BIOS), which resides in flash memory and can be upgraded by diskette, or remotely over a network, if required. Full compliance with PCI specification - Dell OptiPlex GX1p | Dell OptiPlex GX1 and GX1p Midsize Managed PC Systems
Refe - Page 23
video graphics array (SVGA) video controller. On the Dell OptiPlex GX1, this video subsystem contains 4 MB (upgradable to 8 MB) of synchronous graphics random-access memory (SGRAM) video memory; the Dell OptiPlex GX1p comes with 8 MB of SGRAM video memory. Maximum resolutions are 1600 x 1200 with 65 - Dell OptiPlex GX1p | Dell OptiPlex GX1 and GX1p Midsize Managed PC Systems
Refe - Page 24
cards manually. After resources have been assigned to these cards, the system BIOS can assign resources to PCI and Plug and Play expansion cards for a conflict-free configuration. For more information, see Chapter 3, "Using the ISA Configuration Utility." 1-4 Dell OptiPlex GX1 and GX1p Midsize - Dell OptiPlex GX1p | Dell OptiPlex GX1 and GX1p Midsize Managed PC Systems
Refe - Page 25
"Manageability Features." Your Dell OptiPlex GX1 or GX1p Managed PC system incorporates many hardware and software features to improve the manageability of the system. Installed features include: Dell OpenManage program LANDesk® Service Agent Support Wakeup On LAN Auto Power On Security Features The - Dell OptiPlex GX1p | Dell OptiPlex GX1 and GX1p Midsize Managed PC Systems
Refe - Page 26
Management features of the Dell OpenManage include: Wakeup On LAN support, which allows network administrators to remotely turn on Managed PC systems with Wakeup On LAN capability in a Dell DMI network. 1-6 Dell OptiPlex GX1 and GX1p Midsize Managed PC Systems Reference and Installation Guide - Dell OptiPlex GX1p | Dell OptiPlex GX1 and GX1p Midsize Managed PC Systems
Refe - Page 27
following: Provide preboot support for a new Managed PC system that depends on the server for its initial operating system installation Service the network boot requests from the Managed PC systems Download diagnostics and BIOS update utilities Format the hard-disk drive, if required Download and - Dell OptiPlex GX1p | Dell OptiPlex GX1 and GX1p Midsize Managed PC Systems
Refe - Page 28
: Alert! Cover was previously removed. The field can be cleared using the System Setup program to enable future intrusions to be detected. For more information, see Chapter 2, "Using the System Setup Program." 1-8 Dell OptiPlex GX1 and GX1p Midsize Managed PC Systems Reference and Installation Guide - Dell OptiPlex GX1p | Dell OptiPlex GX1 and GX1p Midsize Managed PC Systems
Refe - Page 29
removal of your computer, loop the cable around an immovable object, insert the locking device into the security cable slot on the back of your computer, and lock the device with the key provided. Complete instructions available through the System Setup program. When the Setup Password category is - Dell OptiPlex GX1p | Dell OptiPlex GX1 and GX1p Midsize Managed PC Systems
Refe - Page 30
press the power switch to restart the system. Dell offers an optional stand that you can attach to the computer for a mini tower (vertical) orientation. Although you can attach (and remove) the in the cover. 1-10 Dell OptiPlex GX1 and GX1p Midsize Managed PC Systems Reference and Installation Guide - Dell OptiPlex GX1p | Dell OptiPlex GX1 and GX1p Midsize Managed PC Systems
Refe - Page 31
stand is in place, tighten the thumbscrew. To remove the stand, turn the computer over so the stand is at the top, loosen the Power Management category in the System Setup program. For instructions, see Chapter 2, "Using the System Setup Program." NOTES: As an ENERGY STAR® Partner, Dell Computer - Dell OptiPlex GX1p | Dell OptiPlex GX1 and GX1p Midsize Managed PC Systems
Refe - Page 32
hard-disk drive. Should you need to reinstall Windows 95 on an OptiPlex GX1 or GX1p system for any reason, you must be sure to reinstall the correct version. Dell recommends performing a periodic tape backup of the system's entire hard-disk drive so that, if necessary, the operating system, drivers - Dell OptiPlex GX1p | Dell OptiPlex GX1 and GX1p Midsize Managed PC Systems
Refe - Page 33
82371EB component. Before you can perform the update, you must make a diskette copy of the update software from the disk image on the hard-disk drive. To make the diskette copy, use the Program Diskette Maker, which is located in the Dell Accessories folder. Refer to the online System User's Guide - Dell OptiPlex GX1p | Dell OptiPlex GX1 and GX1p Midsize Managed PC Systems
Refe - Page 34
on your hard-disk drive contains information on the following topics: How to use the online System User's Guide System features Using drivers and utilities Using the integrated audio controller Using the System Setup program Configuring expansion cards Securing your computer Connecting external - Dell OptiPlex GX1p | Dell OptiPlex GX1 and GX1p Midsize Managed PC Systems
Refe - Page 35
to know the kind of diskette drive(s) and hard-disk drive(s) installed in your computer. If you are unsure of any of this information, see the Manufacturing Test Report that was shipped with your system and is located in the Dell Accessories folder. Enter the System Setup program as follows: If your - Dell OptiPlex GX1p | Dell OptiPlex GX1 and GX1p Midsize Managed PC Systems
Refe - Page 36
input/output system (BIOS). Configuration options The box on the left half of both screens lists the options that define the installed hardware in your computer. Fields beside the the System Setup program. 2-2 Dell OptiPlex GX1 and GX1p Midsize Managed PC Systems Reference and Installation Guide - Dell OptiPlex GX1p | Dell OptiPlex GX1 and GX1p Midsize Managed PC Systems
Refe - Page 37
changes you make are recorded but do not take effect until the next time you boot the system. For a few options (as noted in the help area), the changes take effect immediately. Exits the System Setup program and reboots the system, implementing any changes you have made. Resets the selected option - Dell OptiPlex GX1p | Dell OptiPlex GX1 and GX1p Midsize Managed PC Systems
Refe - Page 38
configuration options title box help Page 1 of 2 Dell Computer Corporation (www.dell.com) System OptiPlex GX1 400M Setup BIOS Version: XXX Time: 13:17:02 Date: Mon April 1, 1998 This category sets the time in Diskette Drive A: Diskette Drive B: Drives: 3.5 inch, 1.44 MB Not Installed 24- - Dell OptiPlex GX1p | Dell OptiPlex GX1 and GX1p Midsize Managed PC Systems
Refe - Page 39
B identify the type of diskette drives installed in your computer. With the standard cabling configuration, Diskette Drive A (the boot diskette drive) is the 3.5-inch diskette drive installed in the top externally accessible drive bay; Diskette Drive B is any drive installed in the bottom externally - Dell OptiPlex GX1p | Dell OptiPlex GX1 and GX1p Midsize Managed PC Systems
Refe - Page 40
a memory expansion card that needs to be addressed starting at 15 MB. Selecting the 15M - 16M option in the Reserved Memory option specifies that the base memory from 15 to 16 MB come from the memory expansion 2-6 Dell OptiPlex GX1 and GX1p Midsize Managed PC Systems Reference and Installation Guide - Dell OptiPlex GX1p | Dell OptiPlex GX1 and GX1p Midsize Managed PC Systems
Refe - Page 41
the 15-MB address comes from the dual in-line memory modules [DIMMs] on the system board). The Reserved Memory option has the following options: None (the default option) 512K - 640K 15M - 16M CPU Speed indicates the processor speed at which your system boots. Press the left- or right-arrow key to - Dell OptiPlex GX1p | Dell OptiPlex GX1 and GX1p Midsize Managed PC Systems
Refe - Page 42
on assigning a system password and using or changing an existing system password. See "Disabling a Forgotten Password" found later in this chapter for instructions on disabling a forgotten system password. 2-8 Dell OptiPlex GX1 and GX1p Midsize Managed PC Systems Reference and Installation Guide - Dell OptiPlex GX1p | Dell OptiPlex GX1 and GX1p Midsize Managed PC Systems
Refe - Page 43
finds a diskette that is not bootable in the drive or finds a problem with the drive itself, it displays an error message. If it does not find a diskette in the drive, the system tries to boot from the hard-disk drive (drive 0), then from the CD-ROM drive, and finally from the Plug and Play network - Dell OptiPlex GX1p | Dell OptiPlex GX1 and GX1p Midsize Managed PC Systems
Refe - Page 44
system BIOS controller; any non-Plug and Play devices, such as network adapter cards; and any secondary controller cards, such as a small computer system interface (SCSI) adapter, installed in the computer. 2-10 Dell OptiPlex GX1 and GX1p Midsize Managed PC Systems Reference and Installation Guide - Dell OptiPlex GX1p | Dell OptiPlex GX1 and GX1p Midsize Managed PC Systems
Refe - Page 45
to the Device List option. Device List Dell Computer Corporation (www.dell.com) System OptiPlex 400M Setup BIOS Version: XXX Boot Device Priority: Diskette drive A LANDesk Service Agent for 3C090X Hard drive C: CD-ROM device Exclude from Boot Device Priority: The DEVICE LIST contains devices - Dell OptiPlex GX1p | Dell OptiPlex GX1 and GX1p Midsize Managed PC Systems
Refe - Page 46
Video Electronics Standards Association (VESA®) Display Power Management Signaling (DPMS)-compliant monitor, enabling the Power Management option reduces monitor power consumption during periods of keyboard and mouse inactivity 2-12 Dell OptiPlex GX1 and GX1p Midsize Managed PC Systems Reference and - Dell OptiPlex GX1p | Dell OptiPlex GX1 and GX1p Midsize Managed PC Systems
Refe - Page 47
, not all EIDE hard-disk drives support this feature. Enabling this feature for drives that do not support it may cause the EIDE drive to become inoperable until the computer is restarted and the Power Management option is disabled. In low-power mode, the disks inside the drive stop spinning. They - Dell OptiPlex GX1p | Dell OptiPlex GX1 and GX1p Midsize Managed PC Systems
Refe - Page 48
the remapping of ports, see "Connecting External Devices" in your online System User's Guide. Serial Port 1 and Serial Port 2 configure the system's built-in serial ports remapped to COM4 (I/O address 2E8h). 2-14 Dell OptiPlex GX1 and GX1p Midsize Managed PC Systems Reference and Installation Guide - Dell OptiPlex GX1p | Dell OptiPlex GX1 and GX1p Midsize Managed PC Systems
Refe - Page 49
Devices" in your online System User's Guide. Parallel Port configures the system's built bidirectional) port. Your system also supports ECP mode, which can be part of the boot routine, the system first checks for a primary hard-disk drive drive controller. Using the System Setup Program 2-15 - Dell OptiPlex GX1p | Dell OptiPlex GX1 and GX1p Midsize Managed PC Systems
Refe - Page 50
which is included with your software support utilities, to enter an asset tag number up to ten characters long into NVRAM. For information on using the utility, see "Using Drivers and Utilities" in your online System User's Guide. 2-16 Dell OptiPlex GX1 and GX1p Midsize Managed PC Systems Reference - Dell OptiPlex GX1p | Dell OptiPlex GX1 and GX1p Midsize Managed PC Systems
Refe - Page 51
remove the computer cover to change a jumper setting that disables the system password feature (see "Disabling a Forgotten Password" found later in this chapter). Note that you erase the setup password, using the following procedure: For instructions on changing the setting for Password Status, - Dell OptiPlex GX1p | Dell OptiPlex GX1 and GX1p Midsize Managed PC Systems
Refe - Page 52
keyboard and/or mouse to operate your system as usual. NOTE: If you have assigned a setup password (see "Using the Setup Password Feature" found later in this chapter), the system accepts your setup password as an alternate system password. 2-18 Dell OptiPlex GX1 and GX1p Midsize Managed PC Systems - Dell OptiPlex GX1p | Dell OptiPlex GX1 and GX1p Midsize Managed PC Systems
Refe - Page 53
** Number of unsuccessful password attempts: 3 System halted! Must power down. The number of unsuccessful attempts made to enter the key combination to move to Page 2 of the System Setup screens. For instructions on changing the setting for Password Status, see "Password Status" found - Dell OptiPlex GX1p | Dell OptiPlex GX1 and GX1p Midsize Managed PC Systems
Refe - Page 54
the majority of the System Setup options. When you start the System Setup program, Page 2 of the System Setup screens appears with the Setup Password option highlighted, prompting you to type the password. 2-20 Dell OptiPlex GX1 and GX1p Midsize Managed PC Systems Reference and Installation Guide - Dell OptiPlex GX1p | Dell OptiPlex GX1 and GX1p Midsize Managed PC Systems
Refe - Page 55
view, but not modify, the System Setup screens-with the following exceptions: You can still modify the Date, Time, CPU Speed, Num Lock, and Speaker options system or setup password, you cannot operate your system or change settings in the System Setup program until you remove the computer cover, - Dell OptiPlex GX1p | Dell OptiPlex GX1 and GX1p Midsize Managed PC Systems
Refe - Page 56
the Diagnostics and Troubleshooting Guide; instead, refer to the instructions in "Adding Memory" in Chapter 6 of this guide. If you are given an option of pressing either to continue or to run the System Setup program, press the key. 2-22 Dell OptiPlex GX1 and GX1p Midsize Managed PC - Dell OptiPlex GX1p | Dell OptiPlex GX1 and GX1p Midsize Managed PC Systems
Refe - Page 57
Component expansion cards manually by setting full Plug and Play support. Therefore, some Plug Dell-installed Windows NT operating system, the ICU is installed on the hard-disk drive as a diskette image. Use the Dell Program Diskette Maker (in the Dell 98 documentation for instructions on using - Dell OptiPlex GX1p | Dell OptiPlex GX1 and GX1p Midsize Managed PC Systems
Refe - Page 58
" found later in this chapter for detailed instructions. See your online System User's Guide or "Saving the System Configuration" and "Exiting From the ICU" found later in this chapter for detailed instructions. 3-2 Dell OptiPlex GX1 and GX1p Midsize Managed PC Systems Reference and Installation - Dell OptiPlex GX1p | Dell OptiPlex GX1 and GX1p Midsize Managed PC Systems
Refe - Page 59
on your hard-disk drive. (Your system may also be accompanied by an ISA Configuration Utility Diskette.) The ICU is also available through online services such as Dell's TechConnect bulletin board service (BBS). See your online System User's Guide or the chapter titled "Getting Help" in your - Dell OptiPlex GX1p | Dell OptiPlex GX1 and GX1p Midsize Managed PC Systems
Refe - Page 60
your system, use this procedure to create a backup of that diskette. See your operating system documentation for instructions on making a copy of a diskette. Use only the backup diskette when running the ICU. 3-4 Dell OptiPlex GX1 and GX1p Midsize Managed PC Systems Reference and Installation Guide - Dell OptiPlex GX1p | Dell OptiPlex GX1 and GX1p Midsize Managed PC Systems
Refe - Page 61
Play ISA, Plug and Play, and PCI expansion cards currently installed in the computer. The ICU window contains menus and a tool bar, as shown in Figure 3-1. When you choose a course of action, the ICU displays dialog boxes to guide you through the various steps. You can maneuver through each menu and - Dell OptiPlex GX1p | Dell OptiPlex GX1 and GX1p Midsize Managed PC Systems
Refe - Page 62
3-2 appears, listing the names of all available cards of that type. If the card is not listed, see the next section, "Adding an Unlisted Card." 3-6 Dell OptiPlex GX1 and GX1p Midsize Managed PC Systems Reference and Installation Guide - Dell OptiPlex GX1p | Dell OptiPlex GX1 and GX1p Midsize Managed PC Systems
Refe - Page 63
box. The resource values currently associated with the selected function are displayed in the Resources for Choice box. The resource values displayed are IRQ, DMA, Memory (Hex), and I/O Port (Hex). Using the ISA Configuration Utility 3-7 - Dell OptiPlex GX1p | Dell OptiPlex GX1 and GX1p Midsize Managed PC Systems
Refe - Page 64
You cannot manually enter a value; you must choose a setting from the list. If there is only one setting listed, Options button and later change the setting in the Configuration Choice box, the changes that you 3-8 Dell OptiPlex GX1 and GX1p Midsize Managed PC Systems Reference and Installation Guide - Dell OptiPlex GX1p | Dell OptiPlex GX1 and GX1p Midsize Managed PC Systems
Refe - Page 65
modifying the system configuration, you must turn off the system to install, remove, or change jumper settings on the non-Plug and Play ISA expansion . When you click this button, a Specify dialog box (in this case, Specify Interrupt) appears. Figure 3-7 shows the Configure Unlisted Card dialog box - Dell OptiPlex GX1p | Dell OptiPlex GX1 and GX1p Midsize Managed PC Systems
Refe - Page 66
fields provided by the Specify Memory or Specify I/O Port dialog box (see Figure 3-9). Click each box in succession to enter the beginning and ending addresses, and then click OK to complete the selection. 3-10 Dell OptiPlex GX1 and GX1p Midsize Managed PC Systems Reference and Installation Guide - Dell OptiPlex GX1p | Dell OptiPlex GX1 and GX1p Midsize Managed PC Systems
Refe - Page 67
also use this feature to force Plug and Play or PCI expansion cards to use specific resource values. This procedure is called locking a card. You should lock a card only if it uses static device drivers. See "Locking and Unlocking Cards" found later in this chapter for more information. NOTE: You - Dell OptiPlex GX1p | Dell OptiPlex GX1 and GX1p Midsize Managed PC Systems
Refe - Page 68
the Specify Memory or Specify I/O Port dialog box. A message box appears, notifying you either that the card is using its default settings or that it cannot use its default settings and must be reconfigured. 3-12 Dell OptiPlex GX1 and GX1p Midsize Managed PC Systems Reference and Installation Guide - Dell OptiPlex GX1p | Dell OptiPlex GX1 and GX1p Midsize Managed PC Systems
Refe - Page 69
a non-Plug and Play ISA expansion card from your computer: The ICU requests verification that you want to remove the card. The ICU returns to the ICU window. See "Removing an Expansion Card" in Chapter 6 for instructions. The ICU displays all resources currently used by your system. To view all - Dell OptiPlex GX1p | Dell OptiPlex GX1 and GX1p Midsize Managed PC Systems
Refe - Page 70
then prompts you for a filename. You can save the system configuration to nonvolatile random-access memory (NVRAM) as you configure each card's resources. To do so, select Save from the to save the changes. 3-14 Dell OptiPlex GX1 and GX1p Midsize Managed PC Systems Reference and Installation Guide - Dell OptiPlex GX1p | Dell OptiPlex GX1 and GX1p Midsize Managed PC Systems
Refe - Page 71
updated drivers that do not support this dynamic card configuration are referred to as static device drivers. To determine whether your expansion card has static device drivers, check the documentation that came with the drivers driver might not be able to find the card the next time the system boots - Dell OptiPlex GX1p | Dell OptiPlex GX1 and GX1p Midsize Managed PC Systems
Refe - Page 72
. See "Modifying a Card" found earlier in this chapter for more information. The Lock Resources box toggles the lock state of the selected configuration setting. 3-16 Dell OptiPlex GX1 and GX1p Midsize Managed PC Systems Reference and Installation Guide - Dell OptiPlex GX1p | Dell OptiPlex GX1 and GX1p Midsize Managed PC Systems
Refe - Page 73
your system came with a Dell-installed operating system, the video drivers for that operating system are installed on your hard-disk drive. For information on reinstalling video drivers, see "Using Drivers and Utilities" in your online System User's Guide. For instructions on changing to a different - Dell OptiPlex GX1p | Dell OptiPlex GX1 and GX1p Midsize Managed PC Systems
Refe - Page 74
Dell Accessories and click Program Disk Maker. If your computer is part of a centrally managed network, check with your network administrator for information on reinstalling drivers and utilities. To reinstall DirectX drivers locally on a system with a diskette drive, follow these steps: USB support - Dell OptiPlex GX1p | Dell OptiPlex GX1 and GX1p Midsize Managed PC Systems
Refe - Page 75
system are installed on your hard-disk drive. For information on reinstalling audio drivers, reconfiguring the audio controller, or using the audio utilities provided with your system, see "Using the Audio Controller" in your online System User's Guide. parallel port connector Your system - Dell OptiPlex GX1p | Dell OptiPlex GX1 and GX1p Midsize Managed PC Systems
Refe - Page 76
Your computer's NIC connector (an RJ45 connector located on the back panel) is designed for attaching an unshielded twisted pair (UTP) Ethernet cable. Press one end of 01 diskettes that were provided by Dell. 4-4 Dell OptiPlex GX1 and GX1p Midsize Managed PC Systems Reference and Installation Guide - Dell OptiPlex GX1p | Dell OptiPlex GX1 and GX1p Midsize Managed PC Systems
Refe - Page 77
time, you must install Windows NT 4.0 Service Pack 3 and the Bus-Mastering enhanced integrated drive electronics (EIDE) device drivers prior to installing the Windows NT 4.0 NIC driver. To connect your system to, and reconfigure it for use on, an Ethernet network, you must complete the following - Dell OptiPlex GX1p | Dell OptiPlex GX1 and GX1p Midsize Managed PC Systems
Refe - Page 78
. See Chapter 2, "Using the System Setup Program," for more information. For information on administrative users and privileges, see your Windows NT documentation. The Network Settings window appears. 4-6 Dell OptiPlex GX1 and GX1p Midsize Managed PC Systems Reference and Installation Guide - Dell OptiPlex GX1p | Dell OptiPlex GX1 and GX1p Midsize Managed PC Systems
Refe - Page 79
provided by Dell or its equivalent. Because of the advanced architecture of your system, some components do not function correctly with Windows 95 versions earlier than Service Release 2. Windows 95 and Windows 98 automatically detect and install the NIC driver. The following instructions are for - Dell OptiPlex GX1p | Dell OptiPlex GX1 and GX1p Midsize Managed PC Systems
Refe - Page 80
files to the system's hard-disk drive. See your Windows 95 or Windows 98 documentation for information about usernames and passwords. To connect your system to, and configure it for use on, an Ethernet network, you must complete the following steps: 4-8 Dell OptiPlex GX1 and GX1p Midsize Managed PC - Dell OptiPlex GX1p | Dell OptiPlex GX1 and GX1p Midsize Managed PC Systems
Refe - Page 81
Cable Requirements" found earlier in this section for more information. See Chapter 2, "Using the System Setup Program," for more information. a:\wfw311 a:\wfw311 If the Install Driver dialog box appears and prompts you for the el90x.dos driver, type a:\ndis2\dos and click OK to load the NDIS - Dell OptiPlex GX1p | Dell OptiPlex GX1 and GX1p Midsize Managed PC Systems
Refe - Page 82
use on, an Ethernet network, you must complete the following steps: See "Network Cable Requirements" found earlier in this section for more information. See Chapter 2, "Using the System Setup Program," for more information. (3c90xcfg.exe) 4-10 Dell OptiPlex GX1 and GX1p Midsize Managed PC Systems - Dell OptiPlex GX1p | Dell OptiPlex GX1 and GX1p Midsize Managed PC Systems
Refe - Page 83
to install options inside the computer. It describes how to remove and replace the computer cover and expansion-card cage, as well as rotate the power supply away from the system board. It also familiarizes you with the internal components you may handle if you install Dell hardware options. To make - Dell OptiPlex GX1p | Dell OptiPlex GX1 and GX1p Midsize Managed PC Systems
Refe - Page 84
packing material designed to protect it from electrostatic damage. Do not remove the packing material until you are ready to install the option. Use the following procedure to remove the computer cover: 5-2 Dell OptiPlex GX1 and GX1p Midsize Managed PC Systems Reference and Installation Guide - Dell OptiPlex GX1p | Dell OptiPlex GX1 and GX1p Midsize Managed PC Systems
Refe - Page 85
See "Using the Optional Stand for Vertical Orientation" in Chapter 1 for instructions. From the front of the computer, press in the two securing buttons (located on the sides of the cover toward the back the cover to the front of the chassis, and lift the cover away. Working Inside Your Computer 5-3 - Dell OptiPlex GX1p | Dell OptiPlex GX1 and GX1p Midsize Managed PC Systems
Refe - Page 86
that the securing buttons click into place. NOTE: The computer should be placed fully on a flat surface. It is difficult to align the cover if the front of the computer is hanging over the edge of a table. 5-4 Dell OptiPlex GX1 and GX1p Midsize Managed PC Systems Reference and Installation Guide - Dell OptiPlex GX1p | Dell OptiPlex GX1 and GX1p Midsize Managed PC Systems
Refe - Page 87
ledge hooks in slots (4) See "Using the Optional Stand for Vertical Orientation" in Chapter 1 for instructions. Figure 5-4 shows an overhead view of your computer to help you orient yourself when installing hardware options. Unless otherwise specified, locations or directions relative to the - Dell OptiPlex GX1p | Dell OptiPlex GX1 and GX1p Midsize Managed PC Systems
Refe - Page 88
removed. Refer to this illustration to locate interior features and components discussed in this guide. When you look inside your computer, note the direct current (DC) power cables coming from the power supply. These cables supply power to the system board; to internal diskette drives, hard-disk - Dell OptiPlex GX1p | Dell OptiPlex GX1 and GX1p Midsize Managed PC Systems
Refe - Page 89
your system's jumpers. Switches control various circuits or functions in your computer system. The switches you are most likely to encounter are dual in are normally packaged in groups of two or more switches in a plastic case. Two common types of DIP switches are slide switches and rocker switches - Dell OptiPlex GX1p | Dell OptiPlex GX1 and GX1p Midsize Managed PC Systems
Refe - Page 90
serial port 1 connector mouse connector keyboard connector USB connectors (2) serial port 2 connector video connector optional integrated NIC connector microphone jack chassis intrusion switch security cable slot line-in jack line-out jack 5-8 Dell OptiPlex GX1 and GX1p Midsize Managed PC Systems - Dell OptiPlex GX1p | Dell OptiPlex GX1 and GX1p Midsize Managed PC Systems
Refe - Page 91
jumpered unjumpered Working Inside Your Computer 5-9 - Dell OptiPlex GX1p | Dell OptiPlex GX1 and GX1p Midsize Managed PC Systems
Refe - Page 92
disabled. BIOS (default is 400 MHz. 450MHZ* Jumpered when the microprocessor will operate at an undetermined speed. NOTE: For the full name of an abbreviation or acronym used in this table, see the Glossary in your online System User's Guide. jumpered unjumpered 5-10 Dell OptiPlex GX1 and GX1p - Dell OptiPlex GX1p | Dell OptiPlex GX1 and GX1p Midsize Managed PC Systems
Refe - Page 93
-ROM audio interface connector DIMM_x DIMM socket DSKT Diskette/tape drive interface connector ENET NIC connector (optional) FAN Microprocessor fan connector HDLED Hard-disk drive LED in this table, see the Glossary in your online System User's Guide. Working Inside Your Computer 5-11 - Dell OptiPlex GX1p | Dell OptiPlex GX1 and GX1p Midsize Managed PC Systems
Refe - Page 94
processor SEC cartridge connector TAPI Telephony connector USB USB connectors VIDEO_UPGRADE Video-memory upgrade socket NOTE: For the full name of an abbreviation or acronym used in this table, see the Glossary in your online System User's Guide. Your Dell computer has a removable expansion - Dell OptiPlex GX1p | Dell OptiPlex GX1 and GX1p Midsize Managed PC Systems
Refe - Page 95
securing lever slots (2) left side of computer tabs (2) Use the following procedure to replace the expansion-card cage: Working Inside Your Computer 5-13 - Dell OptiPlex GX1p | Dell OptiPlex GX1 and GX1p Midsize Managed PC Systems
Refe - Page 96
To access some components on the system board, you may have to rotate the system power supply out of the way. Use the following procedure to rotate the power supply: . system power supply DC power cables AC power receptacle 5-14 Dell OptiPlex GX1 and GX1p Midsize Managed PC Systems Reference and - Dell OptiPlex GX1p | Dell OptiPlex GX1 and GX1p Midsize Managed PC Systems
Refe - Page 97
how to install the following options: Industry-Standard Architecture (ISA) and Peripheral Component Interconnect (PCI) expansion cards System memory Video memory Microprocessor This chapter also includes instructions for replacing the system battery, if necessary. Use Figure 6-1 to locate the - Dell OptiPlex GX1p | Dell OptiPlex GX1 and GX1p Midsize Managed PC Systems
Refe - Page 98
power input connector (POWER_1) SEC cartridge connector (SLOT1) microprocessor fan connector (FAN) CD-in connector (CD-IN) video connector MONITOR) front of computer video-memor y upgrade expansion cards.) 6-2 Dell OptiPlex GX1 and GX1p Midsize Managed PC Systems Reference and Installation Guide - Dell OptiPlex GX1p | Dell OptiPlex GX1 and GX1p Midsize Managed PC Systems
Refe - Page 99
8-bit ISA expansion card 16-bit ISA expansion card 32-bit PCI expansion card Expansion cards are installed on the computer's riser board (see Figure 6-3). The riser board plugs into the RISER connector on the system board (see Figure 6-1) and is considered an extension of the - Dell OptiPlex GX1p | Dell OptiPlex GX1 and GX1p Midsize Managed PC Systems
Refe - Page 100
install an expansion card: See Chapter 3, "Using the ISA Configuration Utility," for instructions. NOTE: If you install a PCI or Plug and Play expansion card, your the expansion card later in this procedure. 6-4 Dell OptiPlex GX1 and GX1p Midsize Managed PC Systems Reference and Installation Guide - Dell OptiPlex GX1p | Dell OptiPlex GX1 and GX1p Midsize Managed PC Systems
Refe - Page 101
filler bracket Insert the card-edge connector firmly into the expansion-card connector on the riser board. Gently rock the card into the connector until the card is fully seated (see Figure 6-5). expansion card card-edge connector riser board expansion-card connector expansion-card cage Installing - Dell OptiPlex GX1p | Dell OptiPlex GX1 and GX1p Midsize Managed PC Systems
Refe - Page 102
setup password has been assigned by someone else, contact your network administrator for information on resetting the chassis intrusion detector. Follow this procedure to remove an expansion card: See Chapter 3, "Using the ISA Configuration Utility," for instructions. 6-6 Dell OptiPlex GX1 and GX1p - Dell OptiPlex GX1p | Dell OptiPlex GX1 and GX1p Midsize Managed PC Systems
Refe - Page 103
your computer. NOTE: After you remove and replace the cover, the chassis intrusion detector will cause the following message to be displayed at the next system start-up: ALERT! Cover was previously removed. See Chapter 2, "Using the System Setup Program," for instructions. NOTE: If a setup password - Dell OptiPlex GX1p | Dell OptiPlex GX1 and GX1p Midsize Managed PC Systems
Refe - Page 104
DIMMs (3) DIMM sockets Table 6-1 lists sample memory configurations and shows valid DIMM combinations and socket placements for 128 MB 128 MB * These configurations are supported on the OptiPlex GX1 only. 6-8 Dell OptiPlex GX1 and GX1p Midsize Managed PC Systems Reference and Installation Guide - Dell OptiPlex GX1p | Dell OptiPlex GX1 and GX1p Midsize Managed PC Systems
Refe - Page 105
this procedure to perform a memory upgrade: See Figure 6-1 and Table 6-1. Follow the instructions in "Installing a DIMM" or Removing a DIMM," as appropriate, found later in this section. NOTE: After you remove and replace the cover, the chassis intrusion detector will cause the following message to - Dell OptiPlex GX1p | Dell OptiPlex GX1 and GX1p Midsize Managed PC Systems
Refe - Page 106
and Troubleshooting Guide for information on running the Dell Diagnostics and troubleshooting any problems that may occur. Use the following procedure to install a DIMM: For optimum performance, DIMMs should be installed in consecutive sockets beginning with socket A. 6-10 Dell OptiPlex GX1 and GX1p - Dell OptiPlex GX1p | Dell OptiPlex GX1 and GX1p Midsize Managed PC Systems
Refe - Page 107
clips (2) To remove a DIMM, press the securing clips outward (see Figure 6-8) simultaneously until the DIMM disengages from the socket (it should pop up slightly). You can upgrade video memory on an OptiPlex GX1 from 4 to 8 MB by installing a video-memory upgrade module (OptiPlex GX1p systems come - Dell OptiPlex GX1p | Dell OptiPlex GX1 and GX1p Midsize Managed PC Systems
Refe - Page 108
program. See Chapter 2, "Using the System Setup Program." If the video memory total is incorrect, turn off the system, remove the computer cover, and reseat the video-memory upgrade module in its socket. 6-12 Dell OptiPlex GX1 and GX1p Midsize Managed PC Systems Reference and Installation Guide - Dell OptiPlex GX1p | Dell OptiPlex GX1 and GX1p Midsize Managed PC Systems
Refe - Page 109
Guide for instructions on running the Dell Diagnostics and troubleshooting any problems that occur. To take advantage of future options in speed and functionality, you can replace the microprocessor on your system board with any Dell-supported microprocessor upgrade. Call your Dell sales - Dell OptiPlex GX1p | Dell OptiPlex GX1 and GX1p Midsize Managed PC Systems
Refe - Page 110
microprocessor's rated internal speed. For example, for a 333-megahertz (MHz) Intel Pentium II processor, a jumper plug should be installed on the pins labeled "333MHZ." (See Table 5-1 for more information.) 6-14 Dell OptiPlex GX1 and GX1p Midsize Managed PC Systems Reference and Installation Guide - Dell OptiPlex GX1p | Dell OptiPlex GX1 and GX1p Midsize Managed PC Systems
Refe - Page 111
changes the system configuration information in the System Setup program. See Chapter 2, "Using the System Setup Program." See your Diagnostics and Troubleshooting Guide for information on running the Dell Diagnostics and troubleshooting any problems that may occur. A 3.0-volt (V) CR2032 coin-cell - Dell OptiPlex GX1p | Dell OptiPlex GX1 and GX1p Midsize Managed PC Systems
Refe - Page 112
power. In this case, you must enter the System Setup restore the correct settings. See Chapter 2, "Using the System Setup Program," for instructions. The battery (see Figure 6-1) is mounted in a socket place. 6-16 Dell OptiPlex GX1 and GX1p Midsize Managed PC Systems Reference and Installation Guide - Dell OptiPlex GX1p | Dell OptiPlex GX1 and GX1p Midsize Managed PC Systems
Refe - Page 113
battery BATTERY socket NOTE: After you remove and replace the cover, the chassis intrusion detector will cause the following message to be displayed at the next system start-up: ALERT! Cover was previously removed. See Chapter 2, "Using the System Setup Program," for information on running the - Dell OptiPlex GX1p | Dell OptiPlex GX1 and GX1p Midsize Managed PC Systems
Refe - Page 114
6-18 Dell OptiPlex GX1 and GX1p Midsize Managed PC Systems Reference and Installation Guide - Dell OptiPlex GX1p | Dell OptiPlex GX1 and GX1p Midsize Managed PC Systems
Refe - Page 115
system interface (SCSI) hard-disk drive. The bay on the right (as you face the front of the computer) can hold a 1-inch-high (or smaller) drive, whereas the bay on the left accommodates a 1.6-inch-high (or smaller) drive. The next two sections contain information that you will need in several of - Dell OptiPlex GX1p | Dell OptiPlex GX1 and GX1p Midsize Managed PC Systems
Refe - Page 116
computer from dust particles and also to ensure proper airflow within the computer. Before you install a drive in an empty drive bay, you must first remove the front-panel insert. To remove (see Figure 7-2). 7-2 Dell OptiPlex GX1 and GX1p Midsize Managed PC Systems Reference and Installation Guide - Dell OptiPlex GX1p | Dell OptiPlex GX1 and GX1p Midsize Managed PC Systems
Refe - Page 117
To remove the insert covering the 3.5-inch bay, follow these steps: computer cover (upside down) eject button mechanism To replace the front-panel insert for the 3.5-inch bay, work from outside the cover. Place the insert in position, and press it into the opening. When installing a drive, you - Dell OptiPlex GX1p | Dell OptiPlex GX1 and GX1p Midsize Managed PC Systems
Refe - Page 118
pin 1 of the drive's interface connector. For the location of pin 1 on the drive's interface connector, see the documentation that came with the drive. When disconnecting an directly on the board or card. 7-4 Dell OptiPlex GX1 and GX1p Midsize Managed PC Systems Reference and Installation Guide - Dell OptiPlex GX1p | Dell OptiPlex GX1 and GX1p Midsize Managed PC Systems
Refe - Page 119
setting. Squeeze the metal tabs that extend from each side of the drive bracket toward each other, and pull the bracket out of the bay (see Figure 7-6). NOTE: For easier access inside the chassis, you may want to rotate the power supply out of the way temporarily. To do so, see "Rotating the - Dell OptiPlex GX1p | Dell OptiPlex GX1 and GX1p Midsize Managed PC Systems
Refe - Page 120
power cable and interface cable from the back of the drive before sliding the bracket out of the bay. To remove the old drive from the bracket, turn the drive/ drive (see Figure 7-7). bracket tabs (2) bracket 7-6 Dell OptiPlex GX1 and GX1p Midsize Managed PC Systems Reference and Installation Guide - Dell OptiPlex GX1p | Dell OptiPlex GX1 and GX1p Midsize Managed PC Systems
Refe - Page 121
in the order in which the holes are numbered (the holes are marked "1" through "4"). Make sure that both bracket tabs snap into place in the drive bay. 5.25-inch drive See "Installing an Expansion Card" in Chapter 6. If your system came with an EIDE CD-ROM or tape - Dell OptiPlex GX1p | Dell OptiPlex GX1 and GX1p Midsize Managed PC Systems
Refe - Page 122
remove the drive and adjust the position of the drive on the bracket, making sure to insert and tighten the screws in the order marked. Replace the drive in the drive bay, and then replace the computer cover. 7-8 Dell OptiPlex GX1 and GX1p Midsize Managed PC Systems Reference and Installation Guide - Dell OptiPlex GX1p | Dell OptiPlex GX1 and GX1p Midsize Managed PC Systems
Refe - Page 123
Not Installed. For EIDE CD-ROM and tape drives, set the appropriate Drive option (0 or 1) under Drives: Secondary to Auto. See your Diagnostics and Troubleshooting Guide for information on running the Dell Diagnostics and troubleshooting any problems that may occur. Use the following guidelines to - Dell OptiPlex GX1p | Dell OptiPlex GX1 and GX1p Midsize Managed PC Systems
Refe - Page 124
connector labeled "IDE1." (EIDE tape drives and CD-ROM drives should be connected to the EIDE interface connector labeled "IDE2.") Install an EIDE hard-disk drive in the hard-disk drive bracket as follows: 7-10 Dell OptiPlex GX1 and GX1p Midsize Managed PC Systems Reference and Installation Guide - Dell OptiPlex GX1p | Dell OptiPlex GX1 and GX1p Midsize Managed PC Systems
Refe - Page 125
it is configured for your computer system. If a hard-disk drive is already installed on the drive bracket, disconnect the DC power cable and EIDE cable from the drive. Remove the screw securing the hard-disk drive bracket to the front wall of the chassis. Grasp the front part of the bracket that - Dell OptiPlex GX1p | Dell OptiPlex GX1 and GX1p Midsize Managed PC Systems
Refe - Page 126
, so that it stays at the proper tilt. Let it brush the side of the drive cage as you lower it into the chassis until the two tabs at the bottom back position, and reinstall the screw you removed in step 4. 7-12 Dell OptiPlex GX1 and GX1p Midsize Managed PC Systems Reference and Installation Guide - Dell OptiPlex GX1p | Dell OptiPlex GX1 and GX1p Midsize Managed PC Systems
Refe - Page 127
and firmly seated. NOTE: After you remove and replace the cover, the chassis intrusion detector will cause the following message to be displayed at the next system start-up: ALERT! Cover was previously removed. See Chapter 2, "Using the System Setup Program," for instructions. Installing Drives 7-13 - Dell OptiPlex GX1p | Dell OptiPlex GX1 and GX1p Midsize Managed PC Systems
Refe - Page 128
After you update the System Setup settings, reboot the system. See your Diagnostics and Troubleshooting Guide for information on running the Dell Diagnostics and troubleshooting any problems that may occur. Refer to the documentation that came with your operating system. EIDE hard-disk drives must - Dell OptiPlex GX1p | Dell OptiPlex GX1 and GX1p Midsize Managed PC Systems
Refe - Page 129
host adapter card). A SCSI tape drive or digital audio tape (DAT) drive is configured as SCSI ID 6 (the default ID number for a tape drive). A SCSI CD-ROM drive is configured as SCSI ID 5. SCSI hard-disk drives are usually configured as SCSI ID 0. (The drive used to boot your system should always be - Dell OptiPlex GX1p | Dell OptiPlex GX1 and GX1p Midsize Managed PC Systems
Refe - Page 130
connectors attach to up to two SCSI hard-disk drives installed in the hard-disk drive brackets. If you are installing an computer as follows: See "SCSI Configuration Guidelines" found earlier in this section. 7-16 Dell OptiPlex GX1 and GX1p Midsize Managed PC Systems Reference and Installation Guide - Dell OptiPlex GX1p | Dell OptiPlex GX1 and GX1p Midsize Managed PC Systems
Refe - Page 131
adapter card as well as "Removing an Expansion Card" and "Installing an Expansion Card" in Chapter 6. Connect the hard-disk drive access cable to the SCSI hard-disk drive access indicator on the computer's front panel whenever one of the SCSI hard-disk drives is accessed. For additional instructions - Dell OptiPlex GX1p | Dell OptiPlex GX1 and GX1p Midsize Managed PC Systems
Refe - Page 132
chassis intrusion detector will cause the following message to be displayed at the next system start-up: ALERT! Cover was previously removed. See Chapter 2, "Using the System Setup Program," for instructions. 7-18 Dell OptiPlex GX1 and GX1p Midsize Managed PC Systems Reference and Installation Guide - Dell OptiPlex GX1p | Dell OptiPlex GX1 and GX1p Midsize Managed PC Systems
Refe - Page 133
. For instructions, see the next subsection, "Partitioning and Formatting SCSI Hard-Disk Drives," and your operating system documentation. Test a SCSI hard-disk drive by running the SCSI Device(s) test group of the Dell Diagnostics. See your Diagnostics and Troubleshooting Guide for information - Dell OptiPlex GX1p | Dell OptiPlex GX1 and GX1p Midsize Managed PC Systems
Refe - Page 134
7-20 Dell OptiPlex GX1 and GX1p Midsize Managed PC Systems Reference and Installation Guide - Dell OptiPlex GX1p | Dell OptiPlex GX1 and GX1p Midsize Managed PC Systems
Refe - Page 135
internally/100 MHz externally. Design provides for future Dell-supported upgrades. A slower compatibility speed can be set through the System Setup program. Internal cache 32-KB first-level (16-KB data cache; 16-KB instruction cache) L2 cache memory 512-KB pipelined-burst, four-way setassociative - Dell OptiPlex GX1p | Dell OptiPlex GX1 and GX1p Midsize Managed PC Systems
Refe - Page 136
two 3.5-inch bays: one for a 1-inch-high hard-disk drive and one for a 1.6-inch-high hard-disk drive NOTE: For the full name of an abbreviation or acronym used in this table, see the Glossary in the online System User's Guide. A-2 Dell OptiPlex GX1 and GX1p Midsize Managed PC Systems Reference and - Dell OptiPlex GX1p | Dell OptiPlex GX1 and GX1p Midsize Managed PC Systems
Refe - Page 137
EIDE hard-disk drive 40-pin connector on PCI local bus Secondary EIDE hard-disk drive . . . . . 40-pin connector on PCI local bus Diskette drive 34-pin connector Video type ATI 3D Rage Pro AGP 2X controller Video memory 4 MB standard (upgradable to 8 MB) on the GX1; 8 MB standard on the GX1p - Dell OptiPlex GX1p | Dell OptiPlex GX1 and GX1p Midsize Managed PC Systems
Refe - Page 138
on options installed NOTE: For the full name of an abbreviation or acronym used in this table, see the Glossary in the online System User's Guide. A-4 Dell OptiPlex GX1 and GX1p Midsize Managed PC Systems Reference and Installation - Dell OptiPlex GX1p | Dell OptiPlex GX1 and GX1p Midsize Managed PC Systems
Refe - Page 139
35,000 ft) NOTE: For the full name of an abbreviation or acronym used in this table, see the Glossary in the online System User's Guide. Technical Specifications A-5 - Dell OptiPlex GX1p | Dell OptiPlex GX1 and GX1p Midsize Managed PC Systems
Refe - Page 140
A-6 Dell OptiPlex GX1 and GX1p Midsize Managed PC Systems Reference and Installation Guide - Dell OptiPlex GX1p | Dell OptiPlex GX1 and GX1p Midsize Managed PC Systems
Refe - Page 141
ICU from running correctly, as well as informing you of resource conflicts that prevent the configuration of various cards in your computer. If you receive a message from the ICU, see Table B-1 for suggestions on resolving any problems indicated by the message. ISA Configuration Utility Messages B-1 - Dell OptiPlex GX1p | Dell OptiPlex GX1 and GX1p Midsize Managed PC Systems
Refe - Page 142
enough memory to run the utility. The ICU cannot find the Make sure to switch to drive A before attempting index file for its database. to start the utility. The device driver in the online System User's Guide. B-2 Dell OptiPlex GX1 and GX1p Midsize Managed PC Systems Reference and Installation - Dell OptiPlex GX1p | Dell OptiPlex GX1 and GX1p Midsize Managed PC Systems
Refe - Page 143
be added. No more values are available for the resource you are trying to add or modify. No more memory values can be added. No more I/O port values can be added. The maximum number of values for table, see the Glossary in the online System User's Guide. ISA Configuration Utility Messages B-3 - Dell OptiPlex GX1p | Dell OptiPlex GX1 and GX1p Midsize Managed PC Systems
Refe - Page 144
methods, remove the new card. If you were modifying an existing card, reset the modified card to its previous resource value. NOTE: For the full name of an abbreviation or acronym used in this table, see the Glossary in the online System User's Guide. B-4 Dell OptiPlex GX1 and GX1p Midsize - Dell OptiPlex GX1p | Dell OptiPlex GX1 and GX1p Midsize Managed PC Systems
Refe - Page 145
example, type cd a:\db. The name of the configuration file is part of this card ID. For example, if the card ID is ICU0200 card to the settings in the next display (see the card's manual) before installing it. This message can appear in two situations: Guide. ISA Configuration Utility Messages B-5 - Dell OptiPlex GX1p | Dell OptiPlex GX1 and GX1p Midsize Managed PC Systems
Refe - Page 146
failed. See Chapter 7, "Getting Help," in your Diagnostics and Troubleshooting Guide for instructions. NOTE: For the full name of an abbreviation or acronym used in this table, see the Glossary in the online System User's Guide. B-6 Dell OptiPlex GX1 and GX1p Midsize Managed PC Systems Reference - Dell OptiPlex GX1p | Dell OptiPlex GX1 and GX1p Midsize Managed PC Systems
Refe - Page 147
are unable to determine the cause of the error, see the chapter titled "Getting Help" in your Diagnostics and Troubleshooting Guide for instructions. Use the following procedure: Follow steps 2 through 6 of "Removing an Expansion Card" in Chapter 6, and then return to this procedure. Follow steps - Dell OptiPlex GX1p | Dell OptiPlex GX1 and GX1p Midsize Managed PC Systems
Refe - Page 148
device is using the resource. See "Modifying a Card" in Chapter 3 for instructions. NOTE: For the full name of an abbreviation or acronym used in this table, see the Glossary in the online System User's Guide. B-8 Dell OptiPlex GX1 and GX1p Midsize Managed PC Systems Reference and Installation - Dell OptiPlex GX1p | Dell OptiPlex GX1 and GX1p Midsize Managed PC Systems
Refe - Page 149
3 for instructions. If your Plug and Play or PCI expansion card is not automatically configured when you reboot the system with all other cards removed, you should contact the manufacturer of the card or see Chapter 7, "Getting Help," in your Diagnostics and Troubleshooting Guide. Perform the - Dell OptiPlex GX1p | Dell OptiPlex GX1 and GX1p Midsize Managed PC Systems
Refe - Page 150
B-10 Dell OptiPlex GX1 and GX1p Midsize Managed PC Systems Reference and Installation Guide - Dell OptiPlex GX1p | Dell OptiPlex GX1 and GX1p Midsize Managed PC Systems
Refe - Page 151
branch circuits. If necessary, consult a Regulatory EMC representative of Dell Computer Corporation or an experienced radio/television technician for additional suggestions. You may find the FCC Interference Handbook, 1986, to be helpful. It is available from the U.S. Government Printing Office - Dell OptiPlex GX1p | Dell OptiPlex GX1 and GX1p Midsize Managed PC Systems
Refe - Page 152
complies with Part 15 of the FCC Rules. Operation is subject to the following two conditions: This device may not cause harmful interference. This device must accept any interference received, including interference that may cause undesired operation. C-2 Dell OptiPlex GX1 and GX1p Midsize Managed - Dell OptiPlex GX1p | Dell OptiPlex GX1 and GX1p Midsize Managed PC Systems
Refe - Page 153
experienced radio/television technician for help. The following information is provided on the device or devices covered in this document in compliance with FCC regulations: Product name: Dell OptiPlex GX1 or GX1p Model number: DCM Company name: Dell Computer Corporation EMC Engineering Department - Dell OptiPlex GX1p | Dell OptiPlex GX1 and GX1p Midsize Managed PC Systems
Refe - Page 154
or modifications not expressly approved by Dell Computer Corporation could void your authority to -Generic immunity standard Part 1: Residential, commercial Dell Products Europe BV, Limerick, Ireland. C-4 Dell OptiPlex GX1 and GX1p Midsize Managed PC Systems Reference and Installation Guide - Dell OptiPlex GX1p | Dell OptiPlex GX1 and GX1p Midsize Managed PC Systems
Refe - Page 155
A device on the specification label. The following applies to devices in Class A of EN 55022 (radius of protection up to 30 meters). The user of the device is obliged to take all steps necessary to remove sources of interference to telecommunication or other devices. - Most Dell computer systems are - Dell OptiPlex GX1p | Dell OptiPlex GX1 and GX1p Midsize Managed PC Systems
Refe - Page 156
according to the instruction manual. To determine which classification (Class A or B) applies to your computer system (or other Dell digital device), purposes. Class B devices are for nonbusiness purposes. C-6 Dell OptiPlex GX1 and GX1p Midsize Managed PC Systems Reference and Installation Guide - Dell OptiPlex GX1p | Dell OptiPlex GX1 and GX1p Midsize Managed PC Systems
Refe - Page 157
All equipment that works together (computer, monitor, printer, and so on) should have the same power supply source. The phasing conductor of (A). To completely switch off the equipment, the power supply cable must be removed from the power supply socket, which should be located near the equipment - Dell OptiPlex GX1p | Dell OptiPlex GX1 and GX1p Midsize Managed PC Systems
Refe - Page 158
A protection mark "B" confirms that the equipment is in compliance with the protection usage requirements of standards PN-93/T-42107 and PN-89/E-06251. -- -- - C-8 Dell OptiPlex GX1 and GX1p Midsize Managed PC Systems Reference and Installation Guide - Dell OptiPlex GX1p | Dell OptiPlex GX1 and GX1p Midsize Managed PC Systems
Refe - Page 159
with the requirements of the official Mexican standards (NOM): Exporter: Importer: Ship to: Supply voltage: Frequency: Current consumption: Dell Computer Corporation One Dell Way Round Rock, TX 78682 Dell Computer de México, S.A. de C.V. Rio Lerma No. 302 - 4° Piso Col. Cuauhtemoc 16500 México - Dell OptiPlex GX1p | Dell OptiPlex GX1 and GX1p Midsize Managed PC Systems
Refe - Page 160
16500 México, D.F. Dell Computer de México, S.A. de C.V. al Cuidado de Kuehne & Nagel de México S. de R.I. Avenida Soles No. 55 Col. Peñon de los Baños 15520 México, D.F. 115/230 VAC 60/50 Hz 6.0/3.0 A C-10 Dell OptiPlex GX1 and GX1p Midsize Managed PC Systems Reference and Installation Guide - Dell OptiPlex GX1p | Dell OptiPlex GX1 and GX1p Midsize Managed PC Systems
Refe - Page 161
including accident, abuse, misuse, problems with electrical power, servicing not authorized by Dell, usage not in accordance with product instructions, failure to perform required preventive maintenance, and problems caused by use of parts and components not supplied by Dell. This warranty does not - Dell OptiPlex GX1p | Dell OptiPlex GX1 and GX1p Midsize Managed PC Systems
Refe - Page 162
on the hard-disk drive(s) and any other storage device(s) in the product(s). Remove any removable media, such as diskettes, CDs, or PC Cards. Dell does not accept liability for lost data or software. Dell owns all parts removed from repaired products. Dell uses new and reconditioned parts made by - Dell OptiPlex GX1p | Dell OptiPlex GX1 and GX1p Midsize Managed PC Systems
Refe - Page 163
products, you must call Dell Customer Service to receive a Credit Return Authorization Number. Refer to the chapter titled "Getting Help" in your system's troubleshooting documentation or, for some systems, the section titled "Contacting Dell" in your system's online guide to find the appropriate - Dell OptiPlex GX1p | Dell OptiPlex GX1 and GX1p Midsize Managed PC Systems
Refe - Page 164
products that do not have an upgradable BIOS, Dell has made available, as a convenience to customers, the Dell Program Patch, a software utility designed to assist customers in managing the year 2000 rollover. D-4 Dell OptiPlex GX1 and GX1p Midsize Managed PC Systems Reference and Installation Guide - Dell OptiPlex GX1p | Dell OptiPlex GX1 and GX1p Midsize Managed PC Systems
Refe - Page 165
to be year 2000-compliant. For additional information on year 2000 compliance of Dell-branded hardware products, refer to Dell's Year 2000 Web site at http://www.dell.com/year2000 or contact a Dell customer service representative in your area. Warranty, Return Policy, and Year 2000 Statement of - Dell OptiPlex GX1p | Dell OptiPlex GX1 and GX1p Midsize Managed PC Systems
Refe - Page 166
D-6 Dell OptiPlex GX1 and GX1p Midsize Managed PC Systems Reference and Installation Guide - Dell OptiPlex GX1p | Dell OptiPlex GX1 and GX1p Midsize Managed PC Systems
Refe - Page 167
, location, 6-2 BIOS jumper, 5-10 revision number, 2-2 Boot Sequence option, 2-9 booting the computer system, 2-9 cables connector types, 7-4 DC power, 5-6, 7-3 drive interface, 5-6, 7-3 SCSI cables, 7-15, 7-16 cache secondary, 1-2 card-edge connector, 7-4 cautions, xiii CD-ROM audio interface - Dell OptiPlex GX1p | Dell OptiPlex GX1 and GX1p Midsize Managed PC Systems
Refe - Page 168
tape drives boot diskette drive, 7-2 cables, 7-3 connecting to power, 7-3 formatting, 7-14, 7-19 front-panel inserts, 7-2 location in chassis, 7-1 partitioning, 7-14, 7-19 terminators, 7-15 types supported, A-2 2 Dell OptiPlex GX1 and GX1p Midsize Managed PC Systems Reference and Installation Guide - Dell OptiPlex GX1p | Dell OptiPlex GX1 and GX1p Midsize Managed PC Systems
Refe - Page 169
problems, 1-14 floppy drives. See diskette drives formatting EIDE hard-disk drives, 7-14 SCSI hard-disk drives, 7-19 front-panel inserts, 7-2 getting help, 1-14 hard disk. See drives; EIDE hard-disk drives; SCSI devices Hard Disk Only option, 2-9 hard-disk drives. See drives; EIDE hard- disk drives - Dell OptiPlex GX1p | Dell OptiPlex GX1 and GX1p Midsize Managed PC Systems
Refe - Page 170
>, 2-22 , 2-1 ICU, 3-5 System Setup program, 2-3, 2-10 Level 2 Cache option, 2-16 line-in jack, 4-3, 5-8, 6-2 line-out jack, 4-3, 5-8, 6-2 logical formatting, 7-14, 7-19 low-level formatting, 7-19 4 Dell OptiPlex GX1 and GX1p Midsize Managed PC Systems Reference and Installation Guide - Dell OptiPlex GX1p | Dell OptiPlex GX1 and GX1p Midsize Managed PC Systems
Refe - Page 171
type supported, 1-1 mouse connector, 4-3, 5-8, 6-2 Mouse option, 2-14 MS-DOS network driver, 4-10 Network Driver Interface Specification. See NDIS network drivers MS-DOS partitioning EIDE hard-disk drives, 7-14 SCSI hard-disk drives, 7-19 Password Status option, 2-9 password. See setup password; - Dell OptiPlex GX1p | Dell OptiPlex GX1 and GX1p Midsize Managed PC Systems
Refe - Page 172
disabling and enabling, 2-14 service, 1-14 Service Tag option, 2-16 setup password about, 2-12 assigning, 2-20 changing or deleting an existing password, 2-21 disabling a forgotten password, 2-21 using, 2-20 6 Dell OptiPlex GX1 and GX1p Midsize Managed PC Systems Reference and Installation Guide - Dell OptiPlex GX1p | Dell OptiPlex GX1 and GX1p Midsize Managed PC Systems
Refe - Page 173
Setup Password option, 2-12 small computer system interface See SCSI, 6-17 sockets battery, 6-2 DIMM, 6-2 list of, 5-11 video-memory upgrade, 6-2 Sound option, 2-14 Speaker option, 2-16 specifications, A-1 speed jumpers setting, 5-10, 6-14 stand for vertical orientation, attaching, 1-10 support, 1- - Dell OptiPlex GX1p | Dell OptiPlex GX1 and GX1p Midsize Managed PC Systems
Refe - Page 174
Windows 95 DirectX and video drivers, 4-1 network driver, 4-7 reinstalling, 1-12 Windows 98 NIC driver, 4-7 Windows for Workgroups NIC driver, 4-8 Windows NT 3.5x NIC driver, 4-6 Windows NT 4.0 NIC driver, 4-5 8 Dell OptiPlex GX1 and GX1p Midsize Managed PC Systems Reference and Installation Guide
-
 1
1 -
 2
2 -
 3
3 -
 4
4 -
 5
5 -
 6
6 -
 7
7 -
8
-
9
-
10
-
11
-
12
-
13
-
14
-
15
-
16
-
17
-
18
-
19
-
20
-
21
-
22
-
23
-
24
-
25
-
26
-
27
-
28
-
29
-
30
-
31
-
32
-
33
-
34
-
35
-
36
-
37
-
38
-
39
-
40
-
41
-
42
-
43
-
44
-
45
-
46
-
47
-
48
-
49
-
50
-
51
-
52
-
53
-
54
-
55
-
56
-
57
-
58
-
59
-
60
-
61
-
62
-
63
-
64
-
65
-
66
-
67
-
68
-
69
-
70
-
71
-
72
-
73
-
74
-
75
-
76
-
77
-
78
-
79
-
80
-
81
-
82
-
83
-
84
-
85
-
86
-
87
-
88
-
89
-
90
-
91
-
92
-
93
-
94
-
95
-
96
-
97
-
98
-
99
-
100
-
101
-
102
-
103
-
104
-
105
-
106
-
107
-
108
-
109
-
110
-
111
-
112
-
113
-
114
-
115
-
116
-
117
-
118
-
119
-
120
-
121
-
122
-
123
-
124
-
125
-
126
-
127
-
128
-
129
-
130
-
131
-
132
-
133
-
134
-
135
-
136
-
137
-
138
-
139
-
140
-
141
-
142
-
143
-
144
-
145
-
146
-
147
-
148
-
149
-
150
-
151
-
152
-
153
-
154
-
155
-
156
-
157
-
158
-
159
-
160
-
161
-
162
-
163
-
164
-
165
-
166
-
167
-
168
-
169
-
170
-
171
-
172
-
173
-
174
 |
 |

®
ZZZ±GHOO±FRP
’HOO
±
²2SWL3OH[
±
²
*;³²DQG²*;³S²0LGVL]H²
0DQDJHG²3&²6\VWHPV
5()(5(1&(²$1’
,167$//$7,21²*8,’(