Dell PowerConnect W-AP175 Installation Guide - Page 19
Wrapping of Butyl Rubber
 |
View all Dell PowerConnect W-AP175 manuals
Add to My Manuals
Save this manual to your list of manuals |
Page 19 highlights
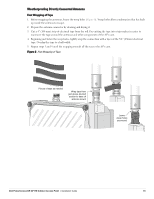
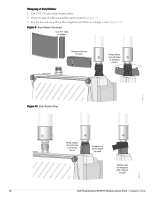
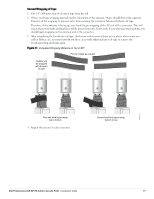
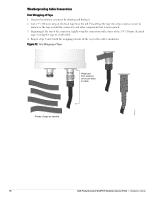
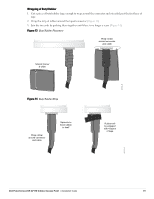
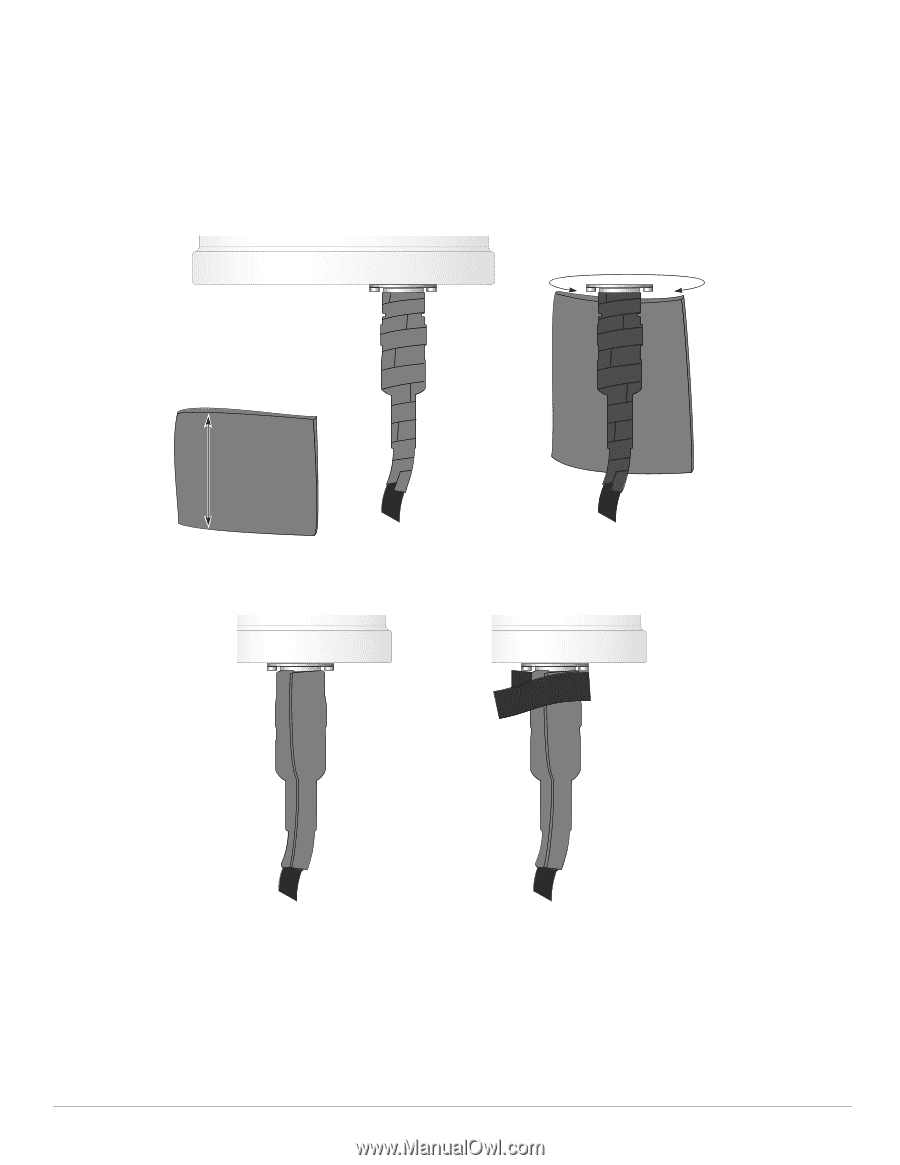
Wrapping of Butyl Rubber 1. Cut a piece of butyl rubber large enough to wrap around the connector and extended past the first layer of tape. 2. Wrap the strip of rubber around the taped connector (Figure 13) 3. Join the two ends by pushing them together until there is no longer a seam (Figure 14). Figure 13 Butyl Rubber Placement Wrap rubber around connector and cable Stretch thinner & wider AP175_18 Figure 14 Butyl Rubber Wrap Wrap rubber around connector and cable Squeeze to bond rubber to itself Rubber will be wrapped with 4 layers of tape AP175_19 Dell PowerConnect W-AP175 Outdoor Access Point | Installation Guide 19
-
 1
1 -
2
-
3
-
4
-
5
-
6
-
7
-
8
-
9
-
10
-
11
-
12
-
13
-
 14
14 -
 15
15 -
 16
16 -
 17
17 -
 18
18 -
 19
19 -
 20
20 -
 21
21 -
 22
22 -
 23
23 -
 24
24 -
25
-
26
-
27
-
28
-
29
-
30
-
31
-
32
 |
 |
Dell PowerConnect W-AP175 Outdoor Access Point
|
Installation Guide
19
Wrapping of Butyl Rubber
1.
Cut a piece of butyl rubber large enough to wrap around the connector and extended past the first layer of
tape.
2.
Wrap the strip of rubber around the taped connector (
Figure 13
)
3.
Join the two ends by pushing them together until there is no longer a seam (
Figure 14
).
Figure 13
Butyl Rubber Placement
Figure 14
Butyl Rubber Wrap
Stretch thinner
& wider
AP175_18
Wrap rubber
around connector
and cable
Squeeze to
bond rubber
to itself
Rubber will
be wrapped
with 4 layers
of tape
AP175_19
Wrap rubber
around connector
and cable