Dell Studio 15 Dell Studio 1555 Service Manual - Page 25
Replacing the Hard Drive
 |
View all Dell Studio 15 manuals
Add to My Manuals
Save this manual to your list of manuals |
Page 25 highlights
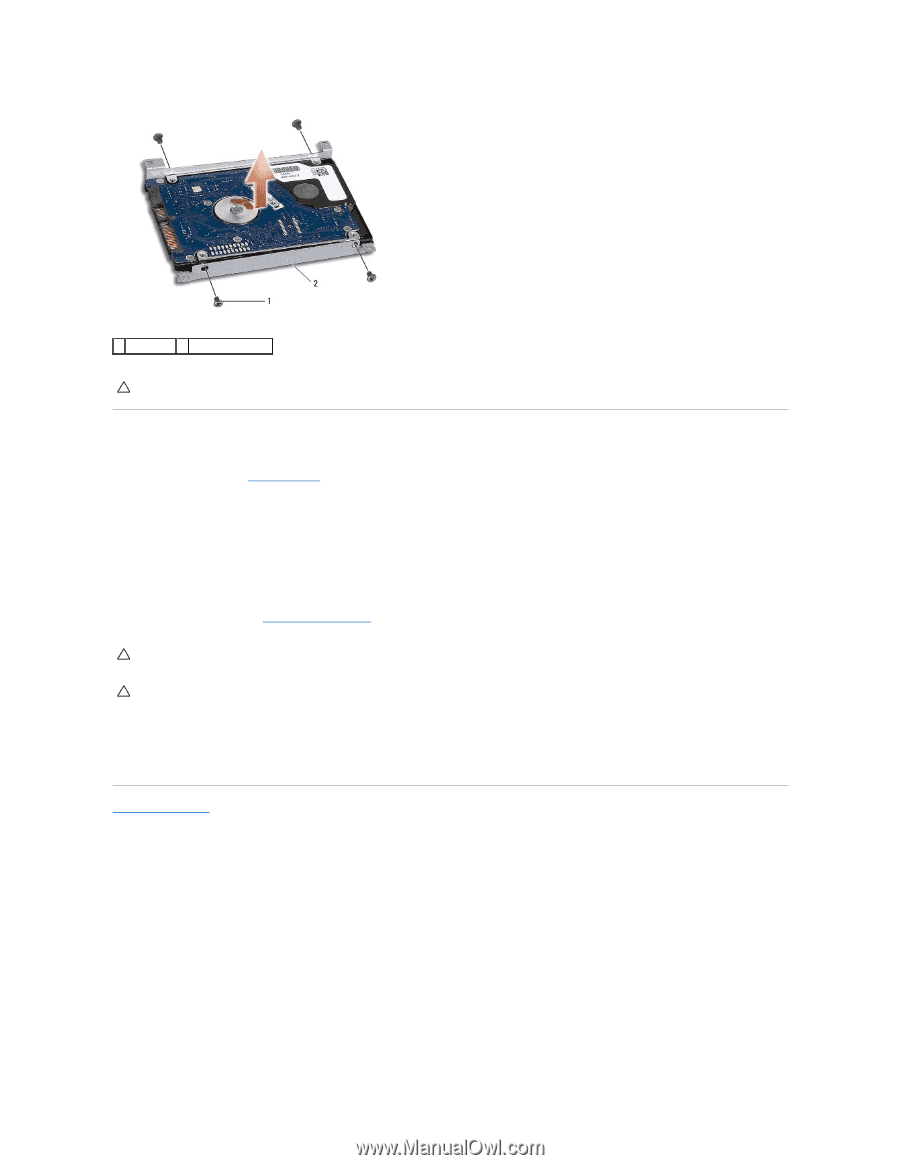
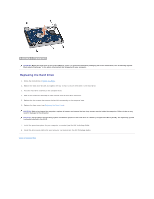
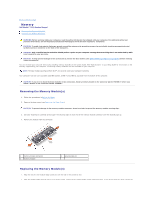
1 screws (4) 2 hard drive bracket CAUTION: When the hard drive is not in the computer, store it in protective antistatic packaging. For more information, see "Protecting Against Electrostatic Discharge" in the safety information that shipped with your computer. Replacing the Hard Drive 1. Follow the instructions in Before You Begin. 2. Replace the hard drive bracket and tighten the four screws to secure the bracket to the hard drive. 3. Place the hard drive assembly in the computer base. 4. Slide in the hard drive assembly to make contact with the hard drive connector. 5. Replace the four screws that secure the hard drive assembly to the computer base. 6. Replace the base cover (see Replacing the Base Cover). CAUTION: Before turning on the computer, replace all screws and ensure that no stray screws remain inside the computer. Failure to do so may result in damage to the computer. CAUTION: Do not follow the operating system installation process if the hard drive is a Factory-Imaged Hard Drive (FIHD). The operating system is already installed in the FIHD. 7. Install the operating system for your computer, as needed (see the Dell Technology Guide). 8. Install the drivers and utilities for your computer, as needed (see the Dell Technology Guide). Back to Contents Page
-
 1
1 -
2
-
3
-
4
-
5
-
6
-
7
-
8
-
9
-
10
-
11
-
12
-
13
-
14
-
15
-
16
-
17
-
18
-
19
-
 20
20 -
 21
21 -
 22
22 -
 23
23 -
 24
24 -
 25
25 -
 26
26 -
 27
27 -
 28
28 -
 29
29 -
 30
30 -
31
-
32
-
33
-
34
-
35
-
36
-
37
-
38
-
39
-
40
-
41
-
42
-
43
-
44
-
45
-
46
-
47
-
48
-
49
 |
 |