Dell Studio XPS M1640 Setup Guide
Dell Studio XPS M1640 Manual
 |
View all Dell Studio XPS M1640 manuals
Add to My Manuals
Save this manual to your list of manuals |
Dell Studio XPS M1640 manual content summary:
- Dell Studio XPS M1640 | Setup Guide - Page 1
SETUP GUIDE - Dell Studio XPS M1640 | Setup Guide - Page 2
- Dell Studio XPS M1640 | Setup Guide - Page 3
Model PP35L SETUP GUIDE - Dell Studio XPS M1640 | Setup Guide - Page 4
how to avoid the problem. WARNING: A WARNING Dell, the DELL logo, Studio XPS, Solution Station, and DellConnect are trademarks of Dell Inc.; Intel is a registered trademarks and Core is a trademark of Intel Corporation in U.S. and other countries; Microsoft, Windows, Windows Vista, and the Windows - Dell Studio XPS M1640 | Setup Guide - Page 5
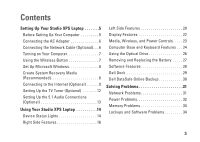
Your Studio XPS Laptop 14 Device Status Lights 14 Right Side Features 16 Left Side Features 20 Display Features 22 Media, Wireless, and Power Controls 23 Computer Base and Keyboard Features 24 Using the Optical Drive 26 Removing and Replacing the Battery 27 Software Features 28 Dell Dock - Dell Studio XPS M1640 | Setup Guide - Page 6
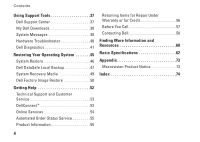
38 System Messages 38 Hardware Troubleshooter 40 Dell Diagnostics 41 Restoring Your Operating System 45 System Restore 46 Dell DataSafe Local Backup 47 System Recovery Media 49 Dell Factory Image Restore 50 Getting Help 52 Technical Support and Customer Service 53 DellConnect 53 Online - Dell Studio XPS M1640 | Setup Guide - Page 7
This section provides information to help you set up your Studio XPS™ 1640/1645/1647 laptop and connect peripherals. Before Setting Up Your Computer When positioning your computer, ensure that you have easy access to a power source, adequate ventilation, and a level surface to place your computer - Dell Studio XPS M1640 | Setup Guide - Page 8
Up Your Studio XPS Laptop Connecting the AC Adapter Connect the AC adapter to the computer and then plug it into a wall outlet or surge protector. Connecting the Network Cable (Optional) If you plan to use a wired network connection, plug in the network cable. WARNING: The AC adapter works with - Dell Studio XPS M1640 | Setup Guide - Page 9
on Your Computer Setting Up Your Studio XPS Laptop Using the Wireless Button To turn on wireless, with the computer turned on, lightly touch the wireless symbol on the center control cover and then release. To turn on your computer, lightly press the power button on the center control cover - Dell Studio XPS M1640 | Setup Guide - Page 10
Setting Up Your Studio XPS Laptop Set Up Microsoft Windows Your computer is preconfigured with the operating system you selected at the time of purchase. To set up Microsoft® Windows® for the first time, follow the instructions on the screen. These steps are mandatory and may take some time to - Dell Studio XPS M1640 | Setup Guide - Page 11
Studio XPS Laptop To create a system recovery media: 1. Ensure that the AC adapter is connected (see "Connecting the AC Adapter" on page 6). 2. Insert the disc or USB key in the computer. 3. Click Start → Programs→ Dell service for setup instructions. To complete setting up your wired Internet - Dell Studio XPS M1640 | Setup Guide - Page 12
. 4. In the search box, type network, and then click Network and Sharing Center→ Connect to a network. 5. Follow the instructions on the screen to complete the setup. 10 Windows Vista® 1. Ensure that wireless is enabled on your computer (see "Using the Wireless Button" on page 7). 2. Save and close - Dell Studio XPS M1640 | Setup Guide - Page 13
Setting Up Your Studio XPS Laptop To set up your Internet connection: Windows 7 1. Save and close any open files, and or contact your ISP. 4. Follow the instructions on the screen and use the setup information provided by your ISP to complete the setup. Windows Vista 1. Save and close any open - Dell Studio XPS M1640 | Setup Guide - Page 14
Setting Up Your Studio XPS Laptop Setting Up the TV Tuner (Optional) → Confirm Your Region and follow the instructions given. • Select Custom setup, --Follow the instructions given. --In the Optional Setup screen, choose Configure tuners, TV signal, and Guide. --Click Next and confirm your region - Dell Studio XPS M1640 | Setup Guide - Page 15
. Run IDT Audio Control Panel. In the Jacks tab, there are three connector icons. Follow the instructions to finish the setup. 1. Click the microphone icon, select Device: Rear Speakers, and plug your speaker cable to the right audio out/ headphone connector. Setting Up Your Studio XPS Laptop 13 - Dell Studio XPS M1640 | Setup Guide - Page 16
Using Your Studio XPS Laptop Your computer has several indicators, buttons, and features that provide information at-a-glance and time-saving shortcuts for common tasks. Device Status Lights 12 3 4 1 Hard drive activity light - Turns on when the computer reads or writes data. A flashing light - Dell Studio XPS M1640 | Setup Guide - Page 17
enabled. To turn on wireless, with the computer turned on, lightly touch the wireless symbol on the center control cover and then release. Using Your Studio XPS Laptop 15 - Dell Studio XPS M1640 | Setup Guide - Page 18
Using Your Studio XPS Laptop Right Side Features 3 2 1 7 6 5 4 1 ExpressCard slot - Supports one ExpressCard. NOTE: Your computer ships with a plastic blank installed in the to view and share digital photos, music, videos, and documents stored on the following digital memory cards: 16 - Dell Studio XPS M1640 | Setup Guide - Page 19
Secure Digital Input/Output (SDIO) card • Multi Media Card (MMC) • Memory Stick • Memory Stick PRO • xD-Picture Card (type - M and type - H) • Using Your Studio XPS Laptop 3 IEEE 1394 connector - Connects to high-speed serial multimedia devices, such as digital video cameras. 4 Optical Drive - - Dell Studio XPS M1640 | Setup Guide - Page 20
Studio XPS Laptop 5 eSATA/USB combo connector with USB PowerShare - Connects to eSATA compatible storage devices (such as external hard drives or optical drives) or USB devices (such as a mouse, keyboard, printer, external drive, or MP3 player). This connector can also be used for charging - Dell Studio XPS M1640 | Setup Guide - Page 21
on battery power • Solid amber - battery is low • Flashing amber - battery is critically low • Blinking white - computer is in sleep state On AC Adapter: • Solid white - computer is powered on and battery is charged • Blinking white - computer is in standby state Using Your Studio XPS Laptop - Dell Studio XPS M1640 | Setup Guide - Page 22
Your Studio XPS Laptop Left Side Features 8 7 6 45 3 2 1 10 9 1 Power light - Illuminates when the computer is turned on. The different lights indicate the following: On Battery Power: • Solid white - computer is running on battery power • Solid amber - battery is low • Flashing amber - battery - Dell Studio XPS M1640 | Setup Guide - Page 23
Using Your Studio XPS Laptop 3 VGA connector - Connects to a monitor or projector. 4 Antenna-in connector (on supported models) - Connects to an external antenna, through a MCX connector, to view programs using the TV Tuner card (optional). For more details on the TV Tuner - Dell Studio XPS M1640 | Setup Guide - Page 24
Studio XPS Laptop Display Features The display panel holds a camera and accompanying dual digital array microphones. 1 2 34 5 1 Display - Your display can vary based on selection you made when purchasing your computer. For more information about displays, see the Dell Technology Guide to manually - Dell Studio XPS M1640 | Setup Guide - Page 25
Using Your Studio XPS Laptop Media, Wireless, and Power Controls To use the media, wireless, and power controls, lightly touch the symbol and then release. The control's symbol will shine for 2 seconds to confirm your selection then fade away. Turn on power, or wake up from sleep state Turn on - Dell Studio XPS M1640 | Setup Guide - Page 26
Using Your Studio XPS Laptop Computer Base and Keyboard Features 1 2 3 4 24 1 Touch pad - Provides the functionality of a mouse to move the cursor, drag or move selected items, and left-click by tapping the surface. It supports circular scrolling and zoom. To change the circular scrolling and zoom - Dell Studio XPS M1640 | Setup Guide - Page 27
on the keyboard, see Dell Technology Guide. Backlit Keyboard/Touch Pad Brightness keyboard/touch pad brightness (default setting) b. no lighting c. half keyboard/touch pad brightness Using Your Studio XPS Laptop 4 Consumer IR - Allows certain software applications to be controlled by the Dell - Dell Studio XPS M1640 | Setup Guide - Page 28
Using Your Studio XPS Laptop Using the Optical Drive CAUTION: Do not use non-standard-size or shape discs (including mini-CDs and mini‑DVDs) as you will damage the drive. NOTE: Do not move the computer while playing or recording CDs and DVDs. Place the disc in the center of the disc slot, with - Dell Studio XPS M1640 | Setup Guide - Page 29
Using Your Studio XPS Laptop Removing and Replacing the Battery WARNING: Using an incompatible battery may increase the risk of fire or explosion. This computer should only use a battery purchased from Dell. Do not use batteries from other computers. WARNING: Before removing the battery, shut down - Dell Studio XPS M1640 | Setup Guide - Page 30
Using Your Studio XPS Laptop Software Features NOTE: For more information about the features described in this section, see the Dell Technology Guide on your hard drive or at support.dell.com. Productivity and Communication You can use your computer to create presentations, brochures, greeting - Dell Studio XPS M1640 | Setup Guide - Page 31
Studio XPS Laptop Dell Dock The Dell Right-click the Dock, click Add→ Category. The Add/Edit Category window is displayed. 2. Enter a title for the category in the Title and click Delete shortcut or Delete category. 2. Follow the instructions on the screen. Personalize the Dock 1. Right-click the - Dell Studio XPS M1640 | Setup Guide - Page 32
Using Your Studio XPS Laptop Dell DataSafe Online Backup NOTE: Dell DataSafe Online may not be available in all regions. NOTE: A broadband connection is recommended for fast upload/download speeds. Dell DataSafe Online is an automated backup and recovery service that helps protect your data and - Dell Studio XPS M1640 | Setup Guide - Page 33
Dell" on page 58. WARNING: Only trained service personnel should remove the computer cover. See the Service Manual at support.dell.com for advanced service and troubleshooting instructions. Network Problems using Dell Wireless WLAN Card Utility from your taskbar. You can also use Windows Wireless - Dell Studio XPS M1640 | Setup Guide - Page 34
10- Problems The power/battery lights on the hinges indicate the following: On Battery Power: • Solid white - computer is running on battery power • Solid amber - battery is low • Flashing amber - battery is critically low On AC Adapter: • Solid white - computer is powered on and battery is charged - Dell Studio XPS M1640 | Setup Guide - Page 35
until the computer turns off and then turn it back on. If the problem persists, see the Dell Technology Guide at support.dell.com. If the power light is blinking white - The computer is in standby mode. Press a key on the keyboard, move the pointer using the touch pad or a connected mouse, or press - Dell Studio XPS M1640 | Setup Guide - Page 36
memory modules (see the Service Manual at support.dell.com) to ensure that your computer is successfully communicating with the memory. Lockups and Software Problems If the computer does not start up - Ensure that the power usually includes installation instructions in its documentation or on the disc (CD - Dell Studio XPS M1640 | Setup Guide - Page 37
response by pressing a key on your keyboard or moving your mouse, press the power button for at least 8 to 10 seconds until your computer turns off and this version of Windows. 2. In the welcome screen, click Next. 3. Follow the instructions on the screen. If you have other software problems - • Back - Dell Studio XPS M1640 | Setup Guide - Page 38
Solving Problems • Check the software documentation or contact the software manufacturer for troubleshooting information: --Ensure that the that the program is installed and configured properly. --Verify that the device drivers do not conflict with the program. --If necessary, uninstall and then - Dell Studio XPS M1640 | Setup Guide - Page 39
to access: Self Help (Troubleshooting, Security, System Performance, Network/Internet, Backup/ Recovery, and Windows operating system) Alerts (technical support alerts relevant to your computer) Assistance from Dell (Technical Support with DellConnect™, Customer Service, Training and Tutorials, How - Dell Studio XPS M1640 | Setup Guide - Page 40
Guide on your computer or at support.dell.com or see "Contacting Dell" on page 58 for assistance. Alert! Previous attempts at booting this system have failed at checkpoint [nnnn]. For help in resolving this problem, please note this checkpoint and contact Dell Technical Support - The computer - Dell Studio XPS M1640 | Setup Guide - Page 41
is connected. In case of keyboard failure, replace the keyboard. For assistance, see the Service Manual at support.dell.com. No boot device available - No bootable partition on hard drive, the hard drive cable is loose, or no bootable device exists. • If the hard drive is your boot device, ensure - Dell Studio XPS M1640 | Setup Guide - Page 42
out of range may or may not indicate a potential hard drive problem - S.M.A.R.T error, possible hard drive failure. This feature can be enabled or disabled in the BIOS setup (see "Contacting Dell" on page 58 for assistance). Hardware Troubleshooter If a device is either not detected during the - Dell Studio XPS M1640 | Setup Guide - Page 43
and is active. Press during POST (Power On Self Test) to enter the System Setup (BIOS) utility. Start the Dell Diagnostics from your hard drive or from the Drivers and Utilities disc. Using Support Tools Starting Dell Diagnostics From Your Hard Drive The Dell Diagnostics is located on a hidden - Dell Studio XPS M1640 | Setup Guide - Page 44
. Press any key to continue." d. Press any key to go to the Choose An Option window. If PSA is not invoked: Press any key to start the Dell Diagnostics from the diagnostic utility partition on your hard drive and to go to the Choose An Option window. 4. Select the test you want to run. 42 - Dell Studio XPS M1640 | Setup Guide - Page 45
Using Support Tools 5. If you encounter a problem during a test, a message with the error code and a description of the problem will appear on your screen. Write down the error code and problem description and contact Dell (see "Contacting Dell" on page 58). NOTE: The Service Tag for your computer - Dell Studio XPS M1640 | Setup Guide - Page 46
each test screen. The Service Tag helps you identify your computer when you contact Dell. 9. When the tests complete, close the test screen to return to the Choose An Option window. 10. To exit the Dell Diagnostics and restart the computer, click Exit. 11. Remove the Drivers and Utilities disc. 44 - Dell Studio XPS M1640 | Setup Guide - Page 47
Backup when System Restore does not resolve your problem System recovery media when operating system failure prevents the use of System Restore and DataSafe Local Backup when installing the factory image on a newly installed hard drive Dell Factory Image Restore to restore your computer to - Dell Studio XPS M1640 | Setup Guide - Page 48
them. Starting System Restore 1. Click Start . 2. In the search box, type System Restore and press . NOTE: The User Account Control window may appear. If you are an administrator on the computer, click Continue; otherwise, contact your administrator to continue the desired action. 3. Click - Dell Studio XPS M1640 | Setup Guide - Page 49
DataSafe Local Backup is not available on your computer, use Dell Factory Image Restore (see "Dell Factory Image Restore" on page 50) to restore your operating system. You can use Dell DataSafe Local Backup to restore your hard drive to the operating state it was in when you purchased your computer - Dell Studio XPS M1640 | Setup Guide - Page 50
Windows® desktop; then, shut down your computer and try again. 5. Select Repair Your Computer. 6. Select Dell DataSafe Restore and Emergency Backup from the System Recovery Options menu and follow the instructions support.dell.com. Upgrading to Dell DataSafe Local Backup Professional NOTE: Dell - Dell Studio XPS M1640 | Setup Guide - Page 51
can use the system recovery media, created using Dell DataSafe Local Backup, to return your hard drive to the operating state it was in when Windows® desktop; then, shut down your computer and try again. 3. Select the appropriate boot device from the list and press . 4. Follow the instructions - Dell Studio XPS M1640 | Setup Guide - Page 52
all data on the hard drive and removes any programs or drivers installed after you received your computer. If possible, back up the data before using these options. Use Dell Factory Image Restore only if System Restore did not resolve your operating system problem. NOTE: Dell Factory Image Restore - Dell Studio XPS M1640 | Setup Guide - Page 53
Tools, then Dell Factory Image Restore. 7. Click Next. The Confirm Data Deletion screen appears. NOTE: If you do not want to proceed with Factory Image Restore, click Cancel. Restoring Your Operating System 8. Select the check box to confirm that you want to continue reformatting the hard drive and - Dell Studio XPS M1640 | Setup Guide - Page 54
57. 4. Use Dell's extensive suite of online services available at support.dell.com for help with installation and troubleshooting procedures. See "Online Services" on page 54 for a more extensive list of Dell Support online. 5. If the preceding steps have not resolved the problem, see "Before You - Dell Studio XPS M1640 | Setup Guide - Page 55
see the contact information for your region or go to support.dell.com. DellConnect™ DellConnect is a simple online access tool that allows a Dell service and support associate to access your computer through a broadband connection, diagnose your problem and repair it all under your supervision. For - Dell Studio XPS M1640 | Setup Guide - Page 56
Dell products and services on the following websites: • www.dell.com • www.dell.com/ap (Asian/Pacific countries only) • www.dell.com/jp (Japan only) • www.euro.dell.com (Europe only) • www.dell.com/la (Latin American and Caribbean countries) • www.dell.ca (Canada only) You can access Dell Support - Dell Studio XPS M1640 | Setup Guide - Page 57
have ordered, you can go to support.dell.com, or you can call the automated order-status service. A recording prompts you for the information needed to locate and report on your order. For the telephone number to call your region, see "Contacting Dell" on page 58 for problems with your order. If you - Dell Studio XPS M1640 | Setup Guide - Page 58
NOTE: Before you return the product to Dell, make sure to back up any data on the hard drive(s) and on any other storage device in the Dell Diagnostics (see "Dell Diagnostics" on page 41). 4. Include any accessories that belong with the item(s) being returned (power cables, software, guides, and - Dell Studio XPS M1640 | Setup Guide - Page 59
possible, turn on your computer before you call Dell for assistance and call from a telephone near the computer. You may be asked to type some commands at the keyboard, relay detailed information during operations, or try other troubleshooting steps possible only at the computer itself. Ensure that - Dell Studio XPS M1640 | Setup Guide - Page 60
of the computer): • Express Service Code: • Return Material Authorization Number (if provided by Dell support technician): • Operating system and version: • Devices: • Expansion cards: • Are you connected to a network? Yes/No • Network, version, and network adapter: • Programs and versions: See - Dell Studio XPS M1640 | Setup Guide - Page 61
, or Dell product catalog. Dell provides several online and telephonebased support and service options. Availability varies by country and product, and some services may not be available in your area. To contact Dell for sales, technical support, or customer service issues: 1. Visit support.dell.com - Dell Studio XPS M1640 | Setup Guide - Page 62
® Windows® operating system and features upgrade your computer with new or additional memory, or a new hard drive reinstall or replace a worn or defective part See: "System Recovery Media" on page 49 "Dell Diagnostics" on page 41 "My Dell Downloads" on page 38 support.dell.com the Service Manual at - Dell Studio XPS M1640 | Setup Guide - Page 63
(U.S. only), Safety instructions, Regulatory information, Ergonomics information, and End User License Agreement find your Service tag/Express Service Code - You must use the service tag to identify your computer on support.dell.com or to contact technical support find drivers and downloads; readme - Dell Studio XPS M1640 | Setup Guide - Page 64
updating drivers for, and upgrading your computer. NOTE: Offerings may vary by region. For more information regarding the configuration of your computer, click Start → Help and Support and select the option to view information about your computer. System Model Processor Studio XPS 1640/1645/1647 - Dell Studio XPS M1640 | Setup Guide - Page 65
XPS 1640/1647 1066 MHz DDR3 SO‑DIMM Studio XPS 1645 1333 MHz DDR3 SO‑DIMM Memory configuration possible Studio XPS 1640 1 GB, 2 GB, 3 GB, and 4 GB Studio XPS 1645/1647 1 GB, 2 GB, 3 GB, 4 GB, and 8 GB NOTE: For instructions on upgrading your memory, see the Service Manual at support.dell - Dell Studio XPS M1640 | Setup Guide - Page 66
adapter Wireless Studio XPS 1640 Studio XPS 1645/1647 external V.92 56K USB Modem (Optional) hardware modem Universal Serial Bus (USB) 10 controller Studio XPS 1640 Intel ICH9M Studio XPS 1645/1647 ExpressCard connector Intel PM55 one ExpressCard slot (54 mm) Cards supported ExpressCard/34 - Dell Studio XPS M1640 | Setup Guide - Page 67
Basic Specifications Video Video memory Studio XPS 1640 ATI Mobility Radeon™ HD 4670 ATI Mobility Radeon HD 565v Studio XPS 1645/1647 LCD interface External display support 512 MB/1 GB dedicated GDDR3 memory 1GB dedicated DDR3 memory 1 GB dedicated DDR3 memory Low Voltage Differential Signaling - Dell Studio XPS M1640 | Setup Guide - Page 68
per channel with 3 watt subwoofer program menus, media control buttons Ports and Connectors IEEE 1394a 4-pin serial connector Network adapter USB eSATA Video one RJ45 10/100/1000 connector two 4-pin USB 2.0-compliant connectors one 4-pin eSATA/USB combo connector one 15-hole connector HDMI - Dell Studio XPS M1640 | Setup Guide - Page 69
inches) (15.6 inches FHD WLED) Width 353.28 mm (13.91 inches) (16 inches WLED) 353.45 mm (13.92 inches) (16 inches RGBLED) 344.16 mm (13.50 inches) (15.6 inches WLED) Diagonal 406.4 mm (16.00 inches) Basic Specifications Display Maximum resolution Refresh rate Operating angle Viewing angles - Dell Studio XPS M1640 | Setup Guide - Page 70
) Studio XPS 1645/1647 300 cd/m2 (typical) 250 cd/m2 (minimum) (WLED/RGBLED) 300 cd/m2 (typical) 270 cd/m2 (minimum) (FHD WLED) Display Pixel pitch Controls 0.2588 mm (WLED) 0.1840 mm (RGBLED) 0.1792 mm (FHD WLED) brightness can be controlled through keyboard shortcuts (see the Dell Technology - Dell Studio XPS M1640 | Setup Guide - Page 71
Camera Pixel 2.0 megapixel Video resolution Studio XPS 1640 Studio XPS 1645/1647 320 x 240 ~1600 x 1200 (640 x inches) sensor-active area 39.04 mm (1.53 inches) rectangle Battery Type Depth Height Width Weight Voltage Charge time (approximate) Basic Specifications 6-cell/9-cell "smart" lithium - Dell Studio XPS M1640 | Setup Guide - Page 72
under certain power-intensive conditions. see the Dell Technology Guide for more information. Life span (approximate) 300 discharge/charge cycles Temperature range Operating 0° to 35°C (32° to 95°F) Storage Coin-cell battery -40° to 65°C (-40° to 149°F) CR-2032 AC Adapter Input voltage - Dell Studio XPS M1640 | Setup Guide - Page 73
16 mm (0.62 inches) 70 mm (2.75 inches) 147 mm (5.7 inches) 76.2 mm (3.0 inches) 25.4 mm (1.0 inch) 154.7 mm (6.09 inches) Basic Specifications AC Adapter Weight (without AC power 6-cell battery) 24.09 mm to 33.95 mm (0.94 inches to 1.33 inches) 384.9 mm (15.15 inches) 254.59 mm (10.02 inches - Dell Studio XPS M1640 | Setup Guide - Page 74
-40° to 65°C (-40° to 149°F) Relative humidity (maximum) Operating 10% to 90% (noncondensing) Storage 5% to 95% (noncondensing) Maximum vibration - measured with Dell Diagnostics running on the hard drive and a 2-ms half-sine pulse; for non-operating - measured with hard drive in head-parked - Dell Studio XPS M1640 | Setup Guide - Page 75
Appendix Macrovision Product Notice This product incorporates copyright protection technology that is protected by method claims of certain U.S. patents and other intellectual property rights owned by Macrovision Corporation and other rights owners. Use of this copyright protection technology must - Dell Studio XPS M1640 | Setup Guide - Page 76
to the Internet 9 Contacting Dell 58 customer service 53 74 D damage, avoiding 5 DellConnect 53 Dell Diagnostics 41 Dell Support Center 37 device status lights 14 Diagnostic Checklist 57 disc drive supported disc sizes 26 discs ejecting 26 using 26 DisplayPort connector 21 drivers and downloads 61 - Dell Studio XPS M1640 | Setup Guide - Page 77
problems diagnosing 40 Hardware Troubleshooter 40 help getting assistance and support 52 I Internet connection 9 ISP Internet Service Provider 9 M memory support 63 my dell downloads 38 N network connection fixing 32 O order status 55 P power problems, solving 33 power strips, using 6 problems - Dell Studio XPS M1640 | Setup Guide - Page 78
features 28 software problems 34 solving problems 31 specifications 62 support email addresses 54 support sites worldwide 54 76 System Messages 38 system recovery media 8 T technical support 53 U USB PowerShare 18 V ventilation, ensuring 5 W warranty returns 56 Windows Program Compatibility Wizard - Dell Studio XPS M1640 | Setup Guide - Page 79
- Dell Studio XPS M1640 | Setup Guide - Page 80
Printed in China. Printed on recycled paper. www.dell.com | support.dell.com
-
 1
1 -
 2
2 -
 3
3 -
 4
4 -
 5
5 -
 6
6 -
 7
7 -
8
-
9
-
10
-
11
-
12
-
13
-
14
-
15
-
16
-
17
-
18
-
19
-
20
-
21
-
22
-
23
-
24
-
25
-
26
-
27
-
28
-
29
-
30
-
31
-
32
-
33
-
34
-
35
-
36
-
37
-
38
-
39
-
40
-
41
-
42
-
43
-
44
-
45
-
46
-
47
-
48
-
49
-
50
-
51
-
52
-
53
-
54
-
55
-
56
-
57
-
58
-
59
-
60
-
61
-
62
-
63
-
64
-
65
-
66
-
67
-
68
-
69
-
70
-
71
-
72
-
73
-
74
-
75
-
76
-
77
-
78
-
79
-
80
 |
 |

SETUP GUIDE