Denon AVR-5805CI Owners Manual - English
Denon AVR-5805CI - AV Receiver Manual
 |
UPC - 081757507424
View all Denon AVR-5805CI manuals
Add to My Manuals
Save this manual to your list of manuals |
Denon AVR-5805CI manual content summary:
- Denon AVR-5805CI | Owners Manual - English - Page 1
AV SURROUND RECEIVER AVR-5805CI OPERATING INSTRUCTIONS - Denon AVR-5805CI | Owners Manual - English - Page 2
and maintenance (servicing) instructions in the literature accompanying the appliance. WARNING: TO REDUCE THE RISK OF FIRE OR ELECTRIC SHOCK, DO NOT EXPOSE THIS APPLIANCE TO RAIN OR MOISTURE. 1. COMPLIANCE INFORMATION Product Name: AV Surround Receiver Model Number: AVR-5805CI This product - Denon AVR-5805CI | Owners Manual - English - Page 3
should follow the manufacturer's instructions, and should use a mounting accessory recommended by 70, provides information with regard to proper grounding of the mast and supporting structure, grounding kind on the product. 20. Servicing - Do not attempt to service this product yourself as opening or - Denon AVR-5805CI | Owners Manual - English - Page 4
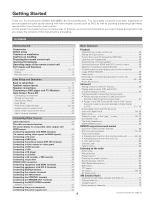
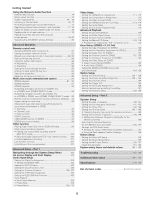
DENON AVR-5805CI AV Surround Receiver review the contents of this manual before proceeding. Contents Getting Started Basic Operation Accessories 7 Before using HDMI and DVI-D monitor output 45 Part names and functions Selection of resolution setting (SCALE 45 Front panel 2 channel playback - Denon AVR-5805CI | Owners Manual - English - Page 5
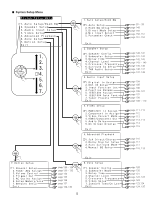
2 System Setup Menu page 126 ~ 128 page 129 ~ 133 page 134 page 135 page 136 page 137 page 138, 139 5 page 20 ~ 26 page 149 page 150 page 150, 151 page 151, 152 page 140, 141 page 141, 142 page 142, 143 page 143 ~ 145 page 145, 146 page 146, 147 page 147, 148 page 104 page 105 page 106 page 106, - Denon AVR-5805CI | Owners Manual - English - Page 6
server 79, 80 Operating the AVR-5805CI using a browser 80 Advanced Operation Remote control unit Operating DENON audio components 81 Setting the preset 153 ~ 156 Troubleshooting 157, 158 Additional information 159 ~ 173 Specifications 174, 175 List of preset codes End of this manual 6 - Denon AVR-5805CI | Owners Manual - English - Page 7
proper and that there are not problems with the connection cables. Always instructions may differ from the actual set for explanation purposes. Cautions on installation Noise or disturbance of the picture may be generated if this unit or any other electronic equipment using microprocessors is used - Denon AVR-5805CI | Owners Manual - English - Page 8
for, say, a vacation. Preparing the remote control unit • The included remote control unit (RC-1036) can be used to operate not only the AVR-5805CI but other remote control compatible DENON components as well. In addition, the memory contains the control signals for other remote control units, so - Denon AVR-5805CI | Owners Manual - English - Page 9
Started • Point the remote control unit at the remote sensor on the main unit as shown on the diagram. • The remote control unit can be used from a straight distance of approximately 23 feet/7 meters from the main unit, but this distance will be shorter if there are obstacles in the way - Denon AVR-5805CI | Owners Manual - English - Page 10
Getting Started Part names and functions Front panel • For details on the functions of these parts, refer to the pages given in parentheses ( ). !3 !2 !1 !0 o !8 !4 !5 !6 !7 !9 @0 qw e r @1 @2 @3 @4 @5 ty ui @6 @7 @8 @9 #0 #1 #3 #5 #7 #9 $1 $2 $3 $5 $7 $9 %1 #2 #4 #6 #8 $0 $4 $6 - Denon AVR-5805CI | Owners Manual - English - Page 11
) $3 MODE button 65) $4 TONE CONTROL button 63) $5 BAND button 65) $6 TONE DEFEAT button 63) $7 MEMORY button 66) $8 SURROUND SPEAKER button 45) $9 TUNING buttons 65) %0 SURROUND BACK button 52) %1 STATUS button 46) 11 - Denon AVR-5805CI | Owners Manual - English - Page 12
Information display This displays the surround mode, function name or setting value, etc. r Output signal channel indicator The audio channels !1 DENON LINK indicator This lights during playback in a DENON LINK connection lights when RDS broadcast has been received. !6 AUTO indicator This lights when - Denon AVR-5805CI | Owners Manual - English - Page 13
51, 67, 73) Tuner system buttons 65) HOME/VIDEO SELECT button 46, 81) FUNCTION/NUMBER buttons 44, 82) NOTE: • For instructions on setting the remote control unit back light's lighting time ( page 85). INPUT MODE selector button 47) Tuner system buttons 65) TEST TONE button 95, 145) SPEAKER - Denon AVR-5805CI | Owners Manual - English - Page 14
the AVR-5805CI's monitor output terminal to the TV's video input terminal ( page 19). Auto setup flow Perform the auto setup procedure, following the instructions displayed on the TV's screen. Connecting a microphone ( page 21). By default, the speaker system setting is set to 9.1 channels. Please - Denon AVR-5805CI | Owners Manual - English - Page 15
listening position to L and R channel speakers (front left (FL) and front right (FR), surround left (SL) and surround right (SR), surround back left (SBL) and surround back right (SBR)) is less than 2 ft (60 cm). With the AVR-5805CI it is also possible to use the surround speaker selector function - Denon AVR-5805CI | Owners Manual - English - Page 16
condition around the unit and switch the power back on. If the protection circuit is activated again even though there are no problems with the wiring or the ventilation around the unit, switch off the power and contact a DENON service center. Note on speaker impedance The protector circuit - Denon AVR-5805CI | Owners Manual - English - Page 17
to 9.1 channels. • The AVR-5805CI can be configured for 10 speaker playback using two pairs of surround speakers (A+B) and one pair of surround back speakers as also refer to the operating instructions of the other components. Example: 9.1 channel connections Front right speaker Subwoofer - Denon AVR-5805CI | Owners Manual - English - Page 18
composite video offers the lowest picture quality of the three connection types. For more information about the video up conversion function ( page 28). • The AVR-5805CI is equipped with HDMI terminals, so it can be connected to a DVD player or TV (monitor) using an HDMI cable. To connect it to - Denon AVR-5805CI | Owners Manual - English - Page 19
, not simultaneously. • Audio signals are only output from the HDMI monitor out connector when audio signals are input to the HDMI input connector. • When connecting the AVR-5805CI and DVD player using an HDMI cable, also connect the AVR-5805CI and monitor or TV using an HDMI cable ( page 36). 19 - Denon AVR-5805CI | Owners Manual - English - Page 20
using the home theater is small, taking multiple measurements at or near the listening positions makes it possible to correct the sound more effectively (Example w). The AVR-5805CI all the speakers flat. This is suitable for multi-channel music reproduction, from discrete music sources such as Dolby - Denon AVR-5805CI | Owners Manual - English - Page 21
a microphone 1 Connect the optional microphone for Auto Setup to the SETUP MIC jack on the front panel of the unit. The optional standard microphone is DENON DM-S305 sold separately. When using other microphone ( page 150, 151). 2 Mount the auto setup microphone onto a camera tripod, etc., and place - Denon AVR-5805CI | Owners Manual - English - Page 22
Easy Setup and Operation Turning on the power Starting Auto Setup 1 Turn on your subwoofer. Set the volume to halfway and set the crossover frequency to the maximum or Low pass filter off if your subwoofer can adjust the output volume and the crossover frequency. Some subwoofers have a standby - Denon AVR-5805CI | Owners Manual - English - Page 23
The AVR-5805CI has ten available amplifier channels, some the "Extra Setup" screen. • This procedure is used to automatically determine the background noise, whether or not setting screen. For instructions on making the "Channel Setup" settings ( page 126 ~128). For instructions on making the " - Denon AVR-5805CI | Owners Manual - English - Page 24
With these measurements, the "Speaker Configuration", "Delay Time", "Channel Level", "Crossover Frequency" and "Room EQ" are analyzed automatically. be taken. Place the microphone at the second listening position. For instructions on the position in which the microphone should be placed ( page 20 - Denon AVR-5805CI | Owners Manual - English - Page 25
set to Small (80 Hz). If you set up your speakers using Auto Setup, please make sure manually that any THX speakers are set to Small with 80 Hz crossover. distance because of the internal electrical delay. • If the "Channel Setup" or "Power Amplifier Assignment" settings are changed after completing - Denon AVR-5805CI | Owners Manual - English - Page 26
pertinent items, and measure again. Be sure to turn off the AVR-5805CI's power before checking the speaker connections. Screen example Cause q The . • Sound was output from the R channel when only one surround back speaker was connected. • The surround back or the surround (B) speaker was detected, - Denon AVR-5805CI | Owners Manual - English - Page 27
The AVR-5805CI does not have a DD RF demodulator function. Therefore, you need to use a commercially available outboard DD RF demodulator and connect its digital output to one of the AVR-5805CI available digital inputs. Refer to the demodulator's operating instruction for further information. 27 - Denon AVR-5805CI | Owners Manual - English - Page 28
S-Video terminals are used to connect the AVR-5805CI with a VCR, depending on the combination of the TV and VCR the picture may flicker in the using an HDMI monitor, set "Analog to HDMI Convert" at "HDMI/Component Out" to "ON" (default). • When only component video signals are input to the AVR5805CI - Denon AVR-5805CI | Owners Manual - English - Page 29
"Through" is set at "Resolution" under "Setting the HDMI/Component Out Setup", use a monitor compatible with input resolutions of 480i/576i. • If your monitor is not equipped with an HDMI terminal, connect the AVR-5805CI to the monitor using the component video, S-Video, or composite video terminals - Denon AVR-5805CI | Owners Manual - English - Page 30
Connecting a TV tuner • For best picture quality choose the component video connection to from either the coaxial or optical connections. If you choose to use the optical connection, it needs to be assigned. For more information about Digital Input Assignment ( page 104). TV tuner J COMPONENT - Denon AVR-5805CI | Owners Manual - English - Page 31
output from the DVD player. In this case, connect the DVD player's analog multi-channel output to the AVR-5805CI's EXT. IN terminals for playback. Also refer to your DVD player's operating instructions. Connecting a video camera or video game Video camera / F Video game VIDEO OUT A AUDIO OUT - Denon AVR-5805CI | Owners Manual - English - Page 32
A AUDIO OUT L L L R R R NOTE: • When recording to DVD recorder, it is necessary that the type of cable used with the playback source equipment be the same type that is connected to the AVR-5805CI VCR-1 (to 4) OUT terminal. Example: TV IN → S-Video cable : VCR-1 to 4 OUT→ S-Video cable TV IN - Denon AVR-5805CI | Owners Manual - English - Page 33
you choose to use the component video connection, it needs to be assign. Video deck For more information about Component Input it is necessary that the type of cable used with the playback source equipment be the same type that is connected to the AVR-5805CI VCR-1 (to 4) OUT terminal. Example: - Denon AVR-5805CI | Owners Manual - English - Page 34
turntable is equipped with a low output MC cartridge, you will need to use a separate MC head amplifier or step-up MC transformer. • If humming the output of the component connected to the OPTICAL 5 OUT terminal on the AVR-5805CI's rear panel to any terminal other than the OPTICAL 5 IN terminal. 34 - Denon AVR-5805CI | Owners Manual - English - Page 35
playback of DVD-Audio discs and other multi-channel sources is possible by connecting the AVR-5805CI to a DENON DVD player equipped with a DENON LINK connector using the connection cable included with the DVD player. • When a DENON DVD player and the DENON LINK have been connected, be sure to make - Denon AVR-5805CI | Owners Manual - English - Page 36
is copy protection technology that comprises data encryption and authentication of the partner equipment. The AVR-5805CI supports HDCP. Please see the operating instruction of your video display for more information about this. NOTE: • The audio signals on the multi/stereo area of Super Audio CDs - Denon AVR-5805CI | Owners Manual - English - Page 37
• Commercially-available DVI-D cables are available in 24-pin and 29-pin types. The AVR-5805CI supports the 24-pin DVI-D cable. • The AVR-5805CI supports HDCP. Use an HDCP-compatible HDMI monitor. Note on connecting a HDMI/DVI-D The table below indicates the compatibility of connections between the - Denon AVR-5805CI | Owners Manual - English - Page 38
on the functions of the different equipment. Please read the operating instructions of the equipment to be connected. • Use an S400-compatible 4-pin IEEE1394 cable to connect. • Video signals are not transferred with the AVR-5805CI's IEEE1394 interface, so when connecting a video device connect the - Denon AVR-5805CI | Owners Manual - English - Page 39
, as close to the point of cable entry as practical. NOTE: • Do not connect two FM antennas simultaneously. • Even if an external AM antenna is used, do not disconnect the AM loop antenna. • Make sure AM loop antenna lead terminals do not touch metal parts of the - Denon AVR-5805CI | Owners Manual - English - Page 40
XM terminal • AVR-5805CI is the XM Ready® receiver. You can receive XM® Satellite Radio by connecting to the XM Mini-Tuner and Home Dock (includes home antenna, sold separately) and subscribing to the XM service. • Plug the XM Mini-Tuner Home Dock into XM terminal on the rear panel. • Position the - Denon AVR-5805CI | Owners Manual - English - Page 41
Trigger Out" ( page 135). Connecting the MULTI ZONE terminals For instructions on operations using the MULTI ZONE functions ( page 87 ~ 98). ZONE2 connections • It is possible to connect a separate amplifier to the AVR-5805CI and simultaneously listen to a different program source than that in - Denon AVR-5805CI | Owners Manual - English - Page 42
BACK L L L R R R A SURROUND A L L L R R R B SUBWOOFER • By changing the MAIN ZONE channel settings, up to three subwoofers can be connected to the AVR-5805CI. For more information about "Setting the Channel NOTE: • Only use the AC OUTLETS for audio equipment. Never use them for hair - Denon AVR-5805CI | Owners Manual - English - Page 43
that mode or function. 2 ZONE2 mode To operate the ZONE2 function. 2 Operate the this unit The AMP button is the main mode for controlling the AVR-5805CI in the main room (MAIN ZONE). 2 ZONE3 mode To operate the ZONE3 function. The function switches as shown below each time one of the AMP - Denon AVR-5805CI | Owners Manual - English - Page 44
playback on the selected component. For operating instructions, refer to the component's manual. 3 Adjust the volume. The volume can channel audio signals into two channels, etc. 2 To choose the surround sound mode Example: HOME THX CINEMA Press the HOME THX CINEMA button. For more information - Denon AVR-5805CI | Owners Manual - English - Page 45
When "HDMI" is used during playback in the XM or Network Audio, the picture switches to the picture selected from the control panel display. Cancel the VIDEO SELECT mode if you want to display the control panel. Video on/off • When no video signals of a DVD, etc., are connected to the AVR-5805CI - Denon AVR-5805CI | Owners Manual - English - Page 46
connected to AVR5805CI's VIDEO MONITOR OUT terminal. Also, the unit's operating status can be checked during playback. Such information as the The AVR-5805CI has an AUTO signal detection mode that automatically identifies the type of incoming audio signals, but is also equipped with a manual mode - Denon AVR-5805CI | Owners Manual - English - Page 47
SURR. R A/B (surround right A/B) SBL (surround back left) and SBR (surround back right) channels of the EXT. IN terminals are output directly to the seems too high, set the "SW ATT" surround parameter to "ON". Playback using the external input treminals (EXT.IN-1 and EXT.IN-2) • When the "ANALOG - Denon AVR-5805CI | Owners Manual - English - Page 48
DTS mode • In the ANALOG mode Room EQ function • The AVR-5805CI's Auto Setup / Room EQ function offers three correction curves: "Audyssey", "Front", "Flat". The timbre of the speakers can also be adjusted manually using a graphic equalizer. Details of the different correction curves are described - Denon AVR-5805CI | Owners Manual - English - Page 49
AVR-5805CI is equipped with many surround modes. We recommend using the surround modes as described below in order to achieve the maximum effect for the specific signal source. is a 6.1 channel/7.1 channel quality. DENON Original Surround Modes ( page 61, 62) • Select these for 7.1 channel playback - Denon AVR-5805CI | Owners Manual - English - Page 50
BACK HOME THX CINEMA PURE DIRECT ENTER SURROUND PARAMETER DIRECT/STEREO CURSOR ON SCREEN Playing audio sources (CDs and DVDs) 2 channel playback modes • The AVR-5805CI is equipped with three 2 channel playback modes exclusively for music. • Select the mode to suit your tastes. 2 STEREO mode Use - Denon AVR-5805CI | Owners Manual - English - Page 51
information during playback of Dolby Digital and DTS sources can be checked pressing the STATUS button on the main unit. Press the SURROUND BACK button. Lights when the Surround Back channel is on. Set to "1spkr" lights Set to "2spkrs" lights For operating instructions, refer to the manuals - Denon AVR-5805CI | Owners Manual - English - Page 52
signal OSD-2 Monitor information OSD-3 Input/output OSD-4 Auto surround mode OSD-5 USER MODE 1 OSD-6 USER MODE 2 OSD-7 USER MODE 3 OSD-8~14 Tuner preset stations NOTE: • OSD-2: The monitor's resolution is displayed when an HDMI monitor is connected to the AVR-5805CI. • OSD-4: This is - Denon AVR-5805CI | Owners Manual - English - Page 53
. This software is scheduled to go on sale in the future. This is a function for automatically playing in the 6.1 channel mode using the surround back speaker(s) if the software is recorded in when the AFDM turns "ON" during playback, manually set "SB CH OUT" to "PLIIx Cinema" or "MTRX ON". 53 - Denon AVR-5805CI | Owners Manual - English - Page 54
DTS sources. , lights lights Press the SURROUND BACK button. Lights when the Surround Back channel is on. Set to "1spkr" lights Set NEO:6 and WIDE SCREEN modes. D.COMP. (Dynamic Range Compression): Motion picture soundtracks have tremendous dynamic range (the contrast between very soft and very - Denon AVR-5805CI | Owners Manual - English - Page 55
used to keep the programs at the same average listening level so the user does not have to change the volume control between Dolby Digital programs. When playing back software which has been encoded in Dolby Digital, sometimes you may see a brief message in the front panel display - Denon AVR-5805CI | Owners Manual - English - Page 56
NEO:6 2 Play a program source. For operating instructions, refer to the manuals of the respective components. 3 Press the SURROUND PARAMETER Game mode) When the "SB CH OUT" parameter is set to "OFF". (Set "SP.Back" at the System Setup to "None"). Display *Surr Parameter MODE: PL C (Pro Logic II - Denon AVR-5805CI | Owners Manual - English - Page 57
Game mode is optimized for computer and/or dedicated game box consoles, that feature stereo analog or digital outputs. It can only be used with 2 channel stereo sources. PANORAMA: This mode extends the front stereo image to include the surround speakers for an exciting "wraparound" effect with side - Denon AVR-5805CI | Owners Manual - English - Page 58
so there is no loss of sound quality, and the effect of the surround signals output from the center (C) and surround (SL, SR and SB) channels add a natural sense of expansion to the sound field. 5 Press the CURSOR D or H button to select the various surround parameters. CENTER IMAGE (0.0 to - Denon AVR-5805CI | Owners Manual - English - Page 59
SURROUND PARAMETER button. • The surround parameter menu appears. • The AVR-5805CI is equipped with a function for storing the selected input source, the playing analog, PCM or other 2 channel sources. The signals are converted into multichannel signals using the decoders shown below and played in - Denon AVR-5805CI | Owners Manual - English - Page 60
Basic Operation DENON original surround modes • The AVR-5805CI is equipped with a high performance DSP (Digital Signal Processor) which uses digital signal processing to synthetically recreate the sound field. One of ten preset surround modes can be selected according to the program source and the - Denon AVR-5805CI | Owners Manual - English - Page 61
DSP surround simulation 1 Select the surround mode for each input channel. Example: 9CH STEREO mode (Main unit) (Remote control unit The "9CH STEREO" display changes as shown below according to the surround back speaker setting. SURROUND BACK SURROUND SPEAKER SPEAKER SETTING A + B ON A or B A - Denon AVR-5805CI | Owners Manual - English - Page 62
the SBL and SBR channel signals are equivalent to the SL and SR channels, respectively. LEVEL: using the surround back speaker. • OFF: Playback is conducted without using the surround back speaker. This operation can be performed directly pressing the SURROUND BACK button on the main unit's panel - Denon AVR-5805CI | Owners Manual - English - Page 63
) F-TREBLE (front) SA-BASS SA-TREBLE S B-BASS S B-TREBLE (surround A) (surround A) (surround B) (surround B) SW-BASS SB-TREBLE SB-BASS (subwoofer) (surround back) (surround back) 2 Press the CURSOR F or G button to set the level. To increase the bass or treble: The bass or treble sound can be - Denon AVR-5805CI | Owners Manual - English - Page 64
your tastes, as described below. 1 Press the CH SEL/ENTER button. • The "Channel Vol." screen appears. TUNER (TUNER mode) BAND TUNING MODE Channels which is not used are not displayed. When the surround back speaker setting is set to "1spkr" for "Speaker Configuration" ( page 140, 141), this - Denon AVR-5805CI | Owners Manual - English - Page 65
• Automatic searching begins, then stops when a station is tuned in. The fader function does not affect the subwoofer channel. • If tuning does not stop at the desired station, use to the "Manual tuning" operation. • When in the auto tuning mode on the FM band, the "STEREO" indicator lights on the - Denon AVR-5805CI | Owners Manual - English - Page 66
the button is held in. 1 Use the "Auto tuning" or "Manual tuning" operation to tune in the channels, repeat steps 2 to 5. A total of 56 broadcast stations can be preset - 8 stations (channels 1 to 8) in each of blocks A to G. • When the manual tuning mode is set, FM stereo broadcasts are received - Denon AVR-5805CI | Owners Manual - English - Page 67
service which allows station to send additional information along with the regular radio program signal. • The following three types of RDS information can be received on main unit's panel 1 Press the TUNING PRESET button. 2 Turn the FUNCTION knob and select the desired preset channel. 2 Traffic - Denon AVR-5805CI | Owners Manual - English - Page 68
Basic Operation FUNCTION TU CURSOR FG CURSORFG RDS SEARCH CHANNEL TUNER (AMP mode) RDS search • Use this function to automatically tune to FM stations that provide RDS service. 4 Press the CHANNEL button. • Automatically begin the RDS search operation. 1 Set the input source to "TUNER". (Main - Denon AVR-5805CI | Owners Manual - English - Page 69
F or G button to call out the desired program type. TP search • Use this function to find RDS SEARCH stations broadcasting traffic program (TP stations). 1 button until "TP SEARCH" appears on the display. 5 Press the CHANNEL button. • Automatically begin the PTY search operation. If there is no - Denon AVR-5805CI | Owners Manual - English - Page 70
. • Automatically begin the TP search operation. TU BAND CURSORFG RDS SEARCH CHANNEL TUNING - TUNER (AMP mode) RT (Radio Text) • "RT" appears on the display when radio text data is received. 1 Set the input source to "TUNER". If no TP station is found with above operation, all the reception - Denon AVR-5805CI | Owners Manual - English - Page 71
language are indicated with an XL. Channel blocking is available for XM radio receivers by calling 1-800-XMRADIO (US residents) and 1-877-GETXMSR (Canadian residents). For a full listing of the XM commercial-free channels and advertising-supported channels, visit lineup.xmradio.com (US residents - Denon AVR-5805CI | Owners Manual - English - Page 72
name Song title/Artist name 4 Press the TUNING button to reach the desired channel. The channel changes continuously when you press and hold the TUNING button. When the artist name and song title are received, they are displayed. 1 Press the CURSOR F or G button in the XM mode. • The current - Denon AVR-5805CI | Owners Manual - English - Page 73
the channel automatically switches to the channel number that was input. • "LOADING" is displayed while receiving the channel or information. channel is not available, "XM- - -" is displayed. XM--- • Information on the artist name, song title, category and signal level can be checked using the - Denon AVR-5805CI | Owners Manual - English - Page 74
2 vTuner The AVR-5805CI's Internet radio station list uses "vTuner", a radio station database service. This database service is edited and prepared for the AVR-5805CI. NOTE: • You must have a contract with an Internet Service Provider (ISP) in order to connect to the Internet. For instructions on - Denon AVR-5805CI | Owners Manual - English - Page 75
made manually, you must make the "Network Setup" ( page 138, 139). • The AVR-5805CI is not compatible with PPPoE. If your contract is of the PPPoE setting type, you need a PPPoEcompatible router. • For some ISPs (Internet Service Providers), you may have to make proxy server settings in order to use - Denon AVR-5805CI | Owners Manual - English - Page 76
Basic Operation FUNCTION MEMORY BLOCK ENTER MEMORY CURSOR CURSOR ENTER MEMORY NUMBER AUX (AMP mode) 2 Network settings When using a broadband router (DHCP function), the network settings are made automatically, so there is no need to make the settings from the setup menu. If the - Denon AVR-5805CI | Owners Manual - English - Page 77
screen appears. 3 Press a MEMORY BLOCK (A ~ G) button, then press a NUMBER (1 ~ 8) button to register the station at the desired preset channel. • This completes registration. If no button is operated for approximately ten seconds, the regular display reappears. Registered presettings can be checked - Denon AVR-5805CI | Owners Manual - English - Page 78
Playback starts. AUX (AMP mode) Character search function (searching by first letter) • The character search function (searching by first letter) can be used to select the desired item from the menu screen displaying the list of Internet radio stations or music files stored on the computer. 1 While - Denon AVR-5805CI | Owners Manual - English - Page 79
stations is updated approximately once every other day. 3 When "Manual Update" is selected: Press the ENTER or CURSOR G button. AVR-5805CI via the network. • The computer's server program must be launched before using this function. For details, refer to the server program's operating instructions - Denon AVR-5805CI | Owners Manual - English - Page 80
the AVR-5805CI using a browser • Internet Explorer can be used on the computer connected to the AVR-5805CI over the network to operate the AVR5805CI. • Check the AVR-5805CI's IP address ( page 138) beforehand and input this IP address in Internet Explorer to display the AVR-5805CI's control panel - Denon AVR-5805CI | Owners Manual - English - Page 81
of the AMP button is pressed. AMP ZONE2 ZONE3 SYSTEM CALL ZONE4 2 Operate the DENON audio component (CD, TAPE, TUNER). For details, refer to the component's operating instructions. • It may not be possible to use some of the buttons, depending on the model and age of your equipment. • When - Denon AVR-5805CI | Owners Manual - English - Page 82
For details, refer to the component's operating instructions. Setting the preset memory function • The device may not operate properly. In this case, use the learning function ( page 84) to store on the list of preset codes ( End of this manual). • The IR segment blinks twice when the memory is - Denon AVR-5805CI | Owners Manual - English - Page 83
beginning of track) Manual search (forward / reverse Guide - - Display selection Guide channel selection selection (0 ~ 9) Station selection - Station selection TV / VCR - - - - - Input mode selection - Default setting (preset code) DENON CD (31867) HITACHI VCR (20000) - - DENON - Denon AVR-5805CI | Owners Manual - English - Page 84
remote control unit CHANNEL NUMBER RC SETUP Setting the learning function • If your AV device is a brand other than DENON or if operation is not possible using the preset memory function, the signals of a remote control unit of that device can be stored in the AVR-5805CI's remote control unit - Denon AVR-5805CI | Owners Manual - English - Page 85
3 seconds. • The IR segment blinks twice and the setting is completed. Setting the back light's lighting time 1 Press and hold the RC SETUP button for at least 3 seconds seconds. • The IR segment blinks twice. 2 Press the CHANNEL button. • Press the + button to increase the brightness 1 step. • - Denon AVR-5805CI | Owners Manual - English - Page 86
Advanced Operation SYSTEM CALL IR segment MODE SELECTOR NUMBER RC SETUP Resetting the system call function 1 Press and hold the RC SETUP button for at least 3 seconds. • The IR segment blinks twice. 2 Press the 9, 7, 8 button (9 → 7 → 8) in that order. • The IR segment blinks twice and the system - Denon AVR-5805CI | Owners Manual - English - Page 87
AUDIO output, use high quality pin-plug cords and wire in such a way that there is no humming or noise. • For instructions on installation and instructions. • Video signals are output from the ZONE3 video output terminals even when the power of ZONE3 is turned off. ZONE2 playback • The AVR-5805CI - Denon AVR-5805CI | Owners Manual - English - Page 88
is "5.1CH".) ZONE2 VIDEO signal cable MULTI SOURCE AUDIO signal cable MAIN ZONE 9.1-channel system Monitor ZONE2 5.1-channel system Monitor FL DVD player C AVR-5805CI Input FR SW SL SR A SYSTEM REMOTE A CONTROL UNIT RC-1036 SL SB SB SR B L R B FL ZONE2 VIDEO OUT C Power - Denon AVR-5805CI | Owners Manual - English - Page 89
for the ZONE2 channel setting at "Channel Setup" in the System Setup Menu. MAIN ZONE 7.1-channel system Monitor FL DVD player C AVR-5805CI Input FR SW A 7.1ch AUDIO IN SURROUND L L L R R R B CENTER B SUBWOOFER A FRONT L L L R R R A SURROUND BACK L L L R R R 89 - Denon AVR-5805CI | Owners Manual - English - Page 90
. • When only one speaker is being used in ZONE2, select "MONO" for the ZONE2 channel setting at "Channel Setup" in the System Setup Menu. In SOURCE AUDIO signal cable MAIN ZONE 9.1-channel system Monitor ZONE2 STEREO/MONO system Monitor FL DVD player C AVR-5805CI Input FR SW SL SR A SYSTEM - Denon AVR-5805CI | Owners Manual - English - Page 91
one speaker is being used in ZONE3, select "MONO" for the ZONE3 channel setting at "Channel Setup" in the System Setup Menu. ZONE3 VIDEO signal cable MULTI SOURCE AUDIO signal cable MAIN ZONE 9.1-channel system Monitor ZONE3 STEREO/MONO system Monitor FL DVD player C AVR-5805CI Input FR SW SL - Denon AVR-5805CI | Owners Manual - English - Page 92
.) • When only one speaker is being used in ZONE4, select "MONO" for the ZONE4 channel setting at "Channel Setup" in the System Setup Menu. MULTI SOURCE AUDIO signal cable MAIN ZONE 9.1-channel system Monitor ZONE4 STEREO/MONO system FL DVD player C AVR-5805CI Input FR SW SL SR A SYSTEM - Denon AVR-5805CI | Owners Manual - English - Page 93
knob to select the source you want to output appears on the display. 3 Start playing the source to be output. For operating instructions, refer to the manuals of the respective components. 1 Press the ZONE3/4/REC SELECT button to display the "ZONE3 (ZONE4) SOURCE" on the display. • If the "ZONE3 - Denon AVR-5805CI | Owners Manual - English - Page 94
: -40 dB The Zone volume can be adjusted within the range of -80 to 18 dB, in steps of 1 dB. However, when using with ZONE2 set to multi-channel (5.1 or 7.1 channel), the ZONE2 volume can be adjusted in steps of 0.5 dB ( page 126 ~ 128). AMP ON/OFF SYSTEM SETUP CH SEL/ENTER VIDEO - Denon AVR-5805CI | Owners Manual - English - Page 95
ZONE2 mode using the AMP button. 2 Press the CH SEL/ENTER button. • The "Channel Vol." screen appears. • For instructions on making the back speakers are only displayed when "7.1ch" is selected for the ZONE2 channel output setting at "Channel Setup" ( page 126 ~ 128). When the ZONE2 surround back - Denon AVR-5805CI | Owners Manual - English - Page 96
CURSOR G button to reduce the volume of the rear channels. The fader function does not affect the SW channel. • The channel whose channel level is adjusted lowest can be faded to -12.0 dB using the fader function. • If the channel levels are adjusted separately after adjusting the fader, the fader - Denon AVR-5805CI | Owners Manual - English - Page 97
modes. 1 Select the ZONE2 mode using the AMP button. 2 Select the surround mode for each input channel. q STANDARD (Dolby w DSP Press the ENTER or SURROUND PARAMETER button to complete the setting. • The AVR-5805CI is equipped with a function for storing the input source, auto surround mode - Denon AVR-5805CI | Owners Manual - English - Page 98
you to adjust the bass and treble of the ZONE2 audio output during surround playback in ZONE2 to suit your tastes. 1 Select the ZONE2 mode using the AMP button. 2 Press the SURROUND PARAMETER button. • The surround parameter menu appears. If you do not want to the tone to be adjusted, set - Denon AVR-5805CI | Owners Manual - English - Page 99
) 3 Start playback on the selected component. • The DSD indicator lights. Lights For operating instructions, refer to the component's manual. "DSD DIRECT" is shown on the display when playing DSD 2 channel signals in the DIRECT mode. "DSD MULTI DIRECT" is displayed when playing DSD multichannel - Denon AVR-5805CI | Owners Manual - English - Page 100
record. 4 Set the recording mode. • Start recording. For operating instructions, refer to the manual of the component on which you want to record. • To cancel, operated. 2 Recording Dolby Digital and DTS multi channel sources • With this set it is possible to record Dolby Digital and - Denon AVR-5805CI | Owners Manual - English - Page 101
with the AVR5805CI it is very rare instances, the AVR-5805CI internal microprocessor might lock up use this procedure if you are sure that the microprocessor requires re-initialization. 1 Switch off the unit using The unit is also equipped with a back-up memory. This function provides approximately - Denon AVR-5805CI | Owners Manual - English - Page 102
menu and the initial setting of this unit ( page 153 ~ 156). Navigating through the System Setup Menu • You can change setting using the buttons on the front panel or remote control unit. SYSTEM SETUP CURSOR AMP ENTER SYSTEM SETUP ENTER CURSOR 1 Press the AMP button to select the "AMP" mode - Denon AVR-5805CI | Owners Manual - English - Page 103
screen display and front display • The AVR-5805CI is equipped with an intuitive and easy-to-understand on screen display, and is equipped with an alpha-numeric front panel display tube that can also be used to check and adjust settings. We recommend that you use the on screen display when you make - Denon AVR-5805CI | Owners Manual - English - Page 104
5 terminals on the AVR-5805CI's rear panel are equipped with an optical digital output terminal for recording digital audio signals to a CD recorder, MD recorder, or other digital audio recording deck. Use this for digital recording between a digital audio source (stereo - 2 channel) and a digital - Denon AVR-5805CI | Owners Manual - English - Page 105
is set to "DSP". Select according to the specifications of the player being used. Also refer to the player's operating instructions. • NOT USED: Select when neither SBL or SBR is connected. • SB (SBL): Select when only one surround back channel (SBL) is connected. • SBL/SBR: Select when two surround - Denon AVR-5805CI | Owners Manual - English - Page 106
Advanced Setup - Part 1 Setting the Input Function Level Setting the Function Rename • The playback level is corrected individually for the different • The names of the different input function can be changed as input sources. desired and displayed on the display. 1 Press the CURSOR D or H - Denon AVR-5805CI | Owners Manual - English - Page 107
input, press the ENTER button. • The "Function Rename" screen reappears. Use the same procedure to change other input function names as well. 6 Press knob. In this case, the connection information is cleared when the power of the connected device or the AVR-5805CI is turned off, so the selection - Denon AVR-5805CI | Owners Manual - English - Page 108
Func." screen appears. 2 Auto Preset Memory • FM stations are received automatically and stored in the memory. 1 Press the CURSOR D on your player. Also refer to the player's operating instructions. 3 Press the ENTER button to enter the setting. use the "Manual tuning" operation ( page 66) to tune - Denon AVR-5805CI | Owners Manual - English - Page 109
2 Preset Skip • Preset channels that are not used often can be skipped. 1 Press the CURSOR D or H button to select "Preset Skip" at the "Tuner Presets" screen, then press the ENTER button. • Switch to the "Preset Skip "screen. Advanced Setup - Part 1 2 Preset Name • The preset channels can be given - Denon AVR-5805CI | Owners Manual - English - Page 110
, press the CURSOR F or G button to highlight the preset channel display, then press the CURSOR H button. When "Default Yes characters have been input, press the ENTER button. • The "Preset Name" screen reappears. Use the same procedure to change other input station names as well. 6 Press the CURSOR - Denon AVR-5805CI | Owners Manual - English - Page 111
directly using the MONITOR SELECT button on the main unit. 5 Press the CURSOR D or H button to select "Audio", then press the CURSOR F or G button to select the method for playing the audio signals included in the HDMI input signal. AMP: Play the audio signals on speakers connected to the AVR-5805CI - Denon AVR-5805CI | Owners Manual - English - Page 112
DENON LINK, IEEE1394 etc.) is previously assigned, the digital audio assignment is set to HDMI. In this case, reassign the digital input using the type of cable connected to the AVR-5805CI's monitor output terminal (video, SVideo or conversion function has been used, information such as that of text - Denon AVR-5805CI | Owners Manual - English - Page 113
HDMI signals. Scaler: • HDMI: The i/p scaler can be used when outputting the input analog video signal to the HDMI monitor output terminal. • Component: The i/p scaler can be used and the video is output. This mode is suited for playing back 4:3 video. Advanced Setup - Part 1 Resolution: • 480p/576p - Denon AVR-5805CI | Owners Manual - English - Page 114
cable, the signals are output in RGB format, regardless of the "Color Space" setting. • To view the on screen display using an HDMI monitor, set "Analog to HDMI Convert" at "HDMI/Component Out" to "ON" (default). • Set the resolution of the video output to one that is compatible with the resolution - Denon AVR-5805CI | Owners Manual - English - Page 115
Prevents flickering of the on screen display when there is no video signal. Use this mode if the on screen display does not appear in the Mode 1, as may happen according to the TV being used. 3 Press the ENTER button to enter the setting. • The "Video Setup" - Denon AVR-5805CI | Owners Manual - English - Page 116
Stereo • The speaker settings can be changed specifically for playing in the 2 channel DIRECT or STEREO mode. 3 Press the CURSOR F or G button to . 2 Setting the front B speakers when the surround mode is set to the 2 channel Direct or Stereo • When "Adv+Front B" is selected at "Power Amp Assign" - Denon AVR-5805CI | Owners Manual - English - Page 117
button. • The "Dolby Digital Setup" screen appears. • The surround mode used at last for the four types of input signals shown below is stored in center speaker or surround speakers are not connected, the sounds in those channels are directed to the front speakers. 3 Press the ENTER button to - Denon AVR-5805CI | Owners Manual - English - Page 118
Playback" menu, then press the ENTER button. • The "Manual EQ" screen appears. 2 Press the CURSOR F or G button to select the adjustment mode, then press the ENTER button. All CH: All channels can be adjusted simultaneously. L/R CH: The left and right channels of the pair of speakers can be adjusted - Denon AVR-5805CI | Owners Manual - English - Page 119
"Default Yes 0", then press the CURSOR F button. 2 Press the CURSOR F button to select "Yes". 3 Press the ENTER button to enter the setting. • The "Manual EQ" screen reappears. The type of the copied correction curve is displayed in the upper right of this screen. • If the "Auto Setup" procedure - Denon AVR-5805CI | Owners Manual - English - Page 120
channel output setting at "Channel Setup" ( the menu screen displayed differs. In this case, see the instructions distribution for ZONE2 • This selects the subwoofer used in ZONE2 for playing the low base sound. back Sp.) LFE: For any channel(s) that are set to LARGE, low frequencies in that channel - Denon AVR-5805CI | Owners Manual - English - Page 121
the proper position as indicated by the displayed value. h 5 Press the ENTER button to enter the setting. • The "Zone Setup" menu reappears. The AVR-5805CI automatically sets the optimum surround delay time for the ZONE2 listening room. 3 Press the CURSOR D or H button to select the speaker to be - Denon AVR-5805CI | Owners Manual - English - Page 122
D or H button to select "Channel Level" at the "Zone Setup" menu, then press the ENTER button. • The "Channel Level" screen appears. 4 When "Auto in units of 0.5 dB. 4 When "Manual" mode is selected: Press the CURSOR D or H button to select the -2 speaker used in ZONE2, then press the CURSOR F or - Denon AVR-5805CI | Owners Manual - English - Page 123
sound mode, your preferred channel level adjustments for just that mode will be recalled. Check the instructions for adjusting channel levels within each surround must be the same as the type of cable connected to the AVR-5805CI's monitor output terminal (video, SVideo or component video). • For - Denon AVR-5805CI | Owners Manual - English - Page 124
(ZONE2) • Set the delay time the sound is synchronized with the picture which are output in ZONE2. 1 Press the CURSOR D or H button strong capacity for producing low bass. Using the high pass filter makes it possible to reduce distortion of the bass sound. Channel Level: Set so that the playback - Denon AVR-5805CI | Owners Manual - English - Page 125
screen shown below is displayed when "STEREO" or "MONO" is selected for the ZONE2 channel setting at "Channel Setup". • "ZONE2 Tone/Ch Lev." can be set in the same way as "ZONE3/ZONE4 Tone/Ch Lev.". • For instructions on the "Video Setup" (item 4) ( page 123, 124). Advanced Setup - Part 1 125 - Denon AVR-5805CI | Owners Manual - English - Page 126
The AVR-5805CI is equipped with pre-out terminals for a total of 22 channels. 16 channel of these pre-out terminals can be assigned between the MAIN ZONE and ZONE2 (Theater). In addition, up to three channels of subwoofers can be added to the MAIN ZONE, so subwoofers can be set in the front and back - Denon AVR-5805CI | Owners Manual - English - Page 127
when subwoofers are installed on the left and right. Select this when subwoofers are installed at the front and rear. Select this to use the subwoofer for both the main channel's low frequencies and for LFE low frequencies. Select this when subwoofers are installed on the left and right and you are - Denon AVR-5805CI | Owners Manual - English - Page 128
Advanced Setup - Part 1 2 Connecting the preouts The pre-out terminals used to connect the subwoofer depends on the MAIN ZONE's channel setup. Connect as shown on the diagram below. Channel Setup Main Subwoofer 9.1 CH / 7.1 CH / 5.1 CH 1 SP Connection 9.1 CH 2 SP Subwoofer Subwoofer(L/F/M) - Denon AVR-5805CI | Owners Manual - English - Page 129
- Part 1 • With the AVR-5805CI's 10-channel power amplifier, it is possible to select 10 channels worth of signals (not including the on the AVR-5805CI's rear panel. • The channels for which the power amplifier can be assigned differ according to the channel settings made at "Channel Setup" ( - Denon AVR-5805CI | Owners Manual - English - Page 130
the power amplifier assignment. By default, this is set to "Normal". Advanced: With this mode, the power amplifiers can be assigned freely to the desired channels according to the speaker system you are using. Adv+Front B: With this mode, the power amplifiers can be assigned freely to the desired - Denon AVR-5805CI | Owners Manual - English - Page 131
, up to a total of 5 biamplified speakers in a system using all 10 of the AVR5805CI amplifier channels. Be sure to consult the operating instructions of your bi-amp-capable speakers for further information before proceeding. AVR-5805CI NOTE: • When making bi-amp connections, be sure to remove - Denon AVR-5805CI | Owners Manual - English - Page 132
SBL R5 SBR L5 SBL R5 SBR L5 Z4 L R5 Z4 R L5 - R5 - L5 - R5 - L5 - R5 - • Amp Assign mode: +ZONE2/3/4 MAIN ZONE 7.1 CH 5.1 CH Channel Setup / ZONE2 ZONE3 MONO MONO STEREO STEREO STEREO MONO MONO STEREO STEREO MONO MONO STEREO MONO MONO MONO MONO ZONE4 MONO MONO STEREO STEREO MONO - Denon AVR-5805CI | Owners Manual - English - Page 133
Z3 L, Z3 R, Z4 L, Z4 R • Amp Assign mode: Adv+Front B Channel Setup ↓ MAIN ZONE ZONE2 9.1 CH 5.1CH STEREO MONO 7.1 CH 7.1CH 5.1CH STEREO MONO 5.1 CH 7.1CH 5.1CH STEREO MONO ASSIGNABLE CHANNEL FL A, FR A, FL B, FR B, C, SL A, SR A, SL B, SR - Denon AVR-5805CI | Owners Manual - English - Page 134
". In this case, the volume can be set to the AVR5805CI's maximum volume (output) level of +18 dB, which is is turned on. • LAST The volume set when the AVR-5805CI was last used is stored in the memory and set when the power is and ZONE4 channels at "Power Amp Assign", "-VAR-" (only variable) is - Denon AVR-5805CI | Owners Manual - English - Page 135
Four 12 V DC Trigger Outputs on the rear panel can be used to control other devices with compatible trigger inputs, such Trigger Out 1" is selected 6 Press the ENTER button. • The "Trigger Out" screen reappears. Use the same procedure to make the settings for Trigger Out 2, 3, 4. 7 Press the CURSOR - Denon AVR-5805CI | Owners Manual - English - Page 136
Setup" menu, then press the ENTER button. • The "AC Outlet Assign" screen appears. 5 Press the ENTER button. • The "AC Outlet Assign" screen reappears. Use the same procedure to make the settings for AC Outlet 2, 3. 6 Press the CURSOR D or H button to select "Exit", then press the ENTER button - Denon AVR-5805CI | Owners Manual - English - Page 137
be changed, and "SETUP LOCKED!" is displayed when related buttons are operated. • System setup settings • Surround parameter settings • Tone control settings • Channel level settings (including test tones) • Room EQ • To unlock, press the SYSTEM SETUP button again and display the "Setup Lock" screen - Denon AVR-5805CI | Owners Manual - English - Page 138
are automatically set for the AVR-5805CI, computer, broadband router and network devices. • DNS (Domain Name System): This is a system for converting the domain names used when browsing Internet sites (for example, "www.denon.jp") into the IP addresses actually used for communications (for example - Denon AVR-5805CI | Owners Manual - English - Page 139
connected in a network, set "ON" to reduce the power consumption when in the standby mode. Set "OFF" when using the AVR-5805CI connected in a network. 1 If the check ends, press the ENTER button. • The "Network Setup" menu reappears. 2 Press the CURSOR D or H button to select "Exit", then - Denon AVR-5805CI | Owners Manual - English - Page 140
settings manually (without using the Auto Setup function), as well as to make manual changes manually. Setting the type of speakers • The composition of the signals output to each channels Front Sp. Subwoofer Surround Sp. A Surround back Sp. Surround Sp. B 4 Press the ENTER button to enter the - Denon AVR-5805CI | Owners Manual - English - Page 141
"Yes" when a subwoofer is installed, "No" when a subwoofer is not installed. 2spkrs / 1spkr: Select the number of speakers to be used for the surround back channel. A subwoofer with sufficient low frequency playback capability can better handle deep bass than most main and surround speakers, and the - Denon AVR-5805CI | Owners Manual - English - Page 142
to use the THX Ultra2 Cinema, THX Music mode and THX Games mode. Set the surround back speakers so that the distance to the listening position is the same for both the left and right speakers. It is also recommended that the deviations of the distance from the listening position to L and R channel - Denon AVR-5805CI | Owners Manual - English - Page 143
the ENTER button to enter the setting. • The "Speaker Setup" menu reappears. The AVR-5805CI automatically sets the optimum surround delay time for the listening room. Advanced Setup - Part 2 Setting the Channel Level • Use this setting to adjust so that the playback level between the different - Denon AVR-5805CI | Owners Manual - English - Page 144
button to adjust all the speakers to the same volume. Example: "Manual" mode is selected. 4 When "Auto" mode is selected: Press SLA SLB SBL SBR SB 1spkr When the surround back speaker setting is set to "1spkr" for "Speaker setting. • The "Channel Level" screen reappears. • To cancel the settings, press the - Denon AVR-5805CI | Owners Manual - English - Page 145
mode, your preferred channel level adjustments for just that mode will be recalled. Check the instructions for adjusting channel levels within each surround via the with remote control unit. • Adjusting with the remote control unit using the test tones is only possible in the "Auto" mode and only - Denon AVR-5805CI | Owners Manual - English - Page 146
speakers to small and the crossover to 80 Hz. • We recommend using with the crossover frequency set to "FIXED-THX-", but depending on the "Speaker Configuration". 2 Setting the crossover frequency individually for the different channels 1 Press the CURSOR F or G button to select "Advanced" - Denon AVR-5805CI | Owners Manual - English - Page 147
the selection of the surround speakers when the "ANALOG" mode is selected at "EXT. IN Setup". Settings the THX Audio Setup 2 Settings for using a THX Ultra2 compatible subwoofer • Make these settings when "Yes" is selected for the subwoofer in the "Speaker Configuration" settings. This option is not - Denon AVR-5805CI | Owners Manual - English - Page 148
button to select the "Exit", then press the ENTER button. • The "System Setup Menu" reappears. 1 Press the CURSOR D or H button to select "Surround Back Speaker Position" at the "THX Audio Setup" screen, then press the ENTER button. 2 Press the CURSOR F or G button to select the settings according - Denon AVR-5805CI | Owners Manual - English - Page 149
button to select the equalizer setting. OFF: The Equalizer is not used. Audyssey: Adjusts the frequency response of all speakers to correct the effects multi-channel music surround sound sources. Manual: Selects the setting value that was set in the Manual EQ Setup. For details of the "Manual EQ - Denon AVR-5805CI | Owners Manual - English - Page 150
DENON Auto- Setup Room EQ • Gain : 29 dB • Frequency Response : 10 ~ 30 kHz Full Flat (Ex : Rane MS1b) Microphone Placement • Set the microphone using turn off the AVR-5805CI. (11) Connect the output of the microphone amplifier to the AVR-5805CI's front panel "V.AUX" Left channel audio input- - Denon AVR-5805CI | Owners Manual - English - Page 151
Pressure level with SPL meter at the microphone point. Adjust AVR volume SPL meter = 80 dB (C) Advanced Setup - Part 2 AVR-5805CI Speaker Use the internal test tones for mic amp calibration. Microphone MIC AMP with mic power supply ex. mixer amp. 120 mVrms Measure the output level and - Denon AVR-5805CI | Owners Manual - English - Page 152
"Restore Yes 0", then press the CURSOR F button. The display is only an approximate picture of the response and that correction is happening at all frequencies. 6 Press the CURSOR F or G button to select the speaker channel. 7 If the check ends, press the CURSOR D or H button to select "Exit", then - Denon AVR-5805CI | Owners Manual - English - Page 153
or Pure Direct. Set this to switch the Mic Input jack for use for Mic or V.AUX L-channel input jack. Default settings - All, Room EQ = OFF OFF Mic Small Center Sp. Small Subwoofer Yes Surround Sp. A / B Small Surround Back Sp. Small / 2spkrs 140, 141 2 Subwoofer Setup This selects the - Denon AVR-5805CI | Owners Manual - English - Page 154
Surr.B = NOT USED, S.Back = NOT USED, Setup SW Level are received automatically channels that are not used often can be skipped. All preset channels = ON 109 Preset Name The preset channels can be given the names you want. - 109 4. Video Setup 1 HDMI/DVI In Assignment Video Setup The HDMI - Denon AVR-5805CI | Owners Manual - English - Page 155
Mode Set the Auto surround mode function. 4 Manual EQ Setup This parameter is for optimizing the Room use the video conversion function. Audio Delay Set the delay time the sound is synchronized with the picture which are output in ZONE2. Zone3/4 7 Tone/ Ch.Level Adjust the tone and channel - Denon AVR-5805CI | Owners Manual - English - Page 156
Advanced Setup - Part 2 7. Option Setup Option Setup Default settings Page 1 Channel Setup The number of channels that you wish to play back in each zone are assigned to each zone accordingly. Main Zone 9.1 CH Zone2 5.1 CH Zone3 Stereo Zone4 Stereo 126 ~ 128 2 Power Amp Assignment - Denon AVR-5805CI | Owners Manual - English - Page 157
Troubleshooting If a problem should arise, first check the following. 1. Are the connections correct? 2. Have you operated the receiver according to the Operating Instructions . • Use a DTS-compatible player. • AVR-5805CI's input setting channel volume level is set • Turn the subwoofer's channel - Denon AVR-5805CI | Owners Manual - English - Page 158
16 power indicator is flashing red. touching each other or the AVR-5805CI's rear cables. panel, activating the protection circuit. • AVR-5805CI is malfunctioning. • Turn off the power and contact a DENON 16 customer service center. Sound is only produced from the center speaker. • You are - Denon AVR-5805CI | Owners Manual - English - Page 159
speakers, are required in order to achieve the ideal sound. The AVR-5805CI's surround speaker selection function makes it possible to change the settings according to the combination of surround speakers being used and the surrounding environment in order to achieve the ideal surround sound - Denon AVR-5805CI | Owners Manual - English - Page 160
with the AVR-5805CI. Adding these, however, allows you to achieve stronger surround effects not only with sources recorded in THX Surround EX, but also with conventional 2- to 5.1 channel sources. The WIDE SCREEN mode is a mode for achieving surround sound with up to 7.1 channels using surround back - Denon AVR-5805CI | Owners Manual - English - Page 161
prevents the surround back channel signals from reflecting off the monitor or screen at the front center, resulting in interference and making the sense of movement from the front to the back less sharp. • Connect the surround speakers to the surround speaker A terminals on the AVR-5805CI and set - Denon AVR-5805CI | Owners Manual - English - Page 162
for watching movies to the surround speaker A terminals on the AVR-5805CI, the surround speakers for playing multi-channel music to the surround speaker B terminals. Set the surround speaker selection on the setup menu. (For instructions ( page 146, 147)) • To activate the appropriate speakers for - Denon AVR-5805CI | Owners Manual - English - Page 163
[2] When not using surround back speakers Front speakers Center speaker Monitor Subwoofer 45° Surround Additional Information The AVR-5805CI is equipped with a digital signal processing circuit that lets you play program sources in the surround mode to achieve the same sense of presence as - Denon AVR-5805CI | Owners Manual - English - Page 164
channels). The compression rate of the audio data when it was recorded on the medium is lower than for Dolby Digital, so there is more information . On the AVR-5805CI, when the back over audio equipment in the home because film soundtracks are designed to be played back in large movie theaters using - Denon AVR-5805CI | Owners Manual - English - Page 165
are watching is encoded in Surround EX, you can manually select the THX Surround EX playback mode, otherwise THX Ultra2 Cinema mode will apply processing to provide optimum replay. Additional Information THX Music Mode: For the replay of 5.1 multi-channel music the THX Music Mode should be selected - Denon AVR-5805CI | Owners Manual - English - Page 166
the "IEEE" (Institute of Electrical and Electronics Engineers) of the United States. The AVR-5805CI can be connected to an IEEE1394 compatible device using an IEEE1394 cable to enable digital transfer of multi-channel audio sources (DVD Audio discs, Super Audio CDs, etc.) with a single cable. • The - Denon AVR-5805CI | Owners Manual - English - Page 167
. With it, non-compressed digital video and multi-channel audio signals can be transferred with a single connector, eliminating the need to use separate cables for the picture and sound and making it possible to make connectors smaller. HDMI is also compatible with HDCP (High-bandwidth Digital - Denon AVR-5805CI | Owners Manual - English - Page 168
Additional Information 168 Surround modes and parameters Surround Mode Channel output FRONT L/R CENTER SURROUND SURROUND SUB- L/R BACK L/R WOOFER Signals and adjustability in the different modes Parameter (default values are shown in parentheses) D. COMP *1 LFE *2 AFDM SB CH OUT TONE - Denon AVR-5805CI | Owners Manual - English - Page 169
MONO MOVIE C (OFF) E E E E E E E VIDEO GAME C (OFF) E E E E E E E MATRIX C (OFF) C (30 msec) E E E E E E VIRTUAL C (OFF) E E E E E E E Additional Information 169 C : Signal / Adjustable E : No signal / Not adjustable B : Turned on or off by speaker configuration - Denon AVR-5805CI | Owners Manual - English - Page 170
Additional Information 170 2 Differences in surround mode names depending on the input signals Button Surround Mode HOME THX CINEMA ES DSCRT6.1 + THX ES MTRX6.1 + THX THX SURROUND - Denon AVR-5805CI | Owners Manual - English - Page 171
Additional Information 171 Button Surround Mode DIRECT DIRECT DSD DIRECT DSD MULTI DIRECT the Surround Back speaker setup is set to "None" and/or the surround (B) speaker setup is set to "None", then "7CH STEREO" or "5CH STEREO" is displayed. *4: For input signals other than 2 channel signals, this - Denon AVR-5805CI | Owners Manual - English - Page 172
Additional Information Relationship between the video input signal and monitor output according to the video convert mode settings of MAIN ZONE Video convert ON Input signals HDMI E E E E E E E E E E E E E E E E COMPONENT E E E E C (1080p) C (480p ~ 720p) C (480i/576i) C (1080p) C (480p ~ 720p) - Denon AVR-5805CI | Owners Manual - English - Page 173
Video convert OFF S-VIDEO MONITOR OUT - - - Used Not used - - - Used Not used - - - Used Not used - - - Used Not used HDMI E E E E E E E E E E C C C C C C C C than the HDMI input signals are output to the HDMI monitor output terminal. Additional Information MONITOR OUT HDMI COMPONENT S-VIDEO - Denon AVR-5805CI | Owners Manual - English - Page 174
% T.H.D.) 200 W + 200 W (6 Ω/ohms, 20 Hz ~ 20 kHz with 0.05 % T.H.D.) Surround Back: 170 W + 170 W (8 Ω/ohms, 20 Hz ~ 20 kHz with 0.05 % T.H.D.) 200 W ch (8 Ω/ohms) 310 W x 2 ch (4 Ω/ohms) Output terminals: All channels 6 ~ 16 Ω/ohms • Analog Input sensitivity / input impedance: 200 mV / 47 - Denon AVR-5805CI | Owners Manual - English - Page 175
2 Tuner section Receiving Range: Usable Sensitivity: 50 dB Quieting Sensitivity: S/N (IHF-A): Total Harmonic Distortion (at 1 kHz): [FM] (note: µV at 75 Ω/ohms, 0 dBf = 1 x 10-15 W) 87.5 MHz ~ 107.9 MHz 1.0 µV ( - Denon AVR-5805CI | Owners Manual - English - Page 176
Daytek 40872 Boghe 41004 Dayton 40872 Boman 40783 DCE 40831 Brainwave 40770, 41115 DEC 40774, 40778 Brandt 40503, 40651 Decca 40770, 41115 Broksonic 40695, 40868 Denon 40490, 40634, *[41470], 41634 1 PRESET CODE - Denon AVR-5805CI | Owners Manual - English - Page 177
Denver 40699, 40778, 41107, 41165, 41353, 41359 Goodmans Desav 40770 Desay 40800, 41407 GPX Diamond 40651, 40768, 40790 Gradiente Dick Smith Electronics Gran Prix 40833, 41730 Grandin Digihome 40713 Greenhill digiRED 40717 Grundig Digitor 40651, 40690 Digitrex 40672, 41056, - Denon AVR-5805CI | Owners Manual - English - Page 178
Landel Lasonic Lawson Lenco Lenoxx Lexia LG Lifetec Limit LiteOn Loewe Logix Lumatron Lunatron Luxman Luxor Magnasonic Magnavox Magnex Malata Manhattan Marantz Mark Marquant Matsui Maxim MBO MDS Mecotek Medion MEI Memorex Metronic Metz Micromedia Micromega Microsoft Microstar Minato Minax Minerva - Denon AVR-5805CI | Owners Manual - English - Page 179
Powtek Prima Prinz Prism Proline Proscan Proson Prosonic ProVision Qwestar Radionette RCA REC Recco Red Star Reoc Resonance Revoy Rio RJTech Roadstar Ronin Rotel Rowa Saba Sabaki Saivod Sakyno Salora Sampo Samsung Sansui Sanyo Scan ScanMagic Schaub Lorenz Schneider Schwaiger Scientific Labs Scott - Denon AVR-5805CI | Owners Manual - English - Page 180
Tokaido 40698 CyberHome 41129 Toshiba 40503, 40695, 41045, 41154 Denon 40490 Trans Continens 40826 Dick Smith Electronics TRANS-continents 40826, 40831, 40872 41730 Transonic 40672, 40730, 41165 Digitrex 41056 Tredex 40800, 40803, 40804 DSE 41730 - Denon AVR-5805CI | Owners Manual - English - Page 181
20072, 20278 Deitron 20278 Audiovox 20037, 20278 Dell 21972 Awa 20037, 20043, 20278, 20642 Denko 20072 Baird 20000, 20041, 20104 Denon 20042 Basic Line 20046, 20072, 20104, 20278 Diamant 20037 Beaumark 20240 Diamond 20209, 20348 Beko 20104 Dick Smith Electronics Bell - Denon AVR-5805CI | Owners Manual - English - Page 182
Fuji 20033, 20035 Hypson Fujitsu 20000, 20045 iBUYPOWER Fujitsu General 20037 Imperial Funai 20000, 21333 Ingersoll Galaxis 20278 Inno Hit Garrard 20000 inotech Gateway 21972 Interbuy GE 20035, 20048, 20060, 20209, 20226, 20240, Interfunk 20320, 20807, 21035, 21060 Internal - Denon AVR-5805CI | Owners Manual - English - Page 183
Magnasonic Magnavox Magnin Magnum Manesth Marantz Mark Marta Mastec Master's Matsui Matsushita Media Center PC Medion MEI Melectronic Memorex Memphis Metronic Metz MGA MGN Technology Micormay Micromaxx Microsoft Mind Minolta Mitsubishi Motorola MTC Multitec Multitech Murphy Myryad NAD Naiko National - Denon AVR-5805CI | Owners Manual - English - Page 184
Protech ProVision Pulsar Pye Qisheng Quarter Quartz Quasar Quelle Radialva Radiola Radionette RadioShack Radix Randex Rank Rank Arena RCA Realistic Reoc ReplayTV Rex RFT Ricavision Roadstar Royal Runco Saba Saisho Salora Sampo Samsung Sanky Sansui Sanyo Saville SBR Schaub Lorenz Schneider Scott - Denon AVR-5805CI | Owners Manual - English - Page 185
Teac Tec Tech Line Technics TechniSat Teco Tedelex Teknika Teleavia Telefunken Telestar Teletech Tenosal Tensai Tevion Texet Thomas Thomson Thorn Tivo TMK Tokai Topline Toshiba Totevision Touch Towada Tradex Triad Uher Ultravox Unitech United Universal Universum Vector Vector Research Victor Video - Denon AVR-5805CI | Owners Manual - English - Page 186
Akito Akura Alaron Alba Albatron Albiral Alfide Alkos Allorgan Allstar Ambassador America Action Amplivision Ampro Amstrad Anam Anam National Andersson Anex Anglo Anhua Anitech Ansonic AOC Aolingpu Aolinpike Apex Apex Digital Arcam Archer Ardem Aristona ART ASA Asberg Asora Astra Asuka ATD Atlantic - Denon AVR-5805CI | Owners Manual - English - Page 187
Bondstec 10247 Chengdu 10009, 10817 Boots 10009, 10217 Ching Tai 10003, 10009, 10092, 10179 Bosch 10320 Chun Yun 10000, 10003, 10009, 10092, 10179, 10180, Boxlight 10752, 10893 10700, 10843 BPL 10037, 10208, 10282 Chunfeng 10009, 10264 Bradford 10180 Chung Hsin 10036, 10053, - Denon AVR-5805CI | Owners Manual - English - Page 188
Decca 10037, 10072, 10217, 10516, 10621 Elektra Deitron 10037, 10374 Elin Dell 11080, 11178, 11264, 11454 Elite Denko 10264 Elman Denon 10145, 10511, 10576 Elta Denstar 10628 Emco Denver 10037, 10587, 10606 Emerson DER 10193 Desmet 10009, 10037, 10087, 10320 Diamant 10037 - Denon AVR-5805CI | Owners Manual - English - Page 189
Feilang Feilu Feiyan Feiyue Fenner Ferguson Fidelity Filsai Finlandia Finlux Firstar Firstline Fisher Flint Forgestone Formenti Formenti-Phoenix Fortress Fraba Friac Frontech Fujitsu Fujitsu General Funai Furi Futronic Future Futuretech Galaxi Galaxis Ganxin Gateway GBC 10009 GE 10009, 10817 - Denon AVR-5805CI | Owners Manual - English - Page 190
Haiyan Halifax Hallmark Hammerstein Hampton Hanimex Hankook Hanseatic Hantarex Hantor Harley Davidson Harman/Kardon Harsper Harvard Harwa Harwood Havermy HCM Helios Hello Kitty Hema Hemmermann Hher Higashi Hikona Himitsu Hinari Hisawa Hisense Hit Hitachi Hitachi Fujian Hitsu HMV 10264, 10412, 10817 - Denon AVR-5805CI | Owners Manual - English - Page 191
Irradio IRT Isukai ITC ITS ITT ITT Nokia ITV Janeil JBL JCB Jean Jensen Jiahua JiaLiCai Jinfeng Jinhai Jinque Jinta Jinxing JMB JNL Jocel Jubilee Juhua JVC Kaige Kaisui Kambrook Kamp Kangchong Kangli Kangyi Kapsch Karcher Kathrein Kawa Kawasho Kaypani KB Aristocrat KEC 10218, 10247, 10290, 10371 - Denon AVR-5805CI | Owners Manual - English - Page 192
LG Liesenk & Tter Liesenkotter Lifetec Lihua Lloyd's Lloytron Loewe Logik Logix Longjiang Luma Lumatron Lux May Luxman Luxor LXI M & S M Electronic Madison Magnadyne Magnafon Magnavox Magnum Majestic Manesth Manhattan Marantz Marelli Mark Master's Masuda Materin 10001, 10003, 10019, 10030, 10032, - Denon AVR-5805CI | Owners Manual - English - Page 193
Mivar Monaco Monivision Morgan's Motorola MTC MTEC MTlogic Mudan Multibroadcast Multitec Multitech Murphy Musikland Myryad NAD Naiko Nanbao Nansheng Naonis NAT National NEC Neckermann NEI Neovia Nesco Netsat NetTV Network Neufunk New Tech Newave Nicam Nicamagic Nikkai Nikko Nikon 10216, 10217, - Denon AVR-5805CI | Owners Manual - English - Page 194
Panama Panashiba Panasonic Panavision Panda Pathe Cinema Pausa Peng Sheng Penney Perdio Phase Philco Philex Philips Phoenix Phonola Pilot Pioneer Pionier Plantron Playsonic Polaroid Polytron Polyvision Portland Powerpoint Prandoni-Prince Premier Prima Princess Princeton Prinston 10037, 10217, 10247 - Denon AVR-5805CI | Owners Manual - English - Page 195
Rex RFT Rhapsody Ricoh Rinex Roadstar Robotron Rover Rowa Rownsonic Royal Royal Lux Runco Ruyi Saba Saccs Sagem Saige Saisho Saivod Saka Sakyno Salora Salsa Sambers Sampo Samsung Samsux Sandra Sanjian Sansei Sansui Santon 10163, 10206, 10259, 10264, 10363, 10411 Sanyo 10037, 10072, 10087, 10264, - Denon AVR-5805CI | Owners Manual - English - Page 196
Show Siarem Siemens Siera Siesta Signature Silva Silva Schneider Silver SilverCrest Simpson Singer Sinotec Sinudyne Skantic SKY Skygiant Skysonic Skyworth Sliding SLX Smaragd Soemtron Solavox Sole Sonawa Songba Soniko Sonitron Sonoko Sonolor Sontec Sony Sound & Vision Soundesign Soundwave Sowa - Denon AVR-5805CI | Owners Manual - English - Page 197
Teac Tec Tech Line Techica Technema Technics TechniSat Technisson Technol Ace Technosonic Techview Techwood Tecnimagen Teco Tedelex Tek Teknika Telecor Telefunken Telefusion Telegazi Telemeister Telesonic Telestar Teletech Teleton Televideon Teleview Tempest Tennessee Tensai Tenson Tera Tesla Tevion - Denon AVR-5805CI | Owners Manual - English - Page 198
Unic Line United Universal Universum Univox Utax V2max V7 Videoseven V7Videoseven Vector Research Vestel Victor Videocon Videologic Videologique Videomac Videosat Videotechnic Videoton Vidikron Vidtech Viewsonic Viking VInc Vision Vistar Vizio Voxson Waltham Wards Warumaia Watson Watt Radio Waycon - Denon AVR-5805CI | Owners Manual - English - Page 199
00017, 00237 Gemini ADB 01063, 01269 General Instrument Aichi Denshi 01512 Alcatel 00896 GMI Allegro 00153, 00315 Golden Channel Americast 00899 GoldStar Amstrad 01222 Goodmind Antronix 00022 Hamlin Archer 00022, 00153, 00797 Hitachi Auna 00277, 01269 HyperVision Austar - Denon AVR-5805CI | Owners Manual - English - Page 200
Paragon 00000 TS Philips 00013, 00153, 00317, 00619, 00817, 01305 Tusa Pioneer 00144, 00533, 00877, 01500, 01877 TV86 Popular Mechanics 00400 Unika Pulsar 00000 United Artists PVP Stereo Visual Matrix United Cable 00003 Universal Quasar 00000 US Electronics Quiero 00817 V2 - Denon AVR-5805CI | Owners Manual - English - Page 201
Arcus 01143 CCE 00345 Arion 01205 Century 00856 Armstrong 00243 Channel Master 00212 Arnion 01300 Chaparral 00053, 00209, 00216 ASA 00397 Cherokee 00123, 00710, 01480 Asat 00200 Chess 00114, 00713, 01085, 01334 ASCI 00114, 01334 CityCom - Denon AVR-5805CI | Owners Manual - English - Page 202
Dish Network System Foxtel 00775, 01005, 01170, 01505, 01775 Dishpro 00775, 01005, 01505, 01775 Fracarro Distratel 00084, 00885, 01205, 01283 Freecom Distrisat 00200 Freesat DMT 01075 Fresat DNR 00692 FTEmaximal DNT 00200, 00396 Dream Multimedia 01237, 01437, 01537, 01637 Fuba - Denon AVR-5805CI | Owners Manual - English - Page 203
Hitachi 00455, 00489, 00819, 01250, 01284, 01518, Kathrein 01523, 01525, 00035 Hnsel & Gretel 00132 Homecable 00238 Homecast 01214 Kathrein Eurostar Houston 00396, 00592, 00668 Kenwood HTS 00775, 01775 Key West Hughes 00749 Kiton Hughes Network Syst Klap 00749 Kolon Hughes - Denon AVR-5805CI | Owners Manual - English - Page 204
Max Maximum MB MDS Mediacom Mediamarkt MediaSat Medion Medison Mega Melectronic Memorex Metronic Metz Micro Micro electronic Micromaxx Microstar Microtec Minerva Mitsubishi Morgan's Motorola Multichoice Multistar Myryad Mysat NEC NEOTION Netgem Netsat Neuhaus Neuling Neusat Neveling Newton Next - Denon AVR-5805CI | Owners Manual - English - Page 205
Pro Visat Prod Profile Promax Prosat Proscan Protek Proton ProVision Pye Pyxis QNS Quadral Quelle Radiola RadioShack Radix Rainbow RCA Realistic Rebox Red Star Regal RFT Roadstar Roch Romsat Rover S-ZWO SAB Saba Sabre Sagem Samsung Sanyo SAT Sat Control Sat Cruiser Sat Partner Sat Team Satcom Satec - Denon AVR-5805CI | Owners Manual - English - Page 206
Stream Strong STS STVI Sunkai Sunny Sunny Sound Sunsat Sunstar Supermax Supernova Tantec Tarbs Tatung TCL Teac Techniland TechniSat Technomate Technosat Technotrend Technowelt Techsan Techwood Teco tekComm Telasat Teleciel Telefunken Teleka Telemaster Telesat Telestar Telesystem Teletech Televes - Denon AVR-5805CI | Owners Manual - English - Page 207
Xcom 00123, 00668, 00832 DBX Xcom Multimedia 00668 Denon XMS 01075 Xrypton 00369 DKK Xsat 00123, 00668, 00713, 00847, 01214, 01323 DMX Electronics Xtreme 01300 Dual Yes 00887 Dynamic Bass Zaunkonig 00692 EEC Zehnder - Denon AVR-5805CI | Owners Manual - English - Page 208
30009, 30032, 30053, 30155, 30179, 30305, Zonda 30420, 30468, 30764, 31062 30155, 30164, 30175, 30179, 30180, 30420 CDR 30157 Classic 30157 Denon 30461 Fisher 30420 GPX 30157, 30420 Harman/Kardon 30164, 30420 JVC 30157 Kenwood 30157, 30202, 30305 LG 30087, 30179, 30342 Marantz - Denon AVR-5805CI | Owners Manual - English - Page 209
RCA Sony TDK Teac Yamaha TAPE Aiwa Akai Arcam Carver Denon Fisher Garrard Genexxa GoldStar Grundig Harman/Kardon Inkel JVC Kenwood LG Luxman Magnavox Marantz Memorex Mitsubishi Myryad Onkyo Optimus Orion Panasonic Philips Phonotrend Pioneer Polk - Denon AVR-5805CI | Owners Manual - English - Page 210
Broksonic Bush Denver Emerson Go Vision Grundig Hitachi Jensen Konka Panasonic Philips Prima RCA Samsung Sansui Sova Sylvania Toshiba Bush 3 Denver 3 Sylvania 3 40695 40516, 40713, 40884 41353, 41359 41268 41071 40695 41247 41016 40719, 40720 41490 40854, 41260 41016 41022 40899 40695 41122 40675, - Denon AVR-5805CI | Owners Manual - English - Page 211
en fonctiom des livraison de l'usine. Dish Network System 00775, 01505 DVD preset codes / Codes préréglés DVD 41470 (default / défaut) 40490 DENON Model No./ Modéle numéro Dishpro 00775, 01505 Dream Multimedia 01237 Echostar 00610, 00775, 01170, 01505 Euro1 01278 Expressvu 00775 Force - Denon AVR-5805CI | Owners Manual - English - Page 212
- Denon AVR-5805CI | Owners Manual - English - Page 213
- Denon AVR-5805CI | Owners Manual - English - Page 214
TOKYO, JAPAN www.denon.com Denon Brand Company, D&M Holdings Inc. Printed in Japan 00D 511 4483 000
-
 1
1 -
 2
2 -
 3
3 -
 4
4 -
 5
5 -
 6
6 -
 7
7 -
8
-
9
-
10
-
11
-
12
-
13
-
14
-
15
-
16
-
17
-
18
-
19
-
20
-
21
-
22
-
23
-
24
-
25
-
26
-
27
-
28
-
29
-
30
-
31
-
32
-
33
-
34
-
35
-
36
-
37
-
38
-
39
-
40
-
41
-
42
-
43
-
44
-
45
-
46
-
47
-
48
-
49
-
50
-
51
-
52
-
53
-
54
-
55
-
56
-
57
-
58
-
59
-
60
-
61
-
62
-
63
-
64
-
65
-
66
-
67
-
68
-
69
-
70
-
71
-
72
-
73
-
74
-
75
-
76
-
77
-
78
-
79
-
80
-
81
-
82
-
83
-
84
-
85
-
86
-
87
-
88
-
89
-
90
-
91
-
92
-
93
-
94
-
95
-
96
-
97
-
98
-
99
-
100
-
101
-
102
-
103
-
104
-
105
-
106
-
107
-
108
-
109
-
110
-
111
-
112
-
113
-
114
-
115
-
116
-
117
-
118
-
119
-
120
-
121
-
122
-
123
-
124
-
125
-
126
-
127
-
128
-
129
-
130
-
131
-
132
-
133
-
134
-
135
-
136
-
137
-
138
-
139
-
140
-
141
-
142
-
143
-
144
-
145
-
146
-
147
-
148
-
149
-
150
-
151
-
152
-
153
-
154
-
155
-
156
-
157
-
158
-
159
-
160
-
161
-
162
-
163
-
164
-
165
-
166
-
167
-
168
-
169
-
170
-
171
-
172
-
173
-
174
-
175
-
176
-
177
-
178
-
179
-
180
-
181
-
182
-
183
-
184
-
185
-
186
-
187
-
188
-
189
-
190
-
191
-
192
-
193
-
194
-
195
-
196
-
197
-
198
-
199
-
200
-
201
-
202
-
203
-
204
-
205
-
206
-
207
-
208
-
209
-
210
-
211
-
212
-
213
-
214
 |
 |

AV SURROUND RECEIVER
AVR-5805CI
OPERATING INSTRUCTIONS