Dewalt DW872 Instruction Manual - Page 7
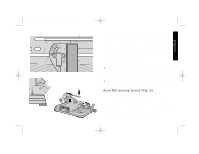
Auto Retracting Guard Fig. 5 - blade
 |
View all Dewalt DW872 manuals
Add to My Manuals
Save this manual to your list of manuals |
Page 7 highlights
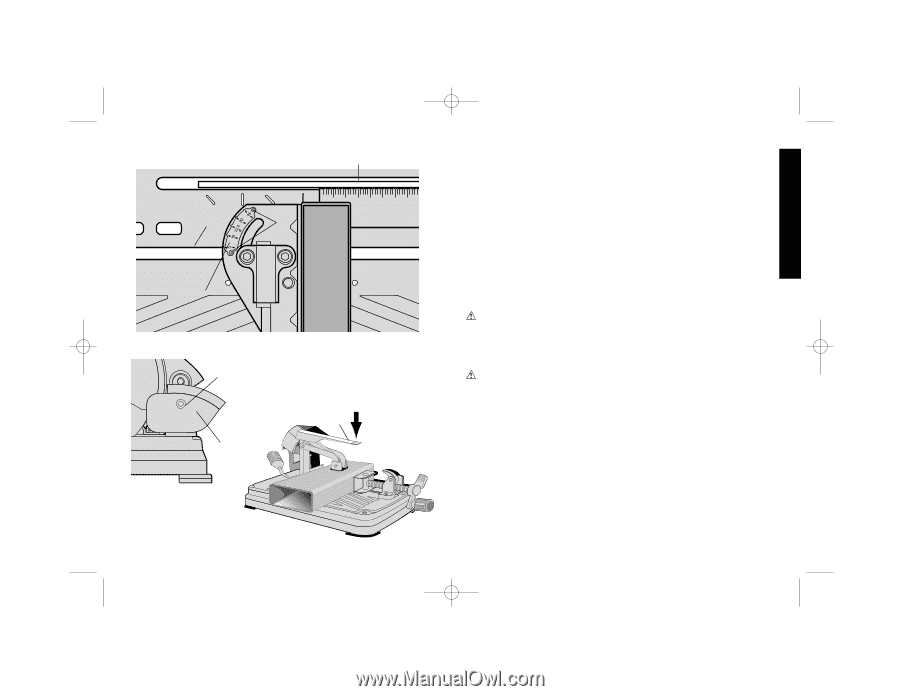
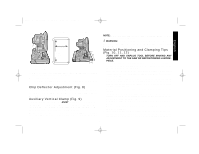
392736-01,00,DW872 6/29/00 9:00 AM Page 5 FIG. 7 D B E C A FIG. 8 A FIG. 9 A B the hex wrench rotate the bolt cover (B) out of the way and loosen the bolt (C) counterclockwise. Then remove the bolt (C), lock washer (D), the flat washer (E) and the outer clamp washer (F). 4. Install blade (G) oriented as shown against the inner clamp washer (H). Reassemble the outer clamp washer, flat washer, lock washer and bolt hand tight. 5. With blade lock engaged, tighten the bolt securely with the hex wrench. 6. Remove hex wrench then release lower guard and blade lock lever. 7. Use same steps to remove the blade. DO NOT MAKE ANY ADJUSTMENT WHILE TOOL IS PLUGGED INTO POWER SUPPLY. WARNING: VISUALLY CHECK BLADE FOR CRACKS OR OTHER DAMAGE. VERIFY PROPER BLADE INSTALLATION BEFORE USE. IF BLADE IS DAMAGED IN ANY WAY, HAVE IT RECONDITIONED AT A QUALIFIED SAW BLADE SERVICE SHOP. WARNING: BE SURE THE BLADE BOLT IS TIGHTENED SECURELY AND THE BOLT COVER IS COVERING THE BOLT HEAD BEFORE CUTTING. Auto Retracting Guard (Fig. 5) This tool has an automatic retracting lower guard system. The blade is exposed as it approaches the material and is covered in the up position. • When cutting very large pieces, it may be necessary to manually assist the guard in retracting. To accomplish this, rotate the guard (A) slightly by the lip (B), just enough to clear the workpiece and release. • Keep hands and other body parts away from rotating blade. • Do not remove blade guard system. • Keep guard system in good operating condition. 5 English
-
 1
1 -
 2
2 -
 3
3 -
 4
4 -
 5
5 -
 6
6 -
 7
7 -
 8
8 -
 9
9 -
 10
10 -
 11
11 -
 12
12 -
13
-
14
-
15
-
16
-
17
-
18
-
19
-
20
-
21
-
22
-
23
-
24
-
25
-
26
-
27
-
28
-
29
-
30
-
31
-
32
-
33
-
34
-
35
 |
 |