Dymo 18134 User Guide - Page 6
Using Symbols and, Special Characters
 |
View all Dymo 18134 manuals
Add to My Manuals
Save this manual to your list of manuals |
Page 6 highlights
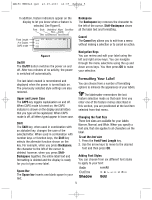
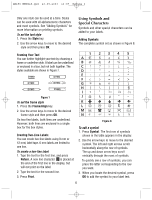
LM150 WEUdef.qxd 23-09-2003 16:07 Pagina 6 Only one style can be used at a time. Styles can be used with all alphanumeric characters and most symbols. See "Adding Symbols" for more information on printing symbols. To set the font style 1. Press the Style key. 2. Use the arrow keys to move to the desired style and then press OK. Using Symbols and Special Characters Symbols and other special characters can be added to your labels. Adding Symbols The complete symbol set as shown in Figure 8. Framing Your Text You can further highlight your text by choosing a frame or underline style. A label can be underlined or enclosed in a box, but not both together. The styles available are shown in Figure 7. Figure 7 To set the frame style 1. Press the Frame/Align key. 2. Use the arrow keys to move to the desired frame style and then press OK. On two-line labels, both lines are underlined. However, both lines are enclosed in a single box for the box styles. Creating Two-Line Labels You can create two-line labels using 9 mm or 12 mm) label tape. 6 mm labels are limited to one line. To create a two-line label 1. Type the text for the first line, and press Return. A new line character is placed at the end of the first line in the display, but will not print on the label. 2. Type the text for the second line. 3. Press Print. Figure 8 To add a symbol 1. Press Symbol. The first row of symbols shown in the table appears in the display. 2. Use the arrow keys to move to the desired symbol. The left and right arrows scroll horizontally along the row of symbols. The up and down arrow keys scroll vertically through the rows of symbols. To quickly see a row of symbols, you can press the letter corresponding to the row you want. 3. When you locate the desired symbol, press OK to add the symbol to your label text. 6
-
 1
1 -
 2
2 -
 3
3 -
 4
4 -
 5
5 -
 6
6 -
 7
7 -
 8
8 -
 9
9
 |
 |
