Dymo 18143 User Guide - Page 4
Settings, Printing Your First Label, Getting to Know Your Labelmaker - label printer
 |
View all Dymo 18143 manuals
Add to My Manuals
Save this manual to your list of manuals |
Page 4 highlights
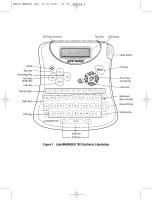
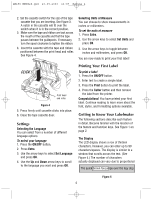
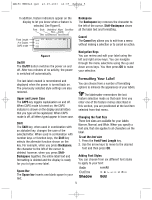
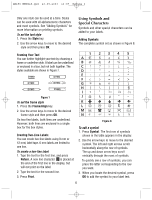
LM150 WEUdef.qxd 23-09-2003 16:07 Pagina 4 2. Set the cassette switch for the size of the tape cassette that you are inserting. See Figure 3. A notch in the cassette will fit over the switch when it is in the correct position. 3. Make sure the tape and ribbon are taut across the mouth of the cassette and that the tape passes between the guideposts. If necessary, turn the spool clockwise to tighten the ribbon. 4. Insert the cassette with the tape and ribbon positioned between the print head and roller. See Figure 4. Selecting Units of Measure You can choose to show measurements in inches or millimeters. To set the units of measure 1. Press Extra. 2. Use the arrow keys to select Set Units and press OK. 3. Use the arrow keys to toggle between inches and millimeters, and press OK. You are now ready to print your first label! CLICK ! Print head and roller Figure 4 5. Press firmly until cassette clicks into place. 6. Close the tape cassette door. Settings Selecting the Language You can select from a number of different language options. To select your language 1. Press the ON/OFF button. 2. Press Extra. 3. Use the arrow keys to select Set Language and press OK. 4. Use the Up and Down arrow keys to scroll to the language you want and press OK. Printing Your First Label To print a label 1. Press the ON/OFF button. 2. Enter text to create a simple label. 3. Press the Print button to print the label. 4. Press the Cutter button and then remove the label from the printer. Congratulations! You have printed your first label. Continue reading to learn more about the font, styles, and formatting options available. Getting to Know Your Labelmaker The following sections describe each feature in detail. Become familiar with the location of the feature and function keys. See Figure 1 on page 2. The Display The LCD display shows a row of thirteen characters. However, you can enter up to 99 characters/spaces. The display is similar to a window that scrolls across the text. (See Figure 5.) The number of characters actually displayed can vary due to proportional spTahceinqgu.ick brown fox jumps over the lazy dog Figure 5 4
-
 1
1 -
 2
2 -
 3
3 -
 4
4 -
 5
5 -
 6
6 -
 7
7 -
 8
8 -
 9
9
 |
 |
