Dymo DYMO Organizer Xpress Embossing Label Maker User Guide - Page 1
Dymo DYMO Organizer Xpress Embossing Label Maker Manual
 |
View all Dymo DYMO Organizer Xpress Embossing Label Maker manuals
Add to My Manuals
Save this manual to your list of manuals |
Page 1 highlights
Organizer Xpress Guide Extend the embossing tape about one inch. This will allow for easier loading in the Organizer Xpress. Grab ahold of the door located on the handle of the Organizer Xpress and pull to open. Insert the embossing tape into the slot located at the top of the label compartment. Feed the tape in as far as you can. Place the embossing tape in the label compartment. Squeeze the handle two times to help feed the tape through the unit. Close the label compartment door. Squeeze the handle two more times to continue feeding the tape through the unit. Turn the wheel to select different characters. Select the symbol.
-
 1
1 -
 2
2 -
 3
3
 |
 |
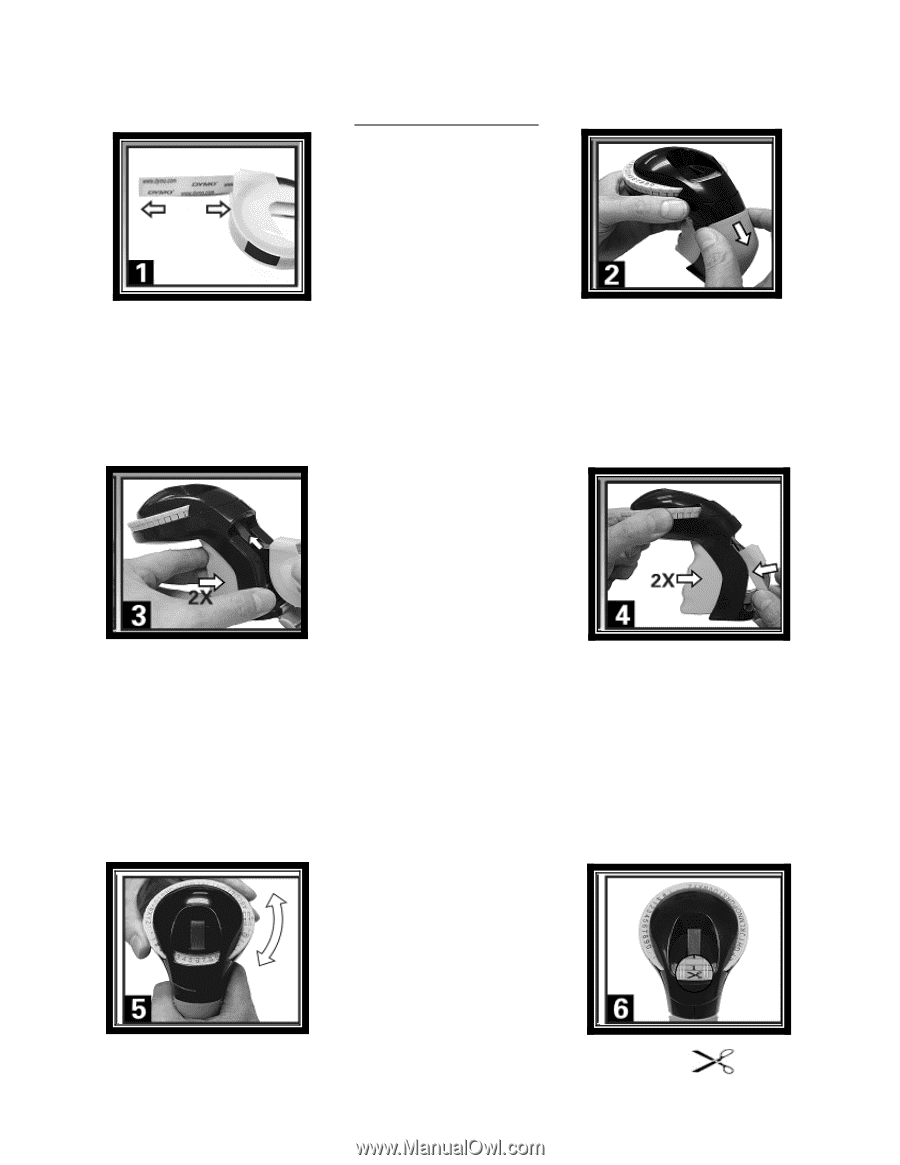
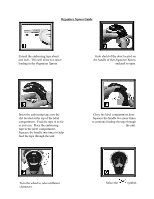
Organizer Xpress Guide
Grab ahold of the door located on
the handle of the Organizer Xpress
and pull to open
.
Extend the embossing tape about
one inch.
This will allow for easier
loading in the Organizer Xpress.
Insert the embossing tape into the
slot located at the top of the label
compartment.
Feed the tape in as far
as you can.
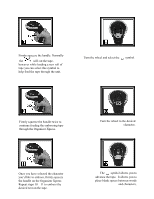
Place the embossing
tape in the label compartment.
Squeeze the handle two times to help
feed the tape through the unit.
Close the label compartment door.
Squeeze the handle two more times
to continue feeding the tape through
the unit.
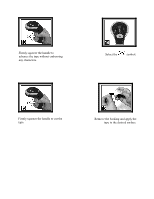
Turn the wheel to select different
characters.
Select the
symbol.