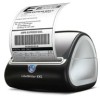
Dymo LabelWriter® 4XL Label Printer User Guide 3
Dymo LabelWriter® 4XL Label Printer Manual
 |
View all Dymo LabelWriter® 4XL Label Printer manuals
Add to My Manuals
Save this manual to your list of manuals |
Dymo LabelWriter® 4XL Label Printer manual content summary:
- Dymo LabelWriter® 4XL Label Printer | User Guide 3 - Page 1
User Guide DYMO LabelTM v.8 - Dymo LabelWriter® 4XL Label Printer | User Guide 3 - Page 2
the software may be reproduced or transmitted in any form or by any means or translated into another language without the prior written consent of Sanford, L.P. DYMO, DYMO Label, and LabelWriter are registered marks in the US and other countries. QuickBooks is a registered trademark and service mark - Dymo LabelWriter® 4XL Label Printer | User Guide 3 - Page 3
to DYMO Label v.8 (Windows) 3 Upgrading to DYMO Label v.8 (Mac) 3 Label Files 3 Address Book 3 Label and Tape Editors 4 Choosing a Label 4 Design Toolbar 4 Choosing a Printer 4 LabelWriter Twin Turbo Users 5 Intelligent Mail® Barcode 5 Supported Label Printers 5 Helping - Dymo LabelWriter® 4XL Label Printer | User Guide 3 - Page 4
Computer 27 Changing the Postal Barcode Position 27 Sharing Label Files 28 Removing the Sample Address Book 28 Finding Your Version 7 Labels (Windows Only) 28 Viewing the Status of Your Label Maker 29 Printing Labels 31 Printing a Single Label 31 Printing from the Address Book 31 - Dymo LabelWriter® 4XL Label Printer | User Guide 3 - Page 5
Using Smart Paste 38 Choosing a Printer 39 Printing to a LabelWriter Twin Turbo Printer 40 Using Both Label Rolls 40 Adjusting the Print Quality 41 Changing the Tape Label Alignment 41 Printing Cut Marks Between Labels 42 Setting the Default Copies to Print 42 Designing a Layout 43 - Dymo LabelWriter® 4XL Label Printer | User Guide 3 - Page 6
) 79 About the DYMO Label Add-In for QuickBooks (Windows Only) 80 Enabling the DYMO Label Add-In 80 Printing a Single Label from QuickBooks 80 Selecting Multiple Labels to Print 81 Printing Multiple Labels from QuickBooks 82 Printing Labels for Letters 82 Printing Directly from Other - Dymo LabelWriter® 4XL Label Printer | User Guide 3 - Page 7
(Windows) 95 Adding a Network Printer (Windows) 96 Sharing a Printer (Mac) 96 Adding a Network Printer (Mac) 96 Using a LabelWriter Print Server 97 Using a Third-Party Print Server 97 Firmware Versions That Support Print Servers 98 LabelManager 500TS Label Maker 99 Importing Data and - Dymo LabelWriter® 4XL Label Printer | User Guide 3 - Page 8
Internet Support 107 Contact Information 107 Glossary 109 viii - Dymo LabelWriter® 4XL Label Printer | User Guide 3 - Page 9
PDF417 barcode types. n Print mulitple labels from a database or CSV file with Import Data and Print on the Mac. n Addition of the Adult Patient Identification Wristband label type under Specialty/Retail Labels. For use with LabelWriter 450 Twin Turbo label printers. What's New in v.8.4 n Support - Dymo LabelWriter® 4XL Label Printer | User Guide 3 - Page 10
options for customizing the software DYMO Label so you can use the software the way you want. About Labels Describes thermal printing and the different types of labels available for DYMO label printers. About Network Printing Contains information about printing to label printers over a network - Dymo LabelWriter® 4XL Label Printer | User Guide 3 - Page 11
participate in the DYMO Product Improvement Program n Registering your DYMO label printer Upgrading to DYMO Label v.8 (Mac) Many of your previous settings are imported when you install DYMO Label v.8. Some of the settings that are imported from earlier versions of the software include: your default - Dymo LabelWriter® 4XL Label Printer | User Guide 3 - Page 12
or drag an object to place the object on the current label. In addition, you can now choose from a wide selection of clip art to add to your labels. Choosing a Printer All the label printers that are installed on your computer are now accessed from the print area of the main window. Simply click the - Dymo LabelWriter® 4XL Label Printer | User Guide 3 - Page 13
Twin Turbo with Left Roll selected Intelligent Mail® Barcode The Intelligent Mail barcode is now used by the USPS instead of the POSTNET barcode to represent the ZIP Code on your labels. Supported Label Printers Most LabelWriter 300 series printers and all of the LabelWriter 400 and 450 series label - Dymo LabelWriter® 4XL Label Printer | User Guide 3 - Page 14
This page intentionally left blank for double-sided printing. 6 - Dymo LabelWriter® 4XL Label Printer | User Guide 3 - Page 15
Chapter 3 Helping to Improve DYMO Products (Windows Only) You can help improve DYMO Label software by allowing DYMO to collect anonymous information on how you use the product. The information collected will not be used to personally identify you and you can stop - Dymo LabelWriter® 4XL Label Printer | User Guide 3 - Page 16
This page intentionally left blank for double-sided printing. 8 - Dymo LabelWriter® 4XL Label Printer | User Guide 3 - Page 17
layout to begin creating a new label. The label types displayed are based on the type of label printer you have installed. If your label printer only prints LabelWriter labels, then only LabelWriter labels are displayed. If your label printer only prints D1 labels (for example, a LabelManager 420P - Dymo LabelWriter® 4XL Label Printer | User Guide 3 - Page 18
Tour DYMO Label v.8 one type of label printer installed or if you have a LabelWriter Duo printer installed, both LabelWriter labels and Tape labels are displayed. The Labels tab consists of the following: n Label Types Label Types displays a preview of all the available label types. You can visually - Dymo LabelWriter® 4XL Label Printer | User Guide 3 - Page 19
types of design objects to your label from the Insert tab: Label Objects n Address n Text n Counter n Date and Time n Barcode n Shape, such as lines, rectangles, circles, and so on n Image from your own collection n Circular Text Clip Art DYMO Label software includes a variety of useful clip art - Dymo LabelWriter® 4XL Label Printer | User Guide 3 - Page 20
list of all the contacts in the current Address Book. DYMO Label software includes a sample address book for you to use as following: n Quickly add an address to a label n Select multiple addresses to print n Add, delete, and edit addresses in a DYMO address book n Correct addresses and add the ZIP - Dymo LabelWriter® 4XL Label Printer | User Guide 3 - Page 21
LabelWriter Label Edit Area - Tape Label Print Area The Print area includes several options for printing your labels. If you have more than one DYMO label printer installed, you can select which printer you want to print to. From the Print area, you can do the following: n Choose a label printer - Dymo LabelWriter® 4XL Label Printer | User Guide 3 - Page 22
Print area. For more information on the possible states of the label maker, see Viewing the Status of Your Label Maker. Zooming the Workspace (Windows) Several options are available for zooming the workspace. You can zoom just the label in the Edit area, or you can zoom the entire DYMO Label window - Dymo LabelWriter® 4XL Label Printer | User Guide 3 - Page 23
(Mac) Several options are available for zooming the label in the Edit area. To zoom the label Do one of the following: l Move the slider at the bottom-right of the Edit area. l Click at the bottom-right of the Edit area to zoom the label to fit the Edit area. l From the - Dymo LabelWriter® 4XL Label Printer | User Guide 3 - Page 24
This page intentionally left blank for double-sided printing. 16 - Dymo LabelWriter® 4XL Label Printer | User Guide 3 - Page 25
from the desktop without opening DYMO Label software. Review the following topics to start using DYMO Label software. n Adding My Return Address n Adding My Logo n Finding Your Label Type n Choosing a Layout n Printing Your First Label n Correcting an Address n Printing from the Desktop (Windows - Dymo LabelWriter® 4XL Label Printer | User Guide 3 - Page 26
DYMO Label label printer only prints D1 labels (for example, a LabelManager 420P or LabelManager PnP label maker), then only Tape labels are displayed. If you have more than one type of label printer installed or if you have a LabelWriter Duo printer installed, both LabelWriter labels and Tape labels - Dymo LabelWriter® 4XL Label Printer | User Guide 3 - Page 27
into an Address object on your label. 2. Click in the toolbar. The corrected address with the ZIP+4 code is displayed on the label in the Edit area. Printing from the Desktop (Windows) Using QuickPrint, you can quickly print a label directly from your desktop without opening DYMO Label software. 19 - Dymo LabelWriter® 4XL Label Printer | User Guide 3 - Page 28
the following to select the print options: a. Choose a label layout to use when printing from the Select label layout list. b. If necessary, choose a printer to print to from the Select printer list. c. (Twin Turbo Only) Choose the label roll to print to from the Select label roll list. You can also - Dymo LabelWriter® 4XL Label Printer | User Guide 3 - Page 29
the following to select the print options: a. Choose a label layout to use when printing from the Select label layout list. b. If necessary, choose a printer to print to from the Select printer list. c. (Twin Turbo Only) Choose the label roll to print to from the Select label roll list. You can also - Dymo LabelWriter® 4XL Label Printer | User Guide 3 - Page 30
This page intentionally left blank for double-sided printing. 22 - Dymo LabelWriter® 4XL Label Printer | User Guide 3 - Page 31
of the things that you can do with DYMO Label software: n Add Style to Your Labels n Print Multiple Labels Quickly with Smart Paste n Print Quickly from Anywhere n Print a Large Mailing List Continuously n Create a Multi-Line CD Label n Create a Two-Sided Label n Add Your Own Logo Add Style to Your - Dymo LabelWriter® 4XL Label Printer | User Guide 3 - Page 32
the address with Address Fixer before printing. n Change the label layout. n Choose a different label printer. Print Quickly from Anywhere (Mac) DYMO Label now includes a QuickPrint widget which you can use to quickly print a label without opening the DYMO Label program. To use the QuickPrint - Dymo LabelWriter® 4XL Label Printer | User Guide 3 - Page 33
a Large Mailing List Continuously Print a Large Mailing List Continuously The LabelWriter Twin Turbo printer can automatically switch from one label roll to the other when you need to print more labels than are left on a roll. For example, suppose you are printing a mailing list that contains 225 - Dymo LabelWriter® 4XL Label Printer | User Guide 3 - Page 34
, a mirror image of the content in the object is placed above the original content. This feature is useful for creating two-sided file folder labels using address labels or for creating tent-shaped cards for place cards. The mirror effect can be applied to Address, Text, Counter, and Date and Time - Dymo LabelWriter® 4XL Label Printer | User Guide 3 - Page 35
the Support section of the DYMO Web site to view more Frequently Asked Questions (FAQs). n Moving Your Files to Another Computer n Changing the Postal Barcode Position n Sharing Label Files n Removing the Sample Address Book n Finding Your Version 7 Labels n Viewing the Status of Your Label Maker - Dymo LabelWriter® 4XL Label Printer | User Guide 3 - Page 36
ABX, from the folder. You cannot delete the sample Address Book from within DYMO Label software. Finding Your Version 7 Labels (Windows Only) When you upgrade to DYMO Label v.8 from Version 7, all of the LabelWriter label files in your default label file folder are automatically converted to the new - Dymo LabelWriter® 4XL Label Printer | User Guide 3 - Page 37
default folder: ...\Libraries\Documents\DYMO Label\Labels You can open all of your Version 7 LabelWriter label files with DYMO Label v.8. However, DYMO Label v.8 cannot open tape labels created in earlier versions of the software. Viewing the Status of Your Label Maker If you have a LabelManager - Dymo LabelWriter® 4XL Label Printer | User Guide 3 - Page 38
This page intentionally left blank for double-sided printing. 30 - Dymo LabelWriter® 4XL Label Printer | User Guide 3 - Page 39
type does not match the last label type printed to the selected printer, appears on the Print button. Printing a Single Label In addition to simply adding text directly to your label, DYMO Label software provides a variety of options for printing single labels. n Print an address from the Address - Dymo LabelWriter® 4XL Label Printer | User Guide 3 - Page 40
Intelligent Mail barcode before printing. l Choose a different label printer. 4. Click . Printing Directly from Other Programs You can print directly to your DYMO label printer from most programs in the same manner as any other printer. To make printing even easier, we have included software add - Dymo LabelWriter® 4XL Label Printer | User Guide 3 - Page 41
Printing Multiple Labels To print labels on a DYMO label printer from applications other than DYMO Label software, you need to complete the following basic procedures: n Select your DYMO label printer from the printers list. n Choose the correct orientation and page size for the type of label you - Dymo LabelWriter® 4XL Label Printer | User Guide 3 - Page 42
in the Number of copies box. The number of labels that will print is displayed under the Print button. 3. Click . For LabelWriter Twin Turbo users, you can automatically switch label rolls when one roll of labels is empty. Load the same type of labels on both sides and select the Use both rolls - Dymo LabelWriter® 4XL Label Printer | User Guide 3 - Page 43
data and layout set to print. The Import Data and Print wizard starts. 3. Follow the instructions in the wizard to choose your data source and print your labels. About Smart Paste DYMO Label software includes a Smart Paste feature for quickly printing labels using data from other programs. Using - Dymo LabelWriter® 4XL Label Printer | User Guide 3 - Page 44
data from a spreadsheet using Smart Paste 1. From your spreadsheet program, copy the data you want to print as labels to the clipboard. 2. In DYMO Label software, make sure the current layout is the correct label that you want to print. 3. Choose Smart Paste from Clipboard from the Edit menu. 36 - Dymo LabelWriter® 4XL Label Printer | User Guide 3 - Page 45
the list delimiter character is based on the Windows list separator (or regional setting) being used. To print multiple labels from a text file 1. In DYMO Label software, make sure the current layout is the correct label that you want to print. 2. Choose Smart Paste from File from the Edit menu. 37 - Dymo LabelWriter® 4XL Label Printer | User Guide 3 - Page 46
contains the data and click Open. A dialog box appears showing how many labels will print. 4. Click OK. The indicated number of labels are printed. Printing from a Word Processor Using Smart Paste You can quickly print labels by copying text from a word processing program, such as Microsoft Word - Dymo LabelWriter® 4XL Label Printer | User Guide 3 - Page 47
In DYMO Label software, make sure the current layout is the correct label that you want to print. 3. Choose Smart Paste from Clipboard from the Edit menu. A dialog box appears showing you how many labels will print. 4. Click OK. The indicated number of labels are printed. Choosing a Printer If you - Dymo LabelWriter® 4XL Label Printer | User Guide 3 - Page 48
is displayed in the Print area. Printing to a LabelWriter Twin Turbo Printer The LabelWriter Twin Turbo printer features two side-by-side label printers in one, allowing you to have two types of labels loaded and ready for printing. When you have a LabelWriter Twin Turbo printer installed on your - Dymo LabelWriter® 4XL Label Printer | User Guide 3 - Page 49
, choose Preferences from the DYMO Label menu. 2. Select the LabelWriter printer tab. 3. Under Print quality, select one of the following settings: l Text - to use the default print setting used for most labels. l Barcode and graphics - to optimize print quality for barcodes and images. l Auto - to - Dymo LabelWriter® 4XL Label Printer | User Guide 3 - Page 50
from the DYMO Label menu. 2. Select the Tape printer tab. 3. Under Label separator, select one of the following: l Cut each label as printed - to pause or cut each label before the next label prints. l Print cut marks between labels - to print a mark between each printed label. 4. Click OK - Dymo LabelWriter® 4XL Label Printer | User Guide 3 - Page 51
Chapter 10 Designing a Layout DYMO Label software includes many sample layouts you can use right away. The sample layouts contain most of the design objects you need for a particular label type. For example, the Large Shipping label has a sample layout that includes the following objects: n an - Dymo LabelWriter® 4XL Label Printer | User Guide 3 - Page 52
designed layouts for later use. Once you save a layout, that layout appears as one of the available layouts each time you select the same label type from the Label Types tab. To save a layout 1. Design your custom layout. 2. Choose Save as Layout from the File menu. The Save As dialog box appears - Dymo LabelWriter® 4XL Label Printer | User Guide 3 - Page 53
An Address object is similar to a Text object, but is designed to print information that changes from label to label, such as names and addresses. Address objects can also display an Intelligent Mail postal barcode for US addresses. Address objects are by default variable text objects that link - Dymo LabelWriter® 4XL Label Printer | User Guide 3 - Page 54
Designing a Layout 4. Enter an address directly in the Address object or select an entry from the Address Book. 5. Format the text using the formatting toolbar. 6. Right-click the object, and then choose Properties. 7. Make any desired changes in the Address Object Properties dialog box, and then - Dymo LabelWriter® 4XL Label Printer | User Guide 3 - Page 55
Service to sort and track mail. Above - Place the Intelligent Mail barcode above the address. Default setting. Below - Place the Intelligent Mail barcode below the address. None - Remove the Intelligent Mail barcode Add a mirror image of the text on your label. Text scaling None - Do not resize the - Dymo LabelWriter® 4XL Label Printer | User Guide 3 - Page 56
Designing a Layout 1. Select the Insert tab. 2. Double-click Text. A new Text object is added to your label. 3. Move and resize the object as necessary. 4. Enter some text in the Text object. 5. Format the text using the formatting toolbar. 6. Right-click the object, - Dymo LabelWriter® 4XL Label Printer | User Guide 3 - Page 57
to use fixed text in the object. Vertical text Place the text vertically within the object. Mirror Add a mirror image of the text on your label. Text scaling None - Do not resize the text to fit the object. Shrink To Fit - Shrink the text to fit within the object. Auto Fit - Dymo LabelWriter® 4XL Label Printer | User Guide 3 - Page 58
of a semicircle. To add a Circular Text object 1. Select the Insert tab. 2. Double-click Circular Text. A new Circular Text object is added to your label. 3. Right-click the object, and then choose Properties. 4. Enter the text for the object and make any other changes in the Circular Text Object - Dymo LabelWriter® 4XL Label Printer | User Guide 3 - Page 59
Circular Text Object Properties Adding Design Objects 51 - Dymo LabelWriter® 4XL Label Printer | User Guide 3 - Page 60
have the object accept variable text. Clear this check box to use fixed text in the object. Add a mirror image of the text on your label. Full circle - Display the text in a full circle. Top arc - Display the text along the top curve of the circle. Text display Bottom arc - Display - Dymo LabelWriter® 4XL Label Printer | User Guide 3 - Page 61
label, you can choose to add your default logo, insert an image from the clipboard or a file on your computer, or capture and insert a still image from a video camera or video-capture board that supports on the label. For example, if you want to print your company logo on a shipping label, you should - Dymo LabelWriter® 4XL Label Printer | User Guide 3 - Page 62
the video device to use. Adding a Shape Object You can add rectangles, circles, or ovals as well as vertical and horizontal lines to your label. To add a Shape object 1. Select the Insert tab. 2. Double-click Shape. The Shape Object Properties dialog box appears. 3. Select the type of shape to - Dymo LabelWriter® 4XL Label Printer | User Guide 3 - Page 63
to fill your shape. Preview Shows how the shape will appear on your label. Adding a Barcode Object In addition to Intelligent Mail barcodes for addresses, you can also create labels that include barcodes based on many other barcode formats or types. You can choose from Code 39 (also called "Code - Dymo LabelWriter® 4XL Label Printer | User Guide 3 - Page 64
- Do not print the barcode text. Above - Place the barcode text above the barcode. Below - Place the barcode text below the barcode. Font - Change the font for the barcode text. QR Code Properties Barcode type Data Alignment Barcode size Select the type of barcode to add to your label. Select the - Dymo LabelWriter® 4XL Label Printer | User Guide 3 - Page 65
vertical format and create mirror images of the counter information on the labels. The labels are automatically numbered according to your specifications when you print them. The current number and other settings appear on the label displayed in the Edit area. To add a Counter object 1. Select the - Dymo LabelWriter® 4XL Label Printer | User Guide 3 - Page 66
CDs, numbered sequentially, you can enter "Disc " in the Before box and " of 10" in the After box. When you print your labels, the first label will read "Disc 1 of 10," the second label will read "Disc 2 of 10," and so on. Start at Enter the number to start the counter at. Count by - Dymo LabelWriter® 4XL Label Printer | User Guide 3 - Page 67
the text vertically within the object. Bottom - Align the text at the bottom of the object. Using Clip Art DYMO Label software includes a variety of useful clip art images that you can quickly add to your labels. Images in the Clip Art library are organized into different categories, making 59 - Dymo LabelWriter® 4XL Label Printer | User Guide 3 - Page 68
. Review the following topics for information about adding clip art to your labels and customizing the Clip Art library. n Adding Clip Art to Your Label n Adding an Image to the Clip Art Library n Deleting an Image from the Clip Art Library Adding Clip Art to Your Label DYMO Label software includes - Dymo LabelWriter® 4XL Label Printer | User Guide 3 - Page 69
available are determined by the fonts installed on your system. Changing the font selected will change the symbols that are available. DYMO Label software only supports TrueType fonts. To insert a symbol 1. Place the cursor at the point where you want to insert a symbol. 2. Choose Symbol from the - Dymo LabelWriter® 4XL Label Printer | User Guide 3 - Page 70
each character placed on top of the previous one. Each line of text within the object prints as a separate column. You can use this option to quickly create vertically-oriented text for video spine labels or binders. To create vertical text 1. Double-click the object that contains the text you want - Dymo LabelWriter® 4XL Label Printer | User Guide 3 - Page 71
list. b. Select the color to use for the border from the Color list. 3. Click OK. Adding a Border to a Tape Label DYMO Label software includes several options for adding borders to tape labels. When you add a border to a label, the border surrounds the entire label. You can also add a border to . 63 - Dymo LabelWriter® 4XL Label Printer | User Guide 3 - Page 72
choose a text color for the object. Creating a Variable Text Object All Address objects are designed to hold information that varies from label to label. For example, Address objects automatically display an entry that you select from the Address Book. Also, you can automatically paste information - Dymo LabelWriter® 4XL Label Printer | User Guide 3 - Page 73
paste names directly into the variable Text object with Smart Paste, for example, or use the Address Book to insert multiple names when the labels print. To create a variable Text object 1. Right-click the Text or Circular Text object that you want to make a variable Text object, and then choose - Dymo LabelWriter® 4XL Label Printer | User Guide 3 - Page 74
This page intentionally left blank for double-sided printing. 66 - Dymo LabelWriter® 4XL Label Printer | User Guide 3 - Page 75
from your Address Book to a label with a click of the mouse. n Create as many Address Books as you want. n Print labels using addresses from your Outlook to import the information. The default Address Book installed with DYMO Label software is named Sample Address Book. To create a new Address - Dymo LabelWriter® 4XL Label Printer | User Guide 3 - Page 76
to create a blank Address Book. l Click Yes and then follow the instructions in the Address Book Import Wizard to import data from an existing file. from your label at one time, select each Address object that contains an address you want to add to your Address Book. 2. Choose Save to DYMO Address - Dymo LabelWriter® 4XL Label Printer | User Guide 3 - Page 77
. 3. Review the correction print addresses that you have stored in your Outlook Contacts. You can also save addresses from your Outlook contacts to your DYMO Address Book. However, unlike the DYMO Address Book, you cannot add or change entries in your Outlook Contacts from within DYMO Label software - Dymo LabelWriter® 4XL Label Printer | User Guide 3 - Page 78
using Mac OS v10.4 or later, you can display and print addresses you already have stored in the Mac Address Book. However, unlike the DYMO Address Book, you cannot add or change the addresses in the Mac Address Book from within DYMO Label software. You must make changes using the Mac Address Book - Dymo LabelWriter® 4XL Label Printer | User Guide 3 - Page 79
box, and then click Save. The selected addresses are saved to the selected DYMO Address Book. Switching Address Books If you have created more than one Address Book you can choose the Address Book that you want to use to create labels. If you want to import addresses or data into an Address Book, - Dymo LabelWriter® 4XL Label Printer | User Guide 3 - Page 80
file, you can then import the data into a personal information management (PIM) database or other type of program. When you export data from DYMO Label software, each entry is exported as a single record and each line as a single field. To export an Address Book 1. Choose Export from the Address - Dymo LabelWriter® 4XL Label Printer | User Guide 3 - Page 81
Address Book menu. The Address Book Import Wizard starts. 3. Follow the instructions in the Address Book Import Wizard. 4. When finished, click Import. The or line breaks in the Arrange fields into desired format box. l To manually arrange the data fields: a. Click Next Record until you find an - Dymo LabelWriter® 4XL Label Printer | User Guide 3 - Page 82
Address Book keywords 1. Do one of the following: l For Windows, choose Preferences from the Edit menu. l For Mac, choose Preferences from the DYMO Label menu. 2. Select the Functional tab. 3. Click Edit keywords under Address Book. The Edit Name Keywords dialog box appears. 4. Select the type of - Dymo LabelWriter® 4XL Label Printer | User Guide 3 - Page 83
have one of the supported programs installed, the add-in is automatically installed as a toolbar print button within that program. You can use the add-in to format and print selected addresses or other information to your DYMO label printer. In addition, you can print directly from other programs - Dymo LabelWriter® 4XL Label Printer | User Guide 3 - Page 84
the LabelWriter Twin Turbo printer, choose the label roll to print to from the Select label roll list. 7. Choose the label layout to use from the Select label layout list. 8. Choose where to place the postal barcode from the Intelligent Mail barcode list. 9. Click Print. A label prints using - Dymo LabelWriter® 4XL Label Printer | User Guide 3 - Page 85
you have more than one DYMO label printer installed on your computer, choose the printer you want to print to from the Select printer list. 6. If you selected the LabelWriter Twin Turbo printer, choose the label roll to print to from the Select label roll list. 7. Choose the label layout to use from - Dymo LabelWriter® 4XL Label Printer | User Guide 3 - Page 86
If necessary, choose a printer from the Select printer list. c. (Twin Turbo Only) Choose the label roll to print to from the Select label roll list. You can also click Options to select a different printer and to visually choose the label type or layout. 7. Click Print. A label prints for each row - Dymo LabelWriter® 4XL Label Printer | User Guide 3 - Page 87
to review the data for each label. 6. If you have more than one DYMO label printer installed on your computer, choose the printer you want to print to from the Select printer list. 7. If you selected the LabelWriter Twin Turbo printer, choose the label roll to print to from the Select label roll - Dymo LabelWriter® 4XL Label Printer | User Guide 3 - Page 88
Other Programs 8. Click Print. A label prints for each selected contact. About the DYMO Label Add-In for QuickBooks (Windows Only) Using the DYMO Label Add-in for QuickBooks, you can quickly print mailing labels to your DYMO label printer from within Intuit's QuickBooks® software. The add-in works - Dymo LabelWriter® 4XL Label Printer | User Guide 3 - Page 89
. 6. Do the following to select the print options: a. Choose a label layout to use from the Select label layout list. b. If necessary, choose a printer from the Select printer list. c. (Twin Turbo Only) Choose the label roll to print to from the Select label roll list. You can also click Options - Dymo LabelWriter® 4XL Label Printer | User Guide 3 - Page 90
If necessary, choose a printer from the Select printer list. c. (Twin Turbo Only) Choose the label roll to print to from the Select label roll list. You can also click Options to select a different printer and to visually choose the label type or layout. 6. Click Print. A label prints for each row - Dymo LabelWriter® 4XL Label Printer | User Guide 3 - Page 91
on the add-ins, see Printing Labels from Other Programs. To print labels on a DYMO label printer from applications other than DYMO Label software, you need to complete the following basic procedures: n Select your DYMO label printer from the printers list. n Choose the correct orientation - Dymo LabelWriter® 4XL Label Printer | User Guide 3 - Page 92
This page intentionally left blank for double-sided printing. 84 - Dymo LabelWriter® 4XL Label Printer | User Guide 3 - Page 93
Chapter 13 Customizing DYMO Label DYMO Label software includes various options for customizing the software so that you can use the software the way you want. You can customize the software in the following ways: n Add My Return Address n Add My Logo n Change the Units of Measure n Hide the Rulers n - Dymo LabelWriter® 4XL Label Printer | User Guide 3 - Page 94
. A preview of the image is displayed in the dialog box. 5. Click OK. Changing the Language (Windows Only) You can change the display language for the DYMO Label software so that you can work in a language that is most familiar to you. Changing the language only affects the text and messages in the - Dymo LabelWriter® 4XL Label Printer | User Guide 3 - Page 95
dialog box and apply your changes. Choosing the Startup Label By default, each time you start DYMO Label software, the last label you used is displayed. However, you can choose to use any saved label as the startup label. To choose the label to display on startup 1. Do one of the following - Dymo LabelWriter® 4XL Label Printer | User Guide 3 - Page 96
and apply your changes. Suppressing the Check Label Size Warning DYMO Label software remembers the last label size that you printed on a specific printer. If the selected label type does not match the last label type printed to the selected printer, appears on the Print button. By default, when you - Dymo LabelWriter® 4XL Label Printer | User Guide 3 - Page 97
: l For Windows, choose Preferences from the Edit menu. l For Mac, choose Preferences from the DYMO Label menu. 2. Select the Functional tab. 3. Under Options, select the Paste button automatically prints check box. 4. Click OK to close the Preferences dialog box and apply your changes. Related - Dymo LabelWriter® 4XL Label Printer | User Guide 3 - Page 98
capitalization settings 1. Do one of the following: l For Windows, choose Preferences from the Edit menu. l For Mac, choose Preferences from the DYMO Label menu. 2. Select the Address Fixer tab. 3. Under Address capitalization, select one of the following: l Uppercase - to change the address to all - Dymo LabelWriter® 4XL Label Printer | User Guide 3 - Page 99
450D, and LabelPoint 350 use DYMO D1 label cassettes. The LabelWriter Duo uses both LabelWriter label rolls and D1 label cassettes. About Label Rolls DYMO LabelWriter printers use advanced thermal printing technology to print on specially treated, heat-sensitive labels. This means you will never - Dymo LabelWriter® 4XL Label Printer | User Guide 3 - Page 100
packaged. About Label Cassettes The following label printers use DYMO D1 label cassettes. n LabelWriter Duo n LabelManager 500TS label printer. Refer to the user guide that came with your printer for the label widths you can use. Visit the DYMO Web site at www.dymo.com for a complete list of label - Dymo LabelWriter® 4XL Label Printer | User Guide 3 - Page 101
your label printer only prints D1 labels (for example, a LabelManager 420P or LabelManager PnP label maker), then only Tape labels are displayed. If you have more than one type of label printer installed or if you have a LabelWriter Duo printer installed, both LabelWriter labels and Tape labels are - Dymo LabelWriter® 4XL Label Printer | User Guide 3 - Page 102
Stock All LabelWriter labels can be ordered with special adhesives and paper stock. If you have a unique application that requires labels with special properties, DYMO can help. Any of DYMO's standard size labels can be ordered with special properties. DYMO can also make custom size labels to fit - Dymo LabelWriter® 4XL Label Printer | User Guide 3 - Page 103
that will be printing to the shared printer. Sharing a Printer (Windows) These instructions assume that you have already installed DYMO Label software on the local computer. See the Quick Start Guide that came with your printer for more information. Before printing to a shared printer from Windows - Dymo LabelWriter® 4XL Label Printer | User Guide 3 - Page 104
print to a shared network printer, you need to install DYMO Label software on your local computer. If you want to install more than one shared DYMO label printer, you must add each label printer separately. The LabelWriter Duo printer is actually two printers (LabelWriter DUO Label and LabelWriter - Dymo LabelWriter® 4XL Label Printer | User Guide 3 - Page 105
servers only support the LabelWriter Duo Label printer. However, the DYMO LabelWriter Print Server does support both the LabelWriter Duo Label and Tape printers. n DYMO label printers with older firmware versions do not support print servers. See Firmware Versions That Support Print Servers. In - Dymo LabelWriter® 4XL Label Printer | User Guide 3 - Page 106
about the label printer firmware versions that support print servers. You can determine the firmware version for your printer by checking the serial number printed on the bottom of the printer. Label Printer Model LabelWriter 400 LabelWriter 400 Turbo LabelWriter Twin Turbo Serial Numbers - Dymo LabelWriter® 4XL Label Printer | User Guide 3 - Page 107
(*.UDL) for more information. To import data and download labels to the label maker 1. Click in the DYMO Label software Print area. 2. Click Create a set of labels from a spreadsheet or database and download. 3. Follow the instructions in the Import Data and Download wizard. Downloading Clip Art - Dymo LabelWriter® 4XL Label Printer | User Guide 3 - Page 108
20 labels printed on your label maker. n Saved - Contains labels created on your label maker and saved to the label maker memory. You can create subfolders within the Saved folder to keep your saved labels organized. To view labels stored on your label maker 1. Click in the DYMO Label software Print - Dymo LabelWriter® 4XL Label Printer | User Guide 3 - Page 109
Clip Art You can delete clip art images that you previously downloaded to your label maker. To delete clip art 1. Click in the DYMO Label software Print area. 2. Click Manage labels and Clip Art on the label maker. The LabelManager 500TS File Manager dialog box appears. 3. Click My Clip Art in the - Dymo LabelWriter® 4XL Label Printer | User Guide 3 - Page 110
This page intentionally left blank for double-sided printing. 102 - Dymo LabelWriter® 4XL Label Printer | User Guide 3 - Page 111
the Software Periodically, DYMO Label software will automatically check to see if you have the most recent version of the software installed. If an update to your version of the software is available, you will be asked to confirm that you want to update the software. You can also manually check - Dymo LabelWriter® 4XL Label Printer | User Guide 3 - Page 112
This page intentionally left blank for double-sided printing. 104 - Dymo LabelWriter® 4XL Label Printer | User Guide 3 - Page 113
that work with the LabelWriter printers and DYMO Label software. Below are some notes for those interested in developing products that work with LabelWriter printers. n Keep in mind that LabelWriter printers use standard printer drivers. Therefore, printing to a LabelWriter is no different than - Dymo LabelWriter® 4XL Label Printer | User Guide 3 - Page 114
This page intentionally left blank for double-sided printing. 106 - Dymo LabelWriter® 4XL Label Printer | User Guide 3 - Page 115
Chapter 19 Contacting DYMO Internet Support DYMO maintains a Web site at www.dymo.com that includes the latest support information for your label printer and DYMO Label software. Contact Information DYMO's Technical Support department is also available by phone from 9 am to 8 pm, Eastern time and by - Dymo LabelWriter® 4XL Label Printer | User Guide 3 - Page 116
This page intentionally left blank for double-sided printing. 108 - Dymo LabelWriter® 4XL Label Printer | User Guide 3 - Page 117
format The address format determines which Outlook data fields will be printed on your label and how those fields will be formated. C Codabar Codabar is and colon (:). Codabar Library DYMO Label software includes two special versions of Codabar that are used to barcode books. One version calculates - Dymo LabelWriter® 4XL Label Printer | User Guide 3 - Page 118
. Code 39 Library DYMO Label software includes two special versions of Code 39 that are used to barcode books. One version calculates print text, address, or barcode as shown. The data does not change. I Intelligent Mail barcode The Intelligent Mail barcode is used by the United States Postal Service - Dymo LabelWriter® 4XL Label Printer | User Guide 3 - Page 119
2 of 5, but requires 14 characters. This barcode is printed in a larger size, surrounded by a bounding box, and is typically used in warehouse applications. L label file You save a custom layout to a label file. label layout Text and graphics that make up a label design. label type Shape and size of - Dymo LabelWriter® 4XL Label Printer | User Guide 3 - Page 120
objects are on a single label. For example, when linking a barcode to a specific object on a label, you use the reference name of the object in the barcode properties. S saved labels Labels that you have created and saved as label files. SmartPaste A quick way to print labels using data from other - Dymo LabelWriter® 4XL Label Printer | User Guide 3 - Page 121
UPC-A barcodes, except that zeros are omitted from the encoded number in order to reduce the number of digits from 12 to 6. This code requires numeric information only. UPC-E can only be used for product UPC codes (the product type character must be 0 or 1). V variable When the label is printed the - Dymo LabelWriter® 4XL Label Printer | User Guide 3 - Page 122
This page intentionally left blank for double-sided printing. 114
-
 1
1 -
 2
2 -
 3
3 -
 4
4 -
 5
5 -
 6
6 -
 7
7 -
8
-
9
-
10
-
11
-
12
-
13
-
14
-
15
-
16
-
17
-
18
-
19
-
20
-
21
-
22
-
23
-
24
-
25
-
26
-
27
-
28
-
29
-
30
-
31
-
32
-
33
-
34
-
35
-
36
-
37
-
38
-
39
-
40
-
41
-
42
-
43
-
44
-
45
-
46
-
47
-
48
-
49
-
50
-
51
-
52
-
53
-
54
-
55
-
56
-
57
-
58
-
59
-
60
-
61
-
62
-
63
-
64
-
65
-
66
-
67
-
68
-
69
-
70
-
71
-
72
-
73
-
74
-
75
-
76
-
77
-
78
-
79
-
80
-
81
-
82
-
83
-
84
-
85
-
86
-
87
-
88
-
89
-
90
-
91
-
92
-
93
-
94
-
95
-
96
-
97
-
98
-
99
-
100
-
101
-
102
-
103
-
104
-
105
-
106
-
107
-
108
-
109
-
110
-
111
-
112
-
113
-
114
-
115
-
116
-
117
-
118
-
119
-
120
-
121
-
122
 |
 |

User Guide
DYMO Label
TM
v.8