Dynex DX-L24-10A User Manual (English)
Dynex DX-L24-10A Manual
 |
View all Dynex DX-L24-10A manuals
Add to My Manuals
Save this manual to your list of manuals |
Dynex DX-L24-10A manual content summary:
- Dynex DX-L24-10A | User Manual (English) - Page 1
24" LCD TV DX-L24-10A USER GUIDE - Dynex DX-L24-10A | User Manual (English) - Page 2
ii Dynex DX-L24-10A 24" LCD TV Contents Important safety instructions 2 Warnings 2 Cautions 2 Installing and removing the stand 3 Installing the stand 3 Adjusting the viewing angle of the TV 4 Removing the stand 4 Installing a wall-mount bracket 5 TV components 5 Front 5 Side 6 Back and - Dynex DX-L24-10A | User Manual (English) - Page 3
the auto shut-off function 21 Setting the optical audio output format 22 Playing TV audio only 22 Turning overscan on or off 23 Troubleshooting 23 Video and audio 23 Remote control 23 General 24 Maintenance 24 Cleaning 24 Specifications 24 Legal notices 24 One-year limited warranty 25 - Dynex DX-L24-10A | User Manual (English) - Page 4
iv - Dynex DX-L24-10A | User Manual (English) - Page 5
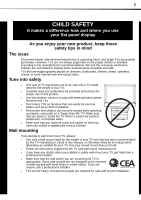
listed in this manual, or otherwise listed by an independent laboratory as suitable for your TV. One size of wall mount does not fit all. • Follow all instructions supplied by the TV and wall mount manufacturers. • If you have any doubts about your ability to safely wall mount your TV, get help from - Dynex DX-L24-10A | User Manual (English) - Page 6
DX-L24-10A Important safety instructions Important safety instructions CAUTION RISK OF ELECTRIC SHOCK DO NOT OPEN This symbol indicates that dangerous voltage constituting a risk of electric shock is present within your TV. This label is located on the back of your TV 10 Protect the power cord - Dynex DX-L24-10A | User Manual (English) - Page 7
Installing and removing the stand DX-L24-10A 3 • If your TV does not operate normally by following the operating instructions. Adjust only those controls that are covered by the operating instructions because incorrect adjustment of other controls may result in damage and will often require - Dynex DX-L24-10A | User Manual (English) - Page 8
4 DX-L24-10A Installing and removing the stand 3 Insert the stand column into the TV stand and secure it with the stand column screws. Stand groove Screws Stand column Caution: When adjusting the angle, use caution to avoid slipping or tipping the TV. 3 10 4 With the wider side of the stand - Dynex DX-L24-10A | User Manual (English) - Page 9
standby mode. Flashes blue when your TV receives no signal from VGA and enters DPMS (Display Power Management System) mode. No lights when power cord is unplugged. For more information, see "Turning your TV on or off"on page 12. 2 Remote sensor Receives signals from the remote control. Do not block. - Dynex DX-L24-10A | User Manual (English) - Page 10
DX-L24-10A TV components Side 1 2 3 Back and side 2 3 45 1 4 5 76 12 11 10 Power) button Press to turn on your TV, or wake the TV up from DPMS mode. Press again to put your TV in standby mode. For more information, see "Turning your TV device" on page 10. For software update only. Do not - Dynex DX-L24-10A | User Manual (English) - Page 11
, or a satellite box to this jack. For more information, see "Connecting an antenna, cable TV, or satellite TV box" on page 9. Remote control 1 12 2 3 13 4 5 14 15 6 7 16 8 17 9 18 10 19 11 20 # Button Description 4 MUTE Press to turn off the sound. Press again to turn on the - Dynex DX-L24-10A | User Manual (English) - Page 12
8 DX-L24-10A Using the remote control Using the remote control Installing remote control batteries To install remote control batteries: 1 Open the battery compartment cover by lifting it off when you press the release button. Aiming the remote control To use the remote control: • Point the remote - Dynex DX-L24-10A | User Manual (English) - Page 13
DX-L24-10A 9 Programming a universal remote control to work with your TV You can operate your TV with a new or existing universal remote control. To program a universal remote control: 1 Find the code for your universal remote control by identifying its model (or your set-top box's remote control - Dynex DX-L24-10A | User Manual (English) - Page 14
10 DX-L24-10A Making connections Connecting a VCR To connect a VCR: 1 Make sure that your TV's power cord is unplugged the camcorder's or game's user guides for more information. Connecting an HDMI device To connect an HDMI device: 1 Make sure that your TV's power cord is unplugged and the HDMI - Dynex DX-L24-10A | User Manual (English) - Page 15
connections DX-L24-10A 11 Connecting a component video device To connect a component video device: 1 Make sure that your TV's power cord is unplugged and the component video device is turned off. 2 Connect a component video cable to the COMPONENT OUT jacks on the component video device. Back of TV - Dynex DX-L24-10A | User Manual (English) - Page 16
12 DX-L24-10A Scanning for TV channels Scanning for TV channels Before you can watch TV channels in your area, you need to let the TV scan for available TV channels and store them in the TV channel list. To scan for channels: 1 Make sure that you have inserted the batteries in the remote control, - Dynex DX-L24-10A | User Manual (English) - Page 17
DX-L24-10A 13 On-screen menu overview Picture menu Picture Aspect Video Status Tint Color Contrast Brightness Sharpness Backlight Color Temp Color Enhance Adaptive Contrast Noise Reduction MPEG NR Cinema Mode Video Reset Wide Vivid 0- 50 -100 0- 48 -100 0- 50 -100 0- 74 -100 0- 40 -100 0- 10 -10 - Dynex DX-L24-10A | User Manual (English) - Page 18
DX-L24-10A Adjusting the picture Note: Button presses must be within three seconds of each other. • Press RECALL to go to the last channel viewed. Digital sub-channels A digital TV 100 0- 48 -100 0- 50 -100 0- 74 -100 0- 40 -100 0- 10 -100 Cool Off On Low Off Off : Select EXIT : Back VGA MENU : - Dynex DX-L24-10A | User Manual (English) - Page 19
DX-L24-10A 40 -100 0- 10 -10 Cool Off On Low Off Off : Select EXIT : Back TV MENU : Exit Sound Setting 2 Press or to highlight TV. The TV menu opens. Picture Cable. Picture TV Closed Caption C.C. Type C.C. Setting Antenna/Cable Auto Scan Add Channel Edit Channel Parental Controls DTV Signal - Dynex DX-L24-10A | User Manual (English) - Page 20
16 DX-L24-10A Setting parental controls Adding 10 -10 Cool Off On Low Off Off : Select EXIT : Back TV MENU : Exit Sound Setting 2 Press or to highlight TV. The TV menu opens. Picture TV Closed Caption C.C. Type C.C. Setting Antenna/Cable Auto Scan Add Channel Edit Channel Parental Controls - Dynex DX-L24-10A | User Manual (English) - Page 21
Setting parental controls DX-L24-10A 17 To set the parental password: 1 Press MENU. The the password. Press the number buttons on the remote control to enter the four-digit password. Note: If you forget the password, enter 9999. Picture TV Sound Closed Caption C.C. Type Auto Auto Password - Dynex DX-L24-10A | User Manual (English) - Page 22
18 DX-L24-10A Using closed captioning Note: For 10 -10 Cool Off On Low Off Off : Select EXIT : Back TV MENU : Exit Sound Setting 2 Press or to highlight TV. The TV menu opens. Picture TV Closed Caption C.C. Type C.C. Setting Antenna/Cable Auto Scan Add Channel Edit Channel Parental Controls - Dynex DX-L24-10A | User Manual (English) - Page 23
Adjusting the sound DX-L24-10A 19 Selecting the 10 -10 Cool Off On Low Off Off : Select EXIT : Back TV MENU : Exit Sound Setting 2 Press or to highlight TV. The TV menu opens. Picture TV Closed Caption C.C. Type C.C. Setting Antenna/Cable Auto Scan Add Channel Edit Channel Parental Controls - Dynex DX-L24-10A | User Manual (English) - Page 24
DX-L24-10A Adjusting TV settings 2 Press or to highlight Sound. The Sound menu opens. 2 Press or to highlight Setting. The Setting menu opens. Picture TV Sound Setting MTS Stereo Multi-Language Sound Status User Balance L50 0 R50 Bass -10- 0 -10 Treble -10- 0 -10 remote control to - Dynex DX-L24-10A | User Manual (English) - Page 25
TV settings DX-L24-10A 21 2 Press or to highlight Setting. The Setting menu opens. Picture TV the control buttons on the TV. When locked, the TV can only be operated using the remote control. To 0- 40 -100 0- 10 -10 Cool Off On Low Off Off : Select EXIT : Back TV MENU : Exit Sound Setting - Dynex DX-L24-10A | User Manual (English) - Page 26
DX-L24-10A Adjusting TV settings 3 Press to highlight Auto Shut Off, then press or to select On or Off. Picture TV -100 0- 10 -10 Cool Off On Low Off Off : Select EXIT : Back TV MENU : TV and your TV is receiving a broadcast signal. To exit Audio Only mode, press any button except the power - Dynex DX-L24-10A | User Manual (English) - Page 27
. Troubleshooting Warning: Do not try to repair your TV yourself. Contact authorized service personnel. Video and audio Problem Solution No picture or sound (the screen is not lit) • Make sure that the power cord is plugged into a power outlet. • Press (power) on your TV or the remote control - Dynex DX-L24-10A | User Manual (English) - Page 28
noise. This is not a malfunction. Buttons do not work • Unplug the power cord for a few seconds, then plug it back in and turn on your TV. Note: If the problem is not solved by using these troubleshooting instructions, turn off your TV, then turn it on again. Maintenance Cleaning • Clean your - Dynex DX-L24-10A | User Manual (English) - Page 29
Legal notices DX-L24-10A 25 One-year limited warranty US and Canada Markets Definitions: Dynex Products ("Dynex") warrants to you, the original purchaser of this new Dynex-branded television ("Product"), that the Product shall be free of defects in the original manufacturer of the material or - Dynex DX-L24-10A | User Manual (English) - Page 30
26 DX-L24-10A What does the warranty not cover? This warranty does not cover: • Customer instruction/education • Installation • Set up adjustments • Cosmetic damage • Damage due to acts of God, such as power surges • Accident(s) • Misuse • Abuse • Negligence • Commercial purposes/use, including but - Dynex DX-L24-10A | User Manual (English) - Page 31
power cord has been damaged, it should be replaced by the manufacturer, your service provider or qualified personnel to avoid risks. Si el cord rights reserved. DYNEX is a their respective owners. Best manual. Favor de leer este manual antes de usar el producto. Para el Soporte técnico de Dynex
-
 1
1 -
 2
2 -
 3
3 -
 4
4 -
 5
5 -
 6
6 -
 7
7 -
8
-
9
-
10
-
11
-
12
-
13
-
14
-
15
-
16
-
17
-
18
-
19
-
20
-
21
-
22
-
23
-
24
-
25
-
26
-
27
-
28
-
29
-
30
-
31
 |
 |

24" LCD TV
DX-L24-10A
USER GUIDE