Edimax IR-123E Manual
Edimax IR-123E Manual
 |
View all Edimax IR-123E manuals
Add to My Manuals
Save this manual to your list of manuals |
Edimax IR-123E manual content summary:
- Edimax IR-123E | Manual - Page 1
IR-113E/IR-123E User Manual 12-2012 / v1.2 - Edimax IR-123E | Manual - Page 2
I Introduction 1 1.1 Highlights of your new Network IP Camera 1 1.2 Safety Instructions 2 1.3 Packaging Contents 3 1.4 Familiar with your new Network IP Camera 3 1.5 Installation of the Network IP Camera 7 1.6 Locate the SD card slot 9 Chapter II Using Network IP Camera by Web Interface 11 - Edimax IR-123E | Manual - Page 3
3-9 Event ...45 3-9-1 Settings ...45 3-9-2 Media ...47 3-9-3 Event Server ...48 3-10 Recording to SD Card 52 3-11 SDHC...53 3-12 Log...55 3-13 Device Info...56 3-14 Maintenance...57 3-15 Language...58 Chapter IV Troubleshooting 59 Notice According to GNU General Public License Version 2 66 - Edimax IR-123E | Manual - Page 4
in remote place. Built-in SD-card slot for local storage, which can act like a stand-alone DVR. Two Way audio. 3GPP Mobile Surveillance Supported. RS-485 communication supported. ONVIF Compliant. The IR-113E/IR-123E (PoE model) Supports IEEE802.3af Power over Ethernet (PoE) standard - Edimax IR-123E | Manual - Page 5
using this Network IP Camera, or you would harm this camera and / or yourself! Also, the warranty will become void if you disobey these safety instructions. This Network IP Camera is sophisticated electronic device; do not drop it from high places. Do not place this IP Camera at hot / humid - Edimax IR-123E | Manual - Page 6
purchase for help. Item No. Description Quantity 1 Network camera 1 2 Power adapter 1 3 CD (with utility software, user manual & 1 multi-language QIG) 4 Quick installation guide 1 5 Sun shield kit 1 6 Bracket 1 1.4 Familiar with your new Network IP Camera Item 1. Sun shield - Edimax IR-123E | Manual - Page 7
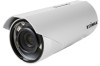
3. IP camera device [Front site] IP camera Item 1. IR-LED 2. Day/night sensor 3. Lens Description Used for illumination assistance under night mode Used for day/night detection and IR-LED ON/OFF control Fixed focal length. 4 - Edimax IR-123E | Manual - Page 8
[Back] Item 1. Screw 2. Sun shield 3. Camera device body 4. Bracket mount 5. Cable glands Description Connects between camera device body & sun shield. Protect camera device body from sun shine or rain directly IP camera metal case The portion to mount bracket For water proof 5 - Edimax IR-123E | Manual - Page 9
[DI/DO PIN ASSIGNMENT] Item Description 1 Blue, Sensor IN1, for alarm input, DV3.3Volt level allowed. 2 Yellow, RS485 D- 3 Orange, RS485 D+ 4 Black, GND 5 Green, Alarm out1, DV3.3Volt level allowed. 6 DC12Volt/2A input 7 Reset Button 8 Audio output 9 Audio input 10 Network, RJ45 - Edimax IR-123E | Manual - Page 10
1.5 Installation of the Network IP Camera Please follow the instructions below to setup your new IP camera. 1. Connect Ethernet cable to LAN port. 2. Plug DC power adapter to power outlet on the wall. 3. Connect DC - Edimax IR-123E | Manual - Page 11
fine tune lens focus. When lens focus fine tune ready, then screw the glass mask to the end position which can not do any more. IR-123E IR-113E 6. Unplug the power then find the screws in the package, use screwdriver to fix the sun shield on the device's main body. 7. Secure the - Edimax IR-123E | Manual - Page 12
the device can be powered on without use the power adapter. Note: The IR-113E/IR-123E (PoE model) supports IEEE 802.3af PoE standard. It can be powered via the Ethernet cable when connected to a PoE switch. 1.6 Locate the SD card slot 1. It is recommended that you use a tool with a hexagonal socket - Edimax IR-123E | Manual - Page 13
3 Loosen the PVC tube as shown below, and then unscrew the back cover to locate the SD Card slot. 10 - Edimax IR-123E | Manual - Page 14
use the EdiView Finder utility included in the CD. Note: We recommend that you use Microsoft Windows to install your network camera - Mac is not supported. 1. Insert the CD into your CD-ROM drive. When the wizard appears, click "Setup Utility" to install the "EdiView Finder" software. 11 - Edimax IR-123E | Manual - Page 15
Note: The contents of the CD-ROM can also be downloaded from the Edimax website: http://www.edimax.com/en/index.php 2. After the installation is complete, double-click the "EdiView_Finder" icon to execute the application. 3. Press 'Discover' button to search for all IP Cameras on your local 12 - Edimax IR-123E | Manual - Page 16
need to use this utility, click 'Exit' button to close it. Please note: If you have several network connections, such as "Wireless Function", please disable the "Wireless Functions" or/and other network connections that is not connected to IP camera, or IPFinder may fail to search IP camera! 13 - Edimax IR-123E | Manual - Page 17
2.2 Connect to IP Camera's Web User Interface and Install ActiveX Plugin When you know the IP address of IP Camera, you can connect to it by Internet Explorer web browser by entering its IP address in address bar. The use login screen will appear when you get connected: IP Camera's administrator - Edimax IR-123E | Manual - Page 18
Right click the indication bar and click: ''Install This Add-on for All Users on This Computer...' to install ActiveX plugin. For IE 9: Click 'Install' button located at the bottom of IE to install ActiveX plugin. If you're prompted that: 'Windows Firewall has blocked some features of this program' - Edimax IR-123E | Manual - Page 19
video stream from camera. NOTE: If this is the first time you use this IP Camera, you can refer to chapter 2.4 for instructions on Setup Wizard, which will guide you to complete the software setup of your new IP Camera. 2.3 Viewing Live Video After ActiveX control is installed, you can view IP - Edimax IR-123E | Manual - Page 20
There are various controls on web page, here are descriptions of every control item: Item Description 'Home' button This button is visible in all setup pages of IP camera, and you can go back to live video view by clicking this button when you're in other page. Stream Select video stream - Edimax IR-123E | Manual - Page 21
/ 'Connect' button original size. If your computer monitor's resolution is not enough and you want to see full image view, switch to fit screen and image size will adjust automatically. Start live video view. 'Disconnect' button Stop live video view. 'Snapshot' button Take a snapshot or camera - Edimax IR-123E | Manual - Page 22
Enable / Disable mute button / Start / Stop talk Button / algorithm to enlarge the video and some details may lost. If you need to focus on detail of specific objects in video view, please use optical zoom ring on lens set of IP camera. When mute is enabled ( ), you will not hear the voice from IP - Edimax IR-123E | Manual - Page 23
2.4 Client Settings In 'Client Settings' menu, you configure basic IP camera settings like data transfer protocol and data storage folder. To access 'Client Settings' menu, click 'Client Settings' button on the left. The following screen will appear: 20 - Edimax IR-123E | Manual - Page 24
Here are the descriptions of every setup item: Item Description RTSP Select this option to use RTSP (Real-Time Streaming Protocol) to transfer video data. HTTP Select this option to use HTTP (Hyper-Text Transfer Protocol) to transfer video data. If you don't know which one you should use, - Edimax IR-123E | Manual - Page 25
Chapter III Advanced Configuration If you wish to configure IP camera's settings, you can access IP camera's 'Configuration' menu, which provides various kinds of system setting. To access configuration menu, click 'Configuration' button on the left. The 'Configuration' submenu will appear, please - Edimax IR-123E | Manual - Page 26
3-1 System In this menu, you can configure basic IP camera settings like hostname and time. Here are the descriptions of every setup item: Item Description Host Name Input the IP camera's hostname here, it can be any meaningful words or characters that will help you to identify this IP camera - Edimax IR-123E | Manual - Page 27
note that if this IP camera can't access Internet, you must have a time server on local area network, or set the time manually. Set IP camera's date and time manually. Please set current date and time by 'Date' and 'Time' dropdown menu. When you finish with above settings, click 'Apply' button to - Edimax IR-123E | Manual - Page 28
3-2 Security In this menu, you can configure IP camera's login account. There are three kinds of account: - Administrator (Can view IP camera's video and make changes of camera setting) - User (Can view IP camera's video and see settings, but can't make any change) - Guest (Can view IP camera's - Edimax IR-123E | Manual - Page 29
Here are the descriptions of every setup item: Item Description Password / Retype Input administrator's new password in both Password 'Password' and 'Retype Password' field, and (Administrator) click 'Modify' button to change administrator's password. Please note: Don't forget administrator - Edimax IR-123E | Manual - Page 30
3-3 Network You can configure the network camera's general and advanced network settings here. 3-3-1 "General" Setup Page Set up IP address for this IP camera. This IP camera supports both IPv4 and IPv6 IP address. 27 - Edimax IR-123E | Manual - Page 31
IPv4 / IPv6: Obtain both IPv4 and IPv6 address from DHCP server on LAN automatically. Static IPv4 / IPv6: Assign an IPv4 / IPv6 address to IP camera manually. If you don't have a DHCP server on your local area network, you must use this option to specify an IP address. IP Address(IPv4): Input - Edimax IR-123E | Manual - Page 32
HTTP Port have to input PPPoE username and password assigned by network operator to get connected. Input IP camera's web connection port number here. When this port number is changed, you need to change web browser's port number you used to connect to IP camera. RTSP Port RTP Data Port For - Edimax IR-123E | Manual - Page 33
3-3-2 "Advanced" Setup Page You can setup advanced network settings in this page. This page is intended for advanced settings only, and this IP camera will work fine even you don't make any changes to this page. 30 - Edimax IR-123E | Manual - Page 34
can use it to discover this IP camera. Enable QoS to improve the data transfer priority of this IP camera (Your local area network must support QoS). You can select Video / Audio's QoS DSCP value (0 to 63), or both video and audio. 31 - Edimax IR-123E | Manual - Page 35
address to you. You must register a dynamic IP service first. Currently this IP camera supports Dyndns, TZO and No-ip dynamic IP service. Provider: Select dynamic IP service provider. Host Name: Input the host name you obtained from dynamic IP service provider. User name: Input user name used to - Edimax IR-123E | Manual - Page 36
3-4 IP Filter When this IP camera is directly connected to Internet and not protected by firewall, this function acts like a mini built-in firewall to protect the safety of this IP camera and avoid attacks from hackers. 33 - Edimax IR-123E | Manual - Page 37
Here are the descriptions of every setup item: Item Description Enable Filter Check this box to enable IP address filter, uncheck this Box to disable this function. Accepted IP list Here lists all IP address that can build connections to this IP camera. If you want to remove a set of IP - Edimax IR-123E | Manual - Page 38
3-5 Video You can adjust the image of the IP camera in this menu. There are 3 sub-menus in this menu: Image Setting, Video Setting, and Overlay, which can be accessed by tabs on the top: 3-5-1 Image Setting You can adjust the image parameters in this page. 35 - Edimax IR-123E | Manual - Page 39
" box to enable its "VIDEO OUT" function for connections and video sending to TV monitors or DVRs. IR-cut An IR-cut filter is built in this IP camera to reduce the effect of IR lights (which will change the color of image and makes it looks different than what you see through - Edimax IR-123E | Manual - Page 40
sunlight. You can define the starting and ending time when IR-cut filter should be switched on by select 'Schedule' and define starting and ending time by dropdown menu. When you finish with above settings, click ' - Edimax IR-123E | Manual - Page 41
Here are the descriptions of every setup item: Item Description H.264 Select the compression of main stream: H.264 / MPEG4. /MPEG4 Video Select video resolution. Resolution - H.264: 2048x1536 (QXGA) / 1920x1080 (1080p) 1280x960 (960p) / 1280x720 (720p) 720x480 (D1) / 640x480 (VGA) 320x240 ( - Edimax IR-123E | Manual - Page 42
3-5-3 Overlay Setting You can adjust the video overlay parameters in this page. Here are the descriptions of every setup item: Item Description Enable Time Check this box to enable overlaying time stamp on Stamp video. Remove the Check this box to remove time stamp's background color - Edimax IR-123E | Manual - Page 43
of the text (Text) readability of text in some cases. Enable Image Check this box to overlay a specific image on Overlay video, so you can show certain text / picture on the video and help people to identify this IP camera. Click 'Browse' button to pick a picture on your computer, then click - Edimax IR-123E | Manual - Page 44
Here are the descriptions of every setup item: Item Description Enable Check this box to enable microphone. If you don't Microphone want to hear voice from IP camera, you can uncheck this box to disable it. Audio Type The format is fixed as G.711 (Microphone) Microphone If the voice - Edimax IR-123E | Manual - Page 45
Here are the descriptions of every setup item: Item Description Enable Motion Check this box to enable motion detection. Detection Enable Check this box to enable this motion detection (Window 1 to window. You can select window 1 to 3 to enable up Window 3) to 3 motion detection windows. - Edimax IR-123E | Manual - Page 46
with above settings, click 'Apply' button to save changes. 3-8 PTZ Control (RS-485) If you mount the IP camera on pan-tilt camera cradles that support pan-tilt control via RS-485 connection, you can use this function to control pan-tilt camera cradle so you can control the orientation of - Edimax IR-123E | Manual - Page 47
camera cradle's address code. Use Custom When the pan-tilt camera cradle does not support Pelco-D Protocol protocol, you can define a protocol's detail by this function. Please refer to pan-tilt camera cradle's user manual to define the protocol. - Baud Rate: Select data baud rate of RS-485 - Edimax IR-123E | Manual - Page 48
of media file should be saved on designate media. 3. Event Server: Define the details of remote server. Please refer to following chapters for detailed instructions. 3-9-1 Settings This page lists all existing events. You can click 'Modify' button to edit an existing event, or 'Remove' to delete an - Edimax IR-123E | Manual - Page 49
To add a new event, click 'New' button and the descriptions of every setup item is listed below: Item Description Enable Setting Check this box to enable this event. If you just want to disable this event temporarily, you can uncheck this box to keep this event and disabling while not - Edimax IR-123E | Manual - Page 50
Time Enable FTP Enable EMAIL Enable Samba (Net Storage) Enable SD CARD Trigger digital output for xx second(s). Input any description text for Check this box and IP camera will save file on SD card when this event is activated. A working SD card must be inserted into IP camera in advance. Check this - Edimax IR-123E | Manual - Page 51
Here are the descriptions of every setup item: Item Description One Snapshot Save a picture file when event is triggered. H.264 Video Save a H.264 video clip. You can also select the recording length before and / or after the time when event is triggered in 'Pre Event' and 'Post' Event'. For - Edimax IR-123E | Manual - Page 52
A Samba server can be any computer running windows operating system with network neighbor function enabled. Many stand-alone network file server also support samba server function. Here are the descriptions of every setup item: Item Description FTP Server Check this box to enable FTP server - Edimax IR-123E | Manual - Page 53
SMTP Server - Enable Passive Mode: Check this box to force IP camera to communicate with FTP server in passive mode (Some FTP Server may only work when you check this box, while others don't). - Test FTP: Click this button to test FTP server settings above immediately. Check this box to enable - Edimax IR-123E | Manual - Page 54
Samba Server this IP camera. - Authentication: Check this box when authentication is required by the Email server you're using. You also need to input Email server's username and password in corresponding field. - Requires SSL Encryption: If your Email server required SSL encryption, check this box - Edimax IR-123E | Manual - Page 55
into IP camera, you can save video files on it. Note: 1. Be sure that the SD Card format should be FAT32. The NTFS format cannot be supported by this camera. 2. Unlink motion detection, this function will record video at specified time period on selected weekday(s). Here are the descriptions - Edimax IR-123E | Manual - Page 56
function please check the option when you place the order of the IP camera module. Once the module equipped SD card slot and SD card is inserted, the UI will show the capacity of the SD card like the image hereunder. There are two UI pages to show the record on the SD - Edimax IR-123E | Manual - Page 57
Set the time range then click "Search" then shows the records like below. 54 - Edimax IR-123E | Manual - Page 58
3-12 Log You can check the usage log of IP camera here. In this page, you can click: 1. First page / Final page: Jump to first / final page of log. 2. Previous / Next: Jump to previous or next page of log. 3. Remove: Clear log. You'll be prompted for confirmation. 55 - Edimax IR-123E | Manual - Page 59
3-13 Device Info You can check the information and network settings of this IP camera. These information are very useful when you need to repair or fix the problem of this IP camera. An example of device info page look like this: 56 - Edimax IR-123E | Manual - Page 60
save it on your computer. Backup to Backup IP camera's setting and save it on Micro SD Micro SD card card. A Micro SD card must be inserted into Micro SD device card slot when you click this button, or you'll receive an error message. Restore Restore a previously-saved configuration file - Edimax IR-123E | Manual - Page 61
device Upgrade button. Restore IP camera's configuration which is previously-saved on SD card. Upgrade IP camera's firmware. Click 'Browse' button to select a firmware image file on your computer first, then click 'Upgrade' button. 3-15 Language You can change - Edimax IR-123E | Manual - Page 62
Chapter IV Troubleshooting Please don't panic when you found this IP Camera is not working properly. Before you send this IP Camera back to us, you can do some simple checks to save your time: Problem description Can't connect to IP Camera No IP Camera found No image Possible solution(s) 1) - Edimax IR-123E | Manual - Page 63
. This equipment generates, uses, and can radiate radio frequency energy and, if not installed and used in accordance with the instructions, may cause harmful interference to radio communications. However, there is no guarantee that interference will not occur in a particular installation - Edimax IR-123E | Manual - Page 64
The ETSI version of this device is intended for home and office use in Austria, Belgium, Bulgaria, Cyprus, Czech, Denmark, Estonia, Finland, France, Germany, Greece, Hungary, Ireland, Italy, Latvia, Lithuania, Luxembourg, Malta, Netherlands, Poland, Portugal, Romania, Slovakia, Slovenia, Spain, - Edimax IR-123E | Manual - Page 65
prevederi relevante ale Directivei 2004/108/EC. Russian 2004/108/EC. Magyar: Ez a berendezés megfelel az alapvető követelményeknek és más vonatkozó irányelveknek 2004/108/EC. Türkçe: Bu cihaz 2004/108/EC direktifleri zorunlu istekler ve diğer hükümlerle ile uyumludur. Ukrainian 2004/108 - Edimax IR-123E | Manual - Page 66
WEEE Directive & Product Disposal At the end of its serviceable life, this product should not be treated as household or general waste. It should be handed over to the applicable collection point for the recycling of electrical and electronic equipment, or returned to the supplier for disposal. 63 - Edimax IR-123E | Manual - Page 67
Conformity We, Edimax Technology Co., Ltd., declare under our sole responsibility, that the equipment described below complies with the requirements of the European EMC directive (2004/108/EC). Equipment: Model No.: Report No.: 3Mpx Outdoor PoE True Day & Night Network Camera IR-113E T120302D06 - Edimax IR-123E | Manual - Page 68
We, Edimax Technology Co., Ltd., declare under our sole responsibility, that the equipment described below complies with the requirements of the European EMC directive (2004/108/EC). Equipment: Model No.: Report No.: 3Mpx Outdoor PoE True Day & Night Network Camera IR-123E T120424D17-E The - Edimax IR-123E | Manual - Page 69
to make sure that you have the freedom to distribute copies of free software (and charge for this service if you wish), that you receive source code , so that any problems introduced by others will not reflect on the original authors' reputations. Finally, any free program is threatened constantly - Edimax IR-123E | Manual - Page 70
section to claim rights or contest your rights to work written entirely by you; rather, the intent is to exercise the right to control the distribution of derivative or collective works based on the Program. In addition, mere aggregation of another work not based on the Program with the Program (or - Edimax IR-123E | Manual - Page 71
other property right claims or to contest validity of any such claims; this section has the sole purpose of protecting the integrity of the free software distribution system, which is implemented by public license practices. Many people have made generous contributions to the wide range of software - Edimax IR-123E | Manual - Page 72
free programs whose distribution conditions are different, write to the author to ask for permission. For software which is copyrighted by the Free Software Foundation, write to the Free Software Foundation; we sometimes make exceptions for this. Our decision will be guided NECESSARY SERVICING, - Edimax IR-123E | Manual - Page 73
70
-
 1
1 -
 2
2 -
 3
3 -
 4
4 -
 5
5 -
 6
6 -
 7
7 -
8
-
9
-
10
-
11
-
12
-
13
-
14
-
15
-
16
-
17
-
18
-
19
-
20
-
21
-
22
-
23
-
24
-
25
-
26
-
27
-
28
-
29
-
30
-
31
-
32
-
33
-
34
-
35
-
36
-
37
-
38
-
39
-
40
-
41
-
42
-
43
-
44
-
45
-
46
-
47
-
48
-
49
-
50
-
51
-
52
-
53
-
54
-
55
-
56
-
57
-
58
-
59
-
60
-
61
-
62
-
63
-
64
-
65
-
66
-
67
-
68
-
69
-
70
-
71
-
72
-
73
 |
 |
IR-113E/IR-123E
User Manual
12-2012 / v1.2