Edimax PT-31E Quick Install Guide - Page 11
Wireless Setting Wi-Fi Connection using WPS, Method 1: WPS BUTTON, Step 1, Step 2, Step 3, Step 4,
 |
View all Edimax PT-31E manuals
Add to My Manuals
Save this manual to your list of manuals |
Page 11 highlights
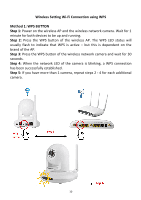
Wireless Setting Wi-Fi Connection using WPS Method 1: WPS BUTTON Step 1: Power on the wireless AP and the wireless network camera. Wait for 1 minute for both devices to be up and running. Step 2: Press the WPS button of the wireless AP. The WPS LED status will usually flash to indicate that WPS is active - but this is dependent on the brand of the AP. Step 3: Press the WPS button of the wireless network camera and wait for 30 seconds. Step 4: When the network LED of the camera is blinking, a WPS connection has been successfully established. Step 5: If you have more than 1 camera, repeat steps 2 - 4 for each additional camera. 10
-
 1
1 -
2
-
3
-
4
-
5
-
 6
6 -
 7
7 -
 8
8 -
 9
9 -
 10
10 -
 11
11 -
 12
12 -
 13
13 -
 14
14 -
 15
15 -
 16
16 -
17
-
18
-
19
-
20
 |
 |
10
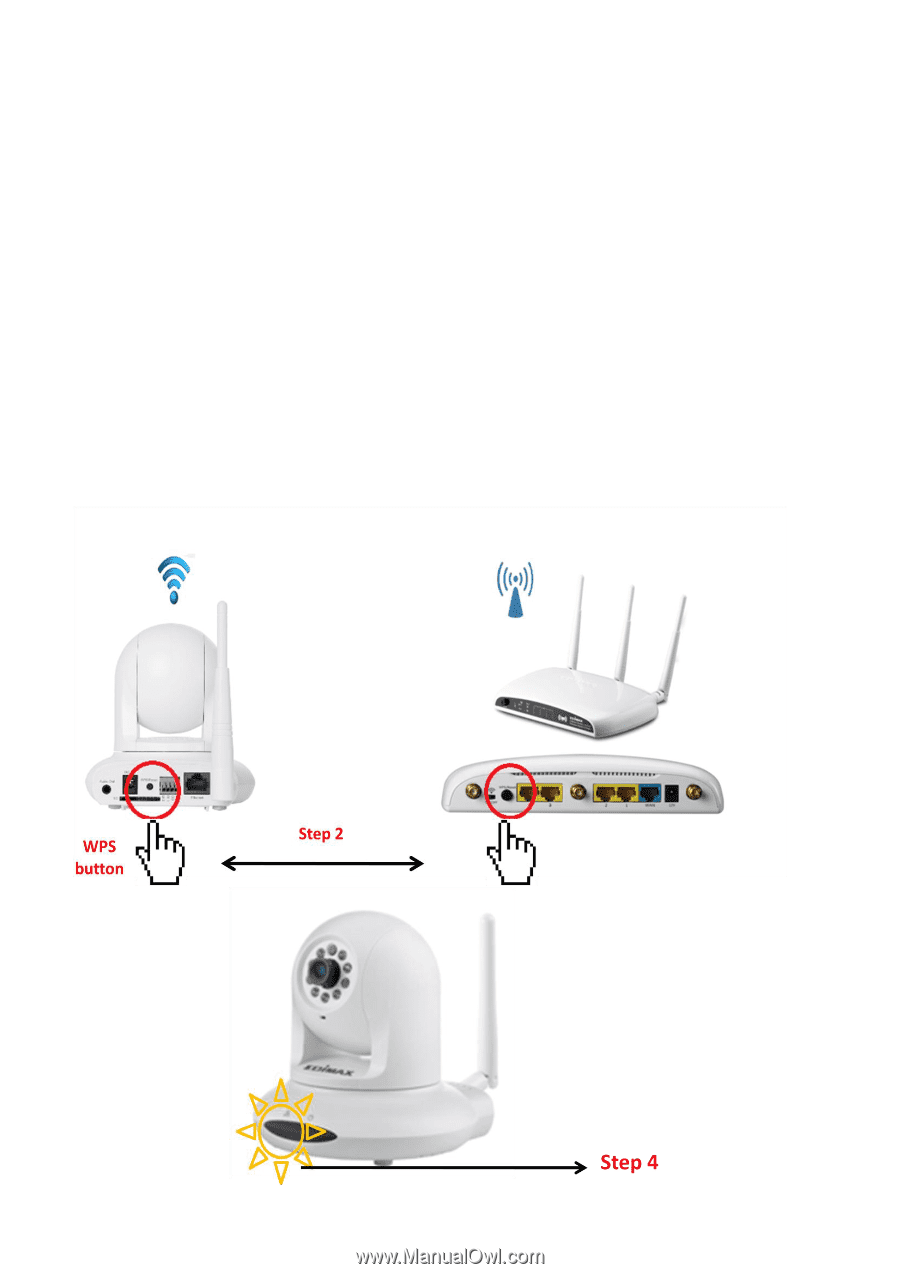
Wireless Setting Wi-Fi Connection using WPS
Method 1: WPS BUTTON
Step 1:
Power on the wireless AP and the wireless network camera. Wait for 1
minute for both devices to be up and running.
Step 2:
Press the WPS button of the wireless AP. The WPS LED status will
usually flash to indicate that WPS is active
–
but this is dependent on the
brand of the AP.
Step 3:
Press the WPS button of the wireless network camera and wait for 30
seconds.
Step 4:
When the network LED of the camera is blinking, a WPS connection
has been successfully established.
Step 5:
If you have more than 1 camera, repeat steps 2 - 4 for each additional
camera.