Epson 2200 Product Support Bulletin(s) - Page 5
the Apple Desktop. - stylus photo reset
 |
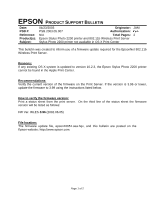
UPC - 010343841840
View all Epson 2200 manuals
Add to My Manuals
Save this manual to your list of manuals |
Page 5 highlights
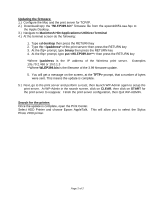
Updating the firmware: 1.) Configure the Mac and the print server for TCP/IP. 2.) Download/copy the "WLEP399.bin" firmware file from the epson10651.sea.hqx to the Apple Desktop. 3.) Navigate to Macintosh HD>Applications>Utilities>Terminal 4.) At the terminal screen do the following: 1. Type cd desktop then press the RETURN key 2. Type tftp then press the RETURN key 3. At the tftp> prompt, type binary then press the RETURN key 4. At the tftp> prompt, type put then press the RETURN key *Where ipaddress is the IP address of the Wireless print server. 135.79.2.468 or 10.0.1.3 **Where WLEP399.bin is the filename of the 3.99 firmware update. Examples 5. You will get a message on the screen, at the TFTP> prompt, that a number of bytes were sent. This means the update is complete. 5.) Next, go to the print server and perform a reset, then launch WP-Admin again to setup the print server. At WP-Admin in the search screen, click on CLEAR, then click on START for the print server to reappear. Finish the print server configuration, then Quit WP-ADMIN. Search for the printer: Once the update is complete, open the Print Center. Select ADD Printer and choose Epson AppleTalk. Photo 2200 printer. This will allow you to select the Stylus Page 2 of 2
-
 1
1 -
 2
2 -
 3
3 -
 4
4 -
 5
5 -
 6
6
 |
 |
