Epson 4180 Product Information Guide - Page 5
EPSON Scan, Scanning Film and Transparencies - photo
 |
UPC - 010343850880
View all Epson 4180 manuals
Add to My Manuals
Save this manual to your list of manuals |
Page 5 highlights
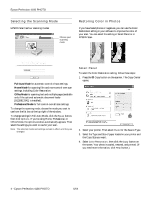
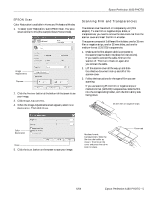
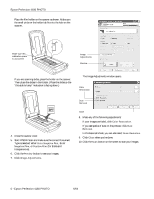
Epson Perfection 4180 PHOTO EPSON Scan Color Restoration is available in Home and Professional Modes. 1. To select Color Restoration, start EPSON Scan. You see a screen similar to this (the example shows Home Mode). Image Adjustments Preview 2. Click the Preview button at the bottom of the screen to see your image. 3. Click Image Adjustments. 4. When the Image Adjustments screen appears, select Color Restoration. Then click Close. Scanning Film and Transparencies The scanner cover has a built-in transparency unit (film adapter). To scan film or negative strips, slides, or transparencies, you need to remove the document mat from the scanner cover and insert the film in a holder. The scanner comes with 3 different film holders: one for 35 mm film or negative strips, one for 35 mm slides, and one for medium-format (120/220) transparencies. 1. Make sure the film adapter cable is connected to the scanner (see the Start Here sheet for instructions). If you need to connect the cable, first turn the scanner off. Then turn it back on again after you connect the cable. 2. Lift the scanner cover all the way up and slide the reflective document mat up and off of the scanner cover. 3. Follow the instructions for the type of film you are scanning: If you are scanning 35 mm film or negative strips or medium-format (120/220) transparencies, slide the film into the corresponding holder, with the film's shiny side facing down. 35 mm film or negative strips Color Restoration Close 5. Click the Scan button on the screen to scan your image. Medium-format transparencies: Slide the film into the holder as shown. Then lower the cover and press the tab to lock it in place. Cover tab 6/04 Epson Perfection 4180 PHOTO - 5
-
 1
1 -
 2
2 -
 3
3 -
 4
4 -
 5
5 -
 6
6 -
 7
7
 |
 |
