Epson 7850p User Manual - Supplement - Page 9
User's Guide, addition, the projector's gateway address should be identical - user manual
 |
UPC - 010343845992
View all Epson 7850p manuals
Add to My Manuals
Save this manual to your list of manuals |
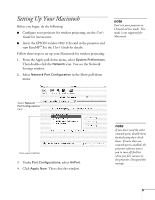
Page 9 highlights
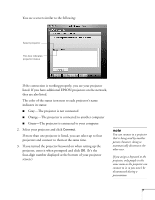
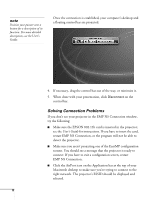
■ Make sure AirPort is turned on. Click the AirPort icon on the Application bar and select AirPort: On if necessary. If you don't see the AirPort icon, follow the instructions beginning on page 5 to enable AirPort. ■ If possible, move your projector, Macintosh, and base station (if you're using one) closer together. ■ If you're using Access Point (infrastructure) mode and you're connecting to the wrong network, you may be experiencing signal interference from another network. Open the Applications folder on your hard drive, then double-click the Utilities folder. Double-click AirPort Admin Utility. If you don't see your base station listed, reset the base station (see the instructions that came with your base station). If your base station is listed, check its name and IP address. Your projector should have the same ESSID name, and the first three segments of the projector's IP address should be identical to the first three segments of the base station's IP address. The last segment of the projector's IP address should be close, but not identical to the last segment of the base station's IP address. In addition, the projector's gateway address should be identical to the base station's IP address. See the User's Guide for instructions on setting up the projector in Access Point mode. ■ If you're unable to connect to the projector, use IP Connect Mode to connect manually. See the User's Guide for instructions. ■ Check the Network Configuration tab for your AirPort base station. If you set up your projector to connect in DHCP mode, Distribute IP Addresses and Start a Single IP Address should both be on. See your AirPort documentation for details about configuring your base station. note In Access Point mode, your projector's ESSID name and IP number are shown at the bottom of the EasyMP Network Screen. 9
-
 1
1 -
2
-
3
-
 4
4 -
 5
5 -
 6
6 -
 7
7 -
 8
8 -
 9
9 -
 10
10 -
 11
11 -
 12
12
 |
 |