Epson AcuLaser CX11N Product Information Guide - Page 12
Removing and Replacing a Toner, Cartridge - aculaser cx11nf toner k
 |
View all Epson AcuLaser CX11N manuals
Add to My Manuals
Save this manual to your list of manuals |
Page 12 highlights
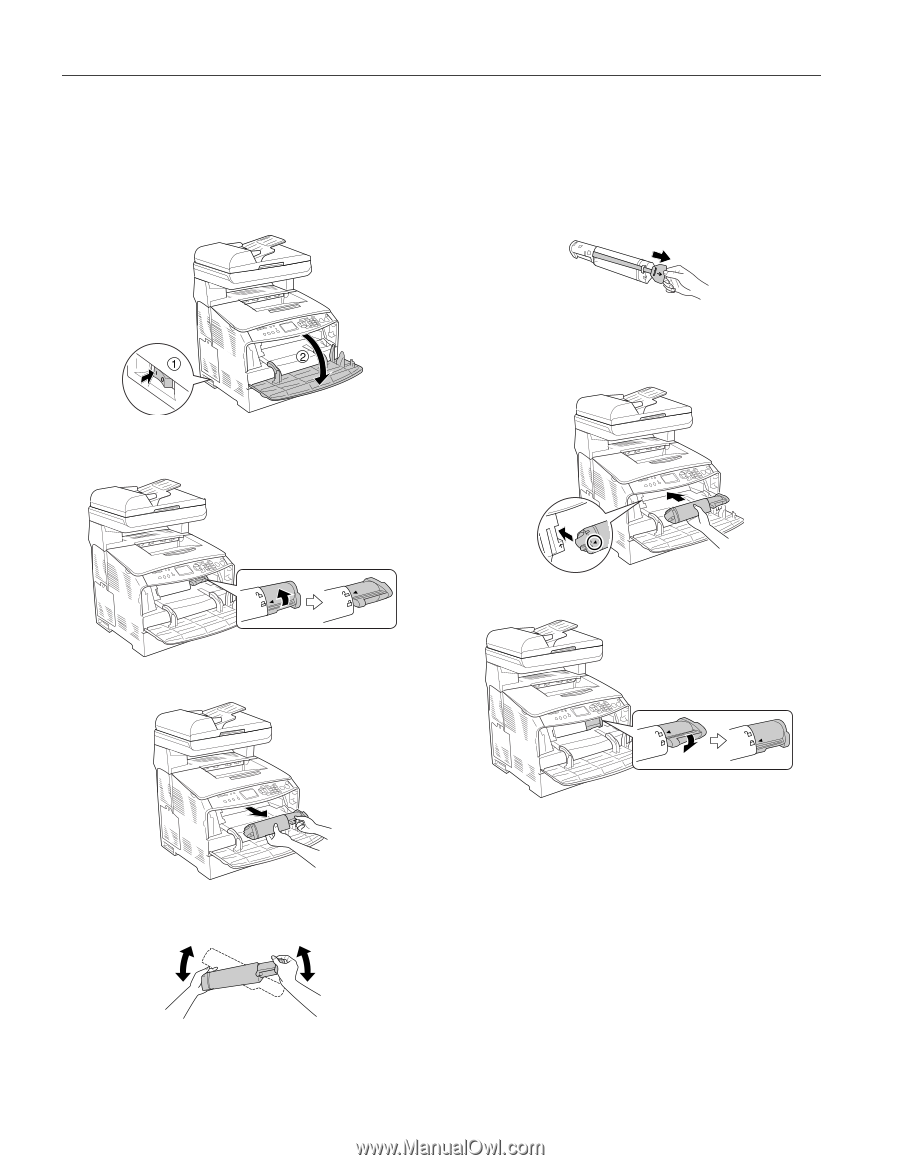
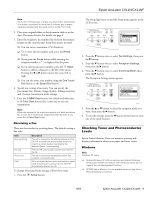
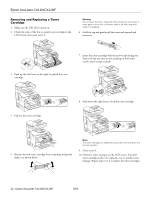
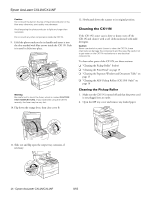
Epson AcuLaser CX11N/CX11NF Removing and Replacing a Toner Cartridge 1. Make sure the CX11N is turned on. 2. Check the color of the low or empty toner cartridge in the LCD screen, then open cover A. Warning: Do not touch the toner. Keep the toner away from your eyes. If toner gets on your skin or clothes, wash it off with soap and water immediately. 6. Hold the tag and gently pull the toner seal upward and remove it. 7. Insert the toner cartridge with the arrow mark facing you. Push it all the way into its slot, pushing on both sides evenly, until it stops securely. 3. Push up the lock lever on the right to unlock the toner cartridge. 4. Pull out the toner cartridge. 8. Push down the right lever to lock the toner cartridge. 5. Remove the new toner cartridge from its package and gently shake it as shown below. Note: The toner cartridge is installed securely when the lock lever is at the lock position. 9. Close cover A. 10. Check for toner messages on the LCD screen. If another toner cartridge needs to be replaced, you see another error message. Repeat steps 2 to 9 to replace the other cartridges. 12 - Epson AcuLaser CX11N/CX11NF 8/05
-
 1
1 -
2
-
3
-
4
-
5
-
6
-
 7
7 -
 8
8 -
 9
9 -
 10
10 -
 11
11 -
 12
12 -
 13
13 -
 14
14 -
 15
15 -
 16
16
 |
 |