Epson B-510DN Start Here
Epson B-510DN - Business Color Ink Jet Printer Manual
 |
View all Epson B-510DN manuals
Add to My Manuals
Save this manual to your list of manuals |
Epson B-510DN manual content summary:
- Epson B-510DN | Start Here - Page 1
Start Here B-310N/B-510DN Before using the printer, make sure you read the safety instructions in the User's Guide on your printer CD. 1 Unpack 3 Install cartridges 1 Open the cartridge cover. 2 Unpack the 4 ink cartridges. If anything is missing, contact Epson as described on the back of this - Epson B-510DN | Start Here - Page 2
the front edge guide. Note: Close the front cover of the legal-sized paper cassette. 5 Reinsert the cassette into the printer. 6 Slide size paper support. 6 Choose your connection Network Connection See the Network Installation Guide for instructions. B-310N/B-510DN Network Installation Guide Guide - Epson B-510DN | Start Here - Page 3
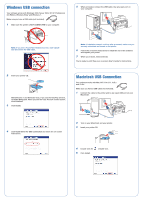
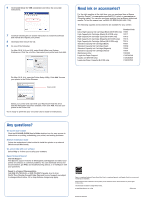
the CD. You're ready to print! See your on-screen User's Guide for instructions. 2 Insert your printer CD. With Windows 7 and Windows Vista, if you see the AutoPlay window, click Run Setup.exe. When you see the User Account Control screen, click Continue. 3 Click Install. Macintosh USB Connection - Epson B-510DN | Start Here - Page 4
Standard Capacity Ink Cartridge (Yellow) Maintenance Box Legal-size Paper Support Duplex unit (B-310N only) Legal-size Paper Cassette (B-310N only) Product Code T6181 T6171 T6172 T6173 T6174 T6161 T6162 T6163 T6164 T619000 C12C815341 C12C802531 C12C817001 For Mac OS X 10.4, open the Printer Setup
-
 1
1 -
 2
2 -
 3
3 -
 4
4
 |
 |
B-310N/B-510DN
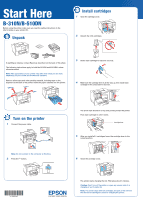
Before using the printer, make sure you read the safety instructions in the
User’s Guide
on your printer CD.
Start Here
Unpack
If anything is missing, contact Epson as described on the back of this sheet.
The following instructions apply to both the B-310N and B-510DN, unless
otherwise noted.
Note:
The appearance of your printer may differ from what you see here,
depending on your model and accessories installed.
Remove all the tape and other packing material, including tape on the
duplexer at the back of the printer. Insert the paper cassette into the printer.
1
Turn on the printer
1
Connect the power cable.
Note:
Do not connect to the computer at this time.
2
Press the
button.
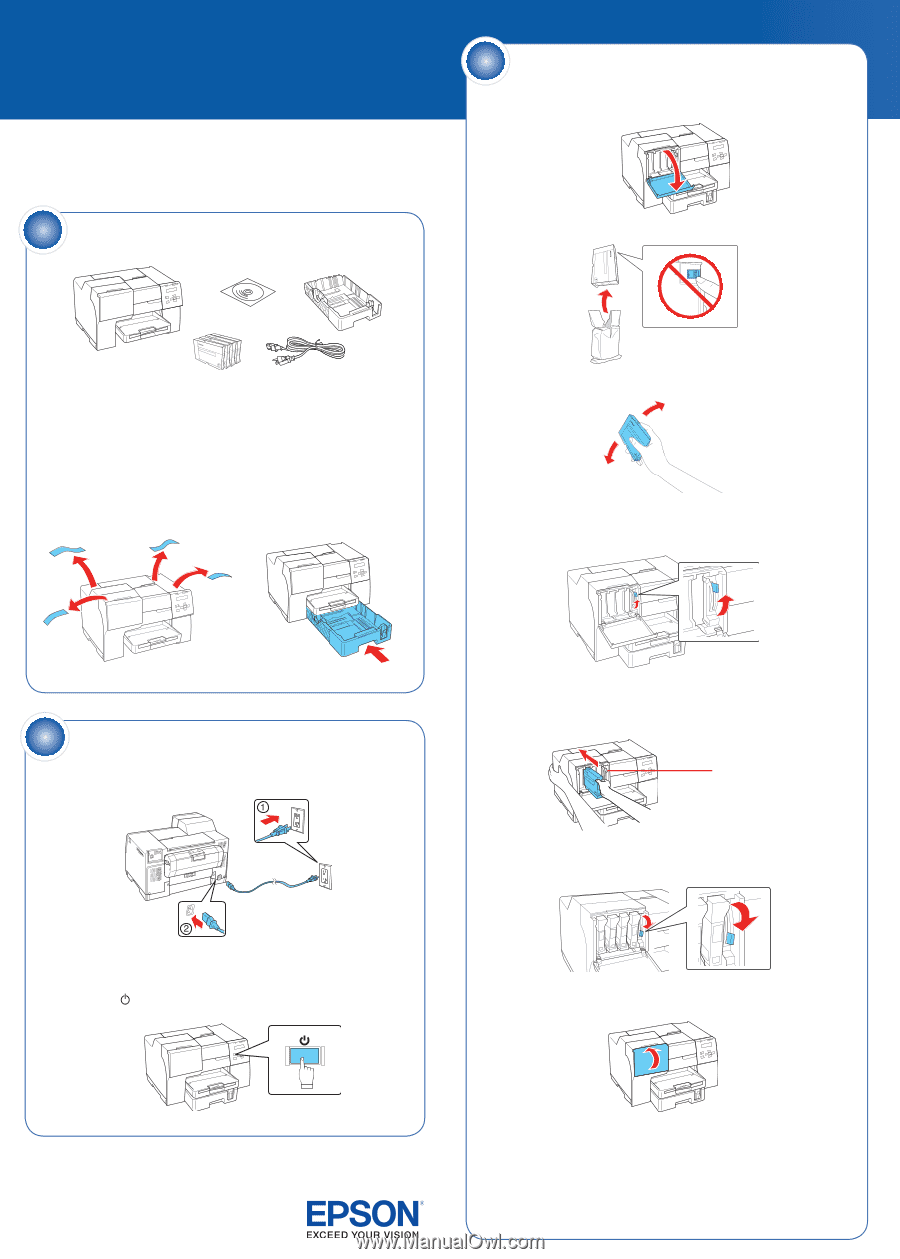
2
Install cartridges
1
Open the cartridge cover.
2
Unpack the 4 ink cartridges.
3
Shake each cartridge for about 5 seconds.
4
Make sure the cartridge lever is all the way up, then install each
cartridge in the correct slot for its color.
The arrow mark should be on top and pointing toward the printer.
Push each cartridge in until it clicks.
Cartridge lever
5
After you install all 4 cartridges, lower the cartridge lever to the
locked position.
6
Close the cartridge cover.
The printer starts charging the ink. This takes about 5 minutes.
Caution:
Don’t turn off the printer or open any covers while it is
charging or you’ll waste ink.
Note:
The printer ships with full cartridges and part of the ink from
this first set of cartridges is used for charging the printer.
3
*411826000*
*411826000*