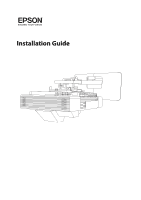
Epson BrightLink 1485Fi Installation Guide - Page 5
Installation Location
 |
View all Epson BrightLink 1485Fi manuals
Add to My Manuals
Save this manual to your list of manuals |
Page 5 highlights
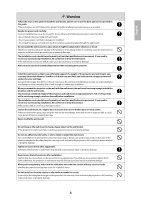
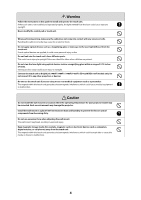
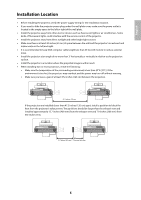
English Installation Location • Before installing the projector, verify the power supply wiring for the installation location. • If you want to hide the projector power plug under the wall plate cover, make sure the power outlet is located in the empty space to the left or right of the wall plate. • Install the projector away from other electric devices such as fluorescent lights or air conditioners. Some kinds of fluorescent lights could interfere with the remote control of the projector. • Install the projector away from direct sunlight and other bright light sources. • Make sure there is at least 20 inches (50 cm) of space between the wall and the projector's air exhaust and intake vents on the left and right. • It is recommended to keep VGA computer cable length less than 65 feet (20 meters) to reduce external noise. • Install the projector at an angle of no more than 3° horizontally or vertically in relation to the projection surface. • Install the projector in a location where the projected image is within reach. • When installing two or more projectors, check the following: • Make sure the temperature of the surrounding environment is less than 95°F (35°C). If the environment is too hot, the projectors may overheat and the power may turn off without warning. • Make sure you leave a gap of at least 47.2 inches (120 cm) between the projectors. 47.2 inches (120 cm) If the projectors are installed closer than 47.2 inches (120 cm) apart, install a partition to block the heat from the projector's exhaust vent. The partitions should be larger than the exhaust vent and installed approximately 15.7 inches (400 mm) from the exhaust vent and 7.9 inches (200 mm) from the intake vents. 15.7 inches (400 mm) 7.9 inches (200 mm) 5
-
 1
1 -
 2
2 -
 3
3 -
 4
4 -
 5
5 -
 6
6 -
 7
7 -
 8
8 -
 9
9 -
 10
10 -
 11
11 -
12
-
13
-
14
-
15
-
16
-
17
-
18
-
19
-
20
-
21
-
22
-
23
-
24
-
25
-
26
-
27
-
28
-
29
-
30
-
31
-
32
-
33
-
34
-
35
-
36
-
37
-
38
-
39
-
40
-
41
-
42
-
43
-
44
-
45
-
46
-
47
-
48
-
49
-
50
-
51
-
52
-
53
-
54
-
55
-
56
-
57
-
58
-
59
-
60
-
61
-
62
-
63
-
64
-
65
-
66
-
67
-
68
-
69
-
70
-
71
-
72
-
73
-
74
-
75
-
76
-
77
-
78
-
79
-
80
-
81
-
82
-
83
-
84
-
85
-
86
-
87
-
88
-
89
-
90
-
91
-
92
-
93
-
94
-
95
-
96
-
97
-
98
-
99
-
100
-
101
-
102
-
103
-
104
-
105
 |
 |
