Epson Perfection 1640SU Office Product Support Bulletin(s) - Page 7
Click on OK
 |
View all Epson Perfection 1640SU Office manuals
Add to My Manuals
Save this manual to your list of manuals |
Page 7 highlights
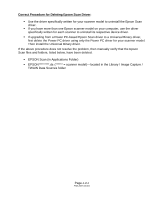
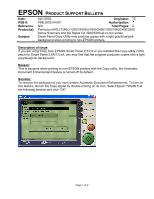
06) Click on the "Path Line" and using the back arrow back up the cursor to the drive letter and change it to the desired "drive" letter. 07) Click on "OK" 08) For the message to create the necessary folders, click "YES" 09) Click "Next" 10) Continue with "installation" 11) Follow steps 5 through 9 for "Copy Utility" installation 12) Follow steps 5 through 9 for any other Smart Panel applet to be installed 13) If Epson Twain has not been installed, go to "Twain 5.x" and run disk 1 14) Restart system and test the software with the scanner Page 3 of 3
-
 1
1 -
 2
2 -
 3
3 -
 4
4 -
 5
5 -
 6
6 -
 7
7 -
 8
8 -
 9
9 -
 10
10 -
 11
11 -
 12
12 -
13
-
14
-
15
-
16
-
17
-
18
-
19
-
20
-
21
-
22
-
23
-
24
-
25
-
26
-
27
-
28
-
29
-
30
-
31
-
32
-
33
-
34
-
35
-
36
-
37
-
38
-
39
 |
 |

Page
3 of 3
06) Click on the "Path Line" and using the back arrow back up the cursor to the drive letter and
change it to the desired "drive" letter.
07) Click on "OK"
08) For the message to create the necessary folders, click "YES"
09) Click "Next"
10) Continue with "installation"
11) Follow steps 5 through 9 for "Copy Utility" installation
12) Follow steps 5 through 9 for any other Smart Panel applet to be installed
13) If Epson Twain has not been installed, go to "Twain 5.x" and run disk 1
14) Restart system and test the software with the scanner