Epson Perfection 3200 Photo Color Management Workbook - Page 32
Print, Print Settings, Color Management, No Color Adjustment, Management settings appear - driver windows 7
 |
View all Epson Perfection 3200 Photo manuals
Add to My Manuals
Save this manual to your list of manuals |
Page 32 highlights
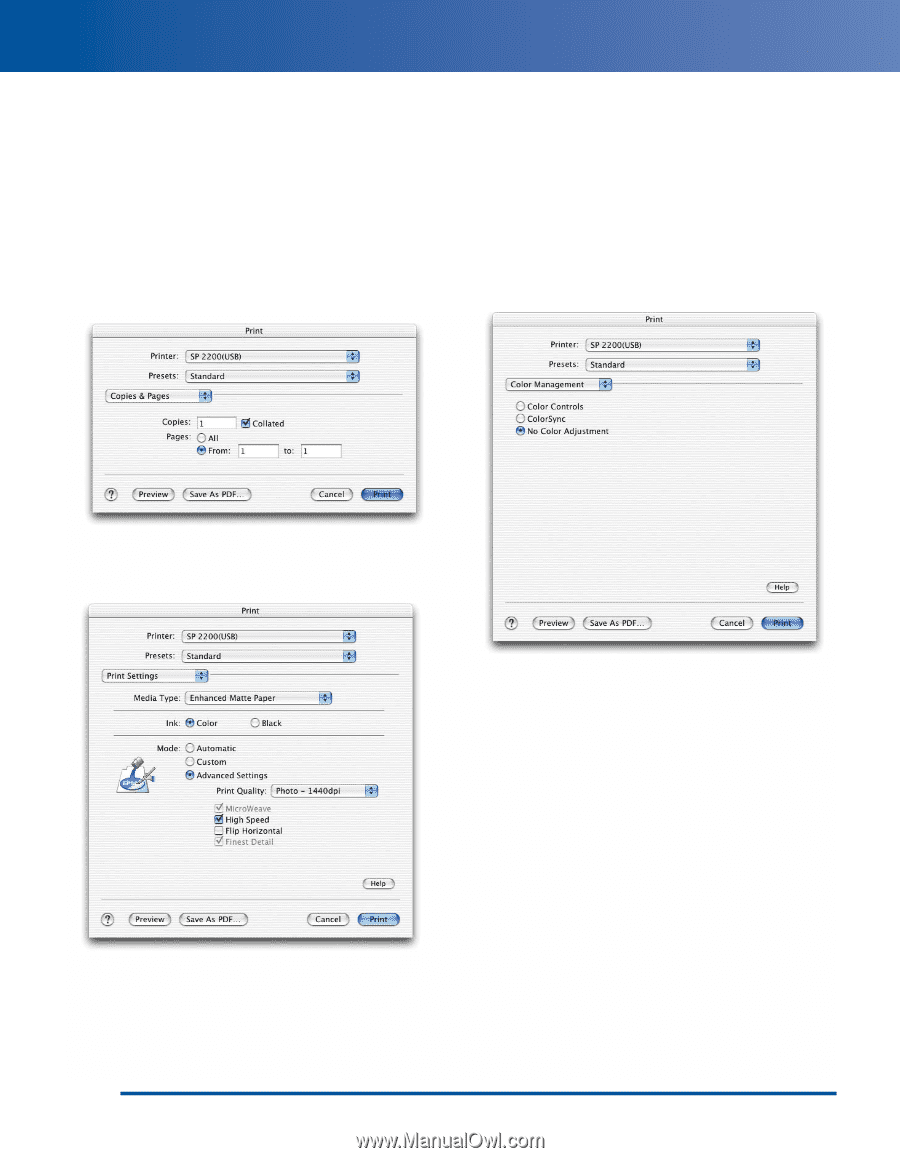
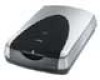
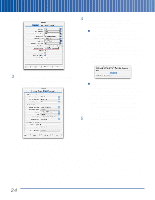
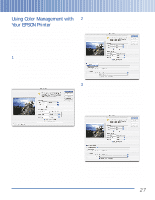
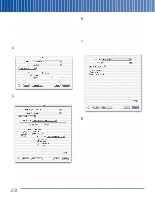
The conversion is applied only to the print stream, leaving the source document untouched. One advantage of this approach is that you can easily print the same document to many different outputs by simply changing the profile in the print space. 4 Once you've made your settings, click the Print button. The Print window appears: 6 Make sure the settings for Media Type and Print Quality are the same as the ones you used for the target when you built your printer profile. Remember, profiles are specific to a paper type and resolution. 7 When you've made your settings, choose Color Management. The Color Management settings appear: 5 Choose Print Settings from the Options pop-up menu. The Print settings appear: 8 Click No Color Adjustment. (If you don't do this, the printer driver will perform an additional correction to the image data, usually with disappointing results.) Then click Print. Your EPSON printer produces a colormanaged print that matches your image as closely as is physically possible. 28
-
 1
1 -
2
-
3
-
4
-
5
-
6
-
7
-
8
-
9
-
10
-
11
-
12
-
13
-
14
-
15
-
16
-
17
-
18
-
19
-
20
-
21
-
22
-
23
-
24
-
25
-
26
-
 27
27 -
 28
28 -
 29
29 -
 30
30 -
 31
31 -
 32
32 -
 33
33 -
 34
34
 |
 |