Epson PictureMate Dash Start Here
Epson PictureMate Dash - PictureMate Dash USB 4x6 Color Inkjet Photo Printer Manual
 |
UPC - 683728127114
View all Epson PictureMate Dash manuals
Add to My Manuals
Save this manual to your list of manuals |
Epson PictureMate Dash manual content summary:
- Epson PictureMate Dash | Start Here - Page 1
Zoom. To print from your computer, see the Basics book and your CD after completing these steps. 1 Unpack PictureMate® comes with all these items in the box. PictureMate Power adapter Power cable PictureMate photo paper Initial PictureMate photo cartridge Basics book Printer Software - Epson PictureMate Dash | Start Here - Page 2
the back. 5 Open the paper support. I/ On button 6 Press the On button to turn on PictureMate. After a moment, you see this on the photo viewer screen: Now you can install your initial photo cartridge. 3 Install the Initial Photo Cartridge 1 Turn PictureMate around and open the - Epson PictureMate Dash | Start Here - Page 3
not go in all the way. 5 Slide the lever all the way right, to the Lock position. 6 Close the cartridge door. PictureMate charges the print head for 3 to 4 minutes and displays the screen above. 7 When you see the Charging complete message on the photo viewer screen, press OK. Press here - Epson PictureMate Dash | Start Here - Page 4
4 Load Paper PictureMate comes with genuine Epson® glossy photo paper made especially for printing lab quality photos. Caution: Don't load or print on plain paper; this may damage PictureMate. 1 Move the handle to the back and open the paper support, if necessary. 2 Press the corner of the - Epson PictureMate Dash | Start Here - Page 5
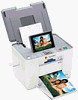
multiple cards at once. 6 Print Your Photos PictureMate's photo viewer screen makes it easy to select the photos you want to print, choose a layout, and even crop. Select Some Photos 1 Press or to view your photos. 2 Press OK to select a photo for printing. 3 To print more than one copy - Epson PictureMate Dash | Start Here - Page 6
for comprehensive instructions on using PictureMate and its software. Note: For information on possible software updates for PictureMate, go to epson.com/support, select Printers, and select your product under Personal Photo Lab. Then check for updated software in the Drivers & Downloads section
-
 1
1 -
 2
2 -
 3
3 -
 4
4 -
 5
5 -
 6
6
 |
 |

*411058000*
*411058000*
Start Here
Follow these steps to set up your PictureMate Dash
or Zoom and print–no computer required!
Note:
PictureMate Dash is shown throughout, but the steps are the
same for PictureMate Zoom. To print from your computer, see the
Basics
book and your CD after completing these steps.
1
Unpack
PictureMate
®
comes with all these items in the box.
1
Remove all the tape and packing material from the
outside of PictureMate.
2
Open the cartridge door
on the back of
PictureMate.
3
Remove the packing
material from inside the
cartridge slot.
4
Close the cartridge door.
PictureMate
Initial PictureMate
photo cartridge
PictureMate
photo paper
Basics
book
Printer Software
CD
Power adapter
Power cable
PictureMate Zoom
TM
(PM 290)
®
PictureMate Dash
TM
(PM 260)