Epson PowerLite S3 Start Here Card - Page 2
Connect your video source, Set up the remote control
 |
View all Epson PowerLite S3 manuals
Add to My Manuals
Save this manual to your list of manuals |
Page 2 highlights
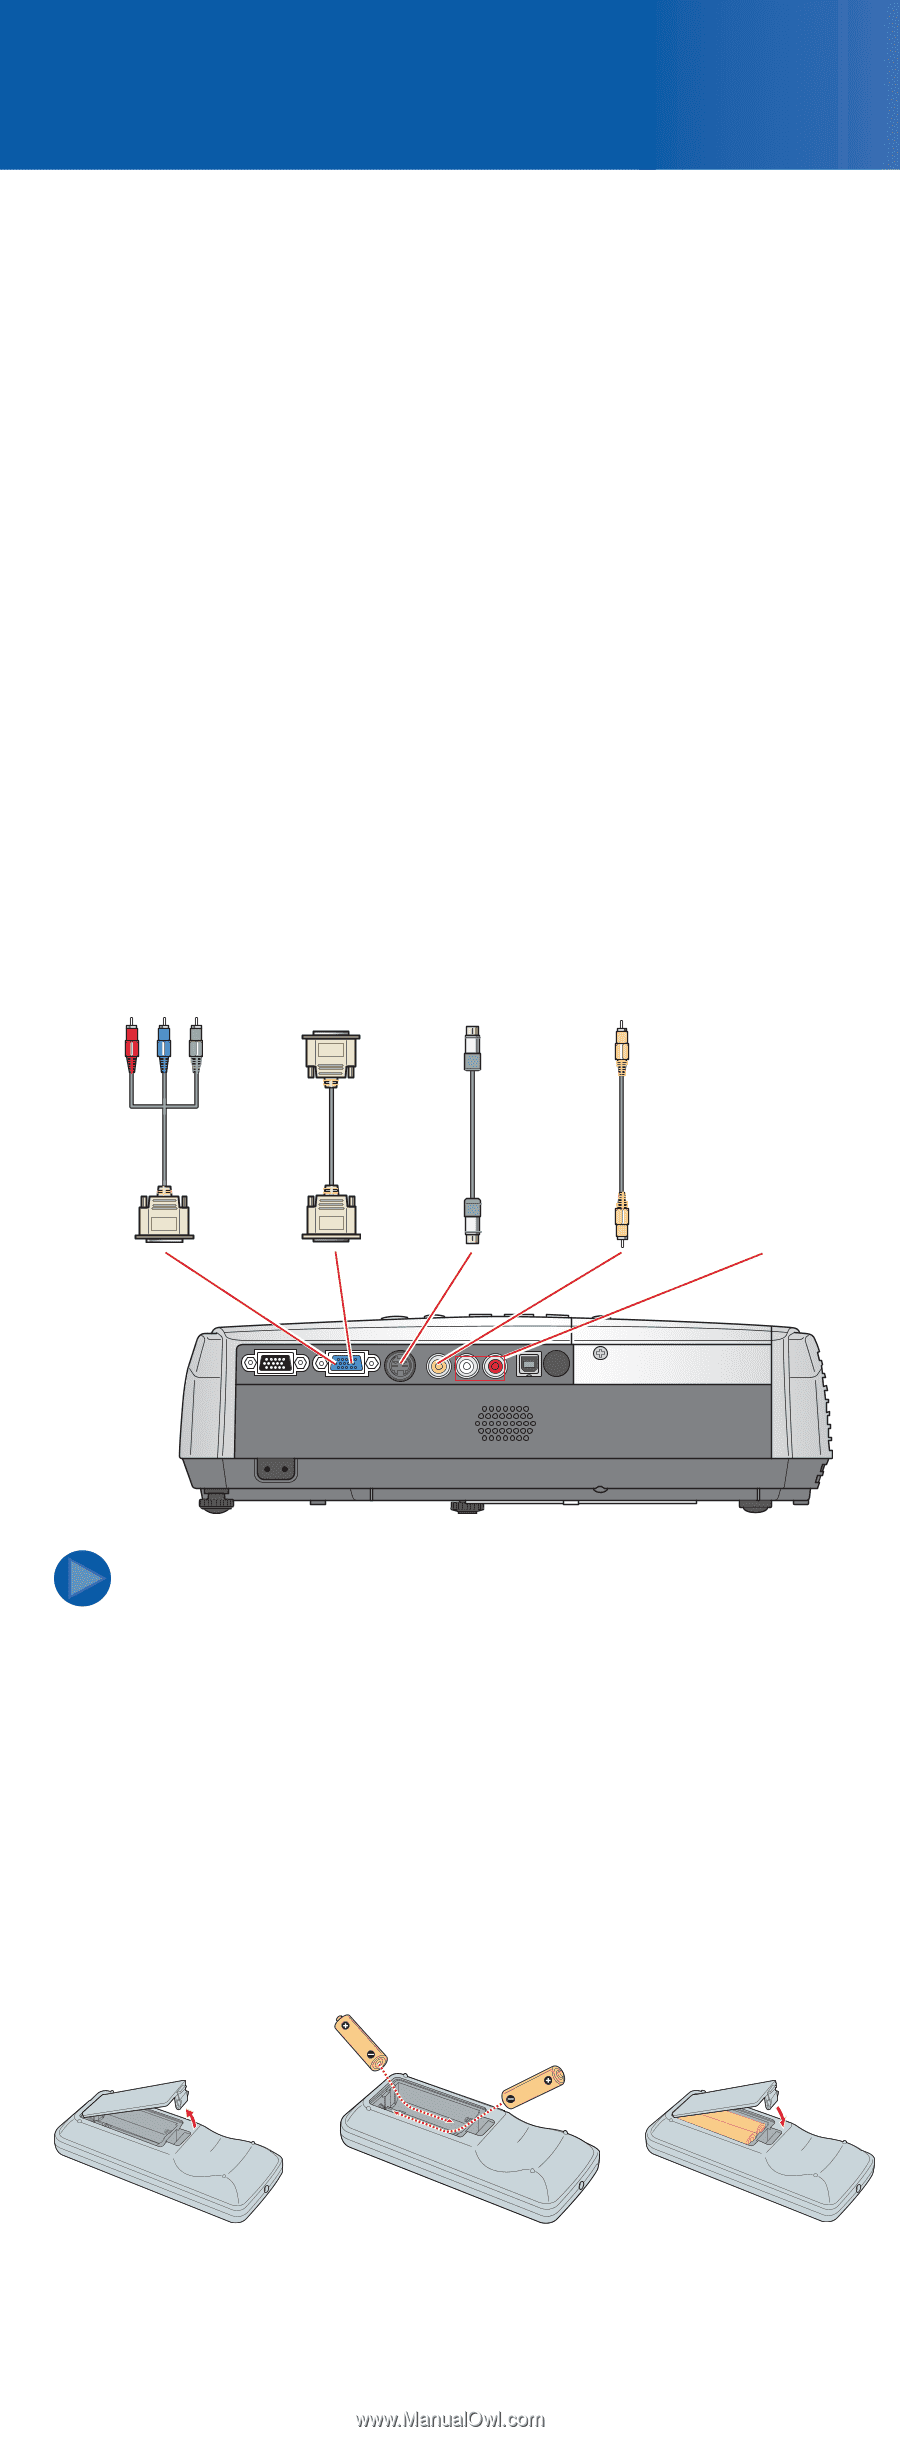
2 Connect your video source The projector has 3 video connectors, as shown below. Each one requires a different type of cable. A computer cable is included. You can purchase optional video cables through Epson or at local electronics stores. You can connect up to 3 video devices and use the remote control to switch among them. 1 Check the connectors on your video equipment. If more than one connection is available, choose the one that provides the best quality. (The projector connectors from highest to lowest quality are Computer/Component Video, S-Video, and Composite Video.) 2 Make sure you have the right cable(s) for the connection(s) you want to use, and the cables are long enough for your setup. If you need a cable longer than the standard 6 to 10 feet, you may need a distribution amplifier. (See the next page for accessory information.) 3 Before you connect your equipment, make sure everything is turned off. 4 Connect your video equipment to the projector. Component video to VGA cable Computer cable (included) S-Video cable RCA video cable (composite video) Audio in ports NOTE To play back audio through the projector, you can connect an audio cable from your video device to the audio in ports on the projector. See the User's Guide on your CD-ROM for instructions. 3 Set up the remote control 1 Remove the battery cover. 2 Insert the batteries. 3 Replace the battery cover. The remote control is ready for use.
-
 1
1 -
 2
2 -
 3
3 -
 4
4 -
 5
5 -
 6
6
 |
 |