Epson R320 How to Insert the CD/DVD Tray
Epson R320 - Stylus Photo Color Inkjet Printer Manual
 |
UPC - 010343851825
View all Epson R320 manuals
Add to My Manuals
Save this manual to your list of manuals |
Epson R320 manual content summary:
- Epson R320 | How to Insert the CD/DVD Tray - Page 1
See the enclosed Start Here sheet before connecting the printer to the computer with your USB cable. You must install your software BEFORE connecting the cable. © 2003 Epson America, Inc. CPD-17101 4047702-00 XXX 9/03 Printed in XXXXXX XX.XX-XX - Epson R320 | How to Insert the CD/DVD Tray - Page 2
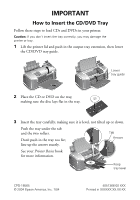
damage the printer or tray. 1 Lift the printer lid and push in the output tray extension, then lower the CD/DVD tray guide. Lower tray guide 2 Place the CD or Printer Basics book for more information. Keep tray level CPD-18565 © 2004 Epson America, Inc. 7/04 4051366-00 XXX Printed in XXXXXX XX. - Epson R320 | How to Insert the CD/DVD Tray - Page 3
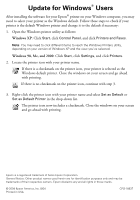
name and select Set as Default or Set as Default Printer in the drop-down list. The printer icon now includes a checkmark. Close the windows on your screen and go ahead with printing. Epson is a registered trademark of Seiko Epson Corporation. General Notice: Other product names used herein are for - Epson R320 | How to Insert the CD/DVD Tray - Page 4
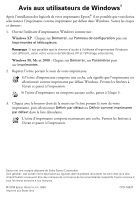
® Après l'installation des logiciels de votre imprimante Epson,® il est possible que vous deviez sélectionner l'imprimante comme imprimante par défaut dans Windows. Suivez les étapes ci-dessous : 1. Ouvrez l'utilitaire d'imprimantes Windows comme suit : Windows XP : Cliquez sur Démarrer, sur Panneau
-
 1
1 -
 2
2 -
 3
3 -
 4
4
 |
 |

See the enclosed
Start Here
sheet
before
connecting the printer to the computer with
your USB cable.
You must install your software BEFORE
connecting the cable.
© 2003 Epson America, Inc.
9/03
CPD-17101
4047702-00 XXX
Printed in XXXXXX XX.XX-XX