Epson Stylus Photo Product Information Guide - Page 15
Information Reference List
 |
View all Epson Stylus Photo manuals
Add to My Manuals
Save this manual to your list of manuals |
Page 15 highlights
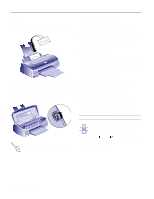
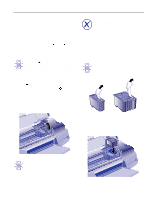
EPSON Stylus Photo 2 Caution: Never turn off the printer while the power light is flashing, unless the printer hasn't moved or made any noise for more than 5 minutes. 2 When the power light stops flashing, you need to run a nozzle check. 6. Make sure paper is loaded in the printer and click Print nozzle check pattern (Windows) or Confirmation (Macintosh). See instructions below for examining the nozzle check pattern. If your print quality has not improved, repeat the steps above. Using the Control Panel * ) 1. Make sure the printer is turned on and not printing, and that the black and color ink out lights are off. 4 2. Press the cleaning button and hold it for three seconds. Cleaning takes about two minutes, during which the 2 printer makes some noise and the power light flashes. 2 After the cleaning cycle is complete and the power light stops flashing, you need to run a nozzle check. 3. Access the Main printer settings dialog box as described in Chapter 1. 4. Click the Utility tab (Windows) or the Utility button (Macintosh). You see the Utility menu. 5. Click the Nozzle Check icon. See the next section for instructions on examining the nozzle check pattern. If your print quality has not improved, repeat the steps above. Examining the Nozzle Check Pattern Examine the nozzle check pattern you print. It should look something like this, with each of the six sections showing one of the ink colors: Each staggered horizontal and straight vertical line should be complete, with no gaps in the dot pattern. If your printout looks okay, you're done. If any dots are missing, clean the print heads again, as explained in the previous sections. Aligning the Print Heads If your printouts contain misaligned vertical lines, you may need to align the print heads. Follow these steps: 1. Make sure the printer is turned on and paper is loaded. 2. Access the Main printer settings dialog box. 3. Click the Utility tab (Windows) or the Utility button (Macintosh). You see the Utility menu. 4. Click the Print Head Alignment icon. 5. Follow the instructions on the screen to print a test page and select the correct alignment. Cleaning the Printer To keep your printer working at its best, you should clean it several times a year, following these steps: Caution: Don't touch the gears inside the printer. Never use alcohol or thinner for cleaning; they can damage the printer components and case. Don't use a hard or abrasive brush. Don't get water on the printer components. Don't spray lubricants or oils inside the printer. 1. Turn off the printer, unplug the power cord, and disconnect the printer cable. 2. Remove all the paper from the sheet feeder. 3. Carefully clean away dust and dirt with a soft brush. 4. Clean the exterior of the printer with a soft, damp cloth. Keep the printer cover closed so water doesn't get inside. 5. Clean ink out of the printer's interior with a damp cloth. Information Reference List Engineering Change Notices None Product Support Bulletins None Technical Information Bulletins None Related Documentation TM-STYPHOTO EPSON Stylus Photo Service Manual PL-STYPHOTO EPSON Stylus Photo Parts Price List 4007083 EPSON Stylus Photo User's Guide 4007082 EPSON Stylus Photo Quick Setup 3/97 EPSON Stylus Photo - 15
-
 1
1 -
2
-
3
-
4
-
5
-
6
-
7
-
8
-
9
-
 10
10 -
 11
11 -
 12
12 -
 13
13 -
 14
14 -
 15
15
 |
 |