Epson Stylus Pro 7000 Printer Guide
Epson Stylus Pro 7000 - Print Engine Manual
 |
View all Epson Stylus Pro 7000 manuals
Add to My Manuals
Save this manual to your list of manuals |
Epson Stylus Pro 7000 manual content summary:
- Epson Stylus Pro 7000 | Printer Guide - Page 1
Printer Guide EPSON Stylus® Pro 7000 ® - Epson Stylus Pro 7000 | Printer Guide - Page 2
's operating and maintenance instructions. SEIKO EPSON CORPORATION shall not be liable for any damages or problems arising from the use of any options or any consumable products other than those designated as Original EPSON Products or EPSON Approved Products by SEIKO EPSON CORPORATION. Part Number - Epson Stylus Pro 7000 | Printer Guide - Page 3
Conformity According to 47CFR, Part 2 and 15 for Class B Personal Computers and Peripherals; and/or CPU Boards and Power Supplies used with Class B Personal Computers: We: EPSON AMERICA, INC. Located at undesired operation. Trade Name: Type of Product: Model: EPSON Ink Jet Printer P180A iii - Epson Stylus Pro 7000 | Printer Guide - Page 4
pursuant to Part 15 of the FCC Rules. These limits are designed to provide reasonable protection against harmful interference in a residential installation. This equipment generates, uses, and can radiate radio frequency energy and, if not installed and used in accordance with the instructions, may - Epson Stylus Pro 7000 | Printer Guide - Page 5
Introduction How To Use Your Manuals 2 Using This Printer Guide 3 Warnings, Cautions, Notes, and Tips 4 Where To Get Help 4 ENERGY STAR Compliance 5 Important Safety Instructions 6 Ink Cartridge Safety Instructions 7 1 Connecting Your Printer and Installing Drivers Installing the EpsonNet - Epson Stylus Pro 7000 | Printer Guide - Page 6
2-18 Turning Off Paper Monitoring Features 2-18 Using the Paper Hammock with the Printer Stand 2-19 Setting Paper Configurations 2-21 Registering Paper Thickness, Drying Time, and Suction 2-21 Selecting Registered Paper Settings 2-22 3 Printing with EPSON Drivers for Macintosh Choosing Page - Epson Stylus Pro 7000 | Printer Guide - Page 7
the Print Head from the Control Panel 6-5 Replacing Ink Cartridges 6-7 Replacing the Paper Cutter Blade 6-9 Removing the Used Cutter Blade 6-9 Installing the New Cutter Blade 6-11 Running the Speed and Progress Utility for Improved Windows Printing 6-12 Cleaning the Printer 6-14 Transporting - Epson Stylus Pro 7000 | Printer Guide - Page 8
Paper Jams 7-11 Solving Windows USB Problems 7-13 Checking Your USB Driver Installation 7-13 Solving USB Cable Problems 7-15 8 Specifications Printing 8-1 Paper 8-2 Printable Area 8-3 Environmental 8-3 Mechanical 8-3 Electrical 8-4 Initialization 8-4 Safety Approvals 8-4 Ink Cartridges - Epson Stylus Pro 7000 | Printer Guide - Page 9
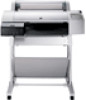
Introduction The EPSON Stylus® Pro 7000 is a 24-inch wide color ink jet printer that produces resolutions up to 1440 dpi. You get true photographic quality with no-compromise text and line art for almost any application, without sacrificing productivity. Support for 24-inch media rolls up to 0.5 mm - Epson Stylus Pro 7000 | Printer Guide - Page 10
To Use Your Manuals This guide is part of a set, which also includes the documentation listed below. • The EPSON Stylus Pro 7000 Assembly and Setup Instructions describe how to unpack and assemble the printer, install ink cartridges and paper, and prepare for printing. • The EPSON Stylus Pro 7000 - Epson Stylus Pro 7000 | Printer Guide - Page 11
4 explains how to use EPSON printer drivers and utilities for Windows computers. Chapter 5 describes how to monitor the printer's status and respond to error messages on the control panel. Chapter 6 gives instructions for cleaning and aligning the print head, replacing ink cartridges and the cutter - Epson Stylus Pro 7000 | Printer Guide - Page 12
this guide: Warnings must be followed carefully to avoid bodily injury. Caution Cautions must be observed to avoid damage to your equipment. Note Notes contain important information about your printer. TIP Tips provide additional suggestions. Where To Get Help EPSON provides telephone support - Epson Stylus Pro 7000 | Printer Guide - Page 13
downloading) to log onto ftp.epson.com with the user name anonymous and your e-mail address as the password. To receive technical advice through e-mail, go to http://support.epson.com and complete the form under the troubleshooting tab, as requested. You can purchase ink cartridges, paper, manuals - Epson Stylus Pro 7000 | Printer Guide - Page 14
the print head is safely capped. Important Safety Instructions Before using your printer or RIP Station 5100, read the following safety instructions to make sure you use the equipment safely and effectively. • Turn off and unplug the printer (and RIP Station 5100) before cleaning. Clean with a damp - Epson Stylus Pro 7000 | Printer Guide - Page 15
that are covered by the operating instructions. Ink Cartridge Safety Instructions • Do not put your hand inside the printer or touch the cartridges during printing. • To avoid damaging the printer, do not move the print head by hand. • Under normal circumstances, ink will not come out of the - Epson Stylus Pro 7000 | Printer Guide - Page 16
8 | Introduction • Do not shake an ink cartridge; this can cause leakage. • Before transporting the printer, remove the ink cartridges, drain the ink lines, and install the carriage restraint (packing material) See Chapter 6 for complete instructions. 8 - Epson Stylus Pro 7000 | Printer Guide - Page 17
the RIP software. See the RIP Station 5100 Getting Started for instructions. For non-PostScript printing using the EPSON driver, you can install the EpsonNet Internal Print Server and connect the printer to your network, or use one of the built-in interfaces to connect to an individual computer - Epson Stylus Pro 7000 | Printer Guide - Page 18
off and the power cord is unplugged. To prevent electric shock and avoid damaging the printer, do not install an interface card when the printer is turned on or connected to an electrical outlet. 2. Use a Phillips-head screwdriver to remove the two screws securing the shield plate to the optional - Epson Stylus Pro 7000 | Printer Guide - Page 19
Connecting Your Printer and Installing Drivers | 1-3 3. Make sure you set any jumpers or DIP switches on the card. See the card's documentation for details. On the FireWire card, make sure DIP switch 10 is set to ON (advanced mode). 4. Slide the interface card along the slots on both sides of the - Epson Stylus Pro 7000 | Printer Guide - Page 20
Internal Print Server, you must configure it for your network protocols and operating system. See the EpsonNet Internal Print Server Administrator's Manual for instructions. Before you can print, you must install the printer software, as described on page 1-7 (Macintosh) or page 1-10 (Windows). 1-4 - Epson Stylus Pro 7000 | Printer Guide - Page 21
time. When you use the USB interface, make sure the printer's parallel interface is set to compatible (the default setting). See the Appendix for more information. You must install the printer software before using the printer. See page 1-7 for Macintosh instructions or page 1-10 for Windows. 1-5 - Epson Stylus Pro 7000 | Printer Guide - Page 22
together until they lock into place on both sides. Note You can't use both the USB and Parallel interfaces at the same time. 3. Plug the other end of the cable into the computer's parallel port. See page 1-10 for instructions on installing the printer software. You must install the software before - Epson Stylus Pro 7000 | Printer Guide - Page 23
Printer Sharing on a Macintosh You need to install the drivers and utilities on any Macintosh that will print to the EPSON Stylus Pro 7000 OS System 8.5.1 System 9 recommended for best USB support for instructions. Then follow these steps to install the printer software: 1. Insert the printer - Epson Stylus Pro 7000 | Printer Guide - Page 24
Printer and Installing Drivers Setting Up Printer Sharing If you want to share the printer, you first need to set it up as a shared printer on the Macintosh to which it is connected. Then, you must specify the network path to the printer from each Macintosh that will use it, and install the printer - Epson Stylus Pro 7000 | Printer Guide - Page 25
Connecting Your Printer and Installing Drivers | 1-9 5. Click OK. The name of the shared printer appears in the port list in the Chooser. 6. Close the Chooser. 7. On each computer from which you want to access the printer, open the Chooser, click the printer's icon, and select the printer port. You - Epson Stylus Pro 7000 | Printer Guide - Page 26
1-10 | Connecting Your Printer and Installing Drivers Installing the Software and Setting Up Printer Sharing in Windows Make sure all computers you may also want to set up printer sharing. Instructions are provided for both Windows 95/98 and Windows NT. Checking System Requirements The memory - Epson Stylus Pro 7000 | Printer Guide - Page 27
If you're using Windows 98 or Windows 2000, follow the on-screen instructions to turn on your printer. The printer port configuration starts automatically. If you're using the USB interface, the USB device driver installation starts automatically. If you see an error message, your drivers may not be - Epson Stylus Pro 7000 | Printer Guide - Page 28
the following port. You should see EPUSBx: (EPSON Stylus Pro 7000). If you don't see the correct port displayed, see Chapter 7 in this guide or "Troubleshooting" in the electronic Reference Guide on your printer software CD-ROM. Setting Up Printer Sharing in Windows 95 and 98 First, you need to set - Epson Stylus Pro 7000 | Printer Guide - Page 29
Connecting Your Printer and Installing Drivers | 1-13 4. Select I want to be able to allow others to print to my printer(s) and click OK. 5. In the Network window, click OK. 6. In the Control Panel, double-click Printers. If you see a message requesting the Windows 95 or 98 CD-ROM, insert the CD-ROM - Epson Stylus Pro 7000 | Printer Guide - Page 30
On the computer from which you want to access the printer, click Start, point to Settings, and click Printers. 2. Double-click the Add Printer icon. You see the Add Printer Wizard. 3. Click Next. You see a window like the following: 4. Click Network printer, then click Next. 5. Click Browse. You see - Epson Stylus Pro 7000 | Printer Guide - Page 31
on the screen. Setting Up Printer Sharing in Windows NT 4.0 These instructions apply to small network users only. If you are on a large network and would like to share your printer, consult your network administrator. First, you need to set up the printer as a shared printer on the computer to which - Epson Stylus Pro 7000 | Printer Guide - Page 32
another computer on your network, follow these steps. 1. Install the printer driver on the client computer from the software CD-ROM. 2. Open the Printer folder from the Control Panel, right-click your printer's icon, then click Properties. 3. Click the Ports tab to display the following window: 1-16 - Epson Stylus Pro 7000 | Printer Guide - Page 33
Connecting Your Printer and Installing Drivers | 1-17 4. Click Add Port. You see the Printer Ports dialog box: 5. Select Local Port, then click New Port. You see the Port Name dialog box: 6. In the text box, type the following information: \\name of computer that is connected to the printer\name of - Epson Stylus Pro 7000 | Printer Guide - Page 34
1-18 | Connecting Your Printer and Installing Drivers 1-18 - Epson Stylus Pro 7000 | Printer Guide - Page 35
Handling Paper The EPSON Stylus Pro 7000 prints on a variety of media, including roll paper and cut sheets up to 24 inches wide. The straight-through paper path allows you to use heavy stock, including media up to 1.5 mm thick. This chapter provides instructions for the following: • Selecting paper - Epson Stylus Pro 7000 | Printer Guide - Page 36
the package may be different from the name shown in the table; use the product code to identify the paper or other media. EPSON Stylus Pro 7000 cut sheet product codes Sizes Photo Quality Photo Ink Jet Paper Paper Photo Quality Poster Board - Glossy Film Semi-Gloss A4 S041061 S041140 S041071 - Epson Stylus Pro 7000 | Printer Guide - Page 37
, up to 24 inches wide. With the optional 3-inch spindle, you can also use roll paper that has a 3-inch core. Switching paper rolls is a simple process. This section covers the following: • Attaching and removing paper from the spindle • Inserting the spindle in the printer • Loading the paper for - Epson Stylus Pro 7000 | Printer Guide - Page 38
as shown: 4. Slide the roll onto the spindle so it fits securely over the paper stop. paper stop 5. Slide the movable paper stop back onto the spindle and insert it firmly into the end of the roll. Caution To avoid damage, do not tap the end of - Epson Stylus Pro 7000 | Printer Guide - Page 39
Handling Paper | 2-5 Inserting the Spindle in the Printer After you have loaded the paper roll onto the spindle, you need to insert it into the printer, following these steps: 1. Open the roll paper cover. 2. Make sure the movable paper stop is firmly fixed into the left end of the paper roll. 2-5 - Epson Stylus Pro 7000 | Printer Guide - Page 40
2-6 | Handling Paper 3. Position the spindle so that the white end (with the fixed paper stop) is on the right. Rest the spindle on the groove on top of the printer if necessary. black white 4. Lift the spindle and place it on the mounting brackets inside the printer. 2-6 - Epson Stylus Pro 7000 | Printer Guide - Page 41
in the printer, you're ready to load it for printing. Follow these steps: 1. Make sure the printer is turned on. Then press the Paper Source button until one of the Roll lights comes on. To avoid feeding excess paper through the printer, make sure you don't select Sheet when you're using roll paper - Epson Stylus Pro 7000 | Printer Guide - Page 42
settings. See page 3-2 or 4-6 in this manual or the RIP Station 5100 User Guide for more information. 2. Make sure the Operate light and Pause light are not flashing. Then push the paper set lever all the way down. To avoid damaging the printer, never move the paper set lever while the Operate or - Epson Stylus Pro 7000 | Printer Guide - Page 43
, open it. Caution 4. Feed the paper into the paper slot. Avoid touching the printable surface of the paper with bare hands. Fingerprints may affect print quality. TIP 5. Pull the paper down so it extends all the way through the slot. If the bottom edge of the paper doesn't come out, open the - Epson Stylus Pro 7000 | Printer Guide - Page 44
cover. PRESS PAUSE BUTTON appears on the control panel display. To avoid damaging the printer, never move the paper set lever while the Operate or Pause light is flashing. If you're using Auto Cut and the edge of the paper is uneven, press Cut/Eject to recut the edge. 8. Press the Pause button - Epson Stylus Pro 7000 | Printer Guide - Page 45
| 2-11 9. To help paper feed out of the printer, pull out the two paper guides at the bottom of the printer. You can now send your print job. Cutting Roll Paper Manually When you're not using the Auto Cut setting, you need to cut the paper manually after your print job is finished. Follow these - Epson Stylus Pro 7000 | Printer Guide - Page 46
Press the SelecType button to exit the Printer Setting menu. You can also turn off trim lines through your print options. See Chapter 3 or 4 (or the RIP Station 5100 User Guide) for more information. Setting Default Roll Paper Margins The default margins for roll paper are .12 inch or 3 mm (left and - Epson Stylus Pro 7000 | Printer Guide - Page 47
your roll paper in the printer when you print on cut sheets; make sure it is rolled up and fastened with the roll paper belt, as described on page 2-7. If you're using paper more than 19 inches long or stock more than 0.5 mm thick, see the following sections for additional instructions. You will - Epson Stylus Pro 7000 | Printer Guide - Page 48
on the control panel display. INCH MM Caution To avoid damaging the printer, never move the paper set lever while the Operate or Pause light is flashing. 5. Press the Pause button. The print head moves and the paper feeds into printing position automatically. READY appears on the control panel - Epson Stylus Pro 7000 | Printer Guide - Page 49
sure the Operate light and Pause light are not flashing. Then push the paper set lever all the way down. Caution 4. Feed the sheet into the paper slot until it extends through the slot. Align the paper with the two rows of holes. Avoid touching the printable surface of the paper with bare hands - Epson Stylus Pro 7000 | Printer Guide - Page 50
(approximately 20 × 28 inches). Follow these instructions when you print on card stock or other media more than 0.5 mm thick. 1. Pull down the paper hammock to catch your printouts in front of the printer (when you're using the printer stand). Extend the paper guides straight out in front of the - Epson Stylus Pro 7000 | Printer Guide - Page 51
appears on the control panel display. Caution To avoid damaging the printer, never move the paper set lever while the Operate or Pause light is flashing. 7. Press the Pause button. The print head moves and the paper feeds into printing position automatically. READY appears on the control panel - Epson Stylus Pro 7000 | Printer Guide - Page 52
Paper Monitoring Features The printer normally stops and displays an error message if you try to print an image wider than the paper, or if paper is fed at an angle. You can turn off the paper size check and/or paper alignment check if you don't want to use these monitoring features. However, ink - Epson Stylus Pro 7000 | Printer Guide - Page 53
, set the hammock to catch printouts in front of the printer. Using the Paper Hammock with the Printer Stand The paper hammock (also called the paper basket) is a cloth sheet that attaches to the printer stand and catches your printouts as they come out. This keeps the printouts from getting dirty - Epson Stylus Pro 7000 | Printer Guide - Page 54
2-20 | Handling Paper • To catch printouts under the printer, lift the hammock rod all the way up. • If the parts shown below become loose, tighten them by hand. 2-20 - Epson Stylus Pro 7000 | Printer Guide - Page 55
experimentation. When you're using a paper stock or other printing material for the first time, always test it on a small print job. If the ink smears or printing is blurred, you need to register the paper's drying time, thickness, and suction setting. On EPSON media, ink dries immediately. You can - Epson Stylus Pro 7000 | Printer Guide - Page 56
printer will pause between pages (or before cutting) to let the ink dry. 8. Press the Item button. SUCTION=NORM* appears on the display. If you're registering very thin paper you want to use. Then press the Enter button. 4. Press the Pause or SelecType button to exit the Paper Configuration menu. - Epson Stylus Pro 7000 | Printer Guide - Page 57
Chapter 3: The EPSON Stylus Pro 7000 comes with drivers that let you use the printer Printing with EPSON Drivers in non-PostScript mode without a RIP and utilities that allow you to manage background printing jobs. ICC profiles for ColorSync® 3.0 are included, so you can use advanced color - Epson Stylus Pro 7000 | Printer Guide - Page 58
3-2 | Printing with EPSON Drivers for Macintosh 3. Select the type of paper you loaded in the printer from the Paper Source list. If your image is more than 62 inches long, select Roll Paper (Banner). You can also use this setting to print a series of continuous images without any "margin space" - Epson Stylus Pro 7000 | Printer Guide - Page 59
to set printing options. The EPSON driver offers automatic settings that optimize print quality and speed when you're using EPSON media. You can also choose advanced settings for more control over your printer and color management options. See page 3-6 for instructions on advanced settings. Follow - Epson Stylus Pro 7000 | Printer Guide - Page 60
with EPSON Drivers for head and paper. Available only when you choose photo or photo-quality media types. Text/Graph Intensifies colors and lightens the midtones and highlights. Best for print jobs with nonphotographic images. ColorSync Adjusts colors based on your printer's ICC profile, using - Epson Stylus Pro 7000 | Printer Guide - Page 61
on EPSON media: EPSON Stylus Pro 7000 cut sheet Media Type settings Product name Product codes Media Type setting Photo Quality Ink Jet Paper S041026, paper or other material you're using is not listed in the tables, check the instructions included with the paper. If you're using a non-EPSON - Epson Stylus Pro 7000 | Printer Guide - Page 62
EPSON Drivers for Macintosh Choosing Advanced Print Options The advanced print options give you complete control over your printing environment. Use different options on the lower part of the screen. 3. Choose the Media on page 3-5. Then choose Color or Black ink. 4. Choose one of the following Print - Epson Stylus Pro 7000 | Printer Guide - Page 63
system. Then choose from three Rendering Intent settings for mapping colors to your printer's profile. See page 3-9 for more information. • No Color Adjustment This setting disables color management in the printer driver. Choose this mode if you want to use a standalone color management module. 3-7 - Epson Stylus Pro 7000 | Printer Guide - Page 64
EPSON Drivers for Macintosh 7. Click Save Settings if you want to have your advanced settings available for reuse. Then type a name for the group of settings and click Save. The name is added to your list of custom settings. 8. When you're finished setting advanced printer EPSON ink jet printers. - Epson Stylus Pro 7000 | Printer Guide - Page 65
EPSON Drivers for Macintosh | 3-9 ColorSync Rendering Intent settings Perceptual For photographic images. Maintains the relationship between colors as it scales them to fit within your printer . Note If you experience problems, you may not be able to use background printing. Setting Up - Epson Stylus Pro 7000 | Printer Guide - Page 66
3-10 | Printing with EPSON Drivers for Using Monitor3 The Monitor3 utility lets you prioritize and control your print jobs as well as monitoring their progress. After you send a print job, click the current application icon at the right end of the menu bar and select EPSON Monitor3. You see a window - Epson Stylus Pro 7000 | Printer Guide - Page 67
Printing with EPSON Drivers for Macintosh | 3-11 The progress bar tracks the current print job. To of the window. The Priority list becomes active. Note If you see a stop sign icon and the message Print queue on hold in the EPSON Monitor3 dialog box, select Start print queue from the Printer menu to - Epson Stylus Pro 7000 | Printer Guide - Page 68
print head cleaning utility. See page 6-2 for more information about the cleaning utility. Cancelling Printing If you need to cancel a print job, follow these steps: 1. Press the Power button to turn off the printer. 2. Do one of the following, depending on whether you're using background printing - Epson Stylus Pro 7000 | Printer Guide - Page 69
with EPSON Drivers for Windows The EPSON Stylus Pro 7000 comes with drivers and utilities that let you print and manage print jobs in non-PostScript mode without a RIP. ICC profiles are included, so you can use advanced color management features of your applications or the driver itself. The driver - Epson Stylus Pro 7000 | Printer Guide - Page 70
4-2 | Printing with EPSON Drivers for Windows A dialog box like the following appears: Note If you listed in the tables on page 4-4. 4. Select Color or Black ink. 5. Set the Mode option as follows: • Click Automatic to have the printer driver analyze the contents of your image or file and make the - Epson Stylus Pro 7000 | Printer Guide - Page 71
Printing with EPSON Drivers for Windows | 4-3 Note You can on your printer's ICC profile, using the Image Color Matching system (effective in Windows 98/2000 only). If you're using an ICM , click the Paper tab and follow the instructions on page 4-5 for choosing paper and layout options. 4-3 - Epson Stylus Pro 7000 | Printer Guide - Page 72
on EPSON media: EPSON Stylus Pro 7000 cut sheet Media Type settings Product name Product codes Media Type setting Photo Quality Ink Jet Paper S041026, paper or other material you're using is not listed in the tables, check the instructions included with the paper. If you're using a non-EPSON - Epson Stylus Pro 7000 | Printer Guide - Page 73
Printing with EPSON Drivers for Windows | 4-5 Note Many application settings override the printer's Paper options. Always verify settings to get the results you expect. Choosing Paper and Layout Options Many of the Paper options correspond to paper handling features that you can also set through - Epson Stylus Pro 7000 | Printer Guide - Page 74
4-6 | Printing with EPSON Drivers for Windows 4. When you're using roll paper, set the following options: • Auto Rotate Saves paper if your document length is shorter than the printable width of the paper roll. The document will be turned automatically by 90 degrees and printed crosswise. This - Epson Stylus Pro 7000 | Printer Guide - Page 75
EPSON Drivers for Windows | 4-7 Choosing Advanced Print Options The advanced print options give you complete control over your printing environment. Use these you see a different set of options on the lower part of the screen. 3. Choose the Media Type setting according to the guidelines on page - Epson Stylus Pro 7000 | Printer Guide - Page 76
image that reflects the settings you choose. See page 4-9 for a description of the available settings. • No Color Adjustment This setting disables color management in the printer driver. Choose this mode if you want to use a standalone color management module. 4-8 - Epson Stylus Pro 7000 | Printer Guide - Page 77
with EPSON Drivers for Windows | 4-9 • ICM Adjusts colors based on your printer's ICC profile, using the Image Color Matching system (effective in Windows 98/2000 only). If you're using an ICM-compatible monitor, adjusts printed colors to closely match screen colors. • sRGB Adjusts colors using the - Epson Stylus Pro 7000 | Printer Guide - Page 78
4-10 | Printing with EPSON Drivers for Windows PhotoEnhance4 settings Tone Lets you choose from the printer's status as well as monitoring print jobs. See page 5-10 for information about Status Monitor 3. Using the Progress Meter After you send a print job, the progress meter window appears - Epson Stylus Pro 7000 | Printer Guide - Page 79
it off. See page 5-11 for instructions. Using the Spool Manager The Spool Manager (not available with Windows NT) displays the status of your print job files and lets you control them. To open spool manager while you're printing, click the EPSON Stylus Pro 7000 icon that appears on the taskbar at - Epson Stylus Pro 7000 | Printer Guide - Page 80
4-12 | Printing with EPSON Drivers for Windows 4-12 - Epson Stylus Pro 7000 | Printer Guide - Page 81
the Printer The EPSON Stylus Pro 7000 includes a number of utilities for monitoring the printer. The control panel displays status messages and error messages, and the lights alert you when a problem occurs or your ink runs out. Status monitoring software utilities for both Macintosh and Windows - Epson Stylus Pro 7000 | Printer Guide - Page 82
the status messages and lights: Status messages Message Light Explanation or response READY Operate light on Printer is ready to print. PRINTING Operate light flashing Printer is receiving data. INK DRY MIN Pause light flashing Printer is paused to let ink dry. Wait for the - Epson Stylus Pro 7000 | Printer Guide - Page 83
10% of ink (or service life) remaining Following is a list of the items displayed. Note that all parts on the list (except the ink cartridges and paper cutter) need to be replaced by an authorized EPSON service center. INK LEFT-K (black) INK LEFT-C (cyan) INK LEFT-M (magenta) INK LEFT-LC (light - Epson Stylus Pro 7000 | Printer Guide - Page 84
default settings, amount of ink remaining in each cartridge, page count, and component life. Follow these steps to print a status check: 1. Load a sheet of paper in the printer, following the instructions on 2-13. (You can print test pages on roll paper, but you will use more paper.) 2. Press the - Epson Stylus Pro 7000 | Printer Guide - Page 85
> A printer part will need to be replaced soon. Note the error number and contact EPSON as described in the Introduction. MAINTENANCE REQ 0100 The waste ink system is almost full. Call an authorized EPSON servicer to schedule replacement of the waste ink system. NO INK CARTRIDGE Ink Out light - Epson Stylus Pro 7000 | Printer Guide - Page 86
in the printer. Resize your image or load wider paper. Paper is not fully ejected. Cut the paper at the paper insertion slot, then reload paper. PAPER NOT CUT error was Reload paper. cleared. Paper is too thick for head cleaning. Push the paper set lever down to remove the paper. Head cleaning - Epson Stylus Pro 7000 | Printer Guide - Page 87
the Printer | 5-7 Error messages (continued) Message Light SERVICE REQ 00000100 All lights flashing TURN PWR OFF AND ON UNABLE TO PRINT Explanation Response The waste ink system is full. Contact EPSON to have the waste ink system replaced. This message appears after you clear a paper jam - Epson Stylus Pro 7000 | Printer Guide - Page 88
Monitoring the Printer The window opens, displaying the amount of ink remaining in the printer: Click to recheck ink levels. 3. To close the Status Monitor, click OK. Configuring Printer Monitoring You can configure the way you want the printer to handle error and warning messages, ink level checks - Epson Stylus Pro 7000 | Printer Guide - Page 89
. • Data will be sent to the printer after being stored on your disk prevents print head pausing. Normally, graphics are sent in rectangular printer as a whole (recommended only for older Macintosh systems). • The last two check boxes let you choose to have your software check for errors or low ink - Epson Stylus Pro 7000 | Printer Guide - Page 90
the Utility menu: Click to run Status Monitor 3 3. Click the EPSON Status Monitor 3 button. The following window appears. (It also opens automatically when an error occurs.) Printer status messages appear here. If an ink cartridge runs low or out, click here to display replacement instructions. 5-10 - Epson Stylus Pro 7000 | Printer Guide - Page 91
one of your cartridges runs out of ink or if any other problems occur. Follow these steps to set monitoring preferences: 1. Click Start, point to Settings, and click Printers. Make sure your printer icon appears in the Printers window. 2. Right-click the Stylus Pro 7000 icon, then click Properties - Epson Stylus Pro 7000 | Printer Guide - Page 92
, click the Shortcut Icon checkbox. Then select the icon you want to use. After you enable the shortcut, you can simply click the icon to open the Status Monitor window. 7. Select Allow monitoring of shared printers if your printer is shared and you want to let other users monitor it. 8. Click - Epson Stylus Pro 7000 | Printer Guide - Page 93
the Printer The EPSON Stylus Pro 7000 requires very little maintenance to keep working at its best. This chapter describes the following routine procedures: • Running a nozzle check • Running a cleaning cycle • Aligning the print head • Replacing ink cartridges • Replacing the paper cutter - Epson Stylus Pro 7000 | Printer Guide - Page 94
light or faint or dots are missing from the image, you may need to run a cleaning cycle. This unclogs the print head nozzles so they can deliver ink properly. You can run a cleaning cycle either from the printer's control panel or from a computer with the EPSON utilities. The cleaning process uses - Epson Stylus Pro 7000 | Printer Guide - Page 95
are not straight, you need to align the print head. You can use the Print Head Alignment utility if you have the EPSON printer driver installed. If not, you can align the print head using the control panel. For best results, use EPSON 24-inch roll paper. The process takes about 15 minutes (to print - Epson Stylus Pro 7000 | Printer Guide - Page 96
6-4 | Maintaining and Transporting the Printer Note Each pattern consists of seven numbered rows. 5. After all the patterns have printed, choose the row number that has the smallest gap in each - Epson Stylus Pro 7000 | Printer Guide - Page 97
to align the print head using the control panel: 1. Load roll paper in the printer, following the instructions on page 2-7. 2. Press the SelecType button until HEAD ALIGNMENT MENU is displayed. 3. Press the Item button. PAPER THICK=STD appears on the display. If you're using EPSON paper, leave this - Epson Stylus Pro 7000 | Printer Guide - Page 98
6-6 | Maintaining and Transporting the Printer If you're using other media, enter the thickness value of the paper in 0.1-mm increments by pressing the + or - button. 4. Press the Enter all the patterns, press the Pause button to exit head alignment mode and return to normal printer operation. 6-6 - Epson Stylus Pro 7000 | Printer Guide - Page 99
. Use the following EPSON ink cartridges: • Black • Cyan • Magenta T460011 T463011 T462011 • Light cyan T465011 • Light magenta T464011 • Yellow T461011 Before you start, make sure the printer is on. Then follow these steps to replace an ink cartridge: 1. Note the color of the Ink Out light - Epson Stylus Pro 7000 | Printer Guide - Page 100
and product code. 4. Make sure the replacement cartridge is the correct color, and remove it from its package. 5. Hold the ink cartridge with the arrow mark face up and pointing to the rear of the printer. Then insert the ink cartridge into the slot until the corresponding Ink Out light goes off - Epson Stylus Pro 7000 | Printer Guide - Page 101
and Transporting the Printer | 6-9 6. Close the ink compartment cover. If the Ink Out light remains on, the cartridge may not be installed correctly. Remove the cartridge and then reinsert it as described above. Replacing the Paper Cutter Blade If you notice that your paper isn't cut cleanly, the - Epson Stylus Pro 7000 | Printer Guide - Page 102
6-10 | Maintaining and Transporting the Printer 4. When the holder stops moving and OPEN LOWER COVER appears on the display, open the lower cover by pulling down on the handles. 5. When REPLACE CUTTER appears on the display, you can open the casing. Push in the side pin while turning the paper - Epson Stylus Pro 7000 | Printer Guide - Page 103
| 6-11 7. Carefully remove the cutter blade from the printer. Installing the New Cutter Blade After you have removed the used cutter blade, you're ready to install the new one. Follow these steps: 1. Remove the new blade from its package. 2. Make sure the spring coil - Epson Stylus Pro 7000 | Printer Guide - Page 104
Transporting the Printer 4. Push in the side pin while turning the paper cutter cover head nozzles may be clogged. Run a nozzle check and cleaning cycle if necessary. Running the Speed and Progress Utility for Improved Windows Printing With this utility, you can speed up the way your printer driver - Epson Stylus Pro 7000 | Printer Guide - Page 105
EPSON Printer Port (not available with Windows NT 4.0) lets you optimize the transfer rate of your printer port for EPSON printers instead of using the Windows default printer See your electronic Reference Guide for instructions on using DMA transfers, if your computer supports them. For more - Epson Stylus Pro 7000 | Printer Guide - Page 106
cover. 5. If you're using the printer stand, first remove the paper hammock. Then clean away any dust or dirt around the stand using a soft brush. 6. If the outer case is dirty, clean it with a soft, clean cloth dampened with mild detergent. Keep the ink cartridge compartment closed to prevent water - Epson Stylus Pro 7000 | Printer Guide - Page 107
flashes for a few minutes while the ink is drained. Then the light goes off and the printer shuts down. 3. Remove the following parts: • Power cord • Interface cable • Roll paper spindle • All paper or other media Push in the paper guides if necessary. 4. Install the carriage shipping restraint - Epson Stylus Pro 7000 | Printer Guide - Page 108
and keep them in a safe place. Warning The printer weighs approximately 96 lb (43.5 kg). Always have two or more people lift it, using the hand grip areas as shown. 6. Have two or more people lift the printer off the stand, using the hand grips. 7. Keep the printer level while you move it. 6-16 - Epson Stylus Pro 7000 | Printer Guide - Page 109
see the Assembly and Setup Instructions. EPSON recommends installing new cartridges after transporting the printer. Because of the ink charging process, you will not be able to save ink by reinstalling used cartridges. Moving the Printer on the Stand If you're using the printer stand and you need to - Epson Stylus Pro 7000 | Printer Guide - Page 110
and Transporting the Printer Replacing the Waste Ink System Approximately every two years (or after 12000 A1-size prints), you must have your authorized EPSON servicer replace the waste ink system. This is necessary to prevent damage to the print head and maintain print quality. Parts and labor for - Epson Stylus Pro 7000 | Printer Guide - Page 111
most common problems, check the messages and lights on the printer's control panel. See page 5-5 for more information. • If you're using the EPSON printer driver and Monitor3 (Macintosh) or Status Monitor 3 (Windows) utility, check your software for error messages. See page 5-7 or page 5-10 for more - Epson Stylus Pro 7000 | Printer Guide - Page 112
a nozzle check and cleaning cycle. See page 6-1 for instructions. • Align the print head. See page 6-3 for instructions. • When you send a print job, make sure your print options are set correctly. For more information, see Chapter 3 or 4 if you're using the EPSON printer driver or the RIP Station - Epson Stylus Pro 7000 | Printer Guide - Page 113
check and cleaning cycle (page 6-1). Your ink supply is low or too old. Check the Ink Out lights and replace ink cartridges if necessary, as described on page 6-7. Your print has vertical misalignment or banding. The print head is out of alignment. If you're using the EPSON driver, the High - Epson Stylus Pro 7000 | Printer Guide - Page 114
a cut sheet, make sure the printable side is face up. Ink has leaked in the paper path. Wipe the paper path area of the printer with a soft, clean cloth. See page 6-14 for cleaning instructions. You're using high speed (bi-directional) printing. Turn off the High Speed or Bi-Directional setting - Epson Stylus Pro 7000 | Printer Guide - Page 115
for ink to dry. flashing. An error has occurred. Check the display message and lights on the control panel. Follow the instructions for the message on page 5-5. The printer sounds like it's printing, but nothing prints. Print head nozzles are clogged. Run a nozzle check and cleaning cycle - Epson Stylus Pro 7000 | Printer Guide - Page 116
problems (continued) Problem Possible cause Nothing prints. The printer is not connected correctly. Your PPD (PostScript printer description) and/or printer driver software are not set up correctly. The printer port setting doesn't match the printer connection port (Windows). The printer driver - Epson Stylus Pro 7000 | Printer Guide - Page 117
at both ends. If you are using Windows NT 4.0, try uninstalling the EPSON printer port. Click Start, point to Programs and EPSON Printers, then click EPSON Printer Port Uninstall. Follow the messages on the screen. Your print has incorrect margins. Page size or paper size are not set correctly in - Epson Stylus Pro 7000 | Printer Guide - Page 118
to register and select your paper thickness. See page 2-21 for instructions. The platen gap setting is too narrow. Use the control panel to change the setting from AUTO to WIDE. See page 2-18 for instructions. Color images print in black Your PPD and/or printer driver Make sure your software is - Epson Stylus Pro 7000 | Printer Guide - Page 119
or paper jam problems occur frequently, try one or more of the following solutions: • When you're loading roll paper, make sure you line up the edge with the row of holes on the printer. Always turn the roll back to remove the slack. See page 2-10 for more information. • If you're not using a roll - Epson Stylus Pro 7000 | Printer Guide - Page 120
re not using EPSON media, make sure you register and select your paper's thickness. See page 2-21 for more information. Solving Roll Paper Ejection Problems If you are using the printer without the stand, tightly wound roll paper may feed out with a curl. Extend the paper guides as shown below: 7-10 - Epson Stylus Pro 7000 | Printer Guide - Page 121
Resolving Problems | 7-11 If you're using the printer stand, set the paper hammock in front of the printer and extend the paper guides as shown: Clearing Paper Jams When paper gets jammed in the printer, printing stops and you see a PAPER JAM message on the control panel display. Follow these steps - Epson Stylus Pro 7000 | Printer Guide - Page 122
7-12 | Resolving Problems 3. Open the roll paper cover and rewind the paper using the paper stop on the right. Carefully pull down the jammed paper. Caution If the print head is not left in the home position, print quality may decline. 4. When TURN PWR OFF AND ON is displayed on the control panel, - Epson Stylus Pro 7000 | Printer Guide - Page 123
Resolving Problems | 7-13 Solving Windows USB Problems A Windows system connected directly to the printer's USB port must have a "clean" installation of Windows 98 or Windows 2000. You may not be able to install or run the USB printer driver on a computer that has been upgraded from Windows 95. For - Epson Stylus Pro 7000 | Printer Guide - Page 124
Problems If EPSON USB Printer Devices does not appear in the Device Manager, click the plus (+) sign beside Other devices to view the installed devices. If USB Printer appears under Other devices, the USB printer device driver is not installed correctly. If EPSON Stylus Pro 7000 appears, the printer - Epson Stylus Pro 7000 | Printer Guide - Page 125
the USB printer device driver and the printer software. First, uninstall EPSON Printer Software using the Add/Remove Programs utility in the Windows Control Panel, then uninstall EPSON USB Printer Devices. Next, reinstall the software, following the steps on page 1-10. If EPSON USB Printer Devices - Epson Stylus Pro 7000 | Printer Guide - Page 126
7-16 | Resolving Problems 7-16 - Epson Stylus Pro 7000 | Printer Guide - Page 127
reliability Engine life Print head life Periodic maintenance Cutter blade life Print direction Control code Line spacing Paper feed speed RAM Character sets On-demand ink jet Black: 64 nozzles Color: 64 nozzles for each color (cyan, magenta, yellow, light cyan, light magenta) 10 characters per inch - Epson Stylus Pro 7000 | Printer Guide - Page 128
mm) 8.27 to 24 in. 0.08 to 0.5 mm (210 to 610 mm) Depending on the media, best feed and print quality are guaranteed on EPSON paper with thicknesses of 0.08 to 0.11 mm. Poor quality paper may reduce print quality and cause paper jams or other problems. If you encounter problems, switch to a higher - Epson Stylus Pro 7000 | Printer Guide - Page 129
85% RH 5 to 85% RH Mechanical Height Width Depth Weight Paper feed method Paper path 22.05 inches (560 mm) 43.31 inches (1100 mm) 22.52 inches (572 mm) 95.8 lb (43.5 kg), without ink cartridges or stand Friction feed (roll paper and cut sheets) Roll paper or cut sheets with manual insertion 8-3 - Epson Stylus Pro 7000 | Printer Guide - Page 130
the label on the back of the printer for voltage information. Initialization Hardware initialization at power on: The printer mechanism is set to its initial The print head is capped. Any paper in the printer is ejected. The input data buffer and print buffer are cleared. The printer returns to - Epson Stylus Pro 7000 | Printer Guide - Page 131
(-30 to 60 °C) 1 month at 104 °F, 120 hours at 140 °F Freezing 14 °F (-10 °C); ink thaws and is usable after at least 3 hours at 77°F (25 °C) Dimensions Width 0.99 head cleaning cycles and how much you use the printer. Yield of the initial cartridge set is reduced because of ink charging. 8-5 - Epson Stylus Pro 7000 | Printer Guide - Page 132
8-6 | Specifications Parallel Interface Forward Channel Data format Synchronization Handshake timing Signal level Connector 8-bit parallel, IEEE-1284 compatibility mode STROBE pulse BUSY and ACKNLG signals TTL compatible 57-30360 Amphenol connector or equivalent Reverse Channel Transmission - Epson Stylus Pro 7000 | Printer Guide - Page 133
Specifications | 8-7 USB Interface Standard Bit rate Data encoding Adaptable connector Recommended cable length Based on Universal Serial Bus Specifications Revision 1.0, Universal Serial Bus Device Class Definition for Printing Devices Version 1.0 - Epson Stylus Pro 7000 | Printer Guide - Page 134
8-8 | Specifications 8-8 - Epson Stylus Pro 7000 | Printer Guide - Page 135
and select registered configurations Replace the paper cutter blade 6-9 Align the print head 6-5 This chapter describes the following configuration settings: • Selecting the printer's interface • Configuring the parallel interface • Changing the printer's code page setting • Setting the control - Epson Stylus Pro 7000 | Printer Guide - Page 136
a parallel and USB interface. You can also install an optional interface board for networking or additional connectivity. By default, the printer automatically switches to whichever interface is receiving data. You can use the control panel to select an individual interface for sending data to the - Epson Stylus Pro 7000 | Printer Guide - Page 137
Press the Enter button to save your setting. 5. Press the SelecType button to exit the Printer Setting menu. Changing the Printer's Code Page Setting The printer uses the PC437 code page (U.S. and standard European character sets) by default. You can use the control panel to change it to the PC850 - Epson Stylus Pro 7000 | Printer Guide - Page 138
use a special printer maintenance mode to change to any of the following languages: • French • Italian • German • Spanish • Portuguese Make sure the printer hold the Pause button while you press the Power button to turn on the printer. HEX DUMP=PRINT appears on the display. 2. Press the Item button - Epson Stylus Pro 7000 | Printer Guide - Page 139
, 2-10, 5-1 to 5-4, A-1 to A-4 C Cable problems, 7-6, 7-7, 7-15 Canceling print jobs control panel, 5-2 Macintosh, 3-11, 3-12 Windows, 4-11 Cartridges, see Ink cartridges Casters, 6-17 Checking, 1-12 Chooser, selecting printer, 1-7 Cleaner (cleaning unit), 5-3 Cleaning paper hammock, 6-14 print head - Epson Stylus Pro 7000 | Printer Guide - Page 140
pad, 5-3 monitoring level, 5-3, 5-7 to 5-12 valve locks, 7-5 Ink cartridges ordering, 6-7 removing for transportation, 6-15 replacing, 6-7 to 6-9 safety instructions, 7 to 8 specifications, 8-5 Ink Out light(s), 5-5 to 5-6 Interface card, installing, 1-1 to 1-4 Interface, see Parallel interface - Epson Stylus Pro 7000 | Printer Guide - Page 141
4-4 Memory problems, 7-6 specifications, 8-1 Menus, SelecType, A-1 Menus, SelecType, see also SelecType menus Messages error, 5-5 to 5-7 status, 5-2 MicroWeave setting, 3-7, 4-8 Monitor3, 3-10 to 3-12 Index | 3 Monitoring printer control panel, 5-1 to 5-7 Macintosh, 5-7 to 5-9 Windows, 5-10 to 5-12 - Epson Stylus Pro 7000 | Printer Guide - Page 142
Feed buttons, 2-11 Paper feed speed, 8-1 Paper guides, 7-10 to 7-11 Paper hammock, 2-19 to 2-20 Paper Out light, 5-5 to 5-6 Paper set lever, 2-8, 2-10, 2-13 to 2-16 Paper Size setting, 3-1, 4-5, 7-7 Paper Source setting, 3-2, 4-5 Parallel interface configuring, A-2 to A-3 connecting to, 1-6 problems - Epson Stylus Pro 7000 | Printer Guide - Page 143
, 7-5 to 7-6 paper, 7-9 to 7-12 PPD, 7-6 to 7-8 print quality, 7-2 to 7-4 printer driver, 7-6 to 7-8 printer port, 7-6, 7-7 printer stops printing, 7-5 slow printing, 7-9 smeared prints, 7-8 USB, 7-13 to 7-15 Progress Meter, 4-10 to 4-11, 6-13 R RAM, see Memory Registering non-EPSON media, 2-21 to - Epson Stylus Pro 7000 | Printer Guide - Page 144
Troubleshooting, 7-1 to 7-15 -6 U Unit ID number, 4 USB interface connecting to, 1-5 problems, 1-12, 7-13 to 7-15 specifications, 8-7 Utility menu Macintosh, 5-7, 6-1 to 6-3 Windows, 5-10, 6-1 to 6-3 W Waste ink (waste ink system), 5-3, 8-1 Web site, EPSON, 5 Weight of printer, 8-3 Width of printer - Epson Stylus Pro 7000 | Printer Guide - Page 145
Index | 7 -7 - Epson Stylus Pro 7000 | Printer Guide - Page 146
ink cartridge compartment roll paper cover paper set lever control panel lower cover paper hammock 1 - Epson Stylus Pro 7000 | Printer Guide - Page 147
paper set lever optional interface shield plate USB interface connector parallel interface connector AC inlet 7
-
 1
1 -
 2
2 -
 3
3 -
 4
4 -
 5
5 -
 6
6 -
 7
7 -
8
-
9
-
10
-
11
-
12
-
13
-
14
-
15
-
16
-
17
-
18
-
19
-
20
-
21
-
22
-
23
-
24
-
25
-
26
-
27
-
28
-
29
-
30
-
31
-
32
-
33
-
34
-
35
-
36
-
37
-
38
-
39
-
40
-
41
-
42
-
43
-
44
-
45
-
46
-
47
-
48
-
49
-
50
-
51
-
52
-
53
-
54
-
55
-
56
-
57
-
58
-
59
-
60
-
61
-
62
-
63
-
64
-
65
-
66
-
67
-
68
-
69
-
70
-
71
-
72
-
73
-
74
-
75
-
76
-
77
-
78
-
79
-
80
-
81
-
82
-
83
-
84
-
85
-
86
-
87
-
88
-
89
-
90
-
91
-
92
-
93
-
94
-
95
-
96
-
97
-
98
-
99
-
100
-
101
-
102
-
103
-
104
-
105
-
106
-
107
-
108
-
109
-
110
-
111
-
112
-
113
-
114
-
115
-
116
-
117
-
118
-
119
-
120
-
121
-
122
-
123
-
124
-
125
-
126
-
127
-
128
-
129
-
130
-
131
-
132
-
133
-
134
-
135
-
136
-
137
-
138
-
139
-
140
-
141
-
142
-
143
-
144
-
145
-
146
-
147
 |
 |

EPSON Stylus
®
Pro 7000
Printer Guide
®