Epson Stylus Pro 7600 - UltraChrome Ink Product Information Guide - Page 14
Replacing the Maintenance Tank, Insert the new cutter as shown.
 |
View all Epson Stylus Pro 7600 - UltraChrome Ink manuals
Add to My Manuals
Save this manual to your list of manuals |
Page 14 highlights
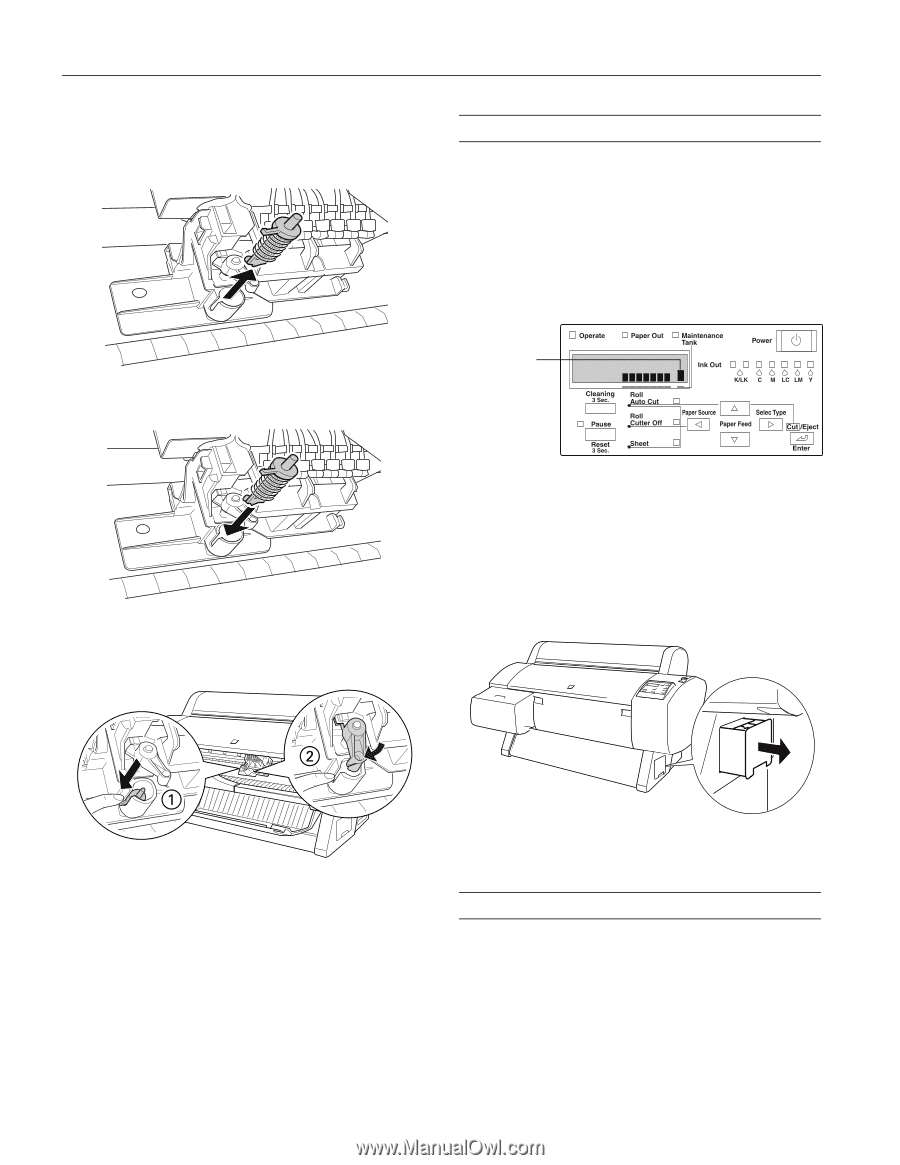
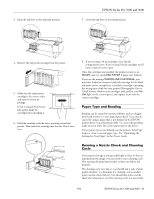
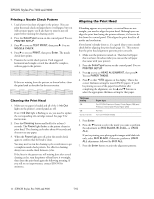
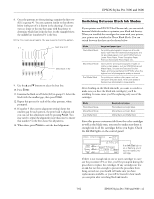
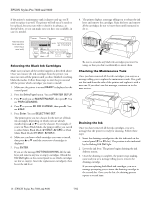
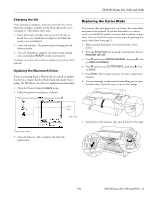
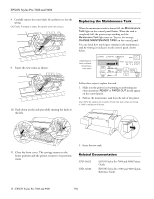
EPSON Stylus Pro 7600 and 9600 8. Carefully remove the cutter blade. Be careful not to lose the spring. CAUTION: The blade is sharp. Be careful when removing it. Replacing the Maintenance Tank When the maintenance tank is almost full, the Maintenance Tank light on the control panel flashes. When the tank is completely full, the printer stops working and the Maintenance Tank light stays on. You see the message CHANGE MAINTENANCE TANK on the control panel. You can check how much space remains in the maintenance tank by viewing its indicator on the control panel, shown below. 9. Insert the new cutter as shown. Maintenance tank indicator (showing a new tank) 10. Push down on the side pin while turning the latch to the left. Follow these steps to replace the tank: 1. Make sure the printer is not printing or performing any other operations (READY or PAPER OUT should appear on the control panel). 2. Pull out the maintenance tank from the side of the printer. CAUTION: Be careful not to spill ink from the tank when removing it. Hold it upright at all times. 11. Close the front cover. The carriage returns to the home position and the printer returns to its previous status. 3. Insert the new tank. Related Documentation CPD-14021 CPD-14020 EPSON Stylus Pro 7600 and 9600 Printer Guide EPSON Stylus Pro 7600 and 9600 Quick Reference Guide 15 - EPSON Stylus Pro 7600 and 9600 7/02
-
 1
1 -
2
-
3
-
4
-
5
-
6
-
7
-
8
-
 9
9 -
 10
10 -
 11
11 -
 12
12 -
 13
13 -
 14
14
 |
 |