Epson Stylus Scan 2000 Quick Start - Page 1
Epson Stylus Scan 2000 - All-in-One Printer Manual
 |
View all Epson Stylus Scan 2000 manuals
Add to My Manuals
Save this manual to your list of manuals |
Page 1 highlights
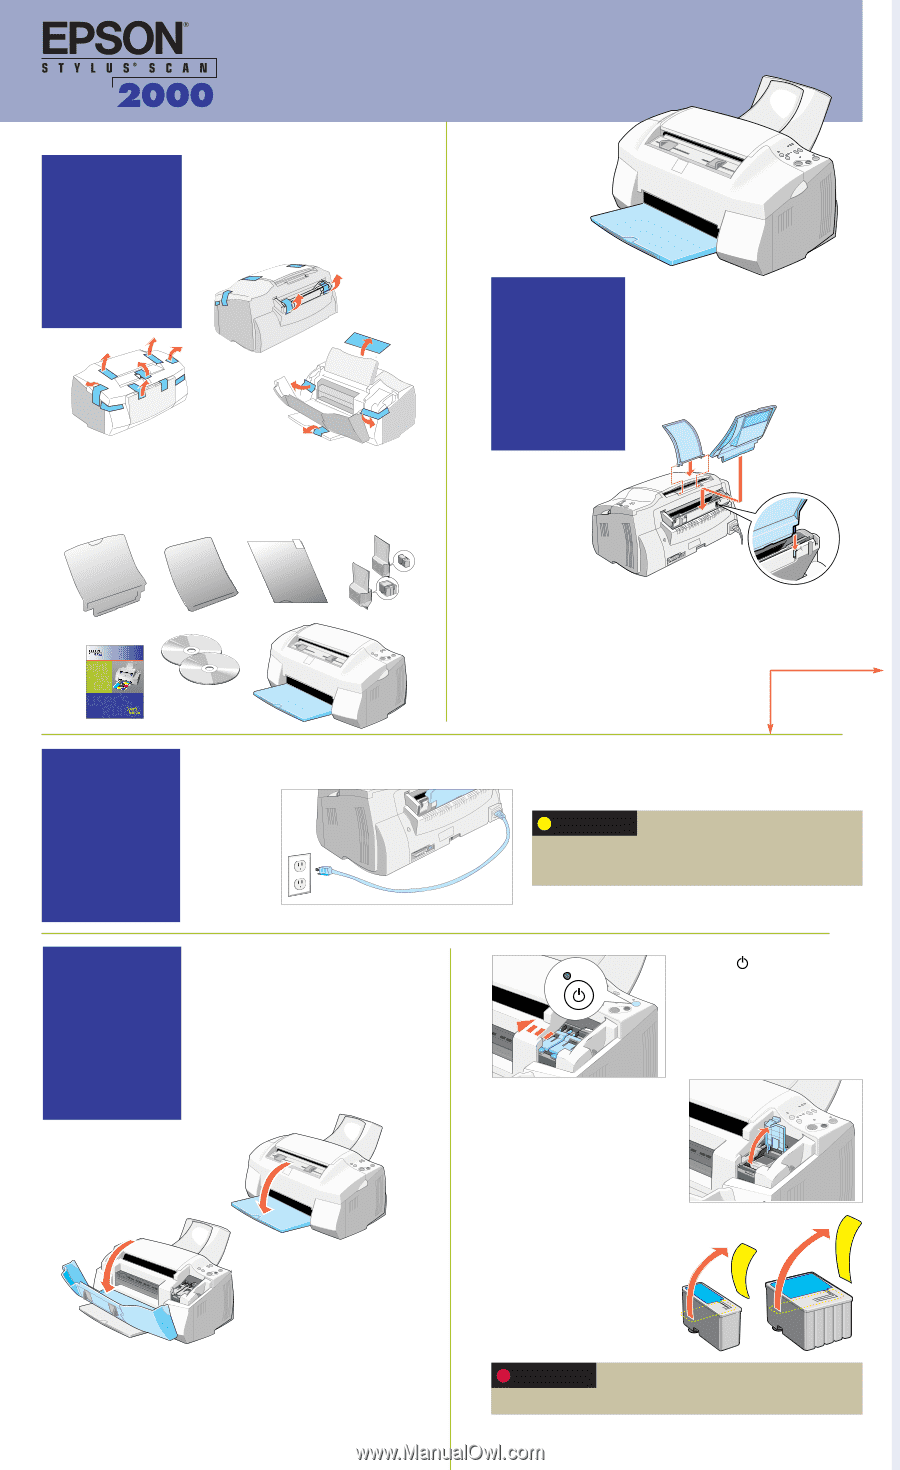
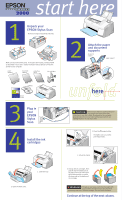
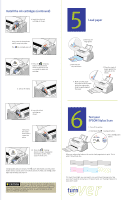
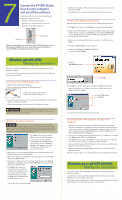
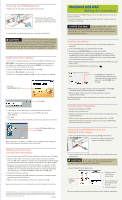
start here 1 Unpack your EPSON Stylus Scan Remove any tape and packing materials. Make sure you have all the parts. If any parts are missing, contact EPSON as described in your User's Guide. You'll also need a cable to connect the printer to your computer. paper support document support protection sheet ink cartridges 2 Attach the paper and document supports document support paper support software printer User's Guide 3 Plug in your EPSON Stylus Scan 4 Install the ink cartridges unfhoereld CAUTION Make sure you check the system and location requirements and follow all the safety instructions in your User's Guide. Plug the printer into a properly grounded outlet. If you need help in setting up your printer, see "Solving Problems" in your User's Guide. 3. Press the power button. The lights come on and the print head moves. 4. Lift up the clamp. 1. Lower the tray. 2. Open the front cover. 5. Unwrap the ink cartridges. Then pull off only the yellow part of the tape seal on top. Don't pull off the blue portion or remove the clear seal on the bottom of the cartridge. WARNING If ink gets on your hands, wash them thoroughly with soap and water. If ink gets in your eyes, flush them immediately with water. Keep ink cartridges out of the reach of children. Continue at the top of the next column.
-
 1
1 -
 2
2 -
 3
3 -
 4
4
 |
 |