Epson U925 User Manual - Page 41
remove any remaining pieces., If you encounter difficulty in clearing a paper jam, remove
 |
View all Epson U925 manuals
Add to My Manuals
Save this manual to your list of manuals |
Page 41 highlights
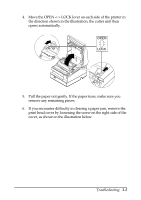
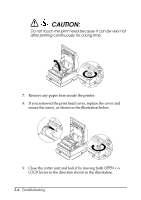
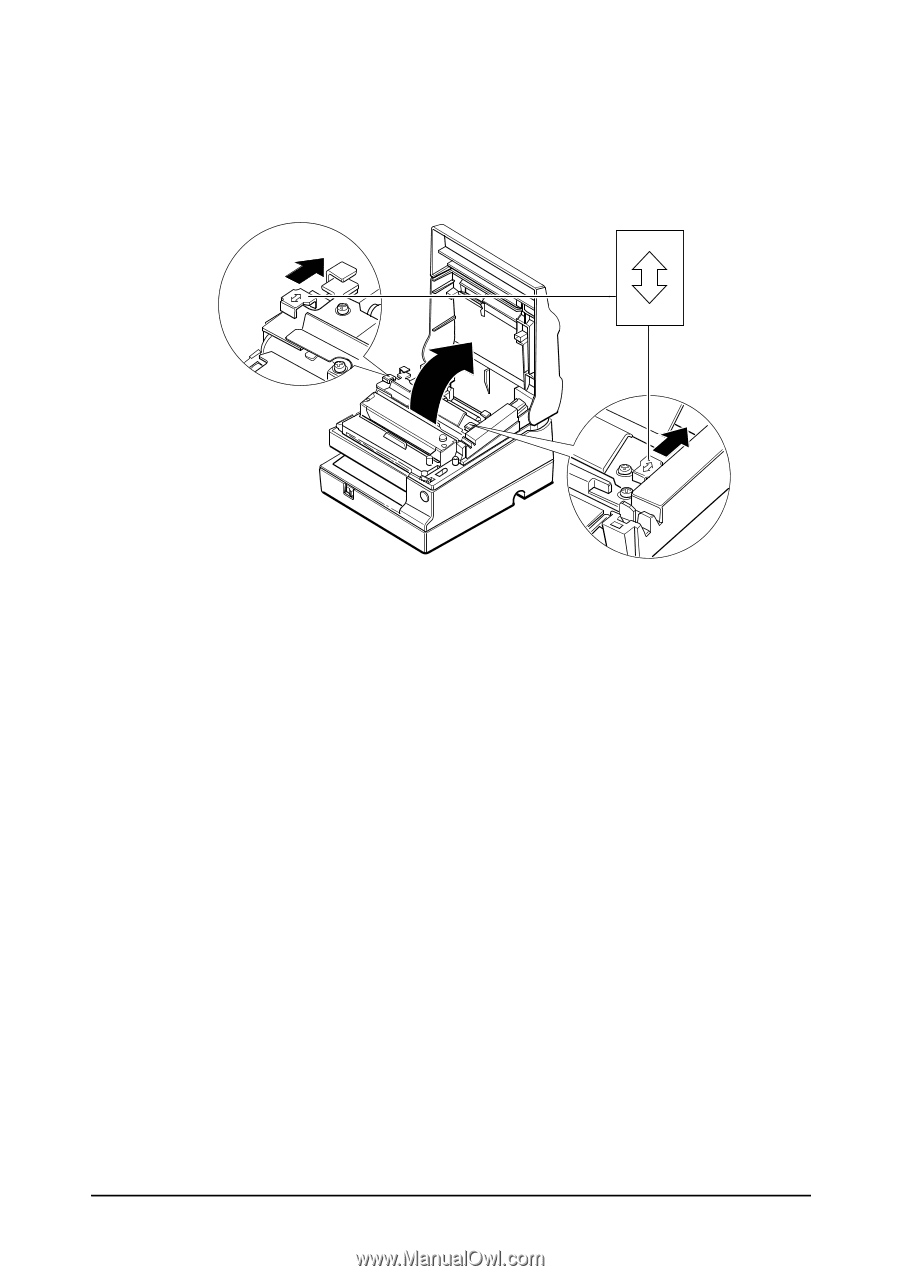
4. Move the OPEN LOCK lever on each side of the printer in the direction shown in the illustration; the cutter unit then opens automatically. OPEN LOCK 5. Pull the paper out gently. If the paper tears, make sure you remove any remaining pieces. 6. If you encounter difficulty in clearing a paper jam, remove the print head cover by loosening the screw on the right side of the cover, as shown in the illustration below. Troubleshooting 3-5
-
 1
1 -
2
-
3
-
4
-
5
-
6
-
7
-
8
-
9
-
10
-
11
-
12
-
13
-
14
-
15
-
16
-
17
-
18
-
19
-
20
-
21
-
22
-
23
-
24
-
25
-
26
-
27
-
28
-
29
-
30
-
31
-
32
-
33
-
34
-
35
-
 36
36 -
 37
37 -
 38
38 -
 39
39 -
 40
40 -
 41
41 -
 42
42 -
 43
43 -
 44
44 -
 45
45 -
 46
46 -
47
-
48
-
49
-
50
-
51
-
52
-
53
-
54
-
55
-
56
-
57
-
58
 |
 |
Troubleshooting
3-5
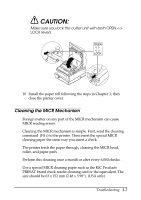
4.
Move the OPEN <-> LOCK lever on each side of the printer in
the direction shown in the illustration; the cutter unit then
opens automatically.
5.
Pull the paper out gently. If the paper tears, make sure you
remove any remaining pieces.
6.
If you encounter difficulty in clearing a paper jam, remove the
print head cover by loosening the screw on the right side of the
cover, as shown in the illustration below.
OPEN
LOCK