Epson WorkForce WF-2530 Start Here - Page 2
Load paper - cartridge
 |
View all Epson WorkForce WF-2530 manuals
Add to My Manuals
Save this manual to your list of manuals |
Page 2 highlights
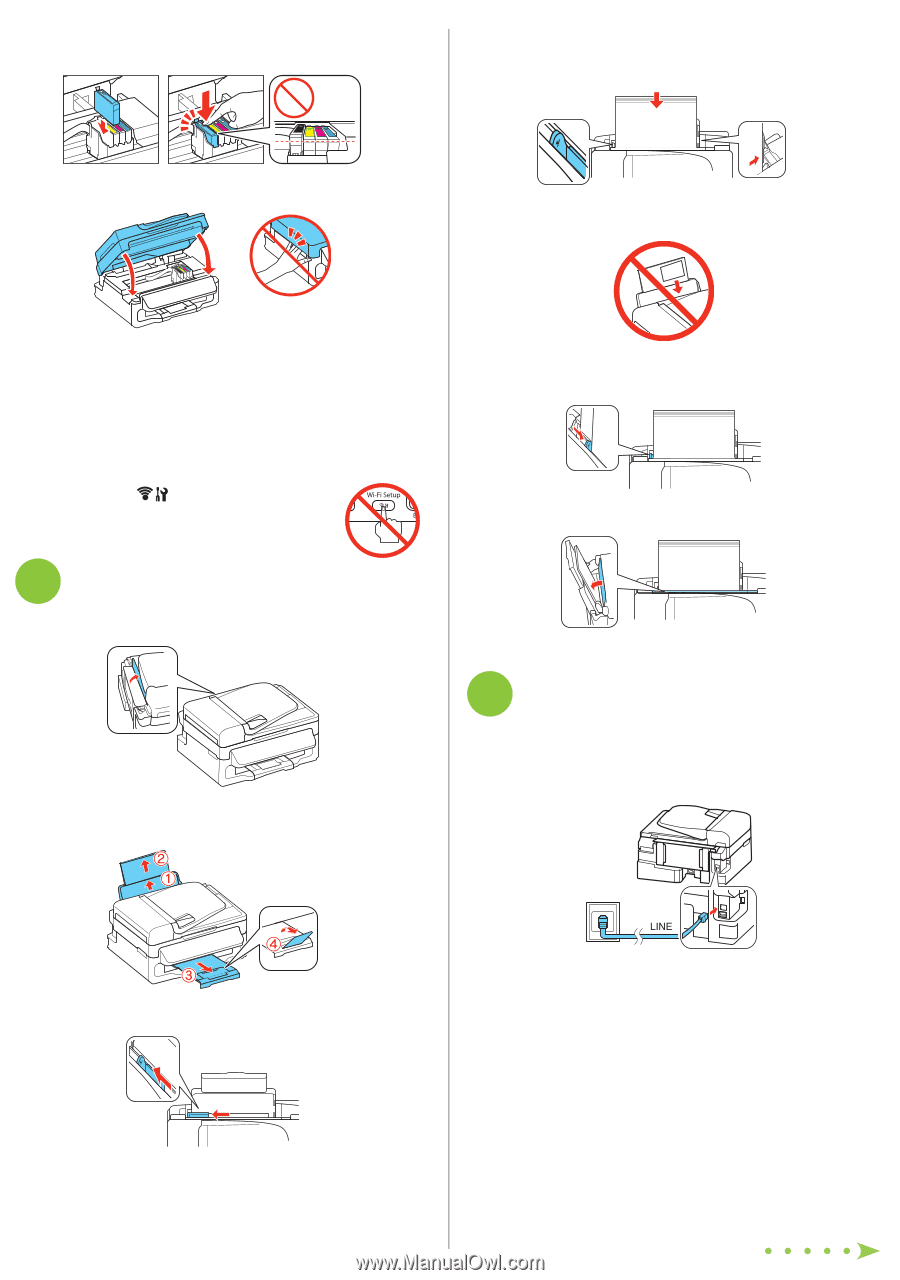
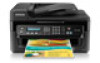
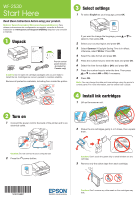
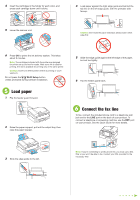
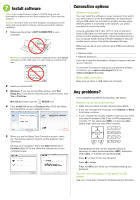
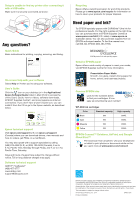
4 Insert the cartridges in the holder for each color, and press each cartridge down until it clicks. 4 Load paper against the right edge guide and behind the tab line on the left edge guide, with the printable side faceup. 5 Lower the scanner unit. Caution: Don't load the paper sideways; always load it short edge first. 6 Press OK to prime the ink delivery system. This takes about 5 minutes. Note: The cartridges included with the printer are designed for printer set up and not for resale. After some ink is used for priming, the rest is available for printing only in the same printer. Caution: Don't turn off the printer while it is priming or you'll waste ink. Do not press the Wi-Fi Setup button unless prompted during software installation. 5 Load paper 1 Flip the feeder guard forward. 2 Raise the paper support, pull out the output tray, then raise the paper stopper. 5 Slide the edge guide against the left edge of the paper, but not too tightly. 6 Flip the feeder guard back. 6 Connect the fax line To fax, connect the included phone cord to a telephone wall jack and to the LINE port on the back of your product. To connect a telephone or answering machine, use the EXT. port on your product. See the Quick Guide for more details. 3 Slide the edge guide to the left. Note: If you're connecting to a DSL phone line, you must use a DSL filter or you won't be able to fax. Contact your DSL provider for the necessary filter.
-
 1
1 -
 2
2 -
 3
3 -
 4
4
 |
 |